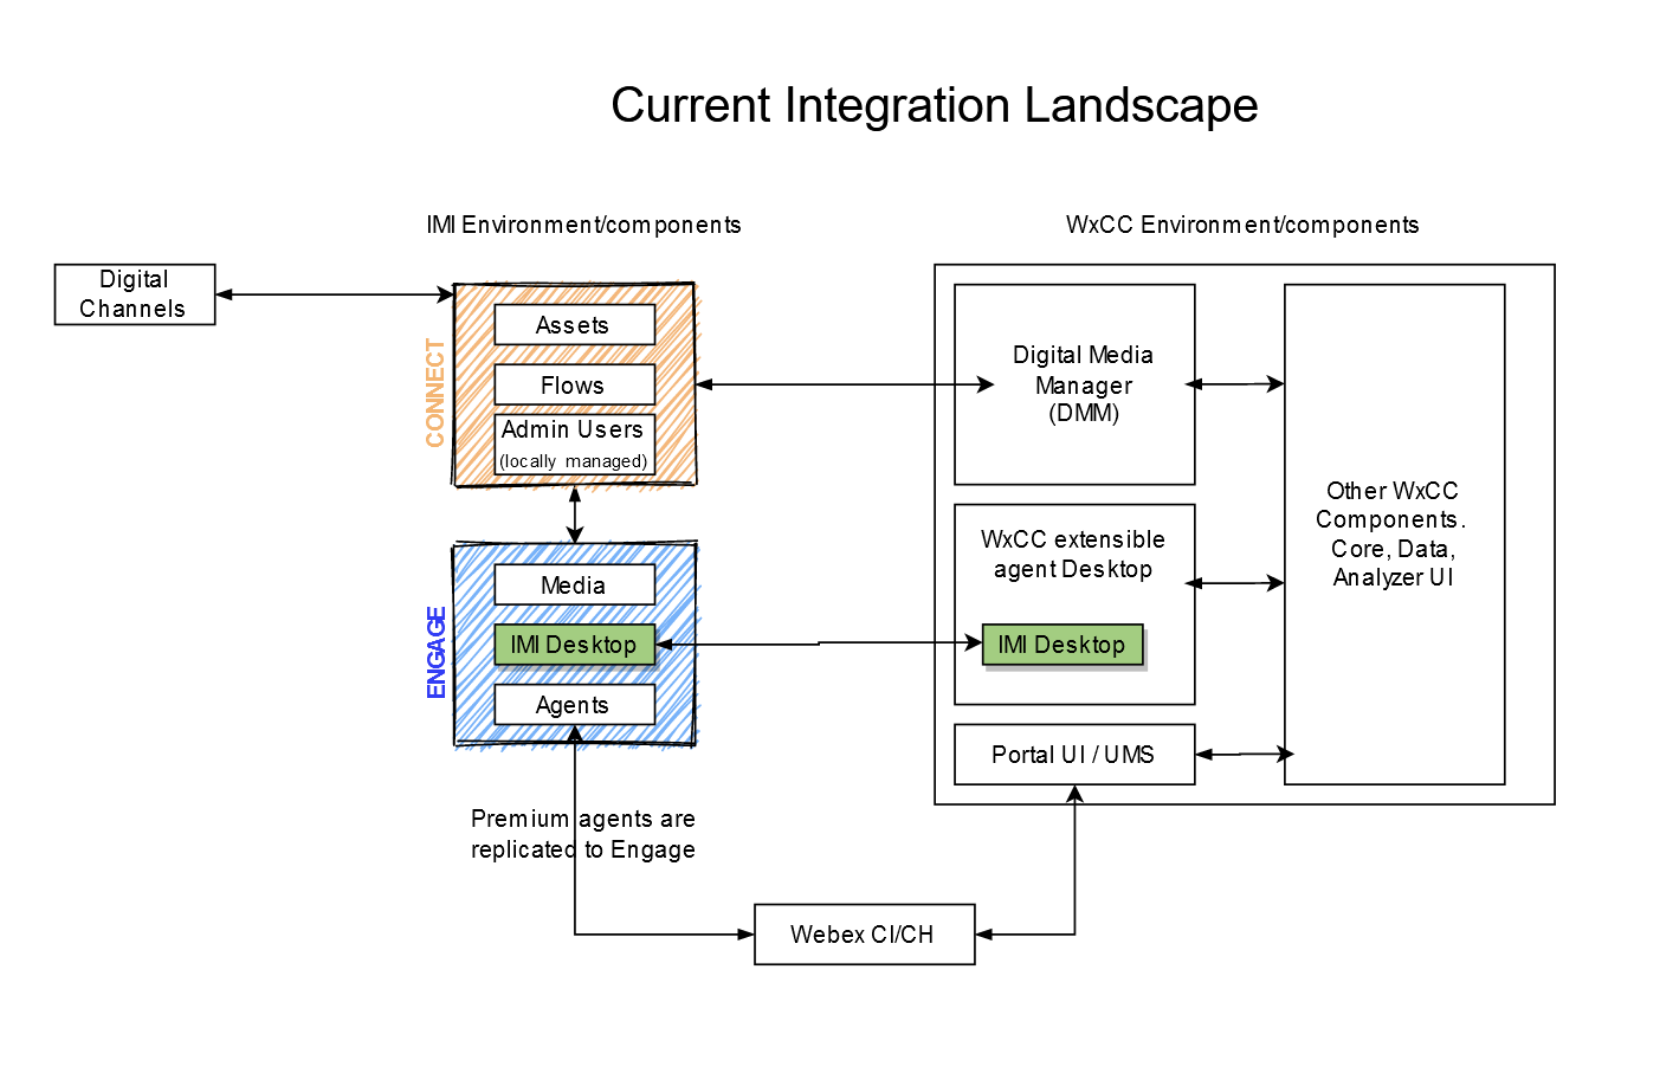
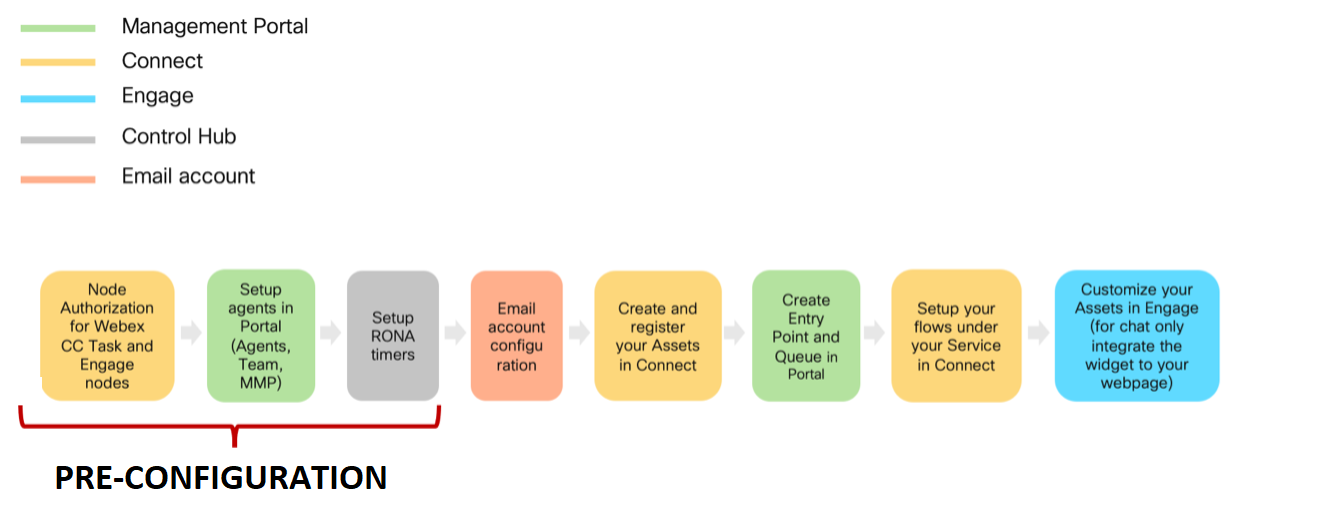
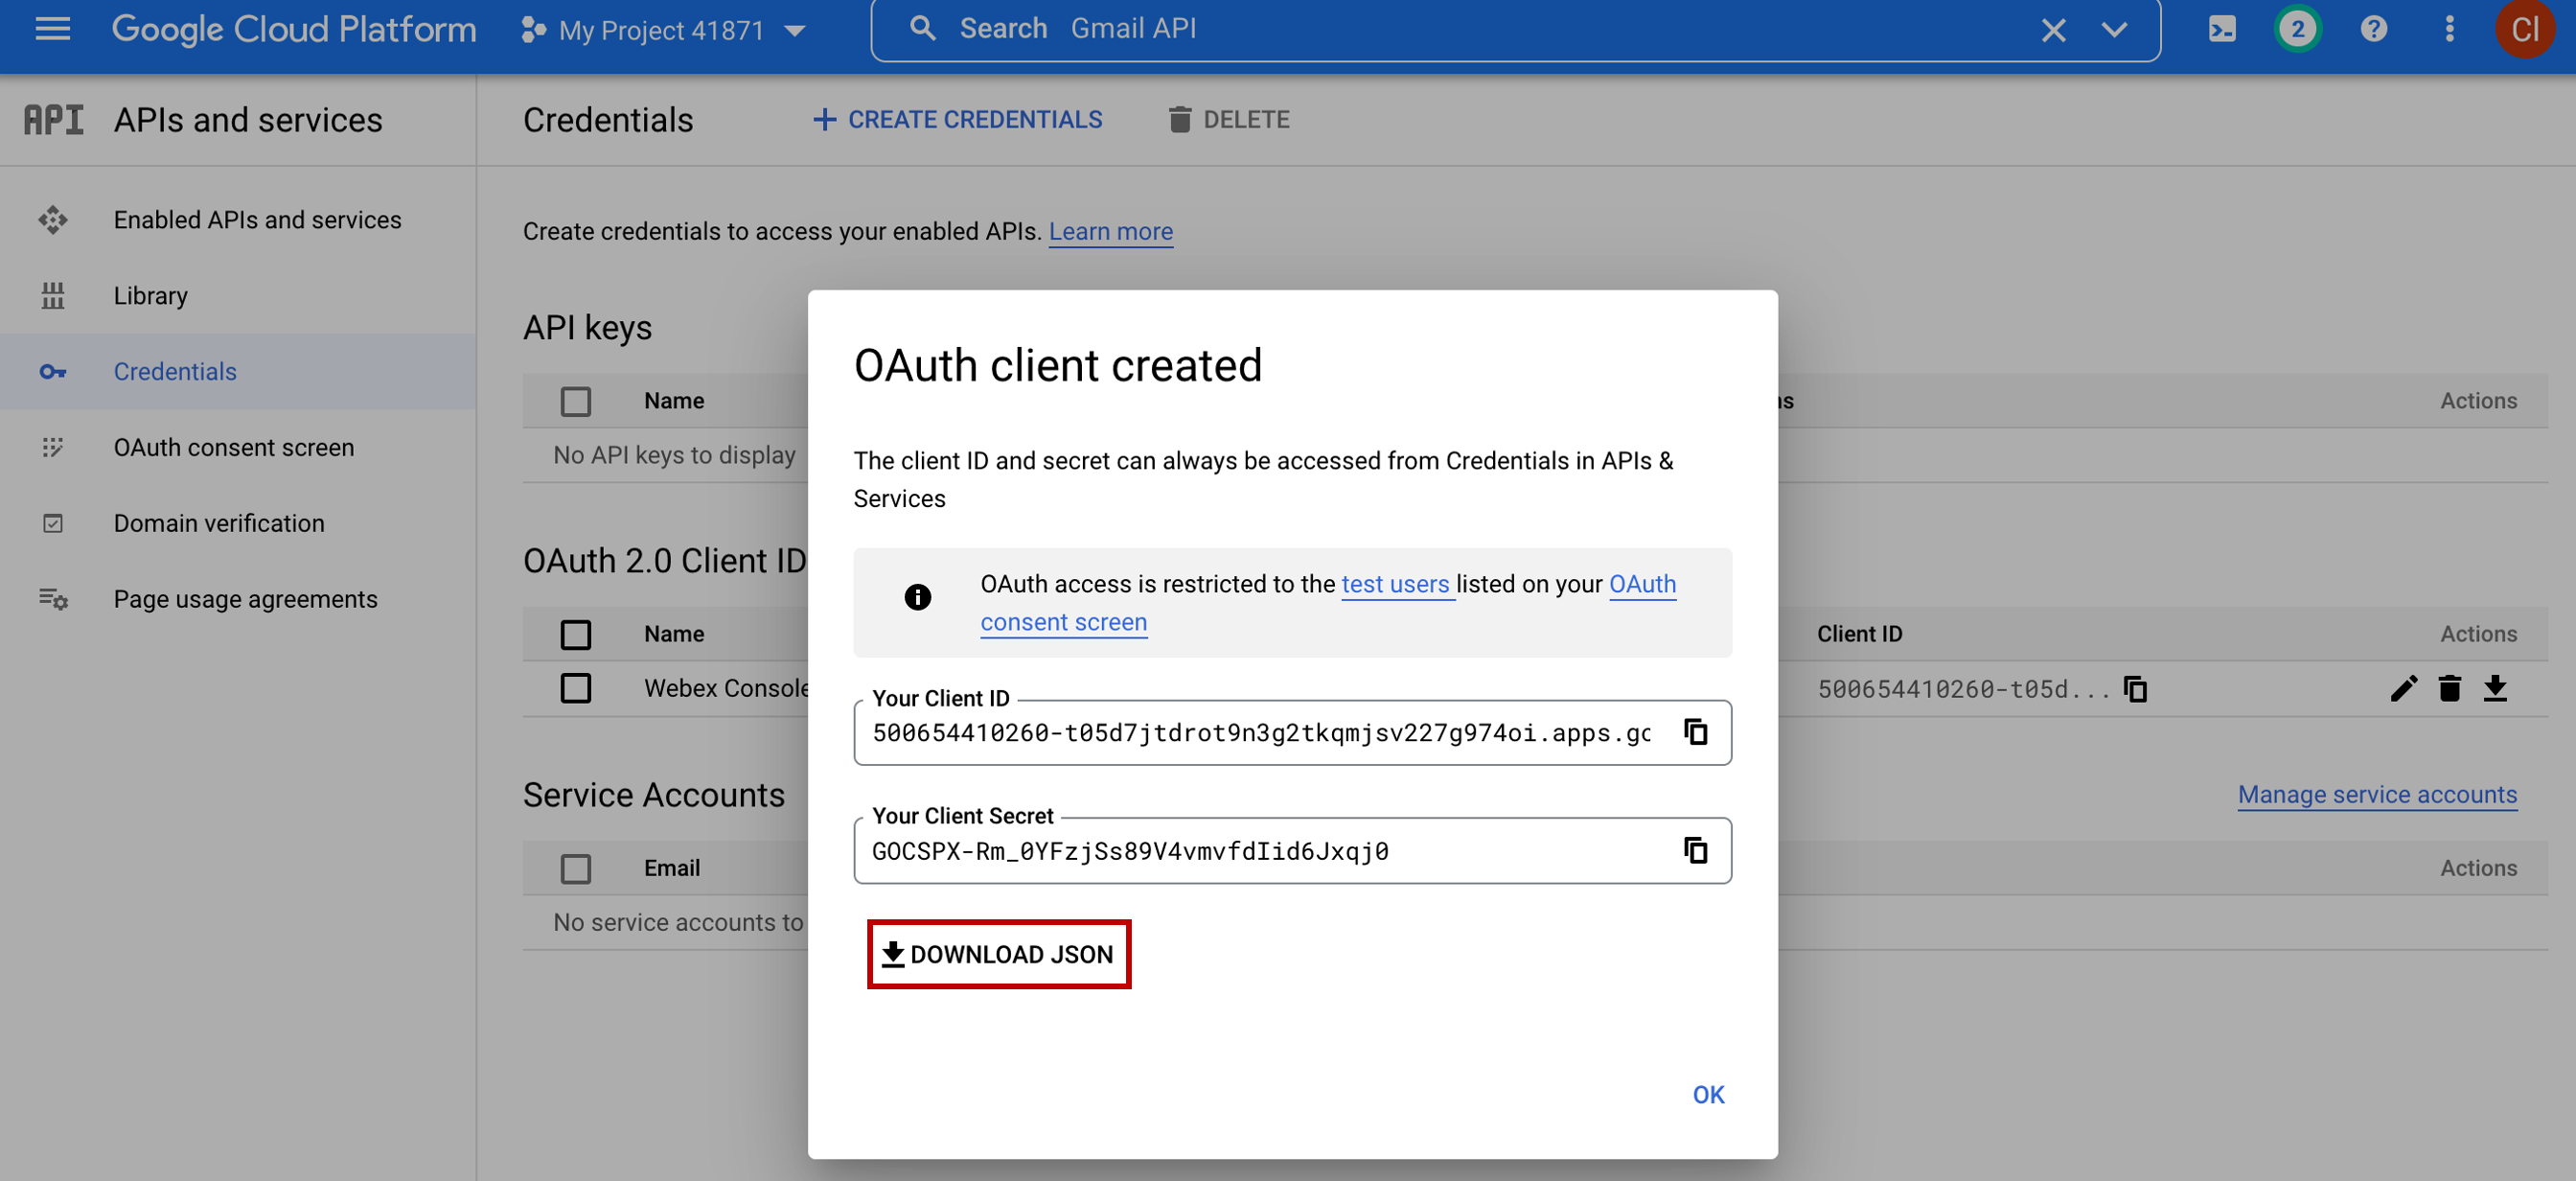
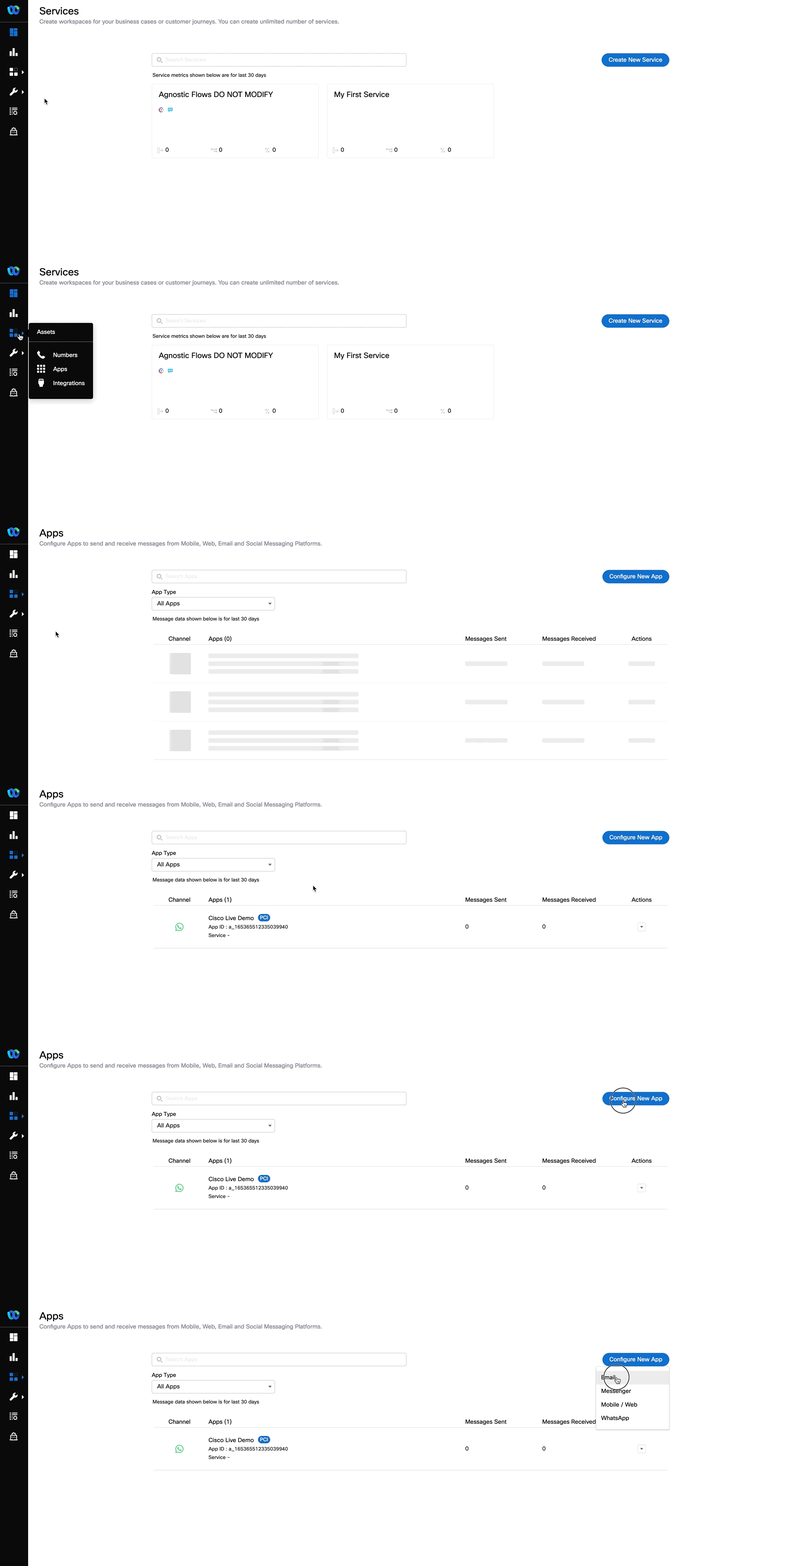
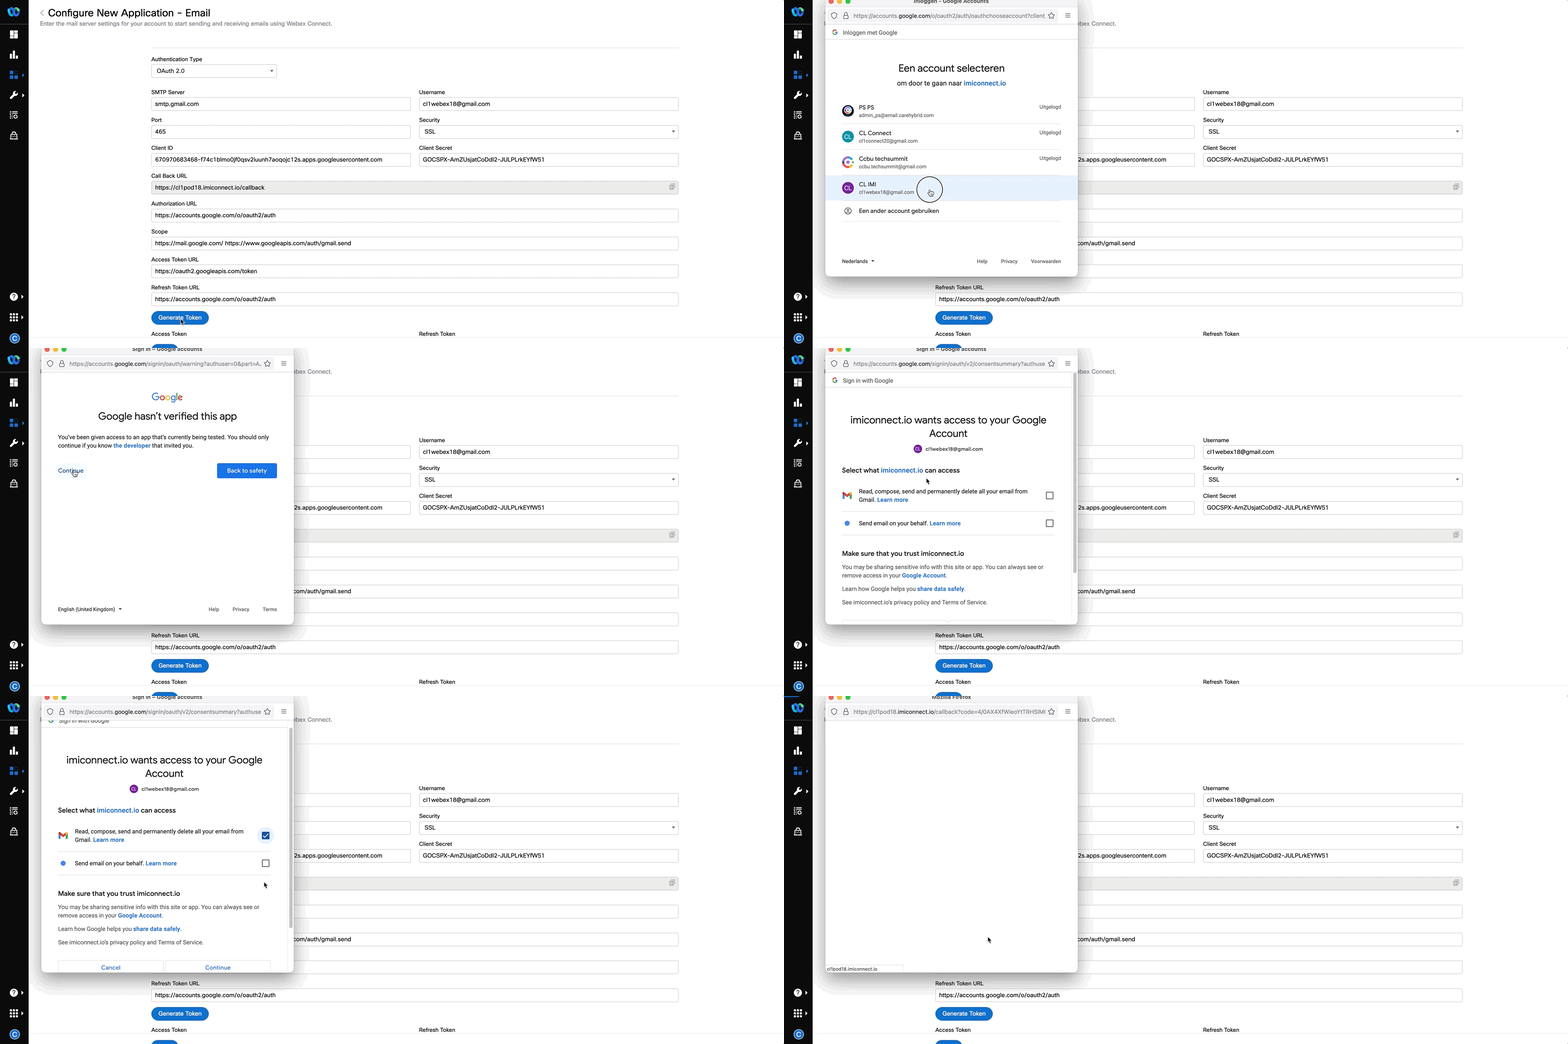
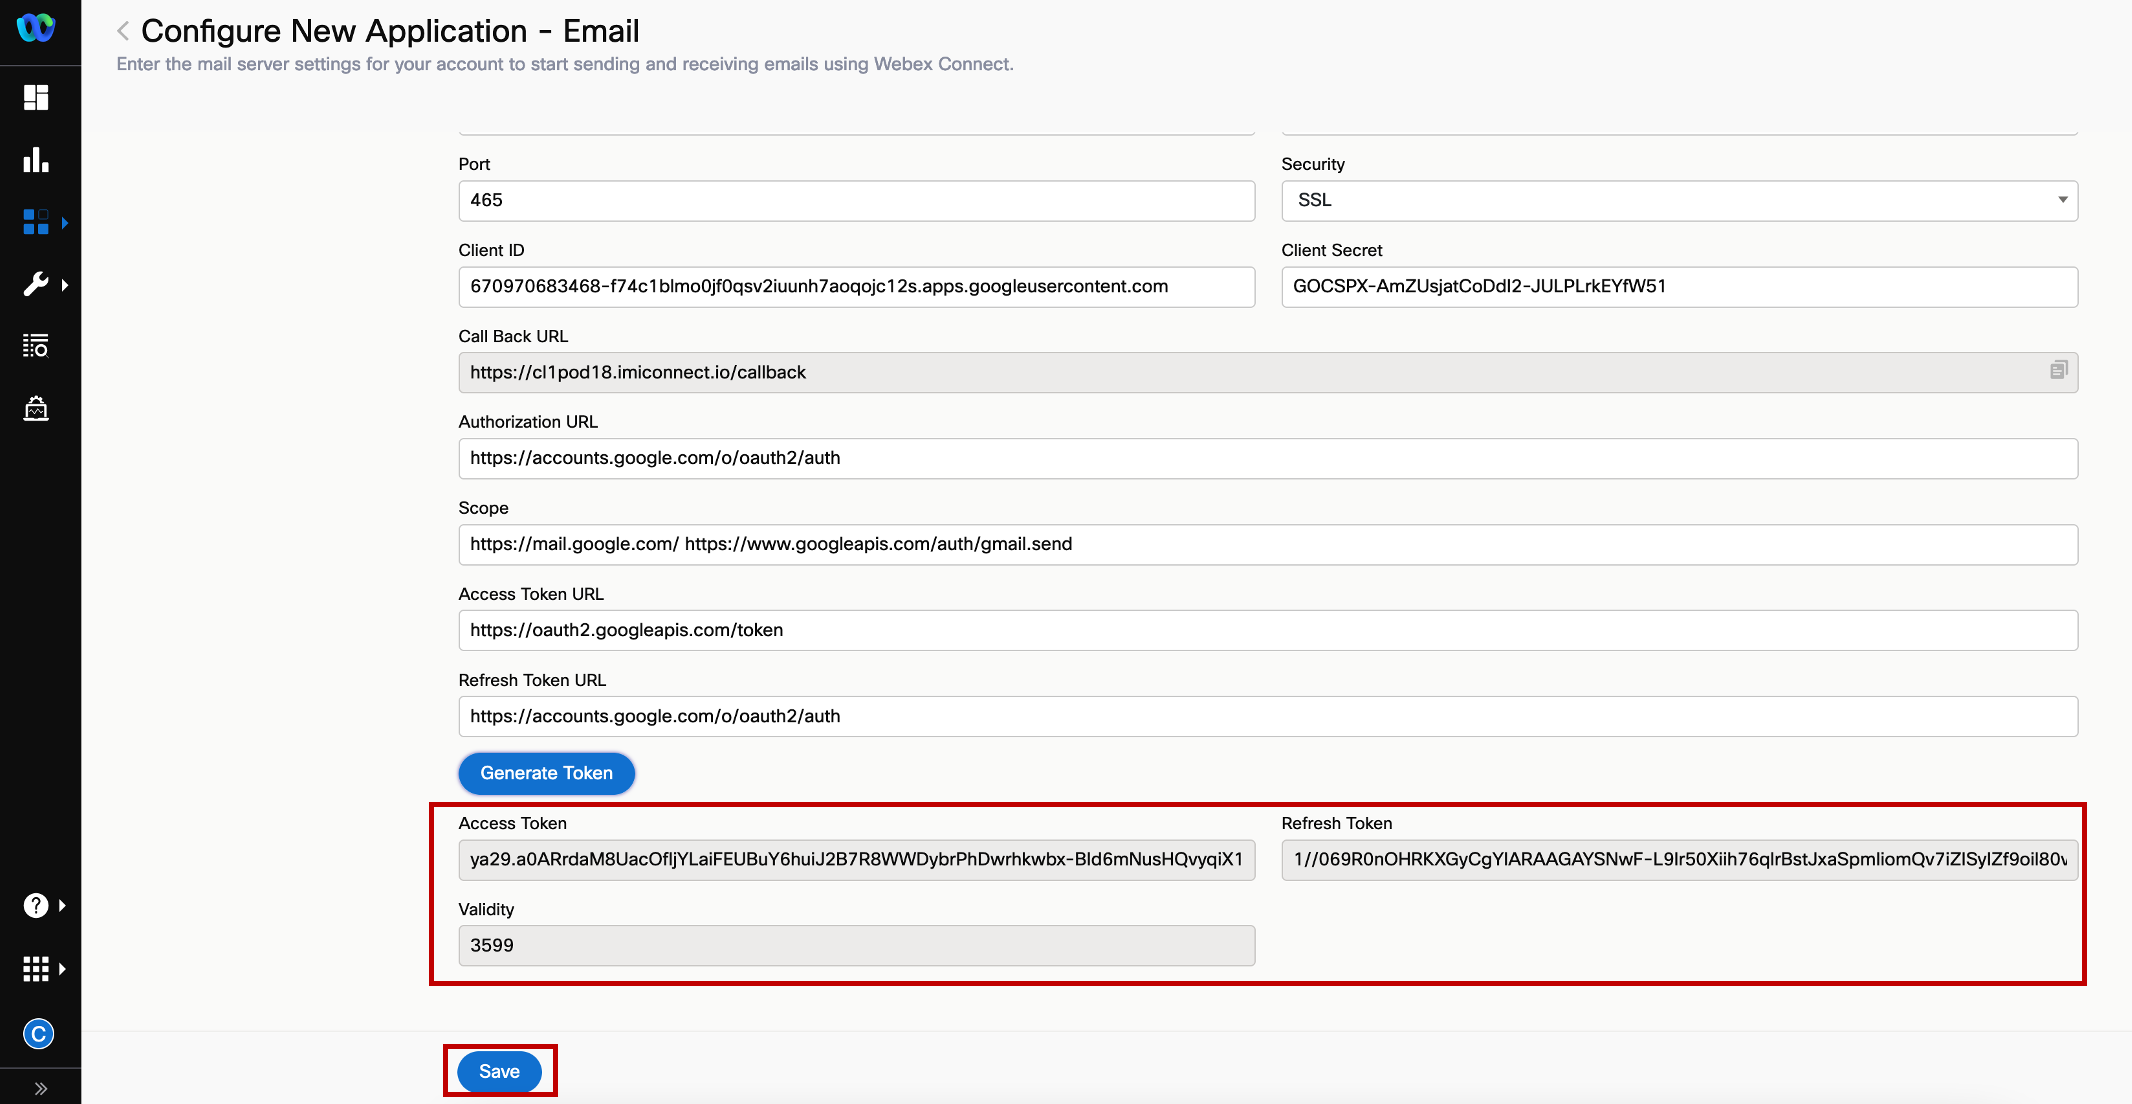
Webex Connect consists of 2 main components, Connect and Engage, which are directly integrated with the Webex Contact Center platform. Access to Webex Connect is restricted to Administrators only.
Connect serves as the entry point for all messages received through any digital channel (email, chat, SMS, Messenger Facebook, WhatsApp) and as the intelligence for routing them. It hosts most of the configuration the Admin will create: flows, assets, bots, scheduled events and webhooks. Access happens via a dedicated URL generated at provisioning. Users in Connect are added and managed locally.
Engage serves as the host for media and agents. Agents configured in Webex Contact Center are automatically synchronized with Engage. With Webex Contact Center, Engage leaves agent console control to the native Webex Agent Desktop. The Admin can customize cosmetics for each channel and create templated responses. Access happens via a dedicated icon inside the Webex Contact Center Management Portal. Users in Engage are automatically synchronized with Webex Control Hub.
Connect interface is divided in two main parts: the main menu on the left side and the configuration of the selected object in the center-right side.
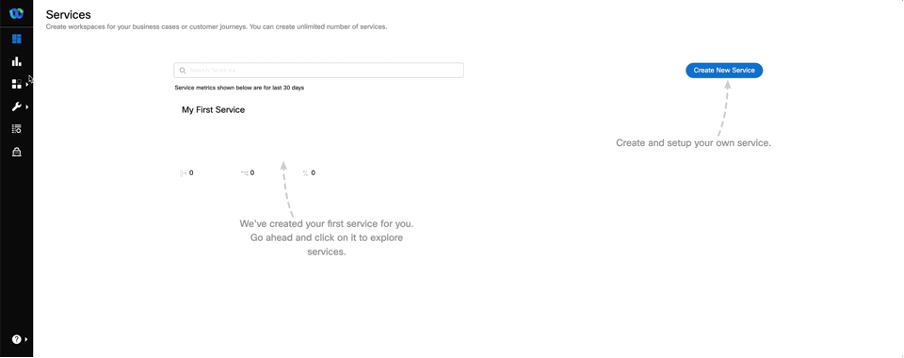
1. Services
Containers for all the flows the administrator will configure to orchestrate and route incoming messages.
DASHBOARD — traffic statistics per channel, flow execution, Messaging API statistics.
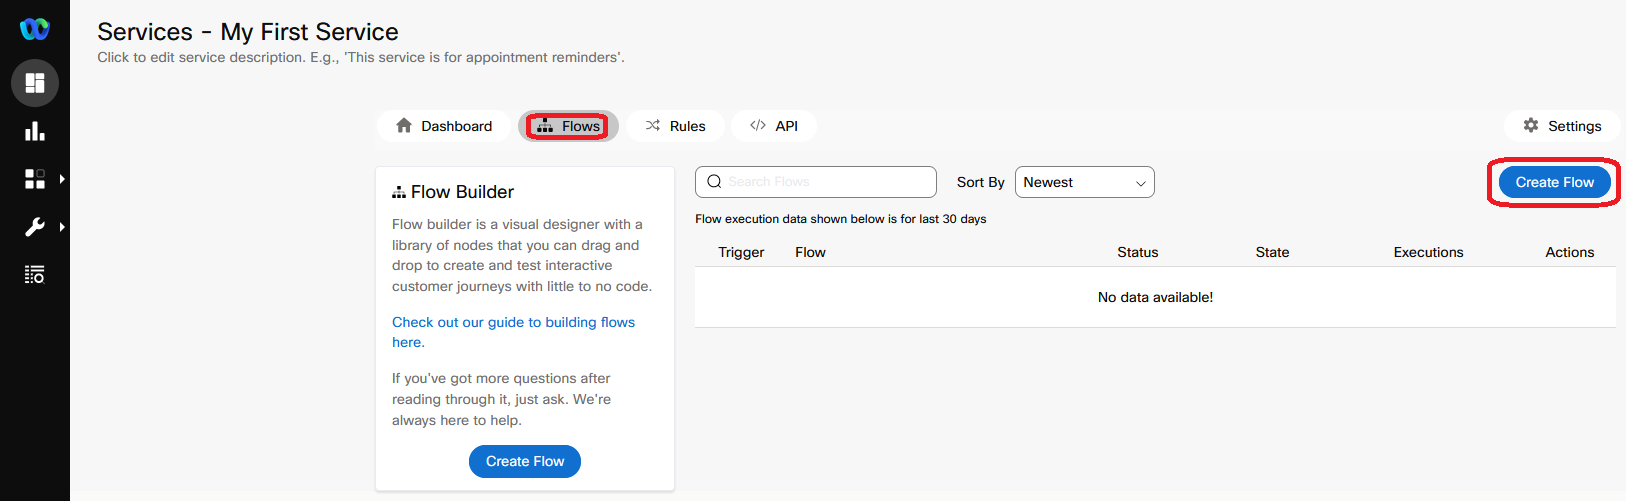
FLOWS — list of all flows created for that service.
RULES — which triggers are configured for which flows.
API — provides SERVICE ID and SERVICE SECRET for external apps to trigger flows.
SETTINGS — rename/delete the service, add description, lock service against uncontrolled changes.
2. Reports
Generate historical utilization reports for existing flows. REPORTS → ENTITY (service) → Channel or Flow → Time Period → GET REPORTS. Data includes Submitted, Rejected, Delivered, Read, and Failed messages.
3. Assets
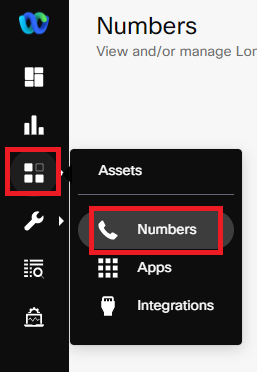
ASSETS → Numbers — SMS numbers added to the platform (provided by Cisco upon request).
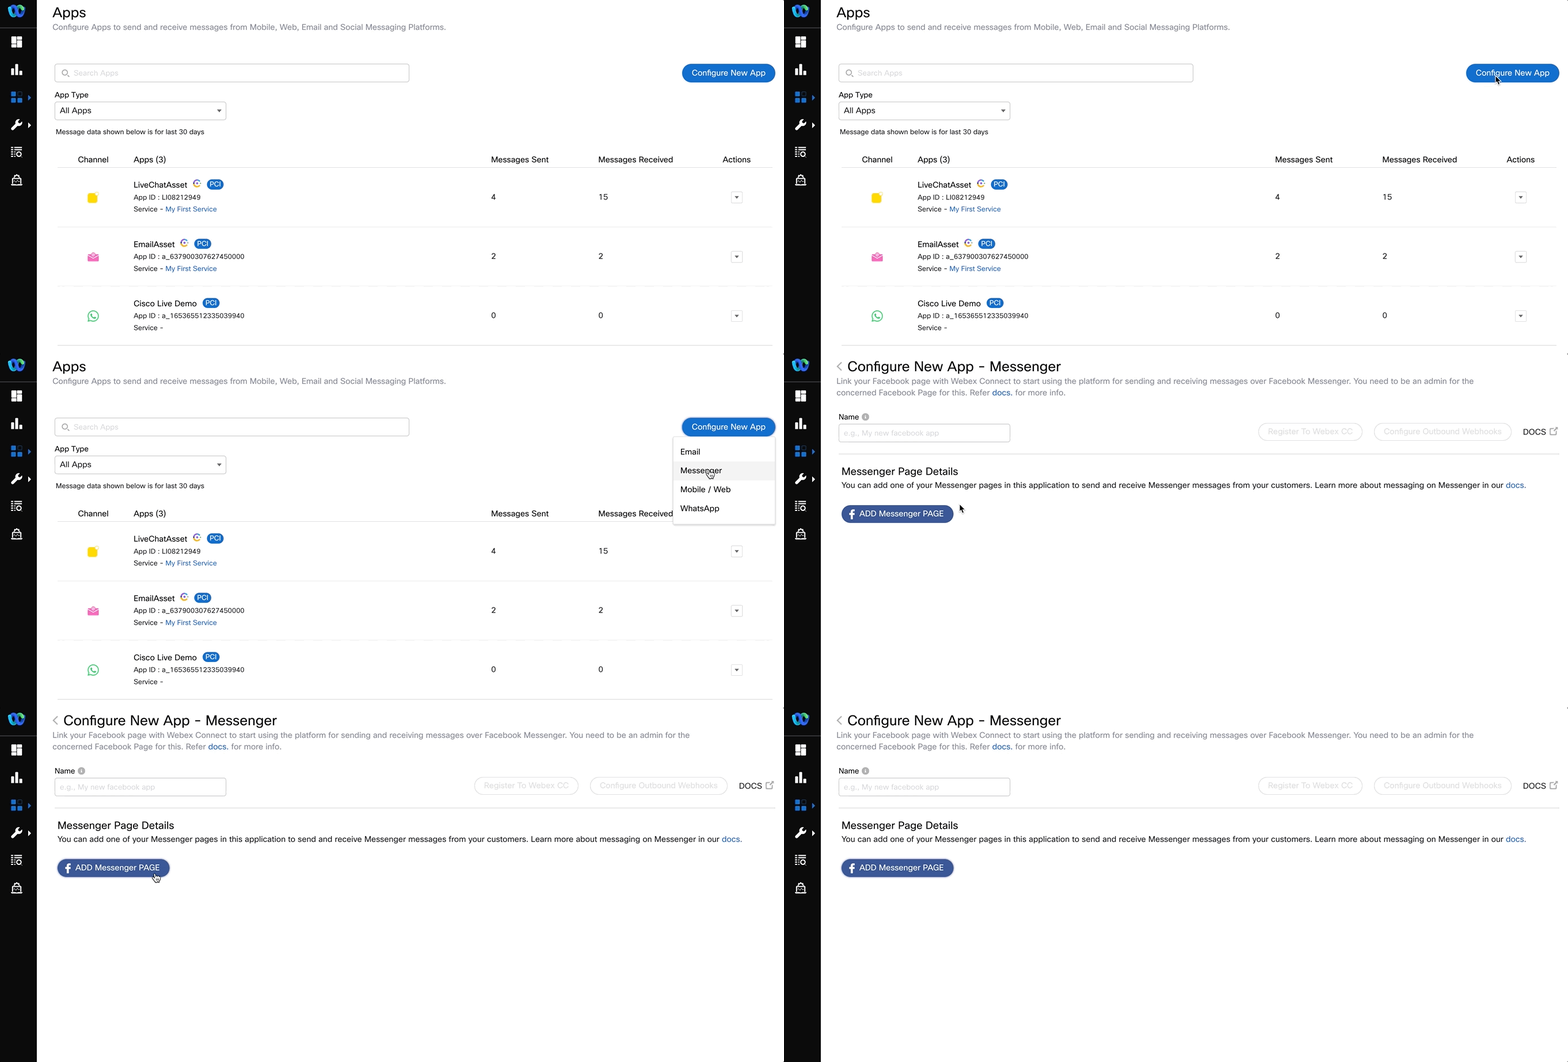
ASSETS → Apps — manage 'triggers' for each channel (except SMS).
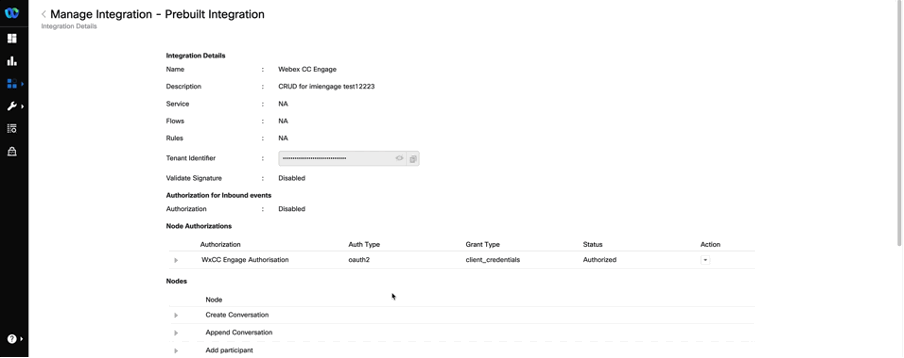
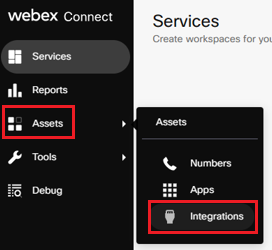
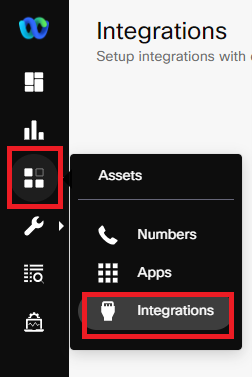
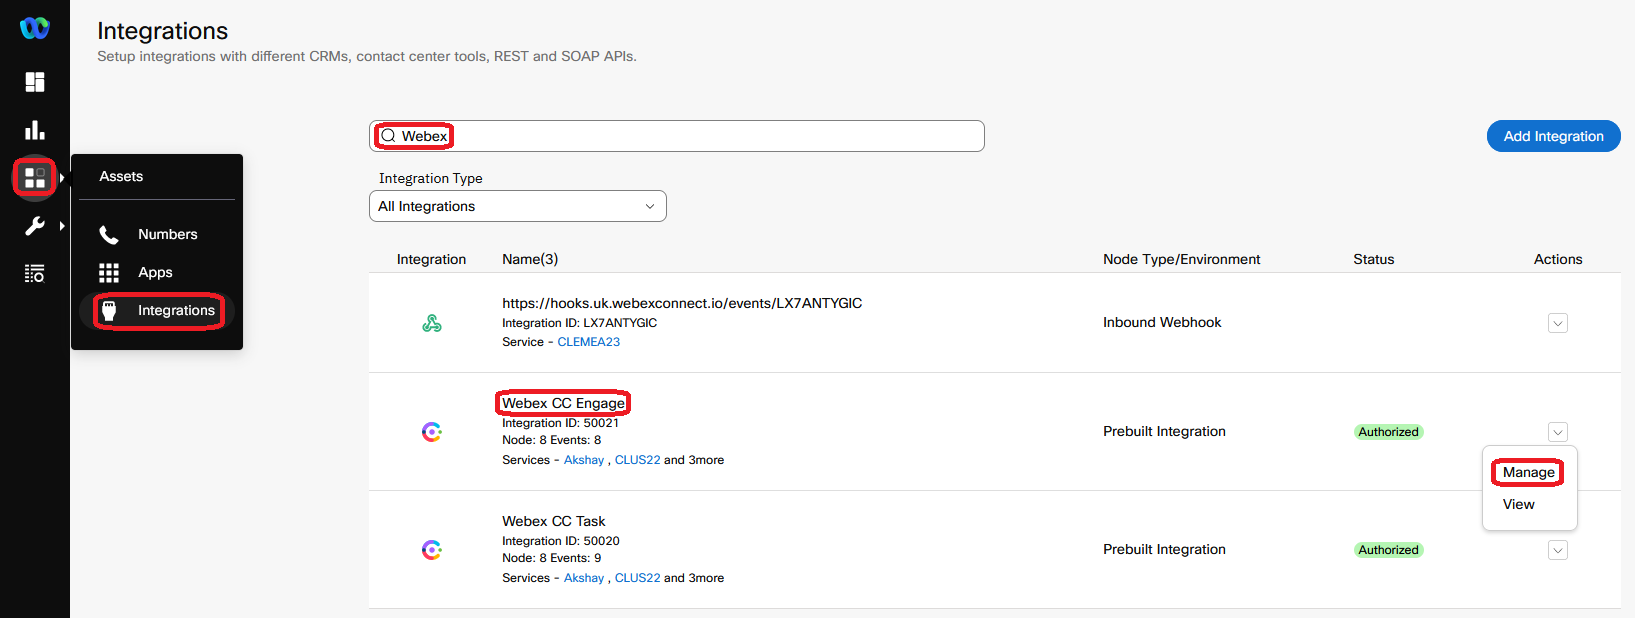
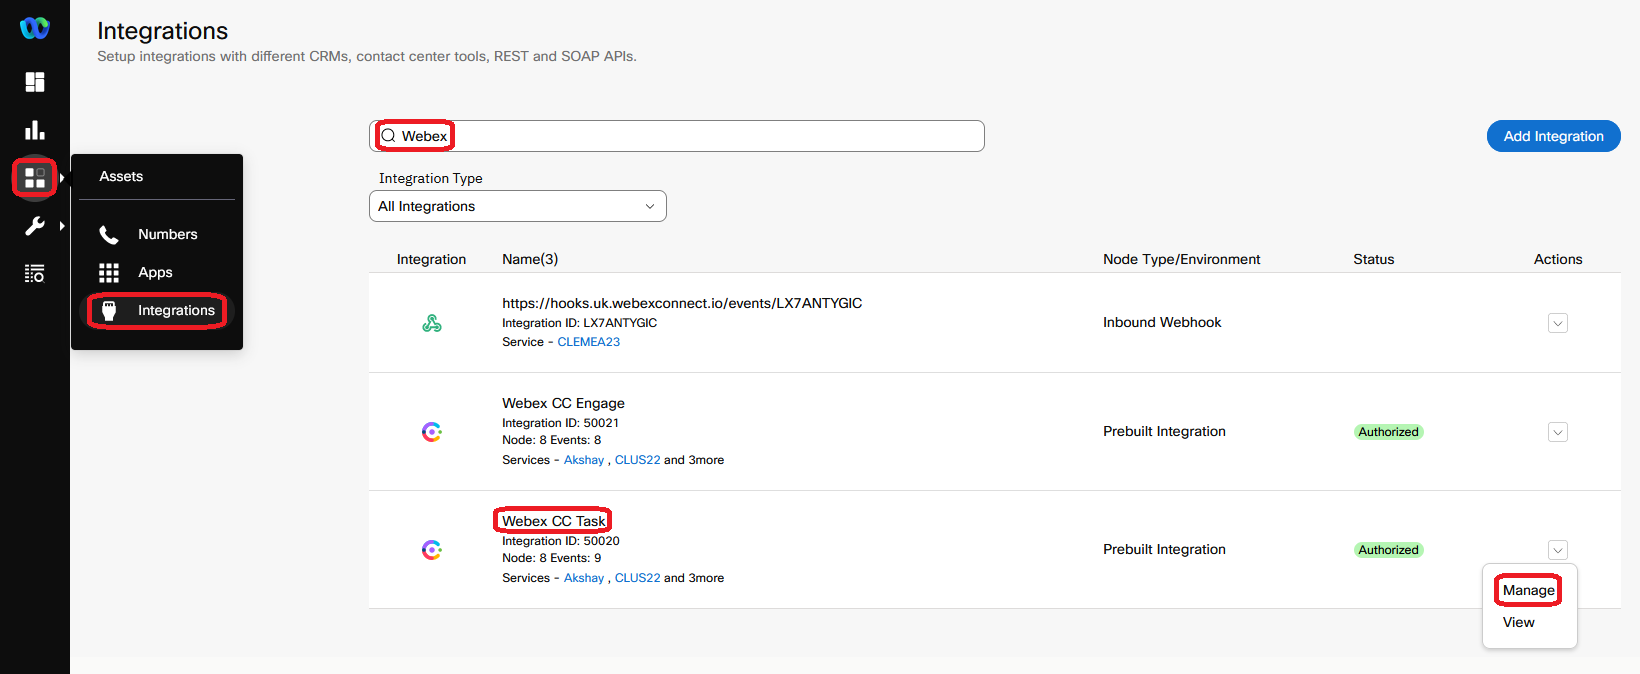
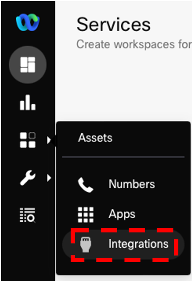
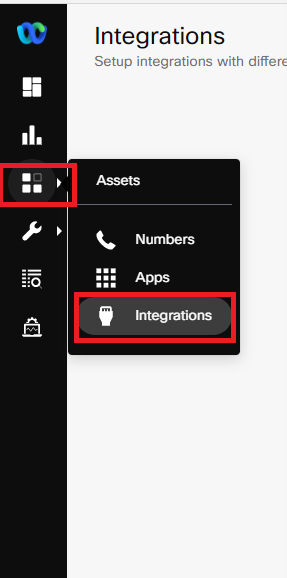
ASSETS → Integrations — list of all integrations. By default includes:
Webex CC Task (Connect ↔ Webex Contact Center backend)
Webex CC Engage (Connect ↔ Engage backend)
4. Tools
Download SDKs — for building your own application.
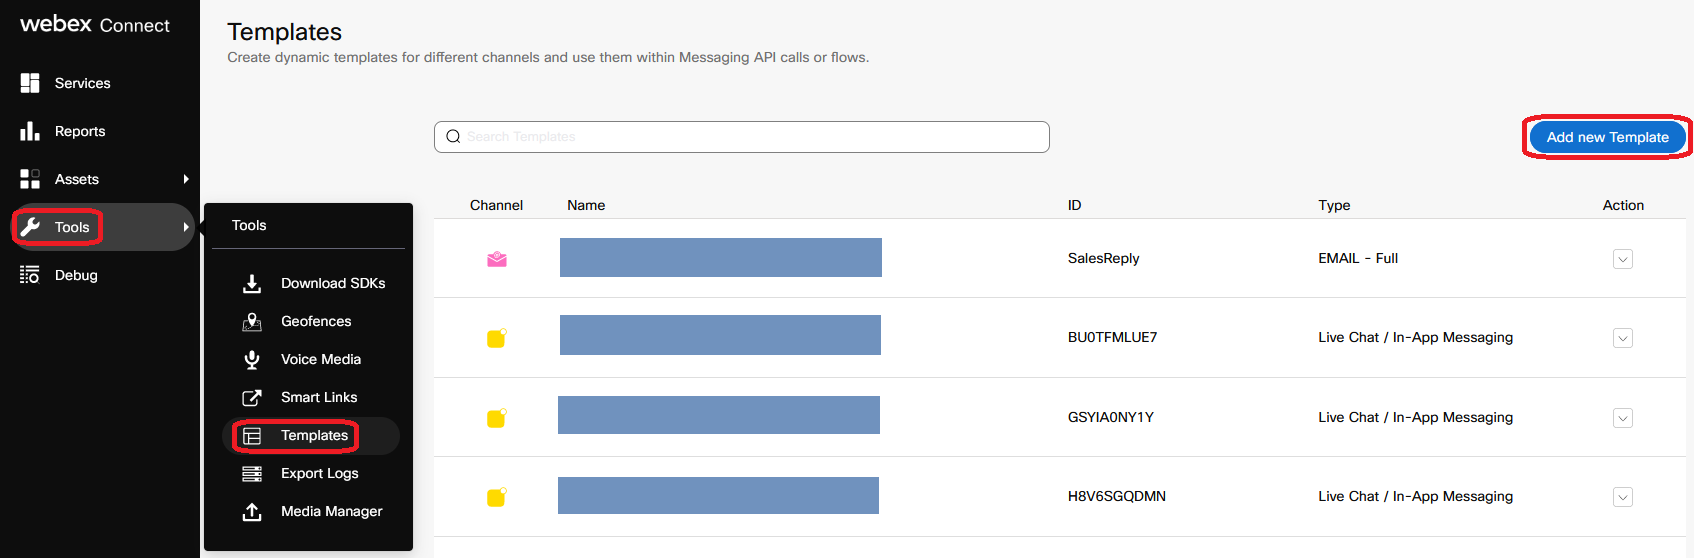
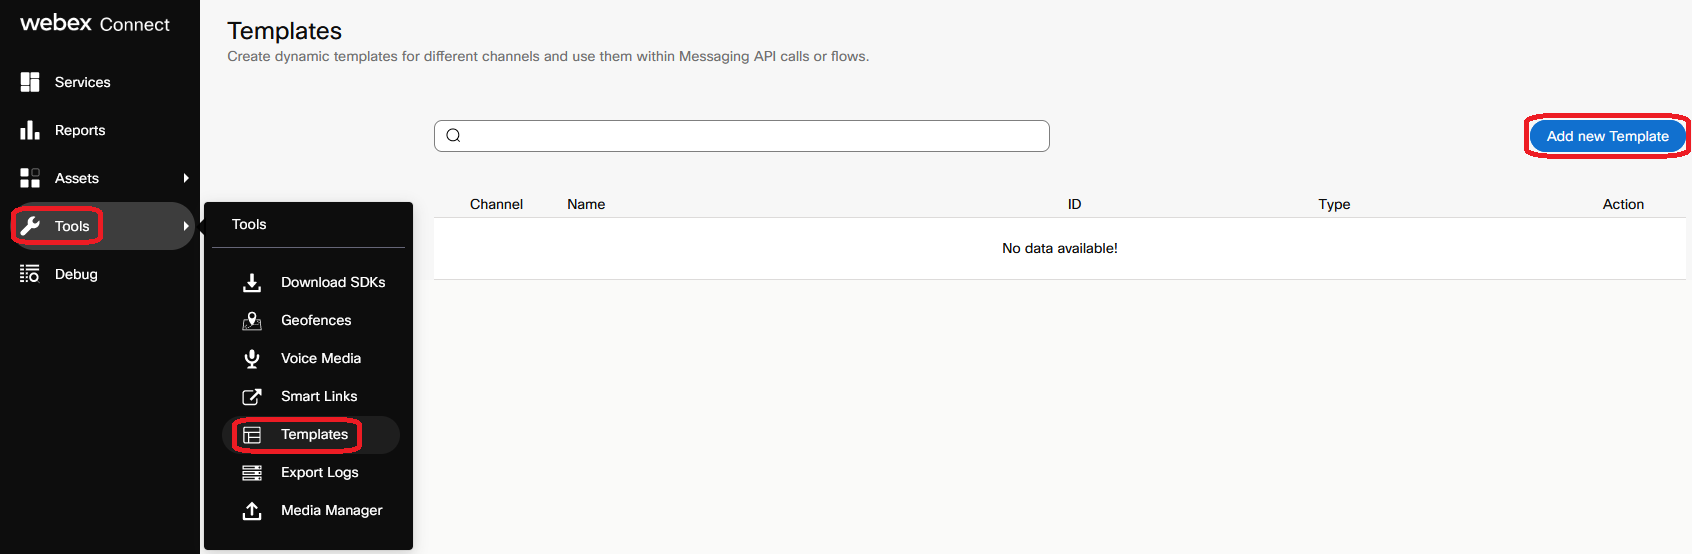
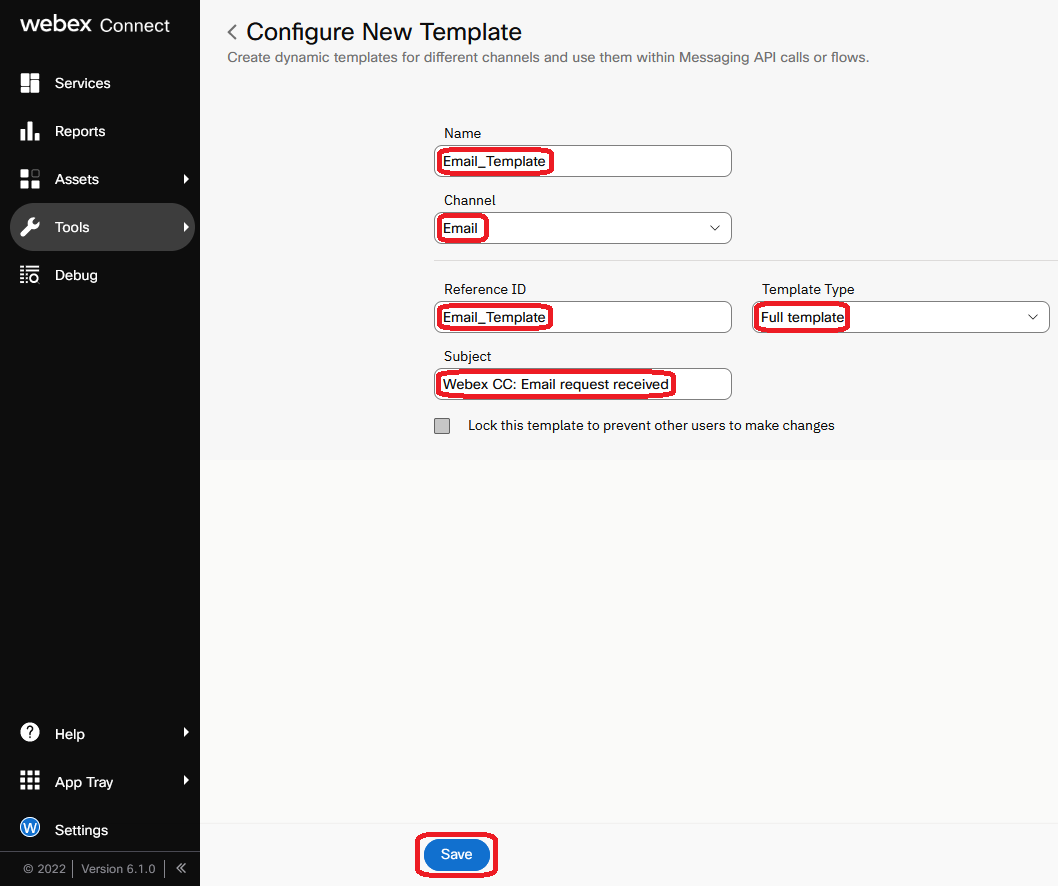
Templates — create new templated messages triggered inside flows.
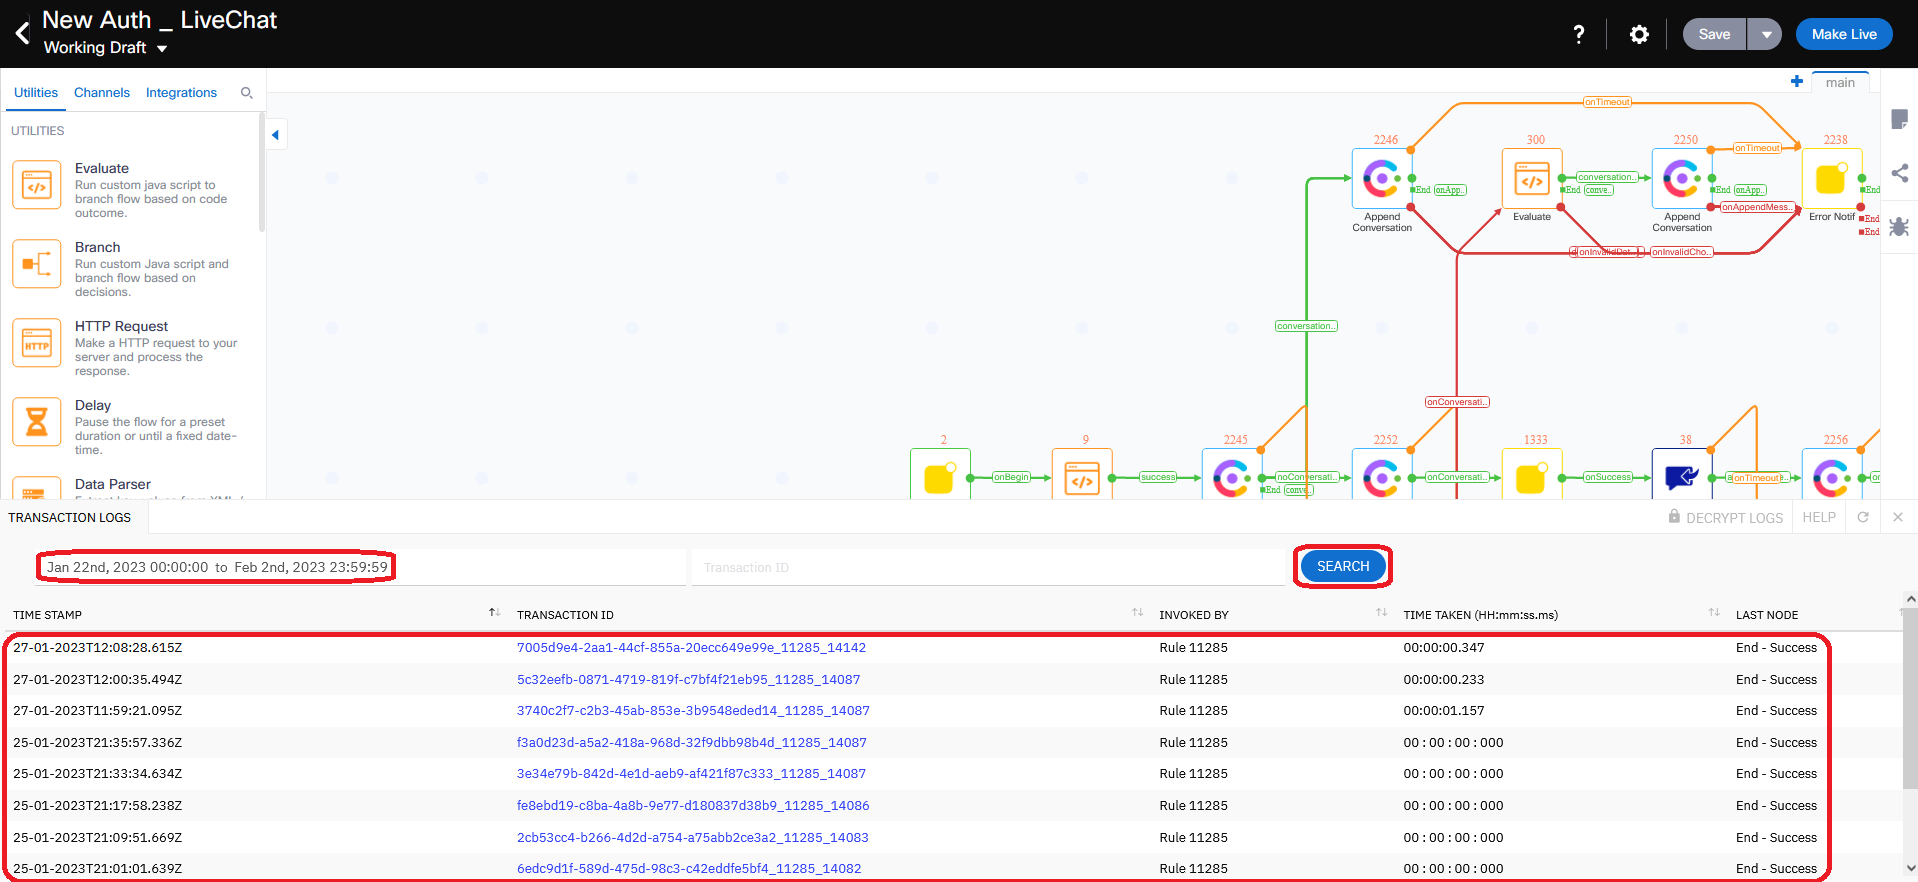
Export Logs — collect detailed logs for Inbound or Outbound messages in a time frame. Useful for troubleshooting.
5. Debug
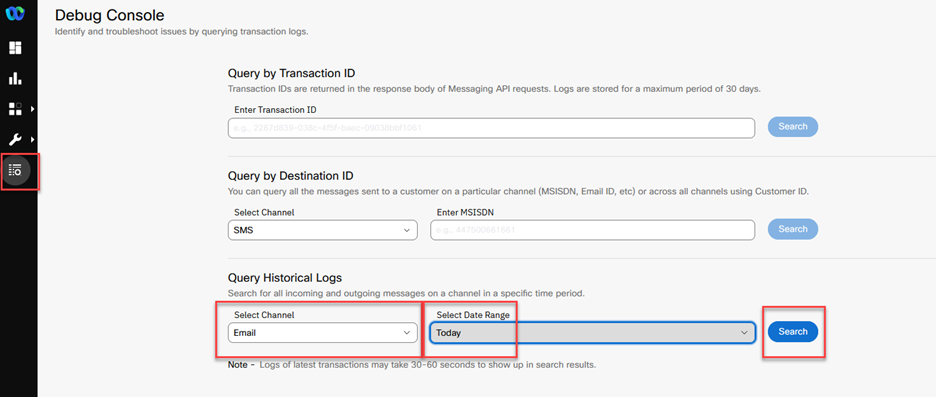
Query by Transaction ID — look up a specific conversation.
Query by Destination ID — look up outbound messages toward a specific destination.
Historical Log — generic search by channel type and date range.
Engage has two portals: Admin (default after login) and Customer Care (accessible via user icon top-right).
1. Engage login
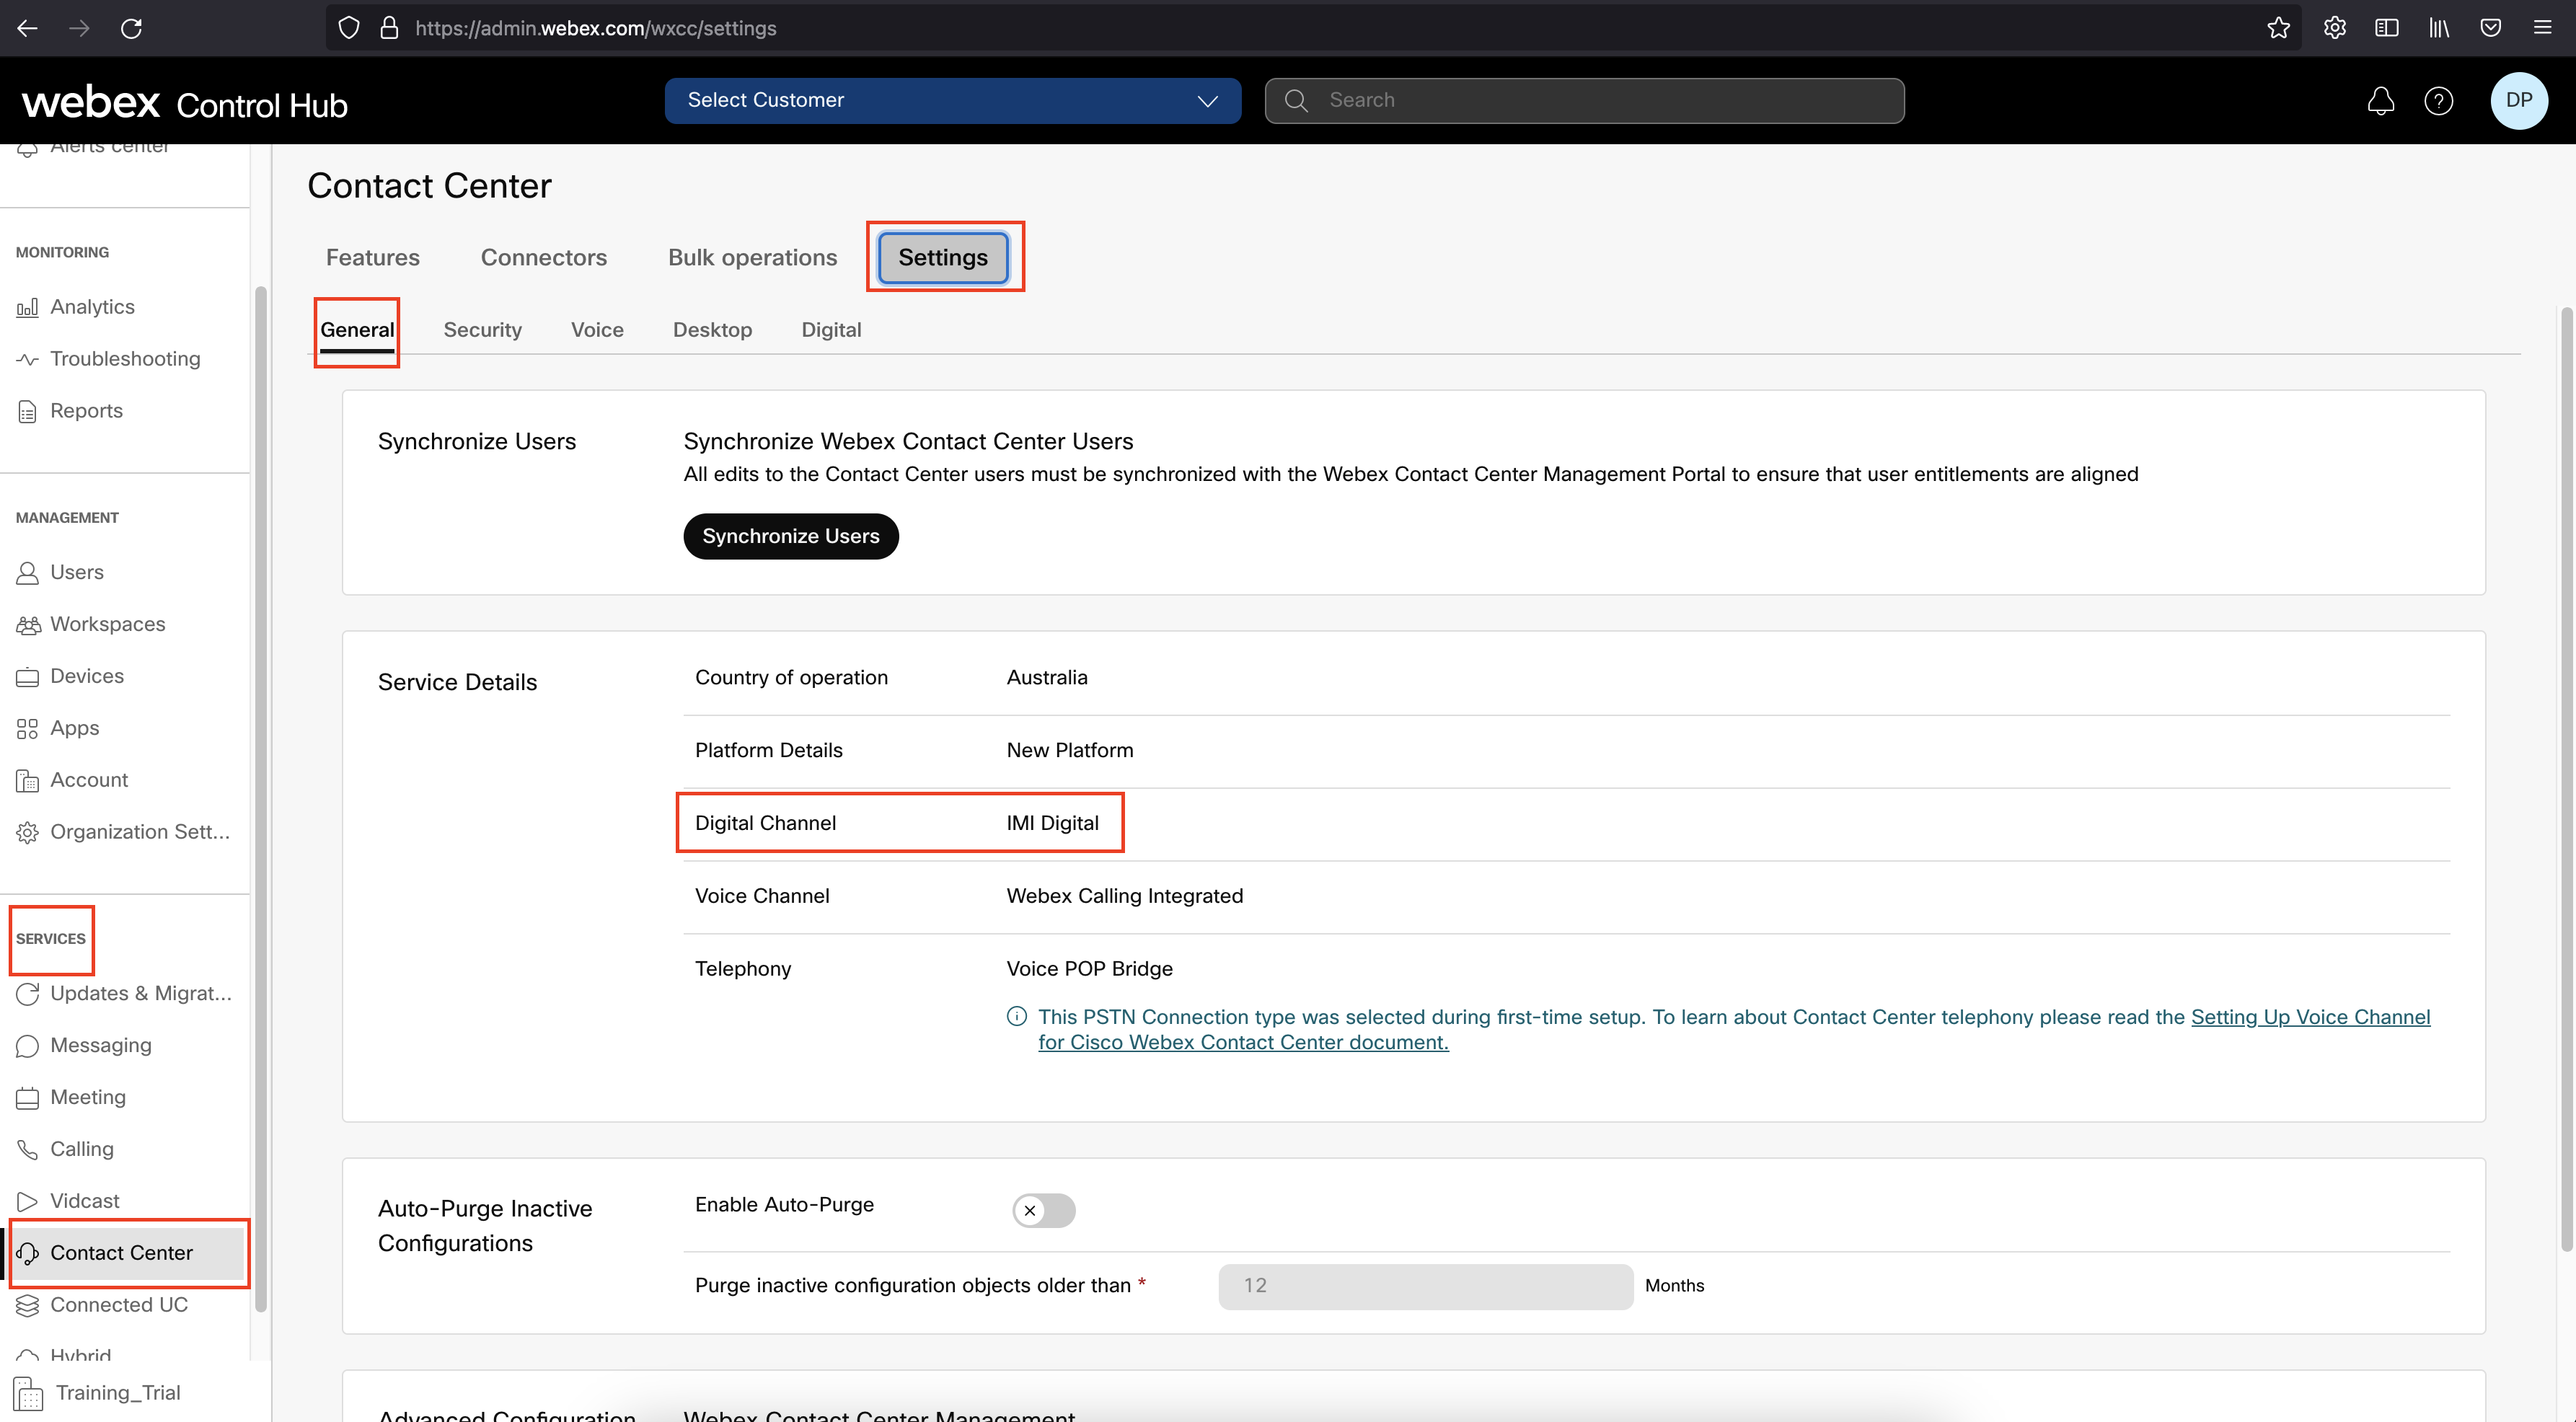
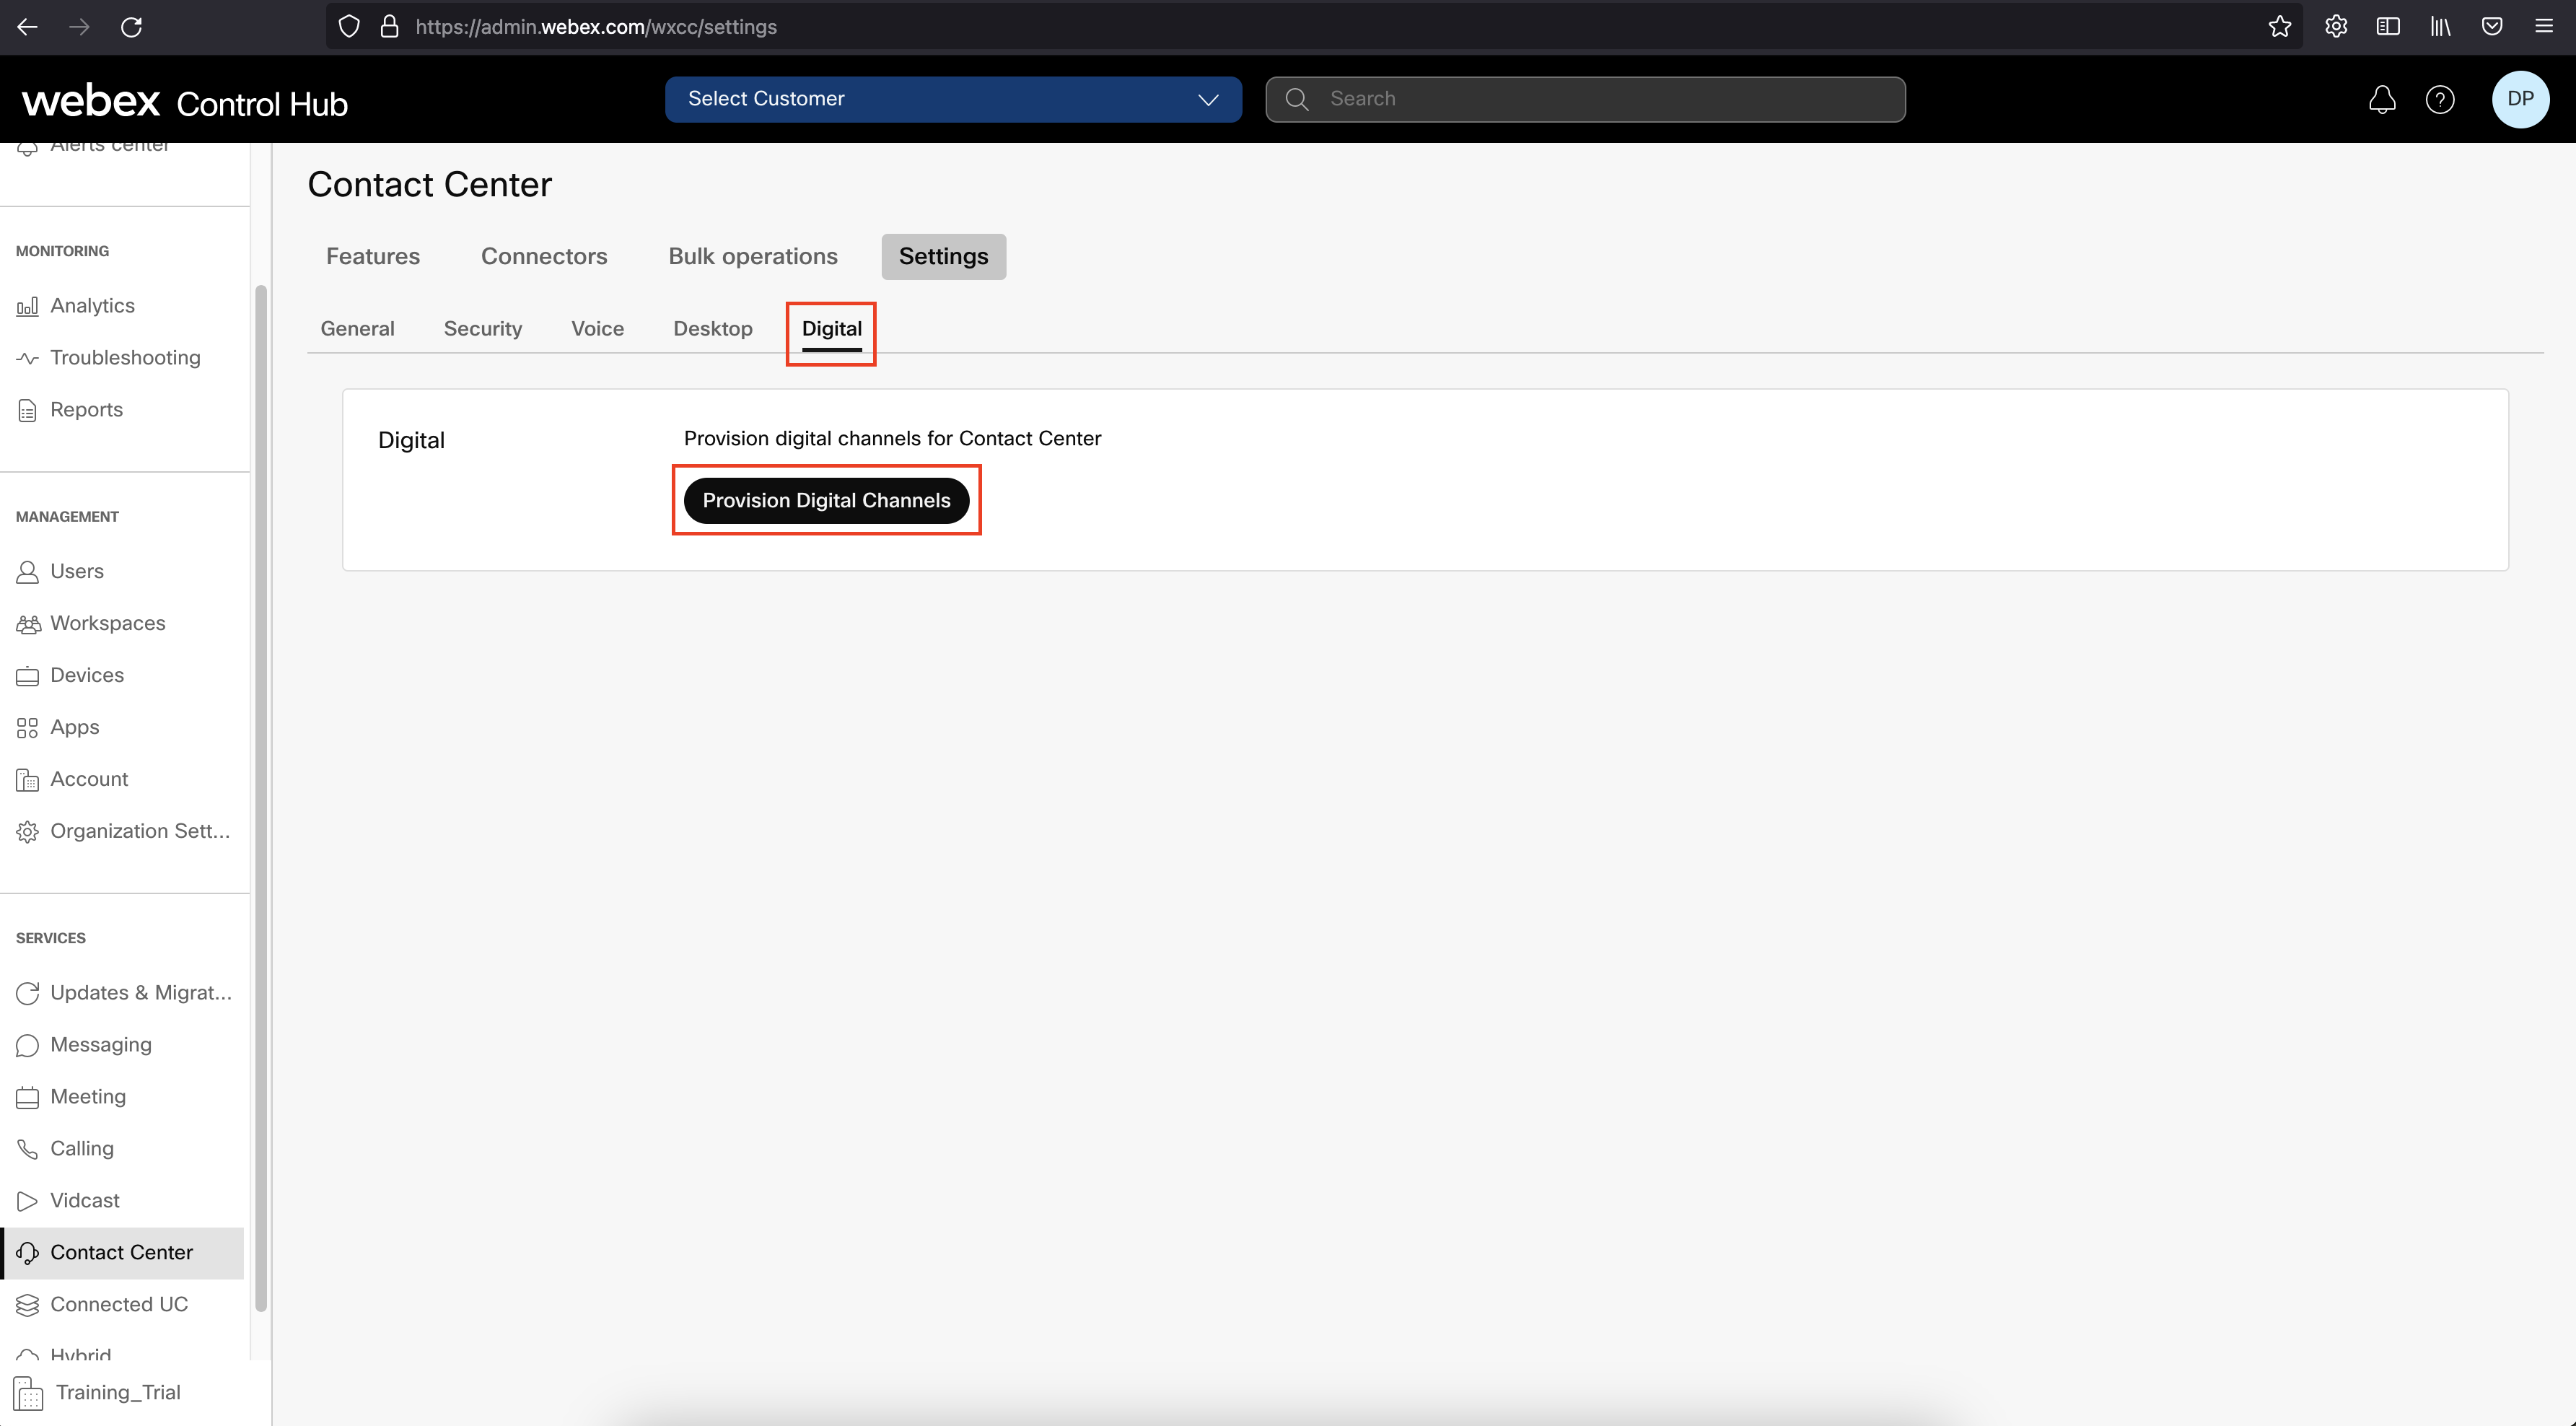
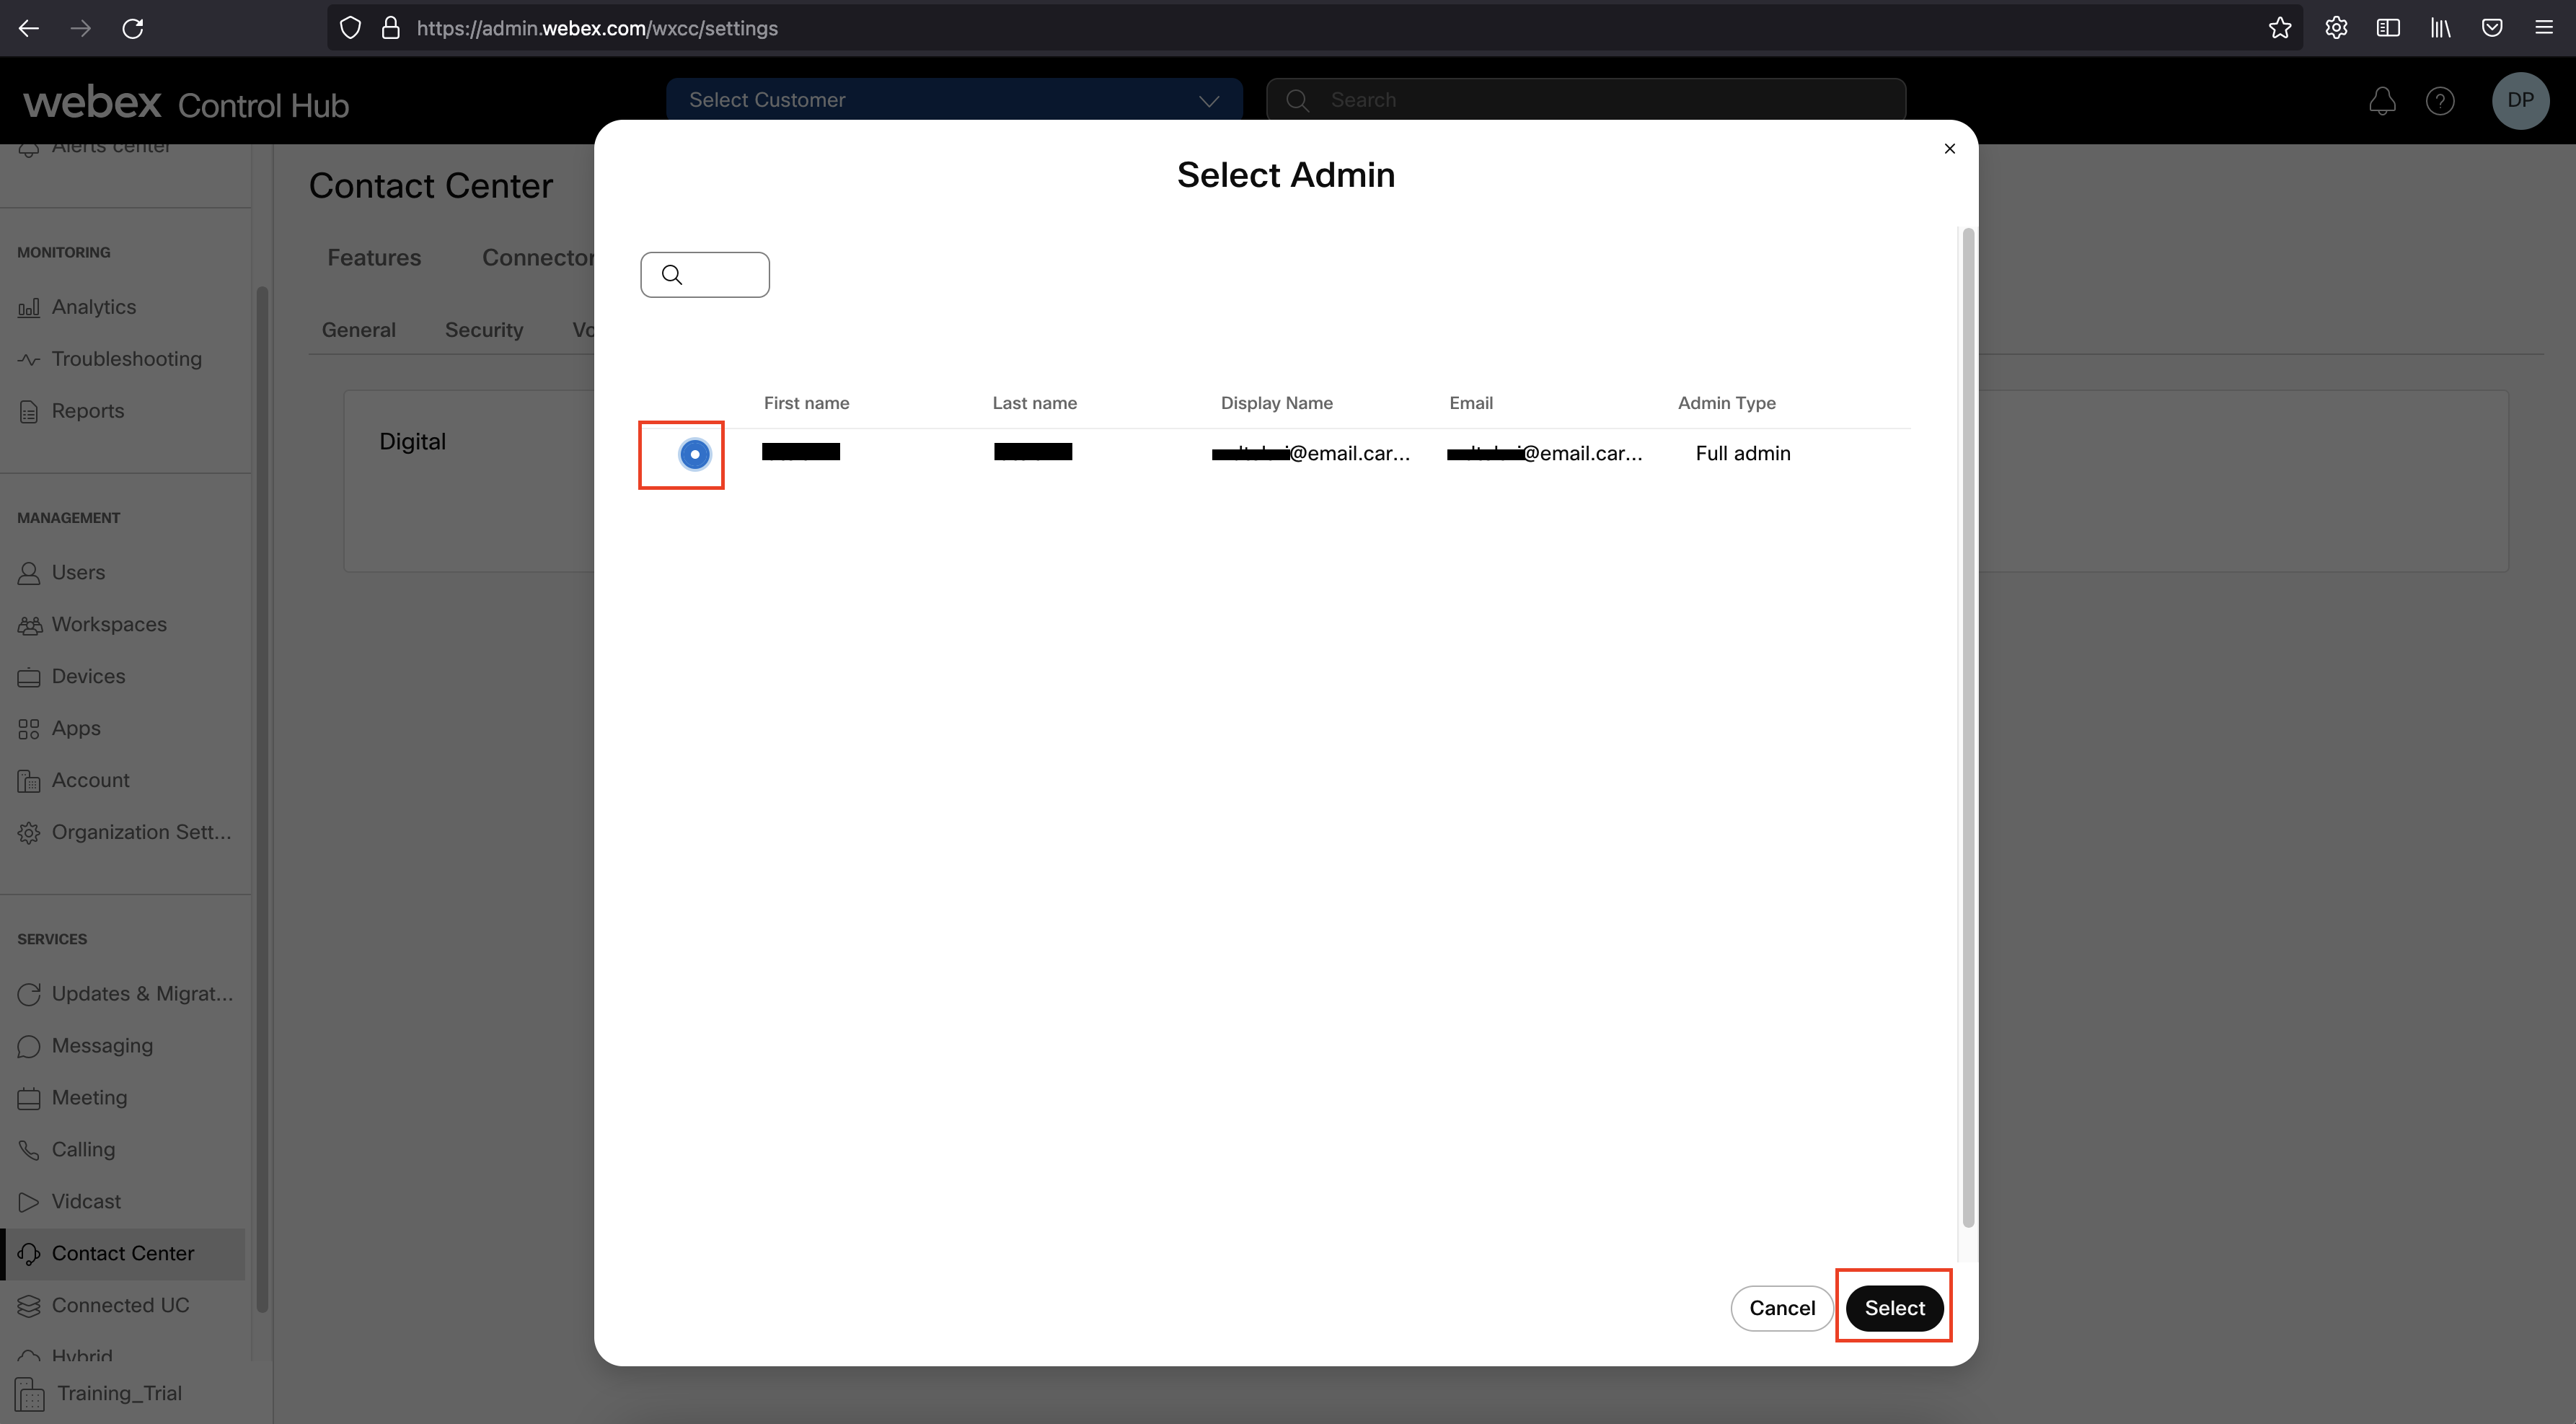
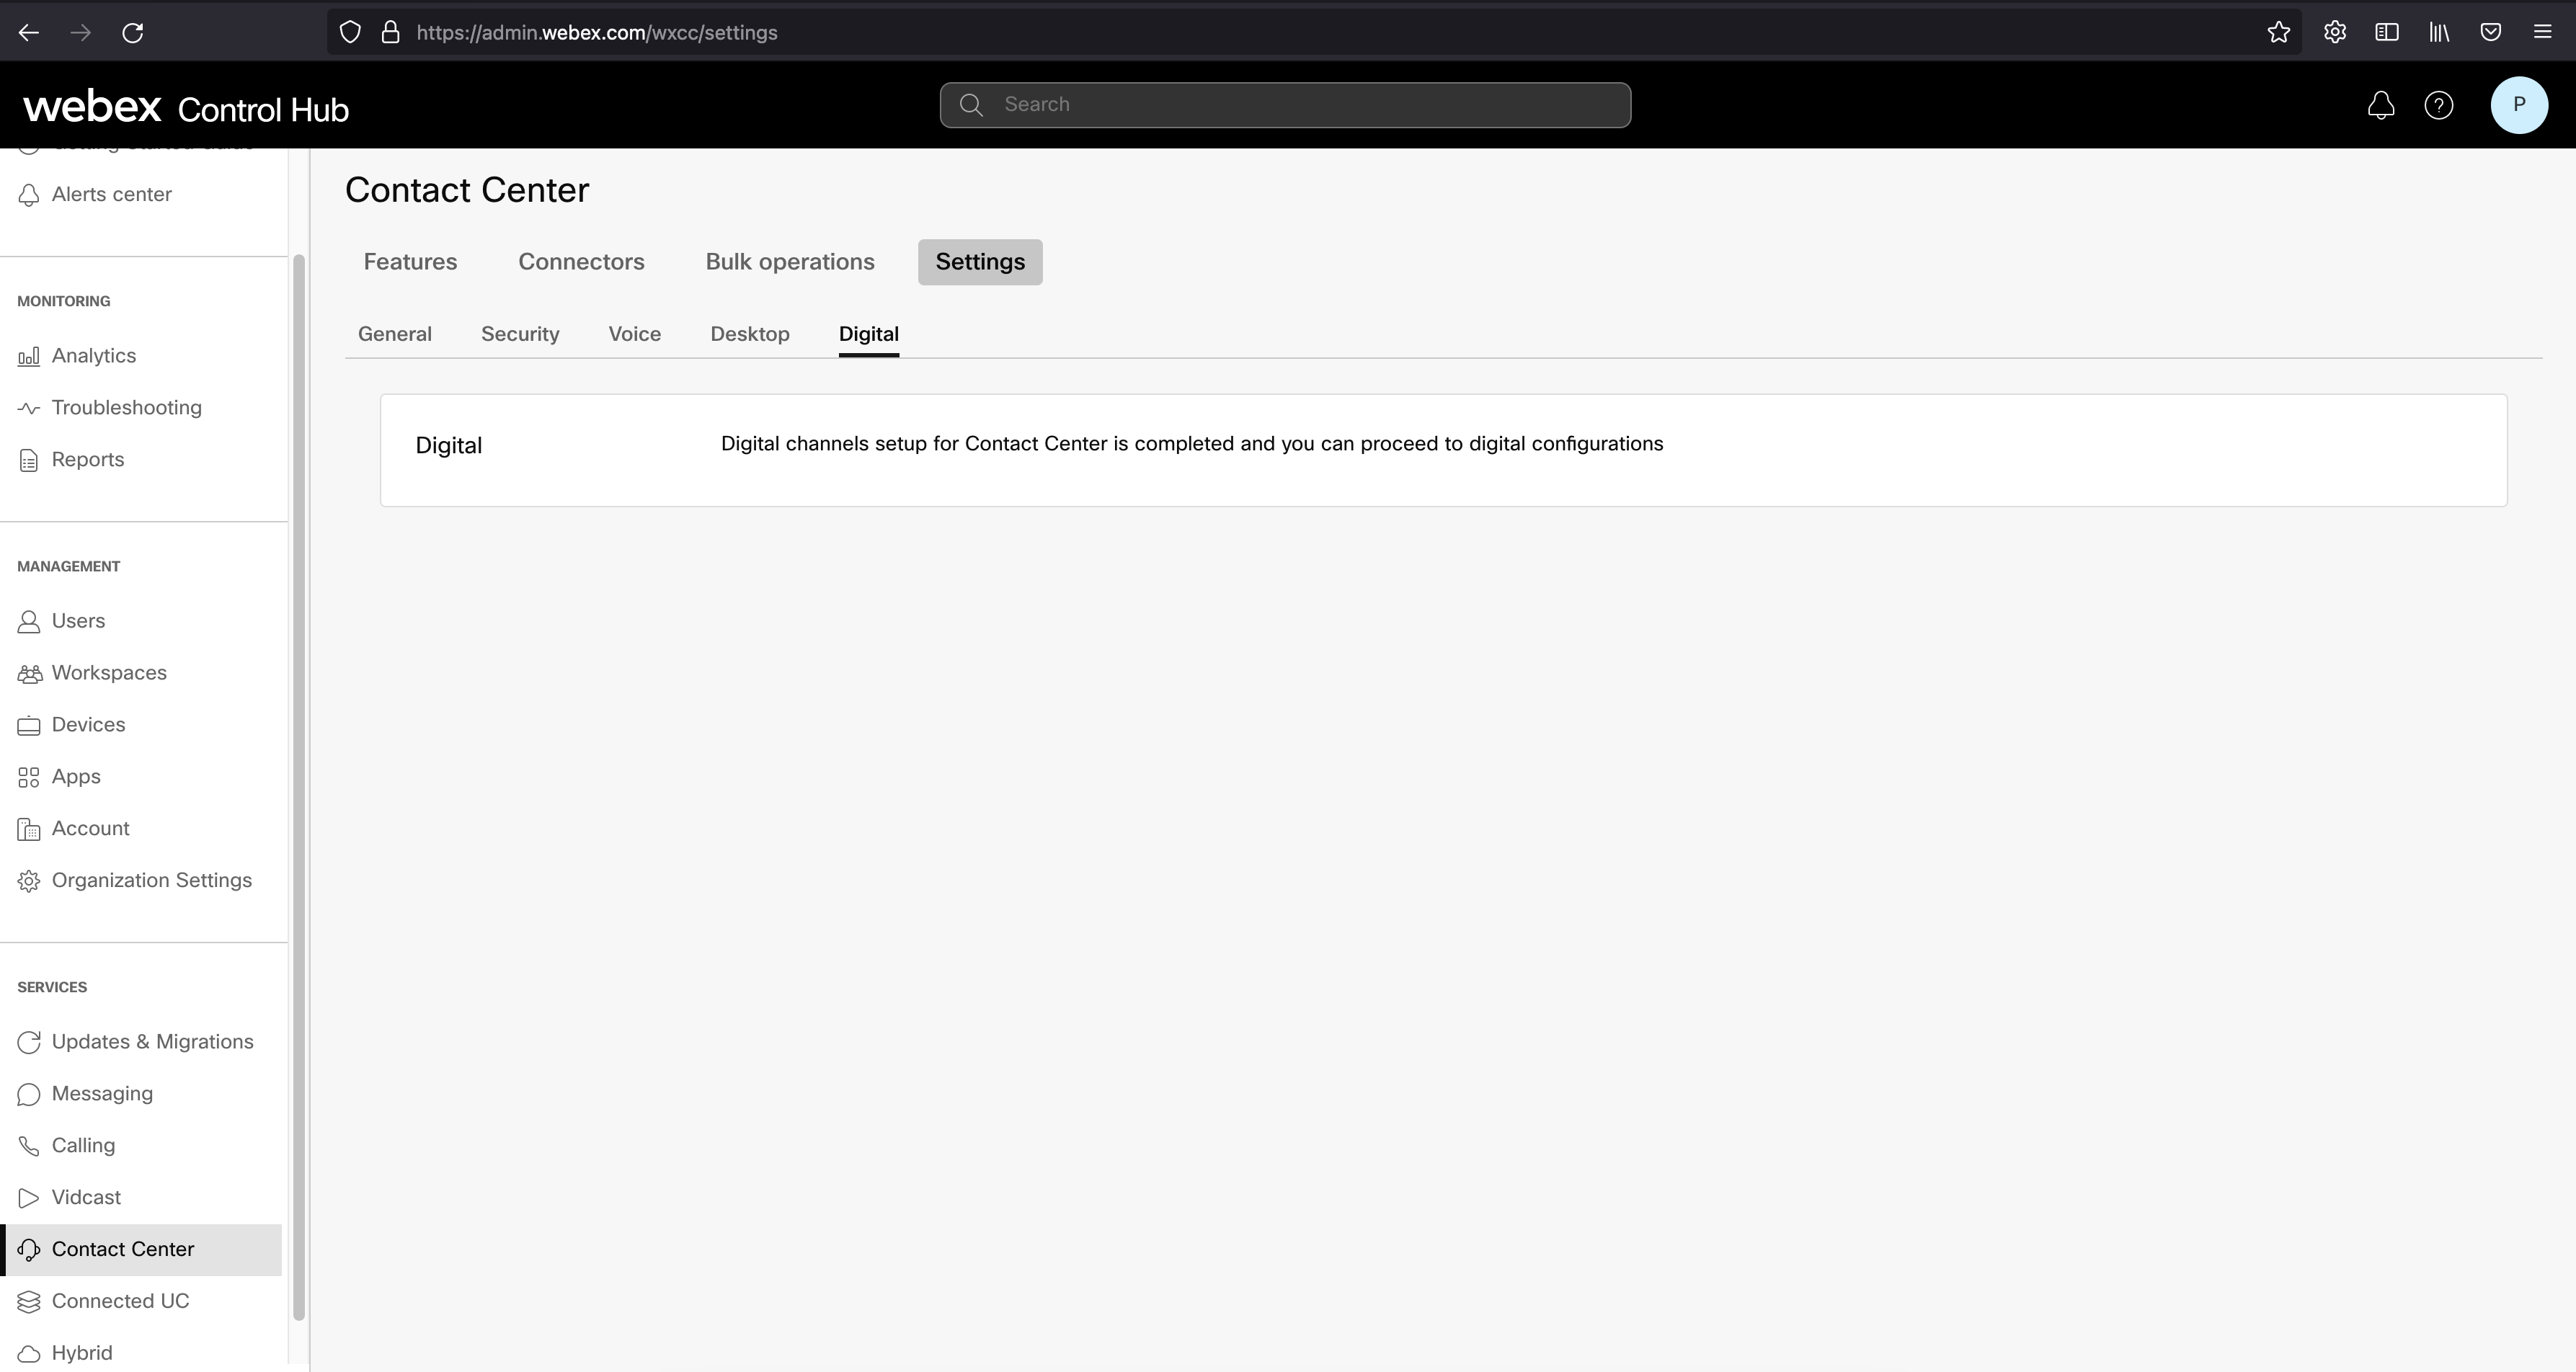
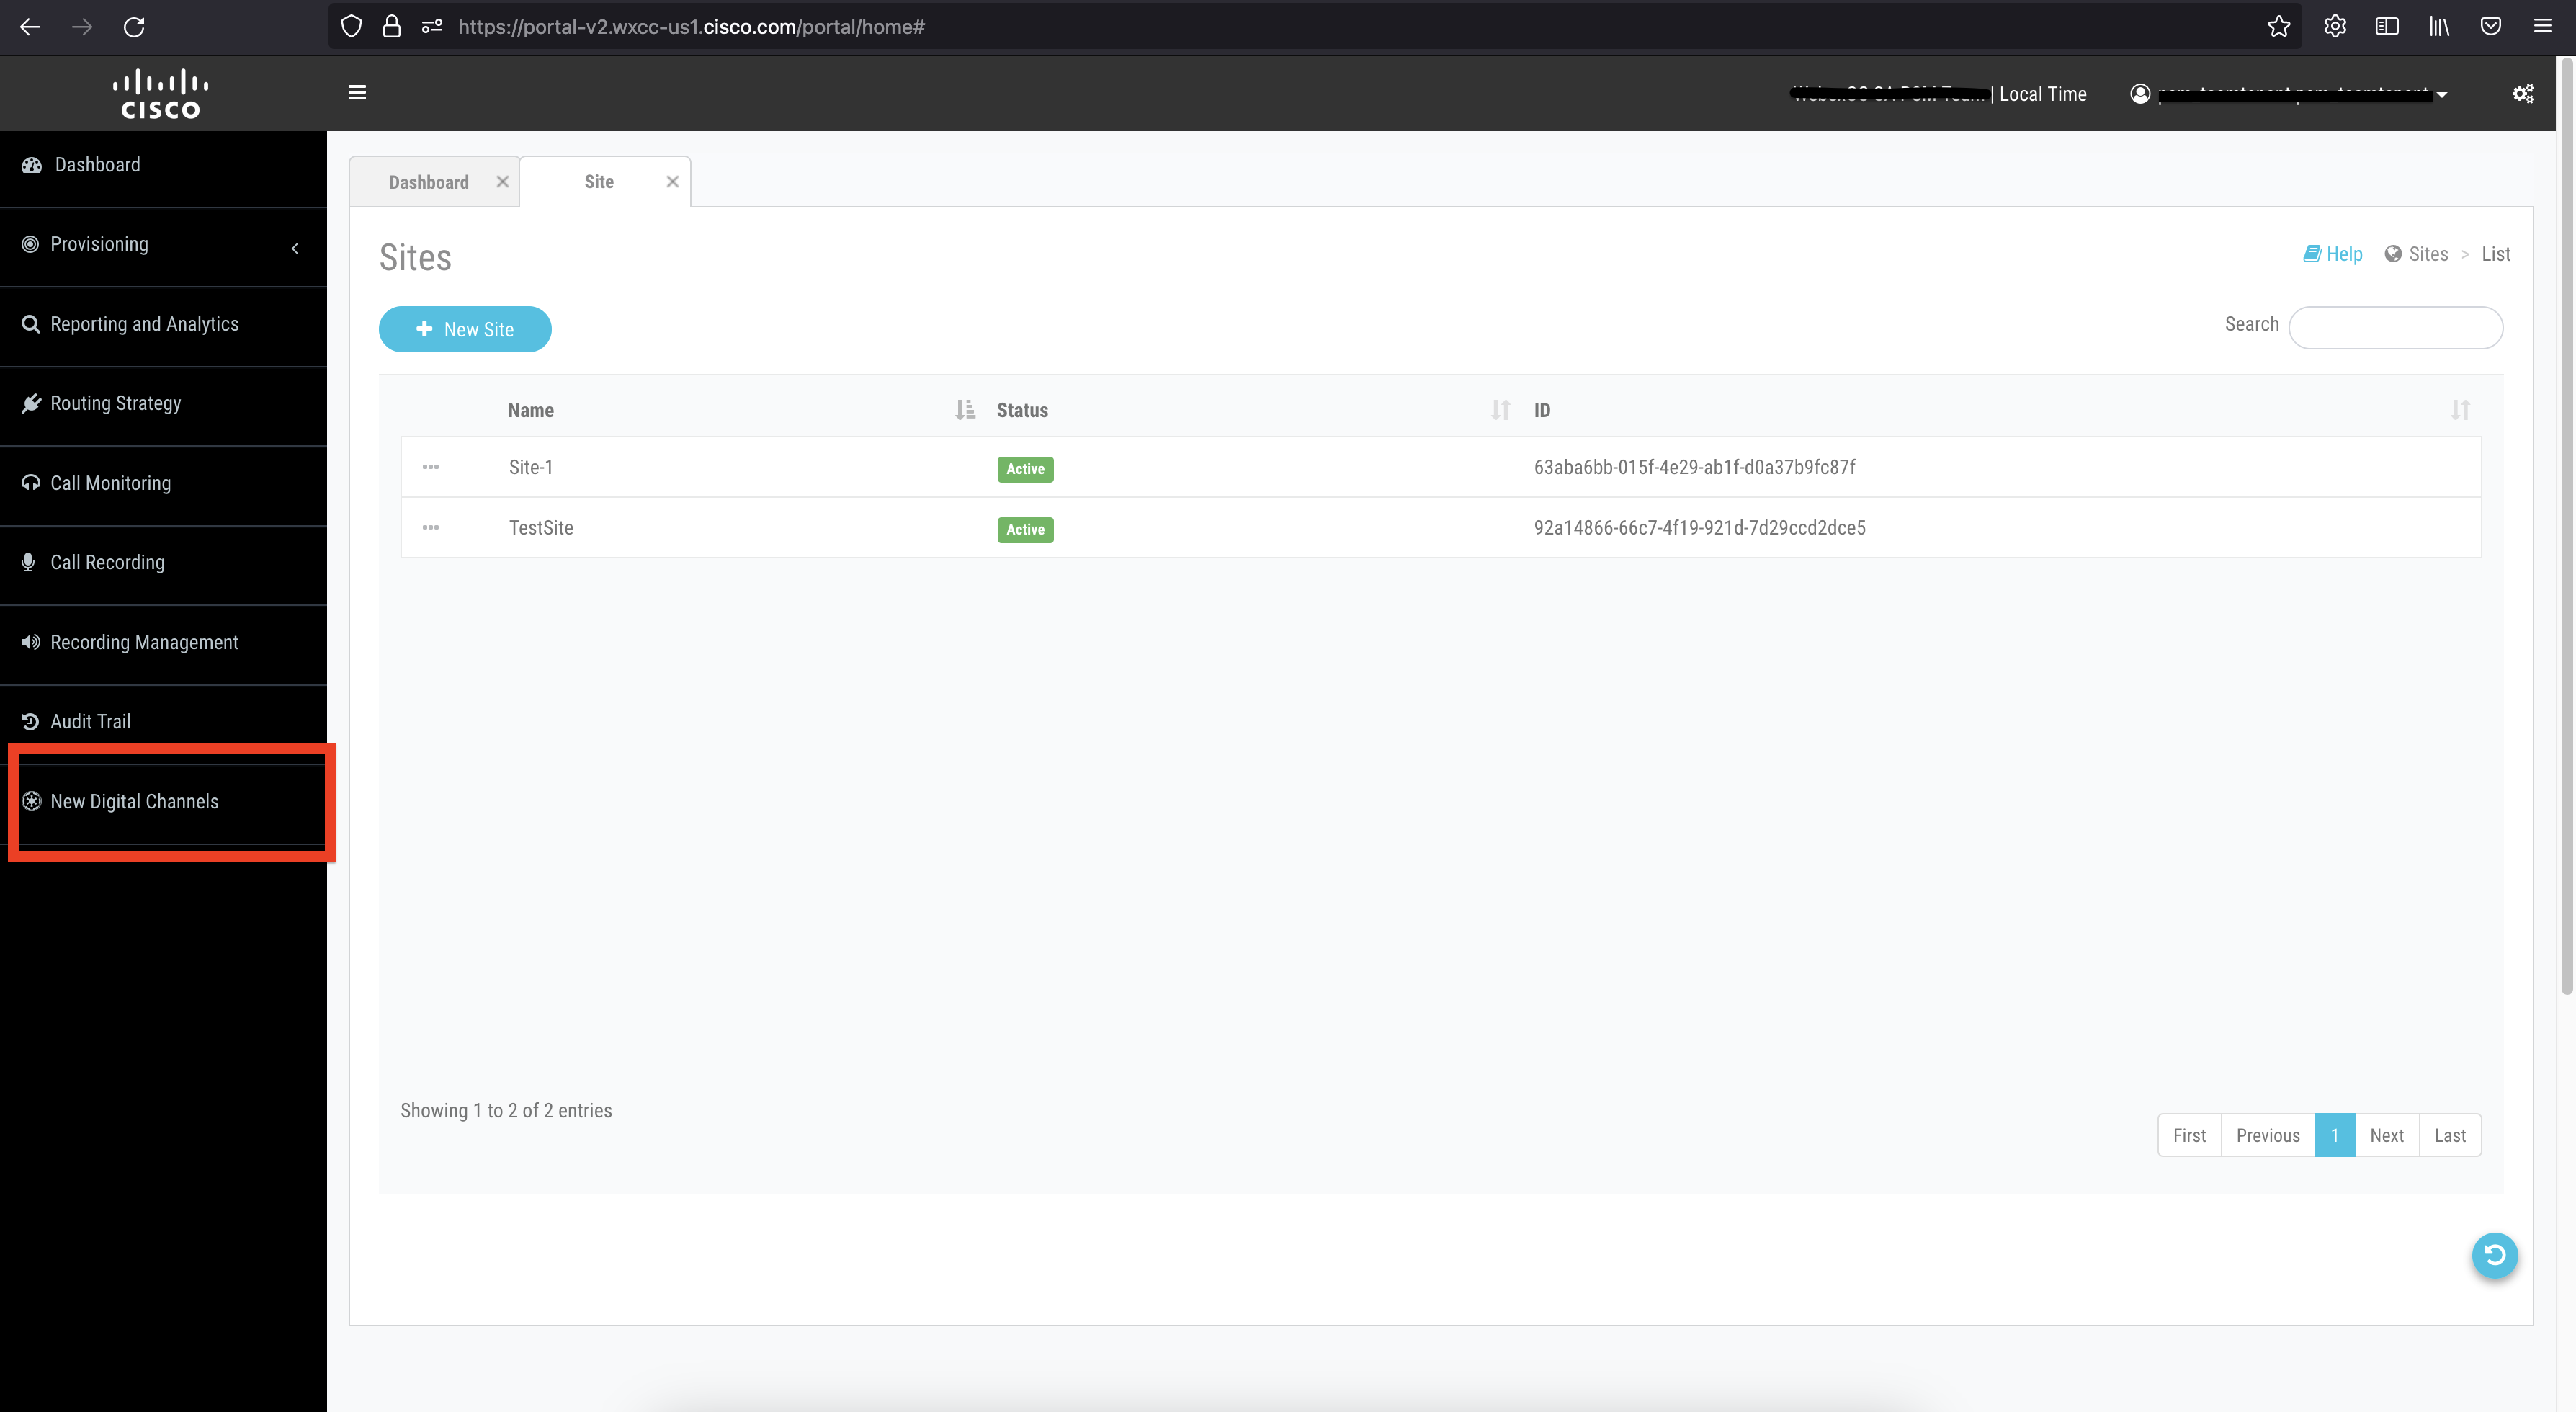
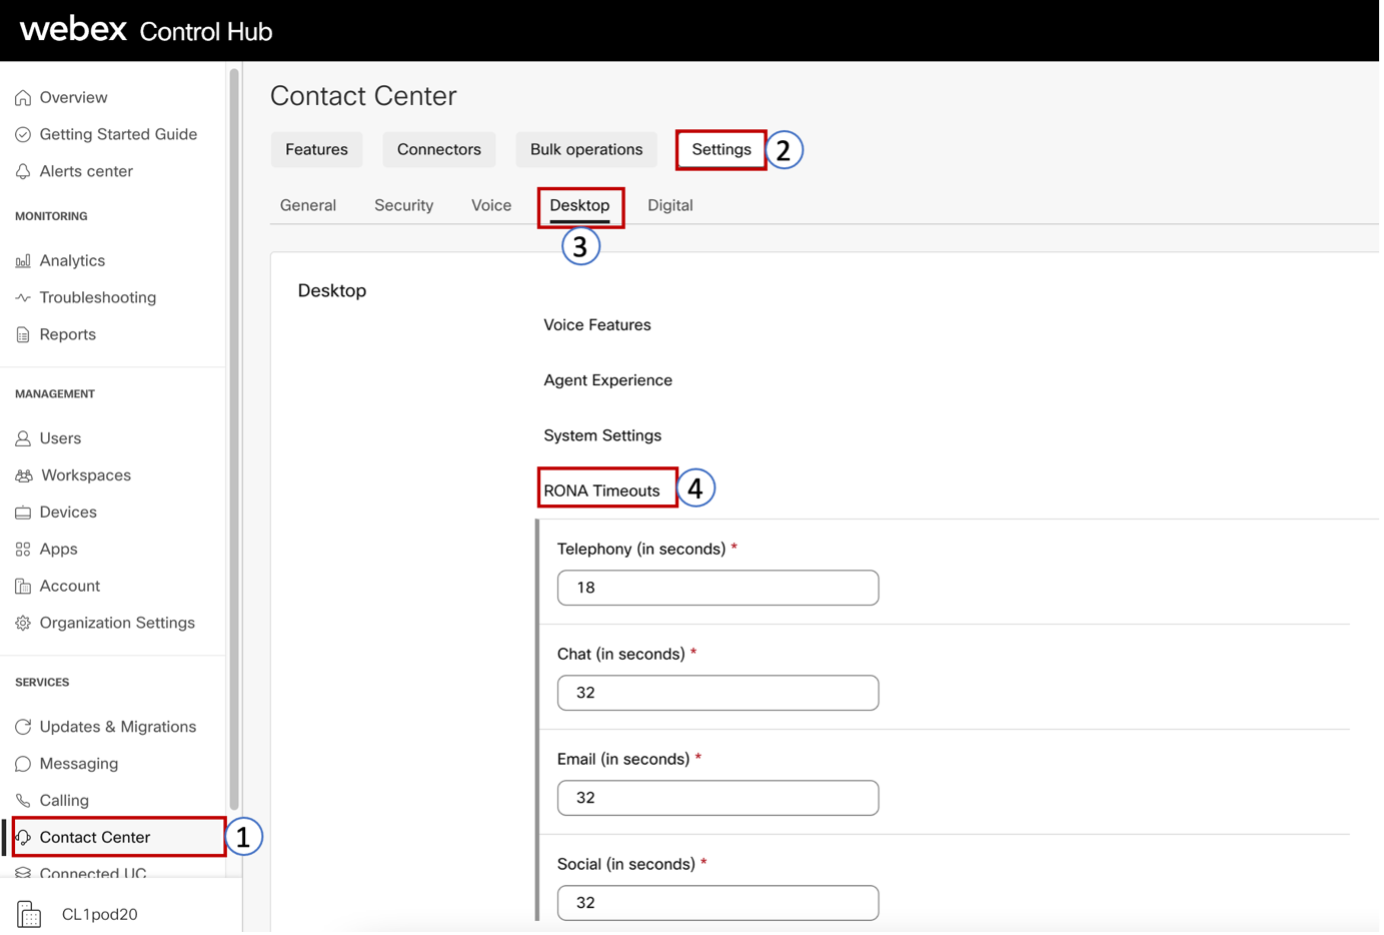
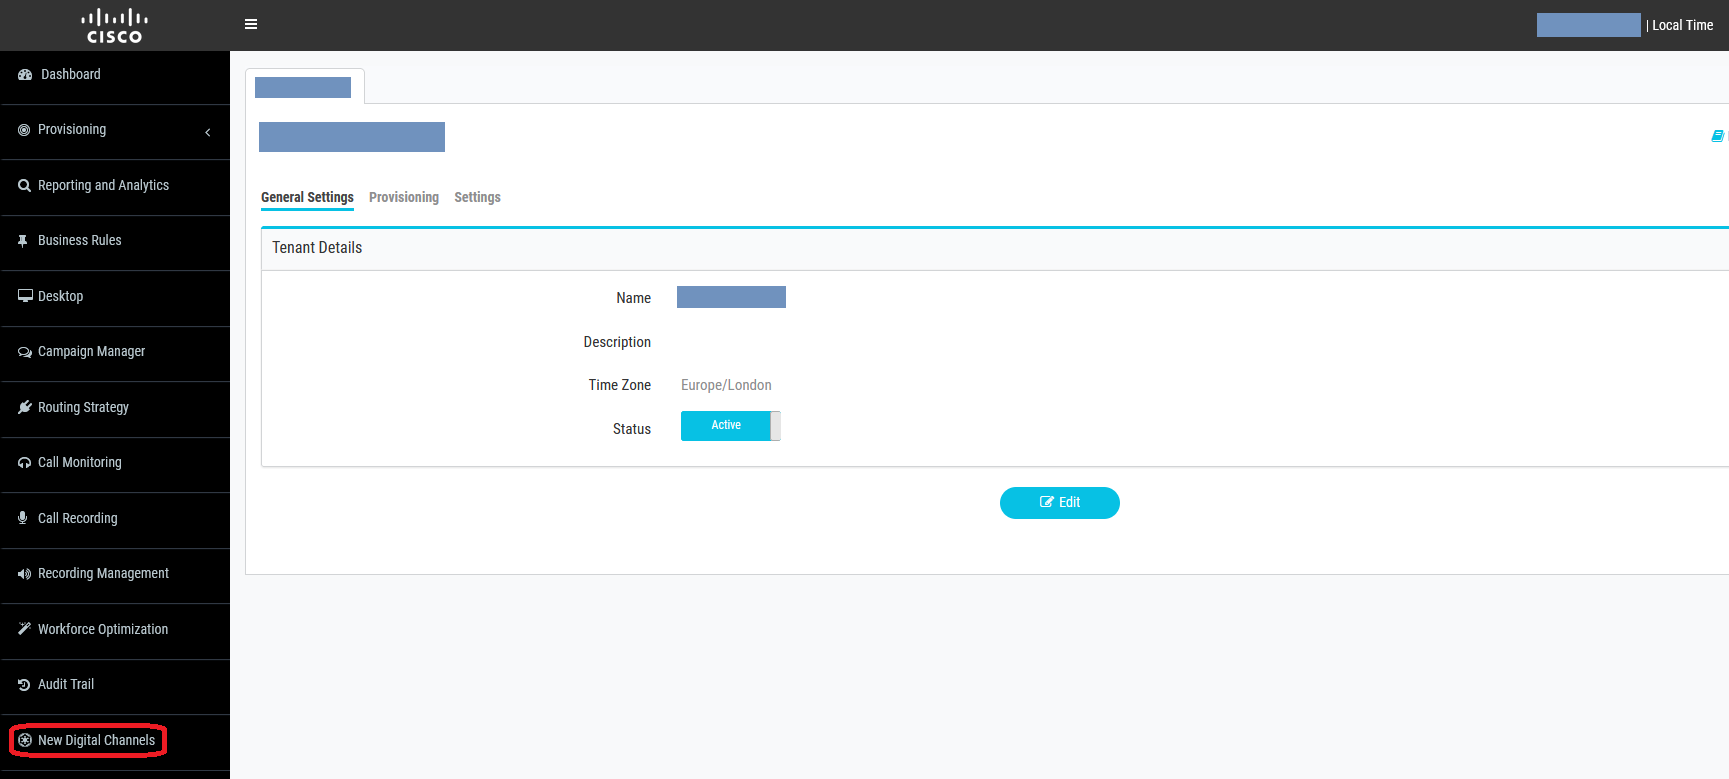
Control Hub → Services → Contact Center → Settings → General → Advanced Configuration → Go to Webex Contact Center Management Portal. Then click the hamburger icon → New Digital Channels to cross launch into Engage.
2. Dashboard
Real-time view of all ongoing chats. From the drop-down top-right check Select All to display data for all agents.
3. Settings
Controls whether and which types of attachments can be exchanged per channel.
IMPORTANT: Webex Connect is a PCI compliant application — only text-based files are allowed. Documents containing images alongside plain text will be rejected.
4. Users
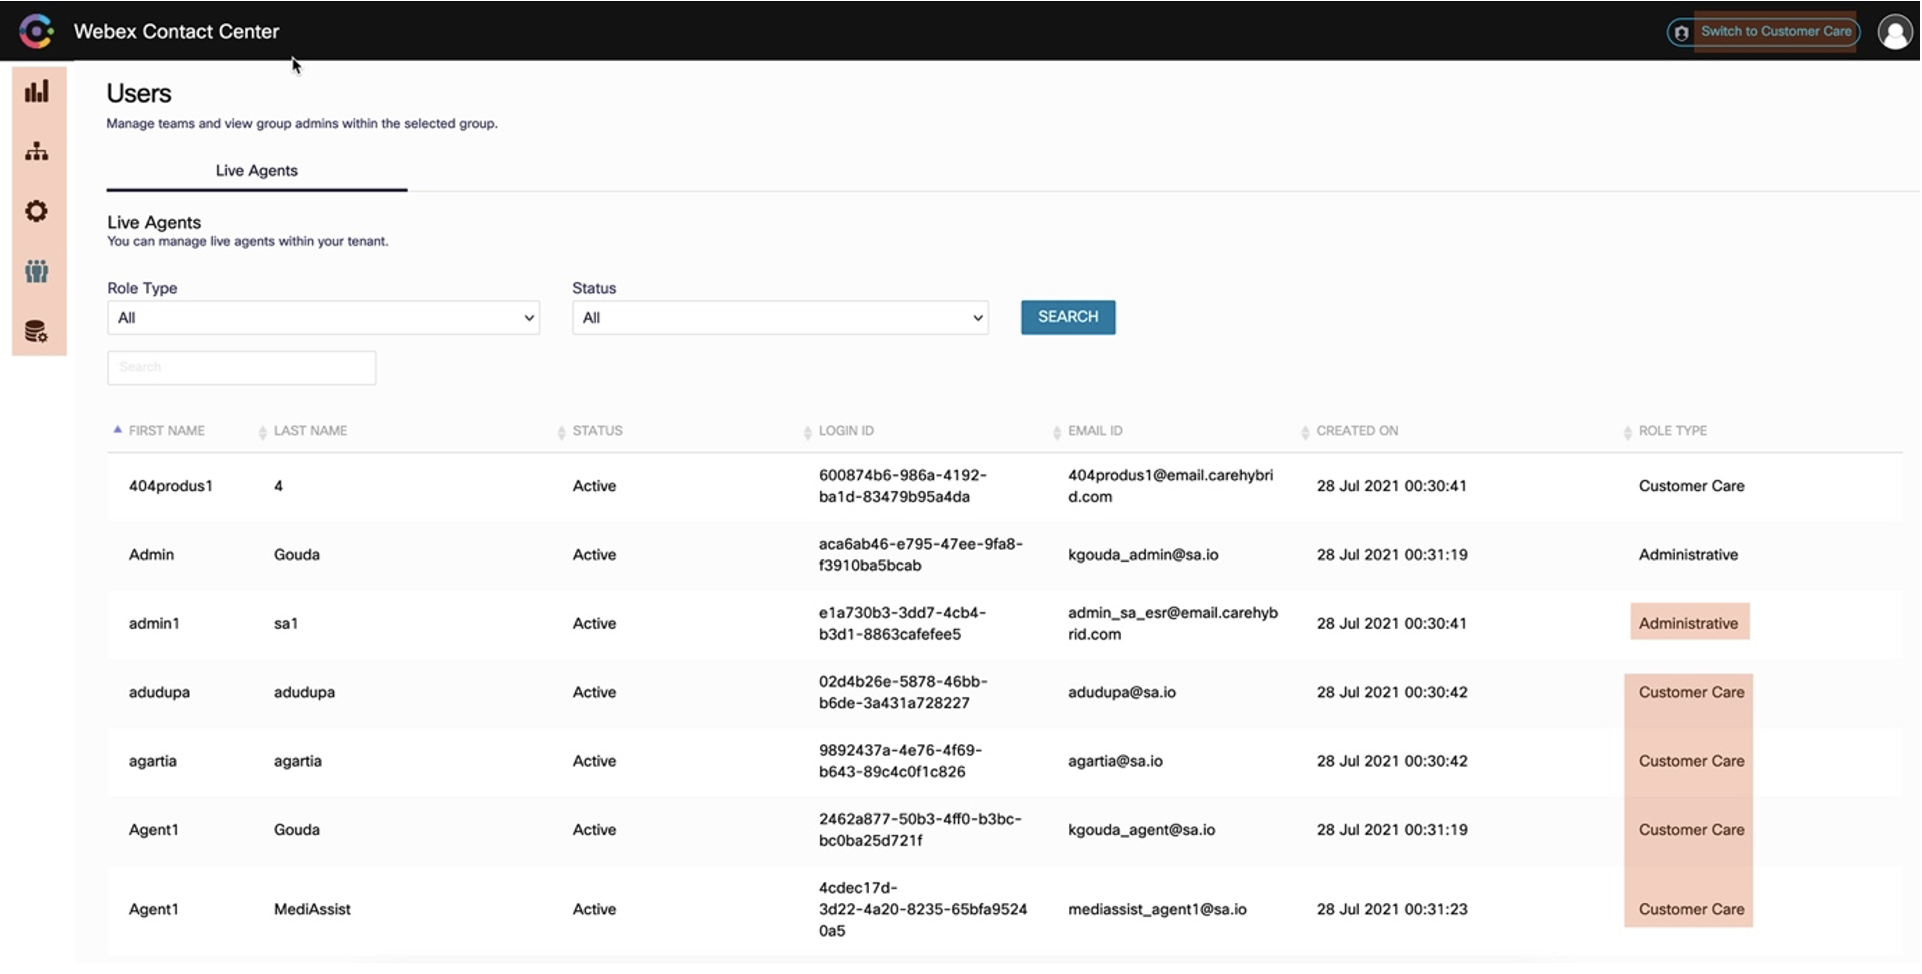
Lists all licensed Contact Center Administrators and Agent users from Control Hub (except the currently logged in user).
If a user is missing: verify license in Control Hub → temporarily remove license → Services → Contact Center → Settings → General → Synchronize Users → re-assign license → Synchronize Users again.
5. Assets
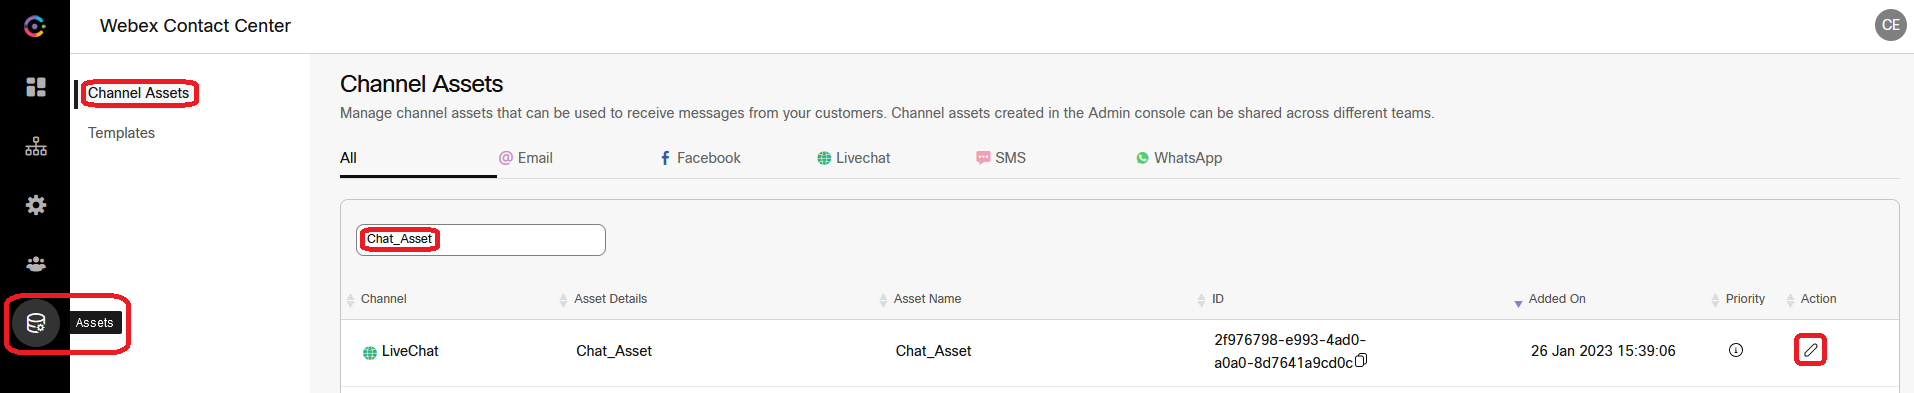
Channel Assets — assets configured in Connect, auto-synced with Engage. Used especially for Web Chat widget configuration.
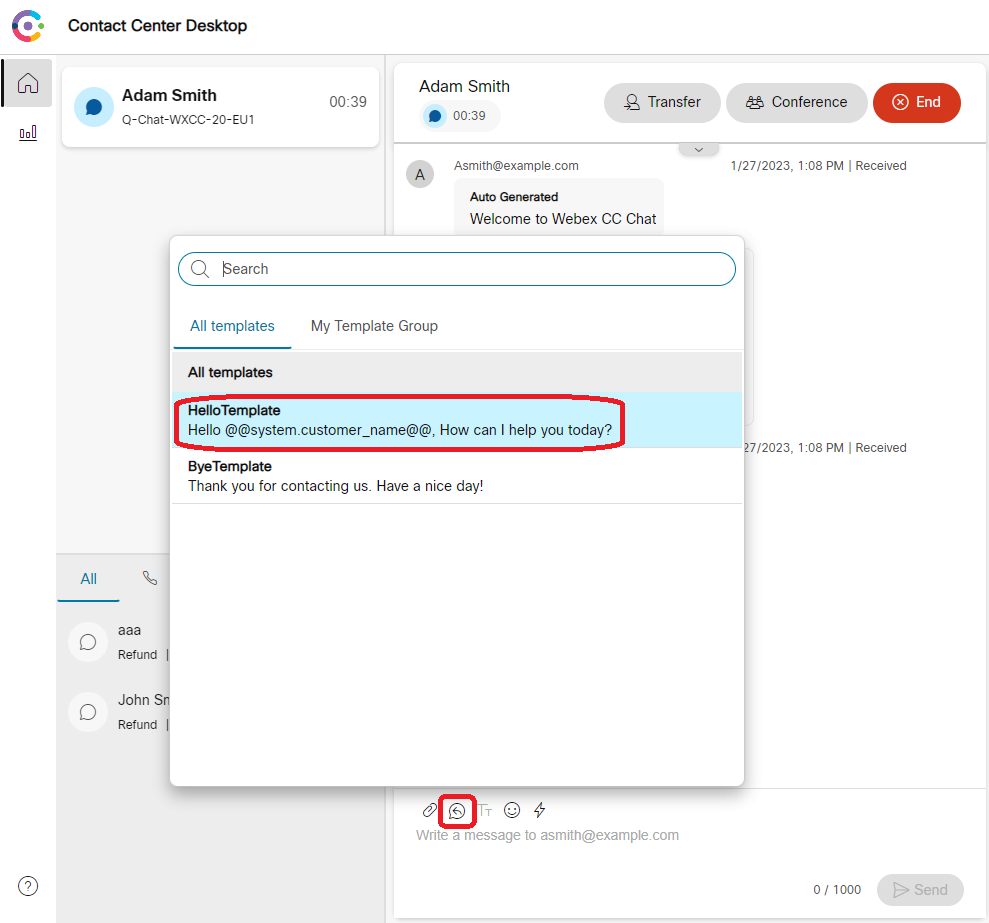
Templates — add and manage templated messages for agents.
6. Customer Care portal
Click user icon top-right → Customer Care.
6.1 Dashboard — real-time view of ongoing conversations and agents. Download conversation transcripts by conversation ID.
6.2 Settings —
MANAGE → Template — same templates as Admin view
MANAGE → Blocklist — words blocked from conversation
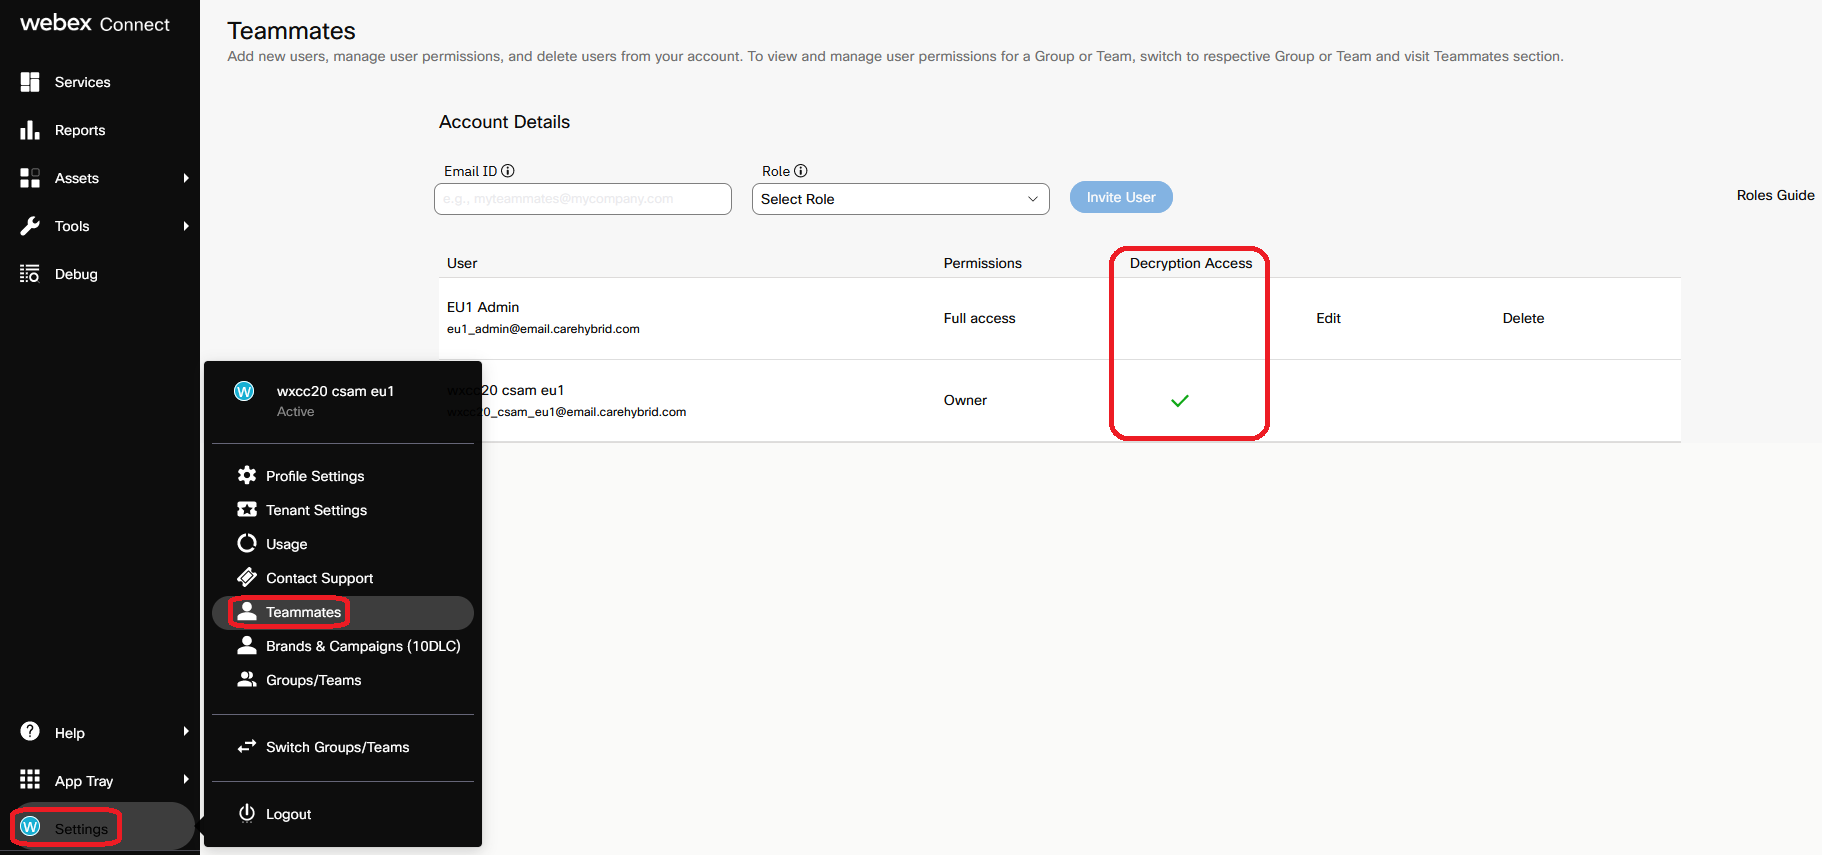
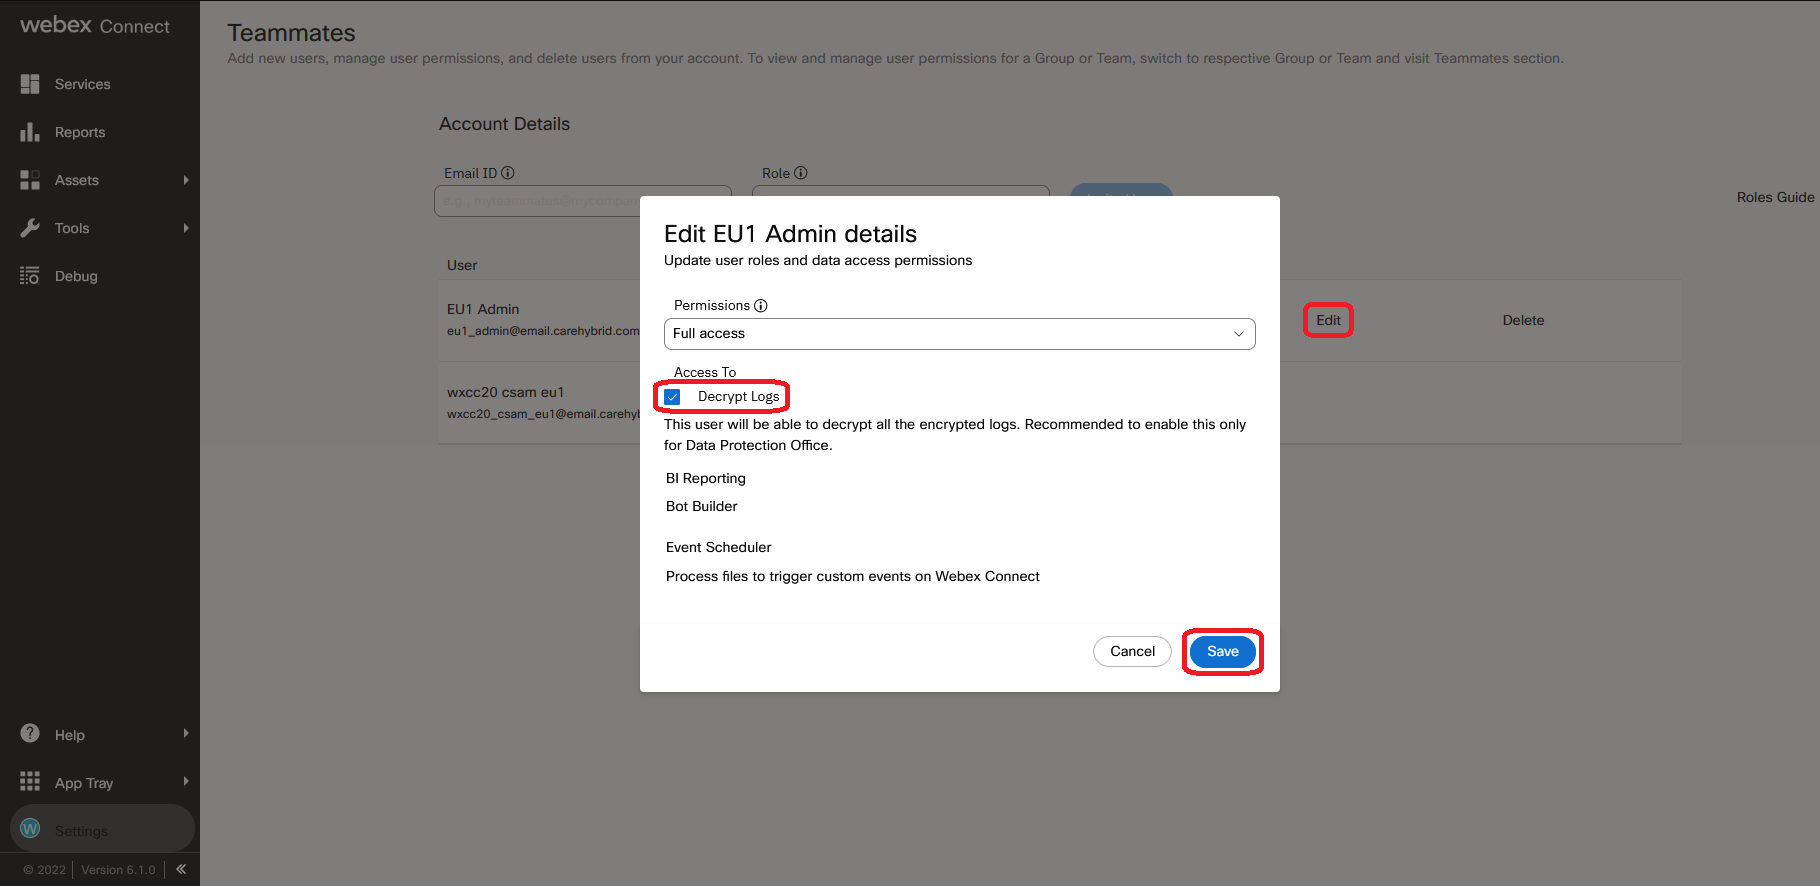
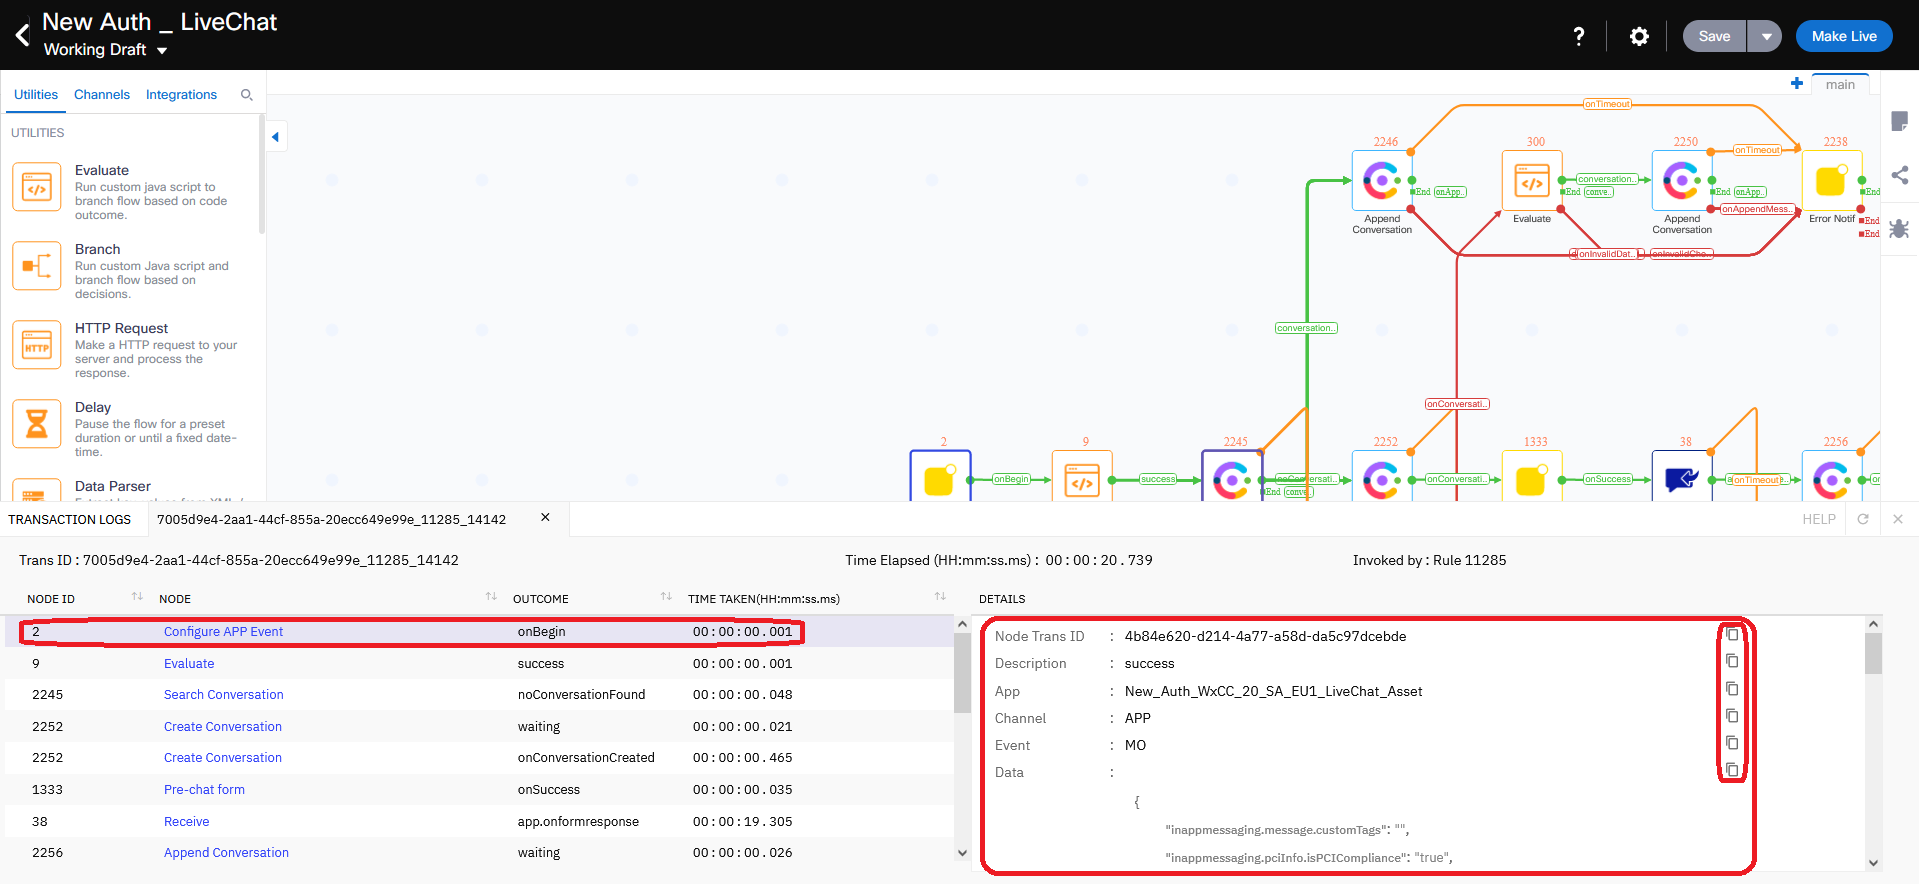
The Owner is the only role who can grant Decrypt Log permission to other users (essential for troubleshooting).
If the Owner leaves your organization, contact your Partner Success Manager (PSM) to request an Owner change.
Connect must be accessed only by system administrators — not by agents or supervisors.
2. Users organization
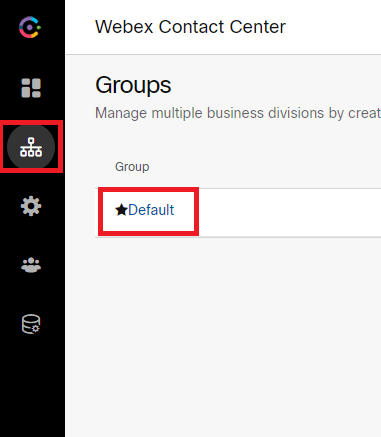
Connect allows the Owner to create local users in containers called Groups and Teams:
Tenant level — can contain users and Groups
Group — can contain users and Teams
Team — can contain users only
Create groups/teams via Settings → Groups/Teams.
3. Login to Connect portal
Access the tenant-specific Connect URL
Login with provided credentials
4. Add new users with administrator role
Settings → Teammates
Add a new user (working email required), select Full access role, click Invite user
5. New user activation
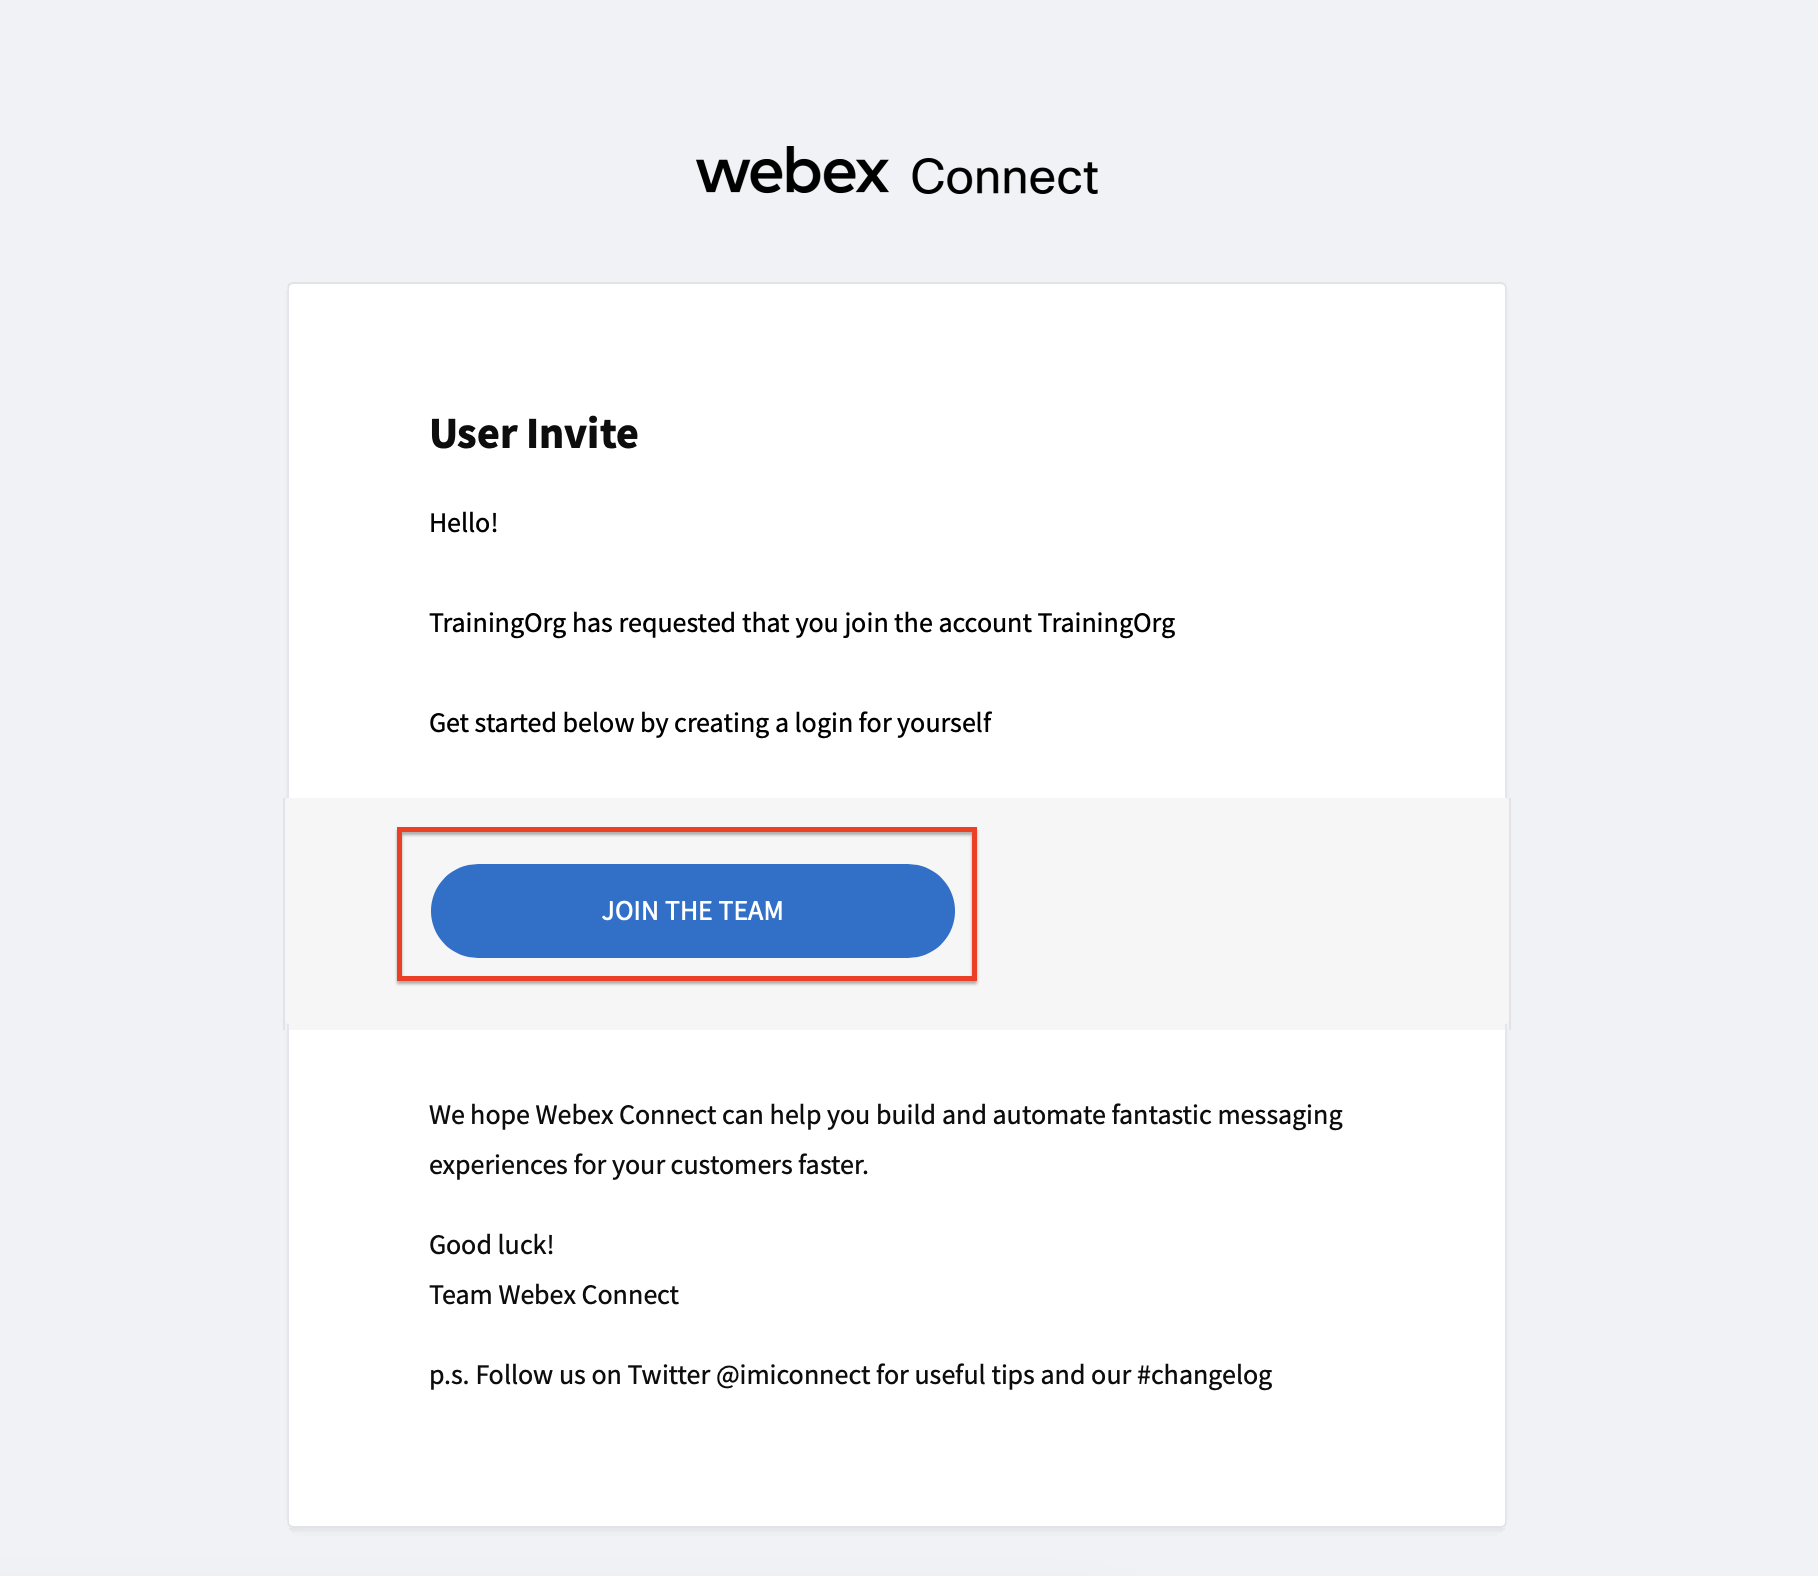
New user clicks Join the team link in welcome email
Provides name + password → fills additional details
Auto-login into Connect
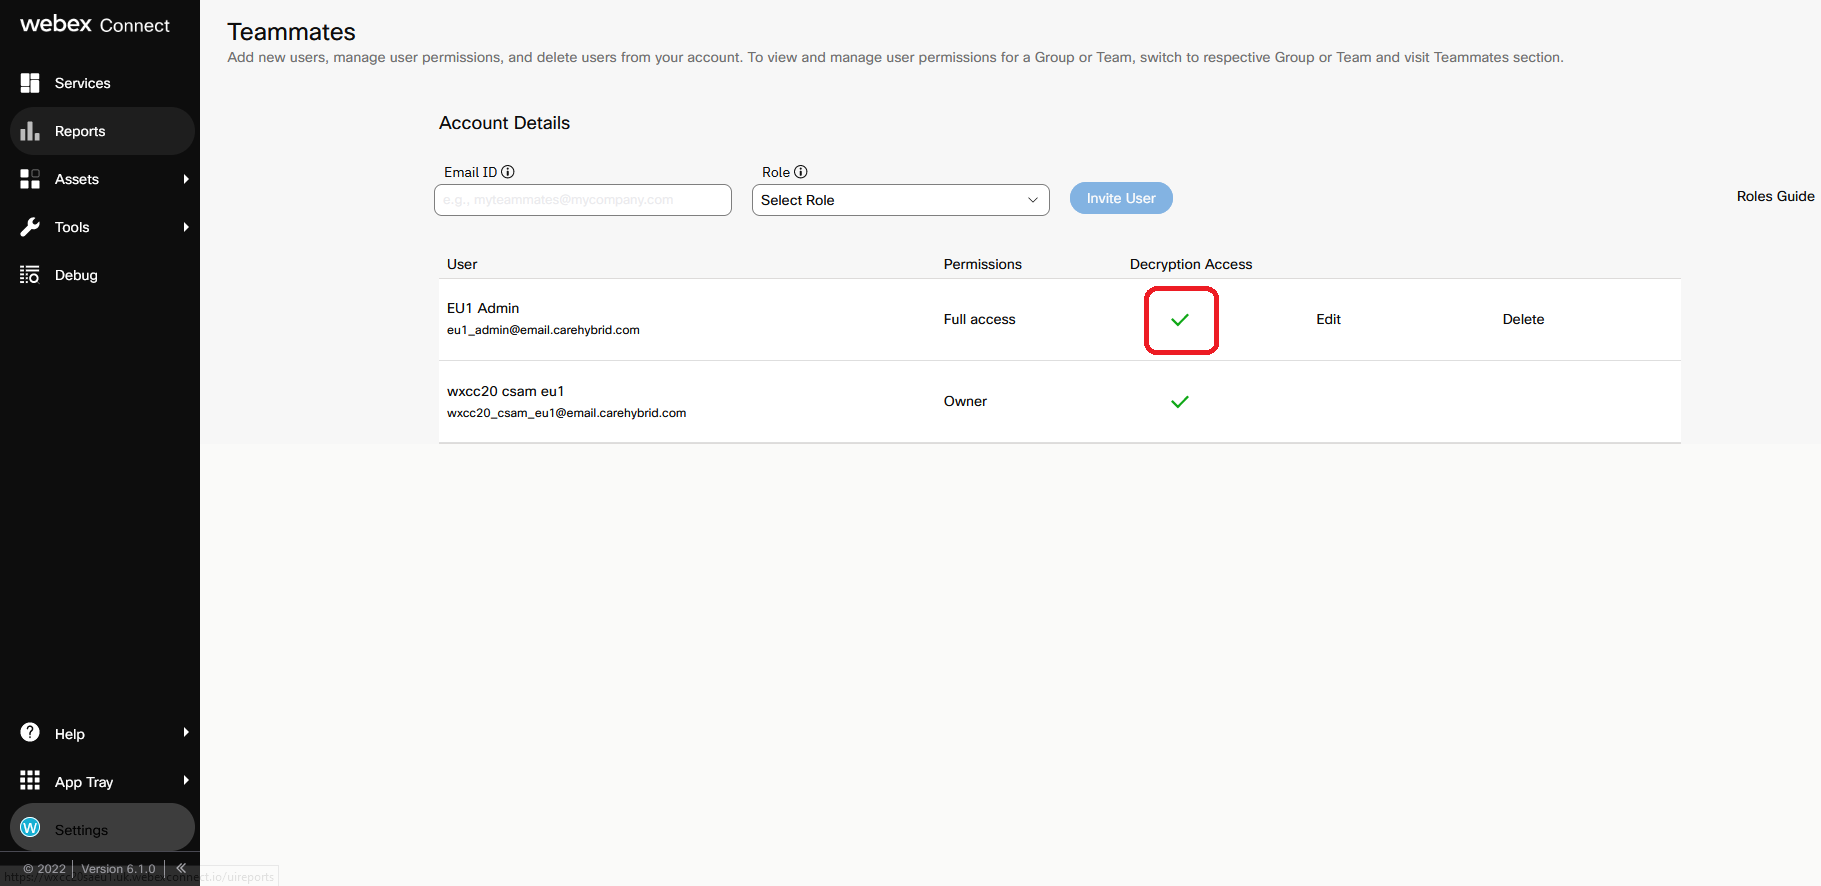
User informs Owner of successful activation → Owner: Settings → Teammates → Edit → tick Decrypt Logs → Save
Lab 12.5 — Digital Channels Pre-configuration
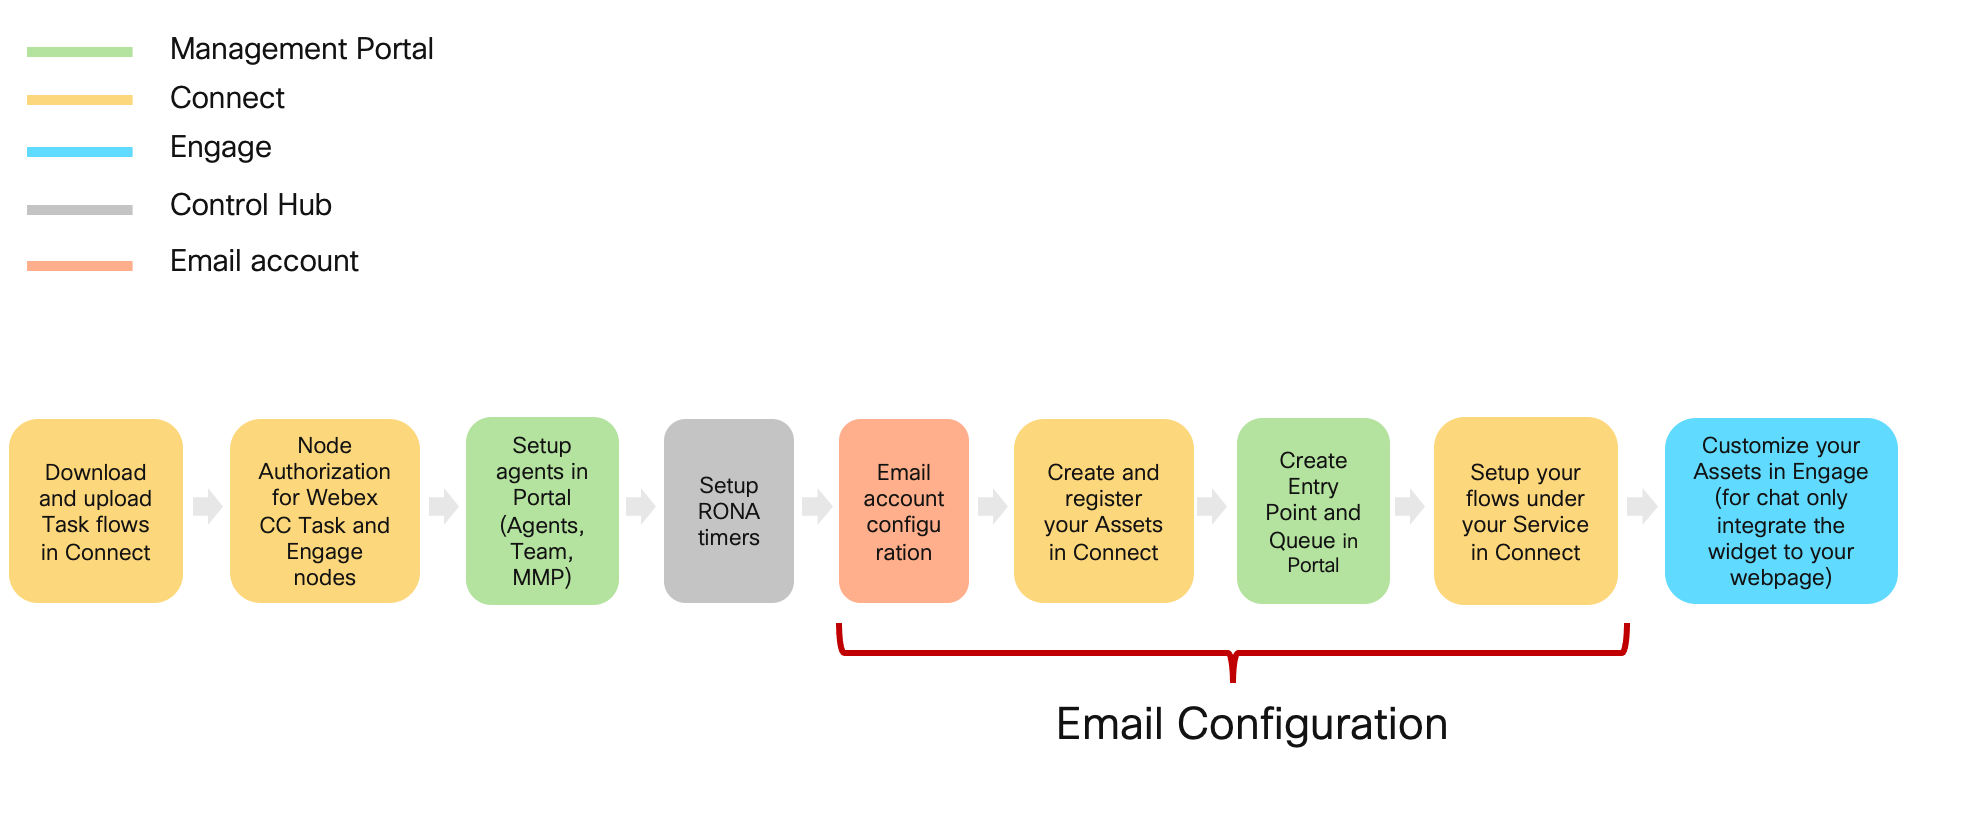
Configuration Order
1. Node Authorization for Webex CC Task and Engage nodes
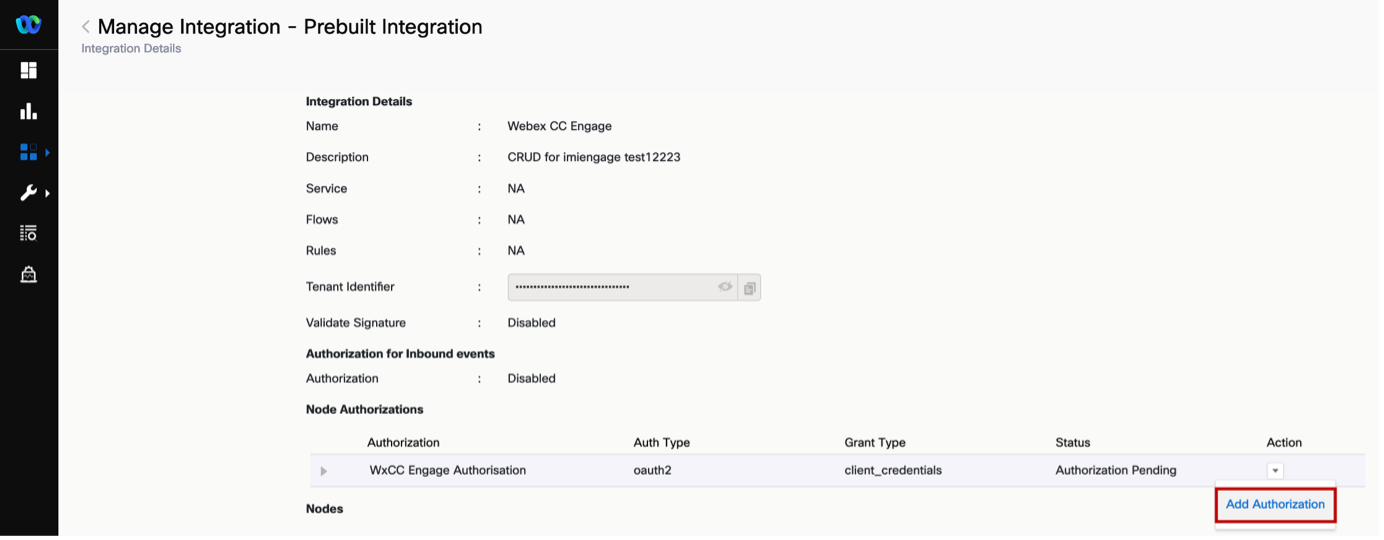
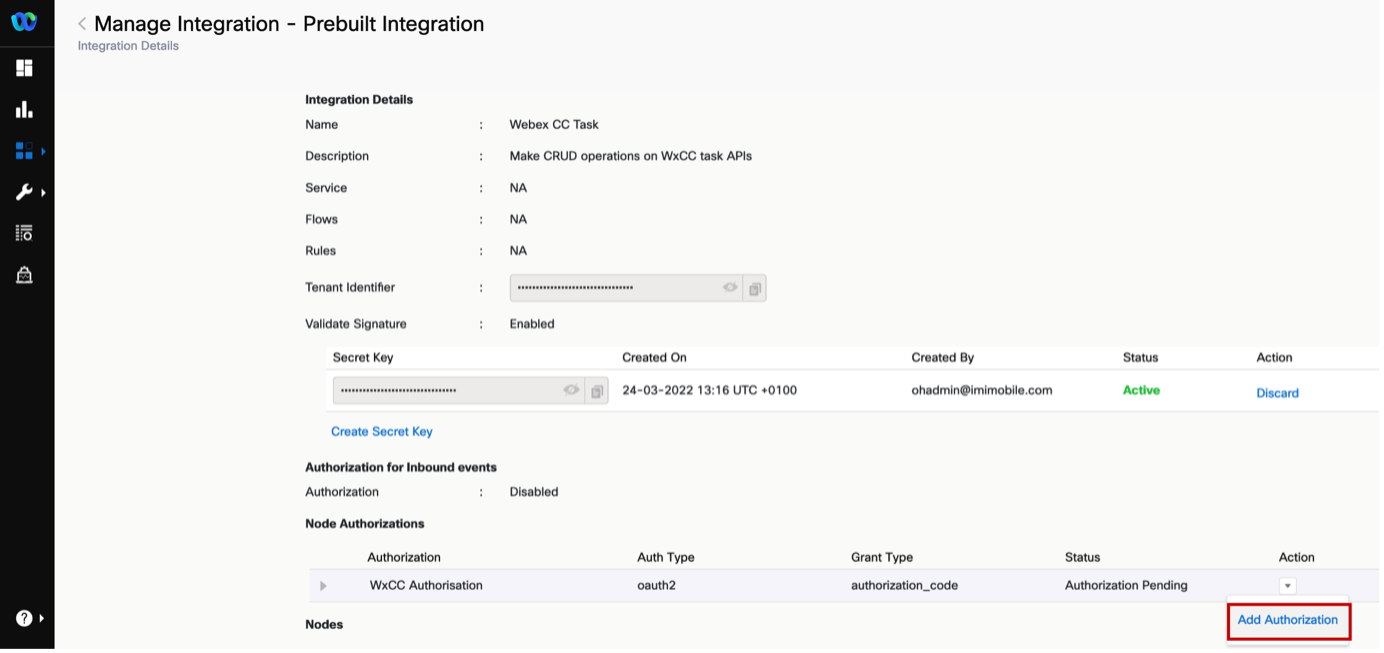
Assets → Integrations — integrations not yet authorized show Authorization Pending.
Webex CC Engage → Actions → Manage
Scroll to Node Authorizations → Action → Add Authorization for WxCC Engage Authorisation (Auth Type oauth2, Status Authorization Pending)
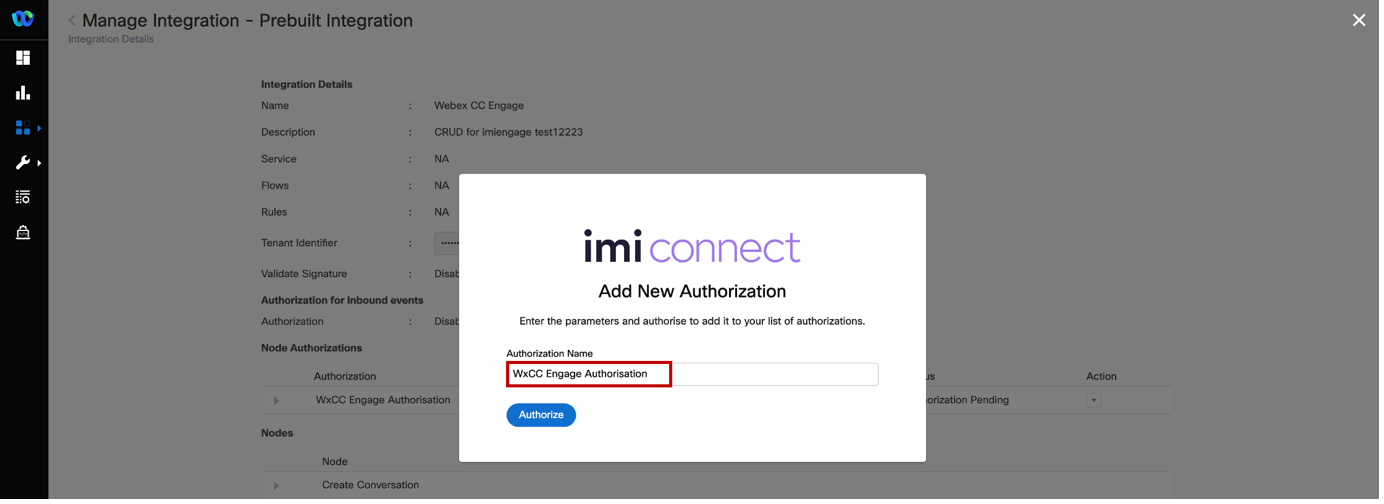
Enter Authorization Name (e.g. WxCC Engage Authorisation) → Authorize
Back to Integrations → Webex CC Task → Actions → Manage
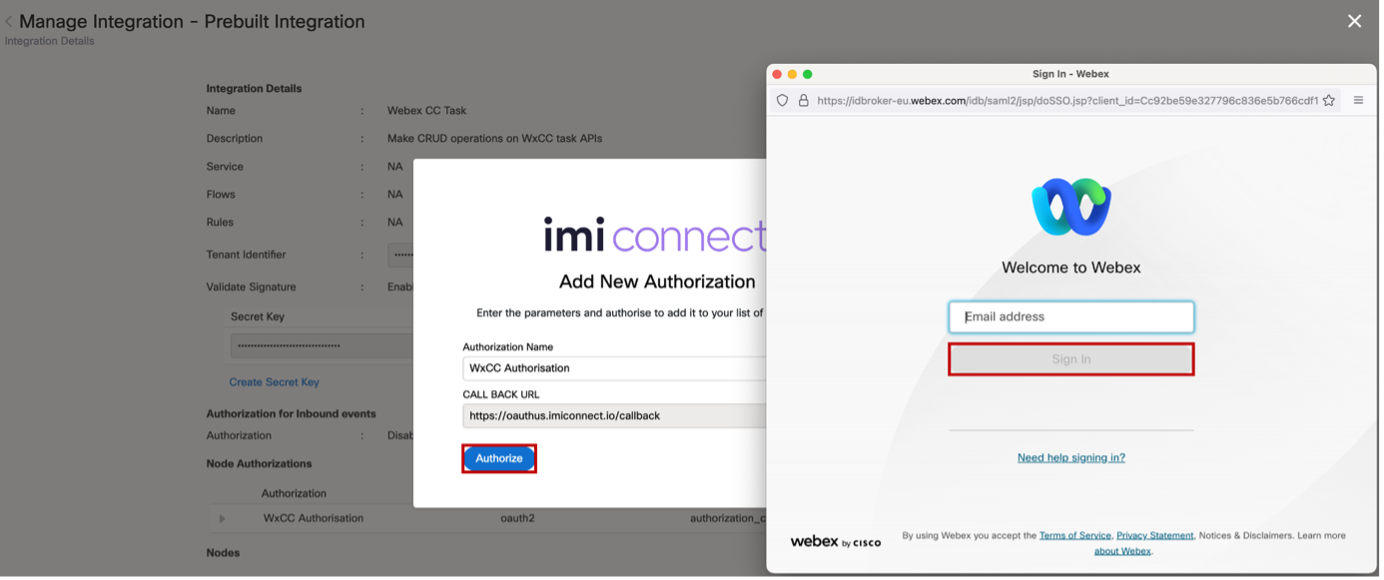
Node Authorizations → Action → Add Authorization for WxCC Authorisation
Enter Authorization Name (e.g. WxCC Authorisation) → Authorize → Sign in with Cisco admin email
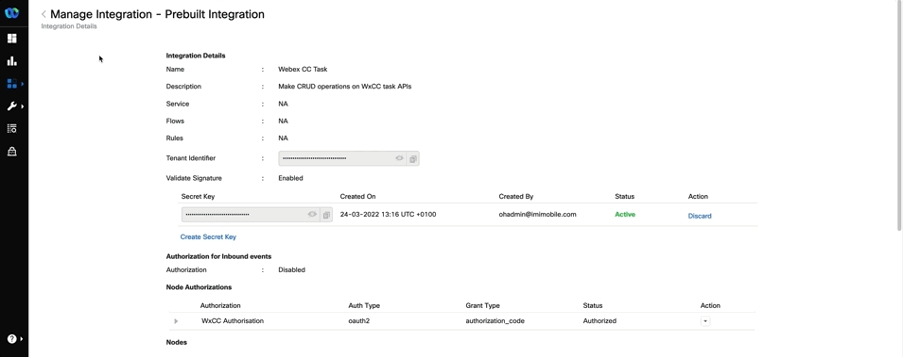
Verify ACCESS TOKEN and REFRESH TOKEN are generated → SAVE
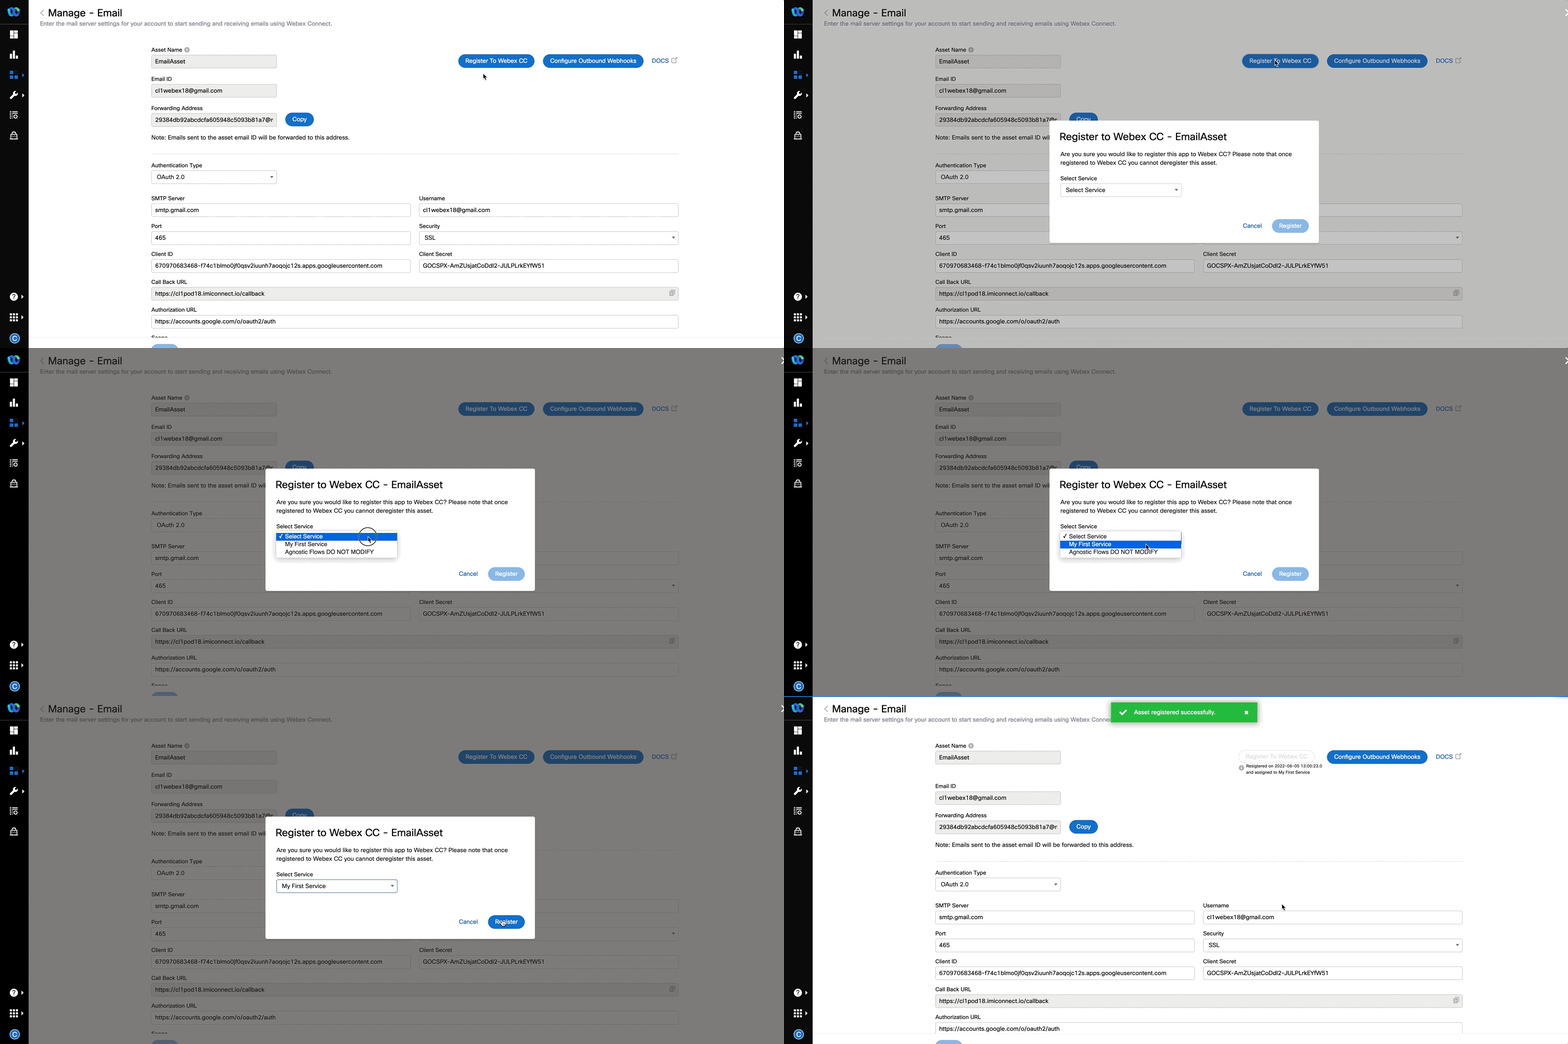
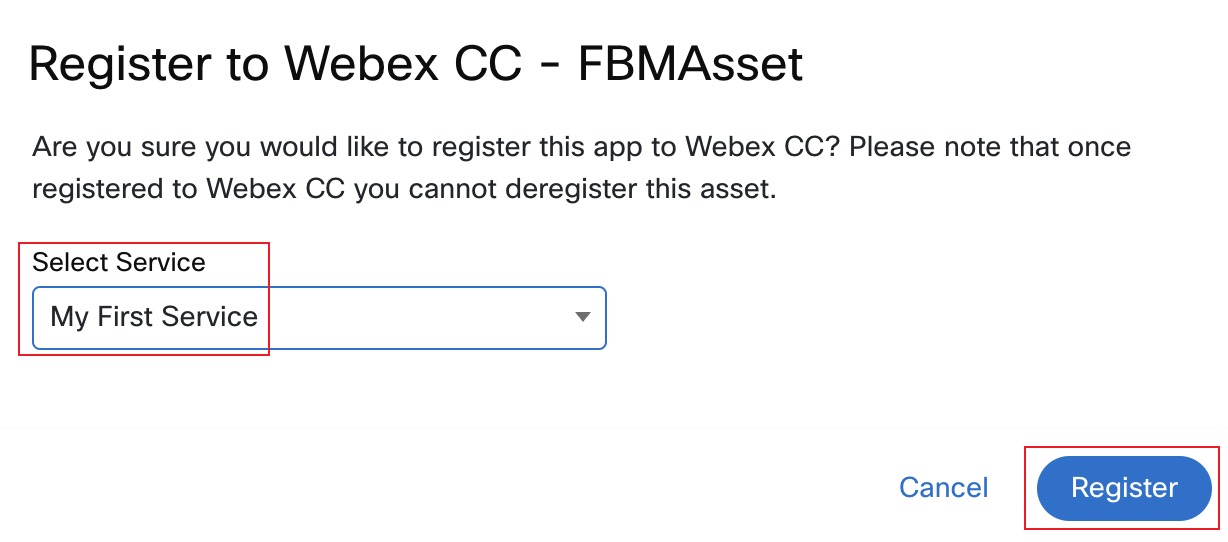
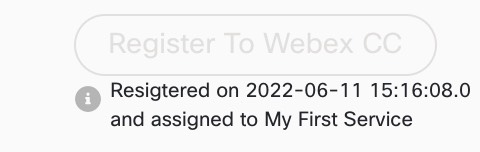
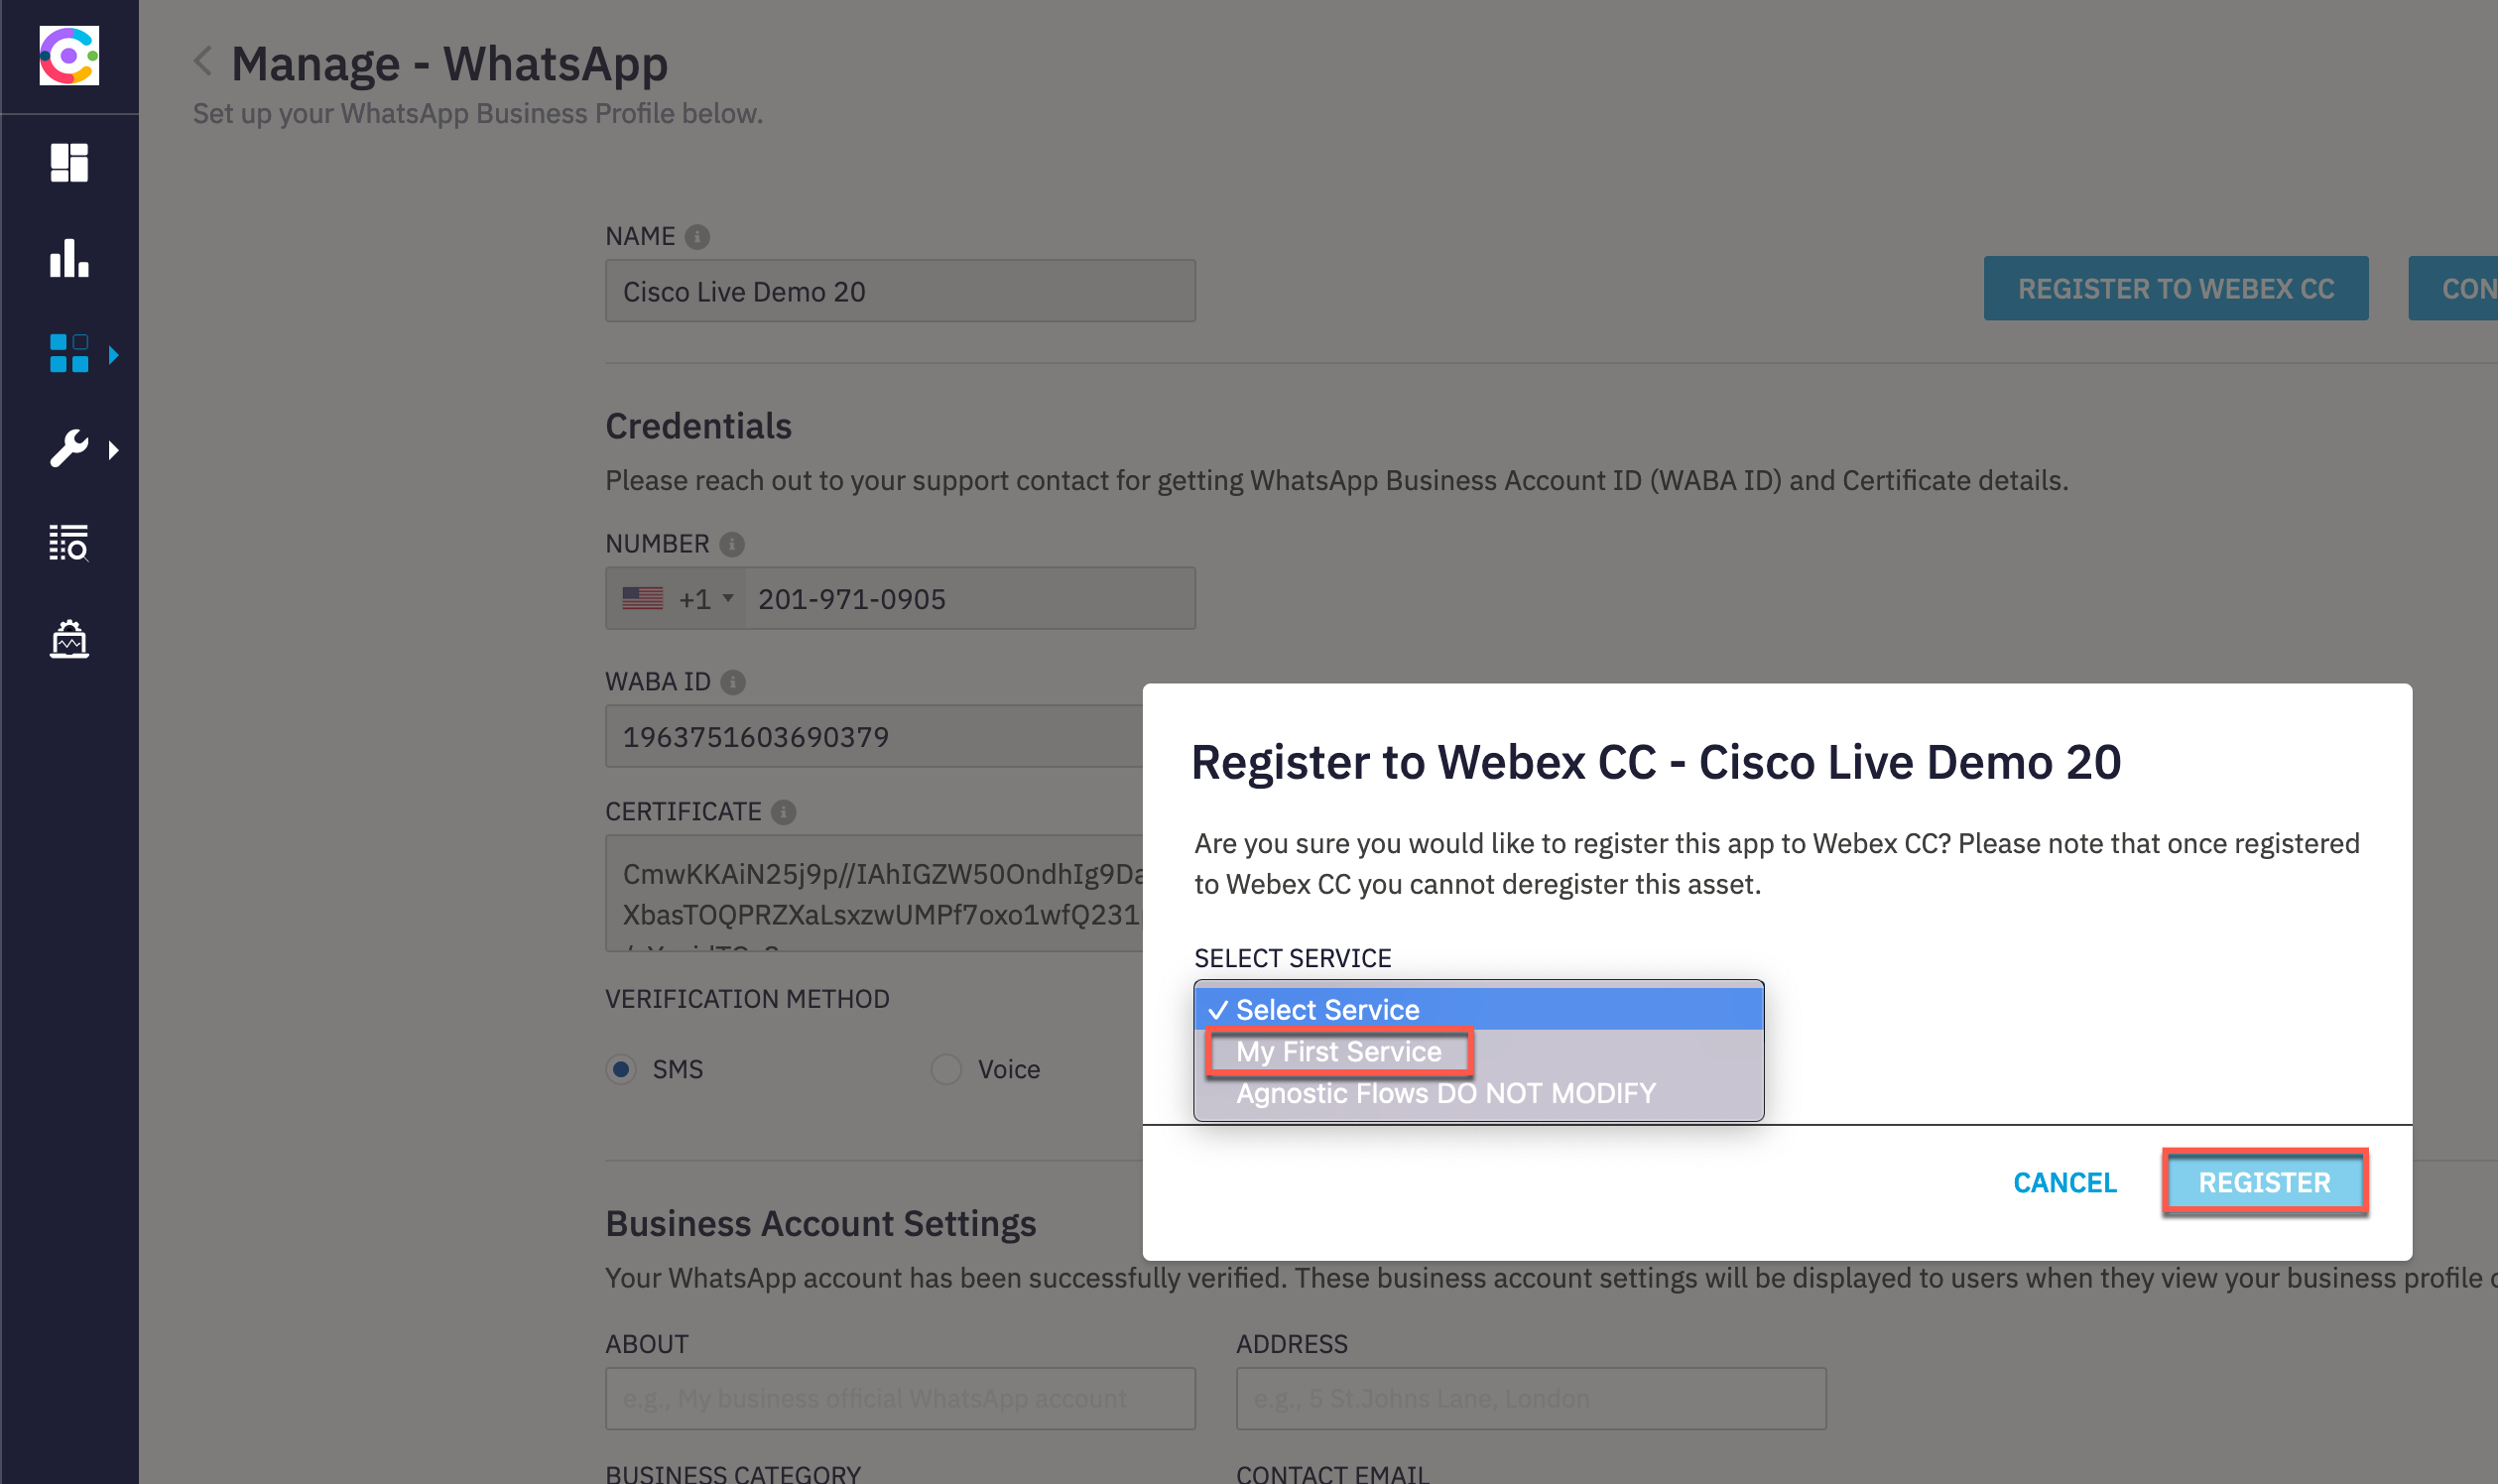
REGISTER TO WEBEX CC → Service My First Service → REGISTER
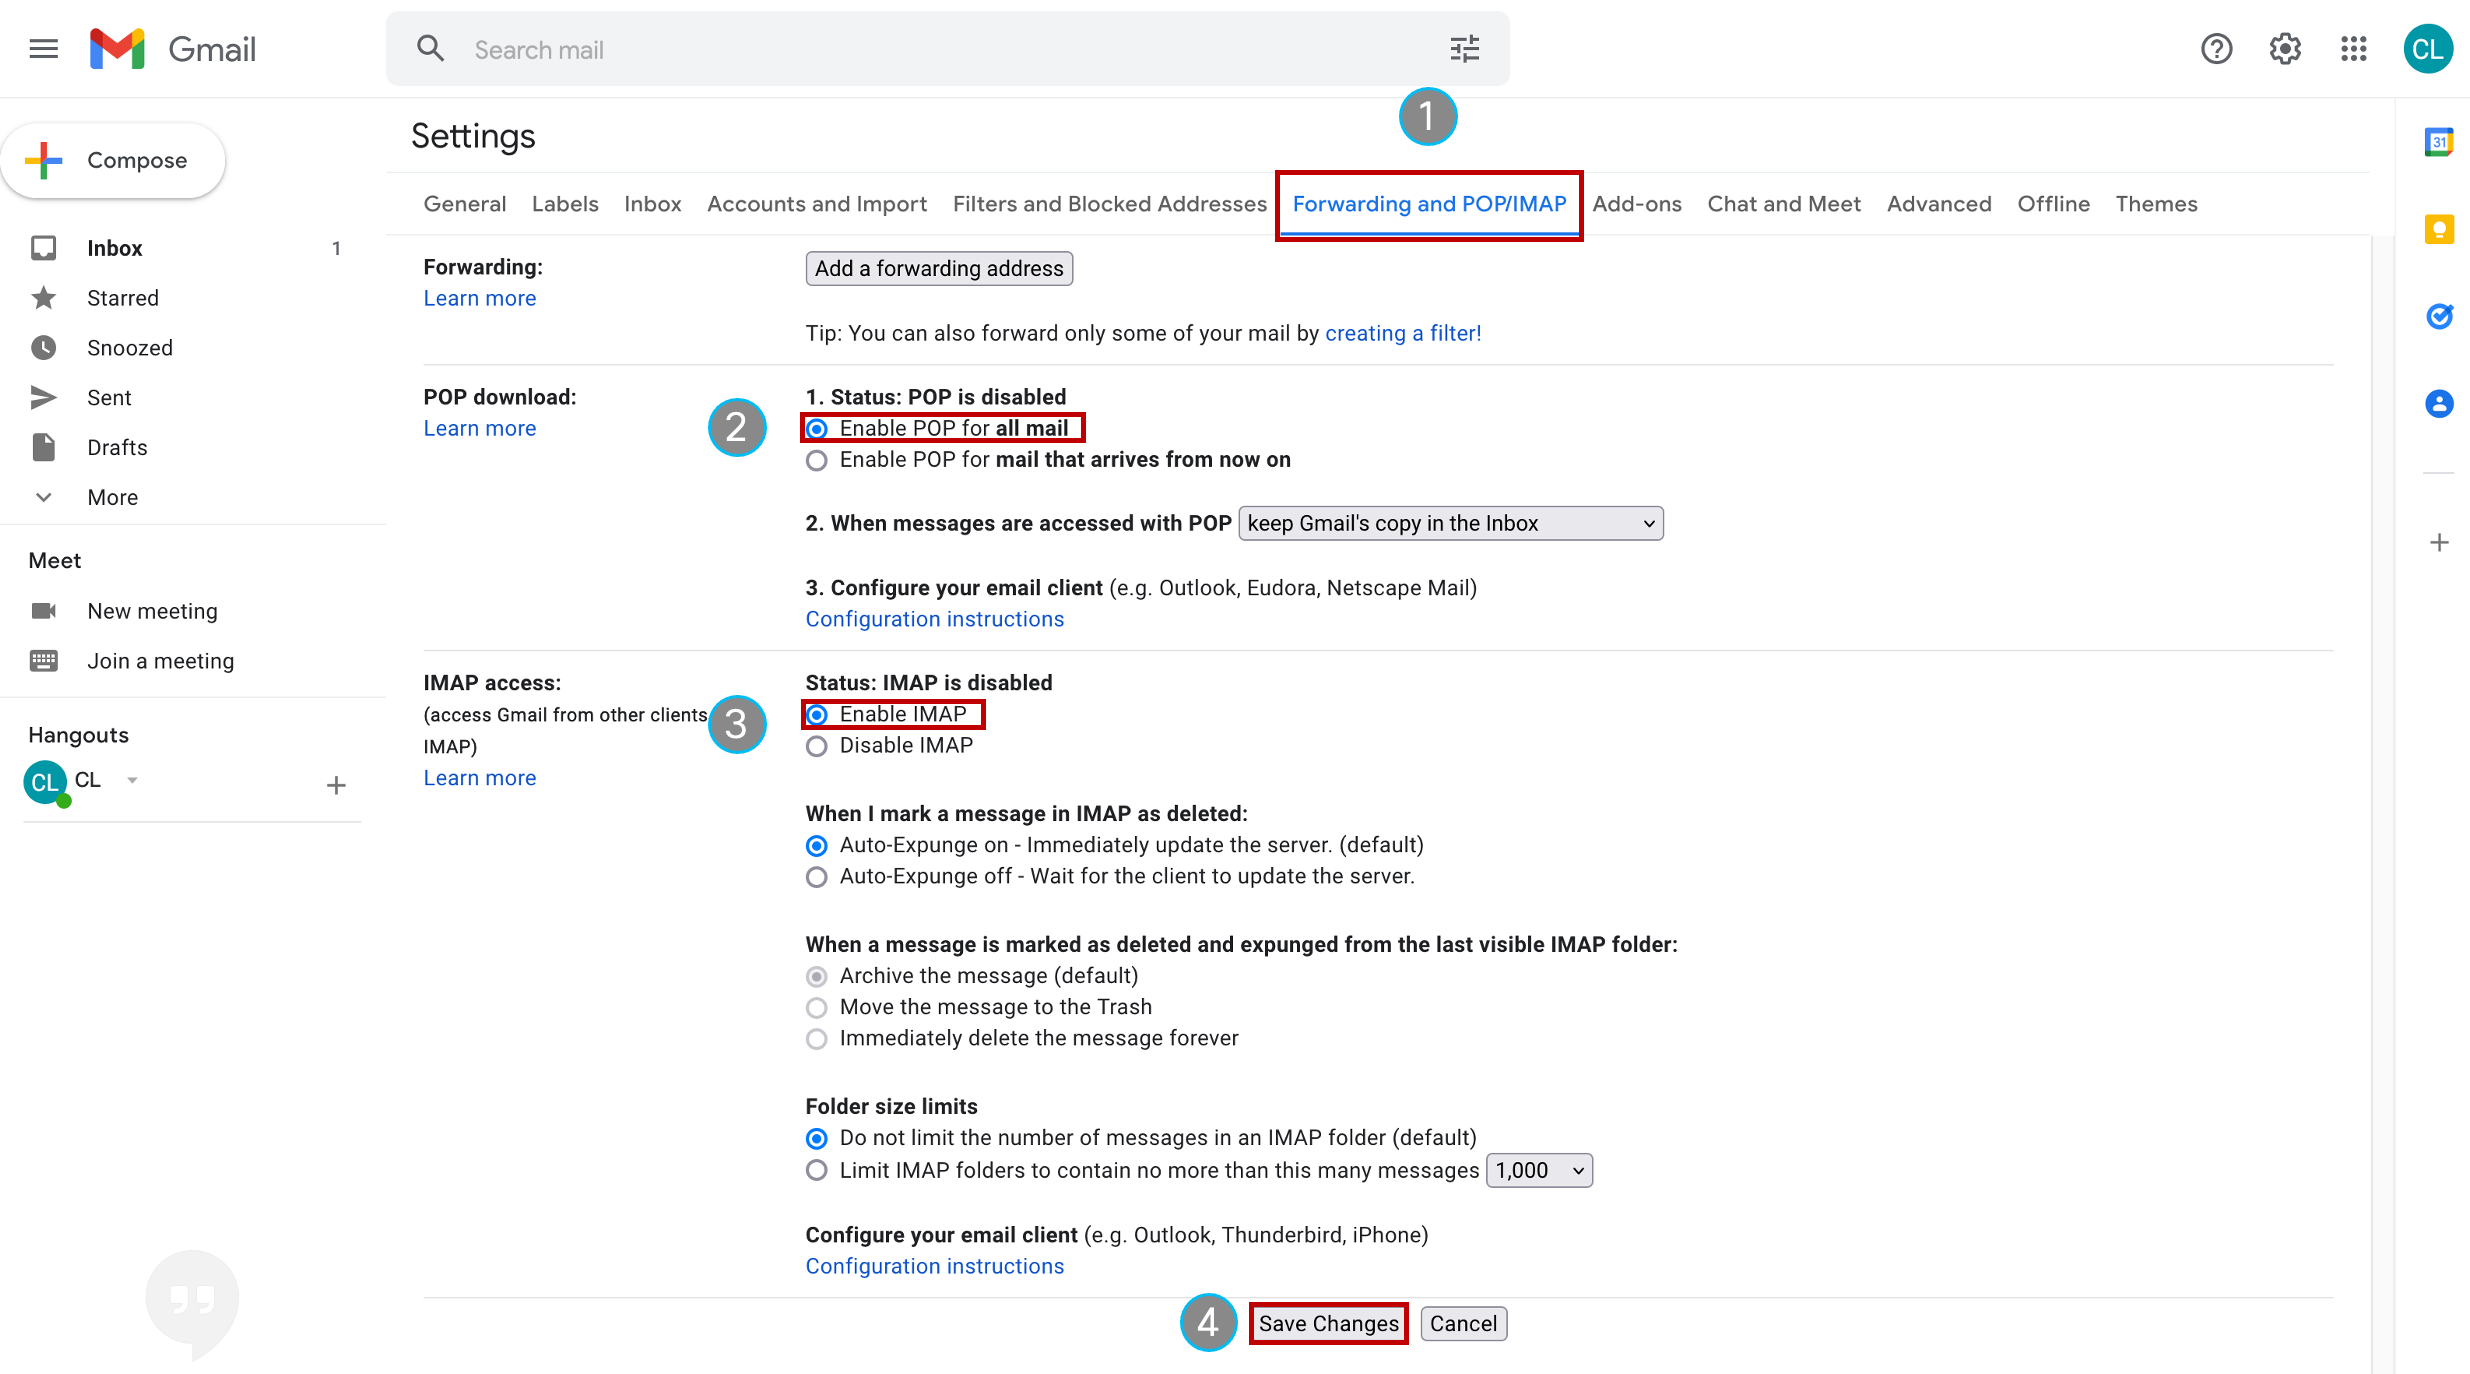
2. Add forwarding Address
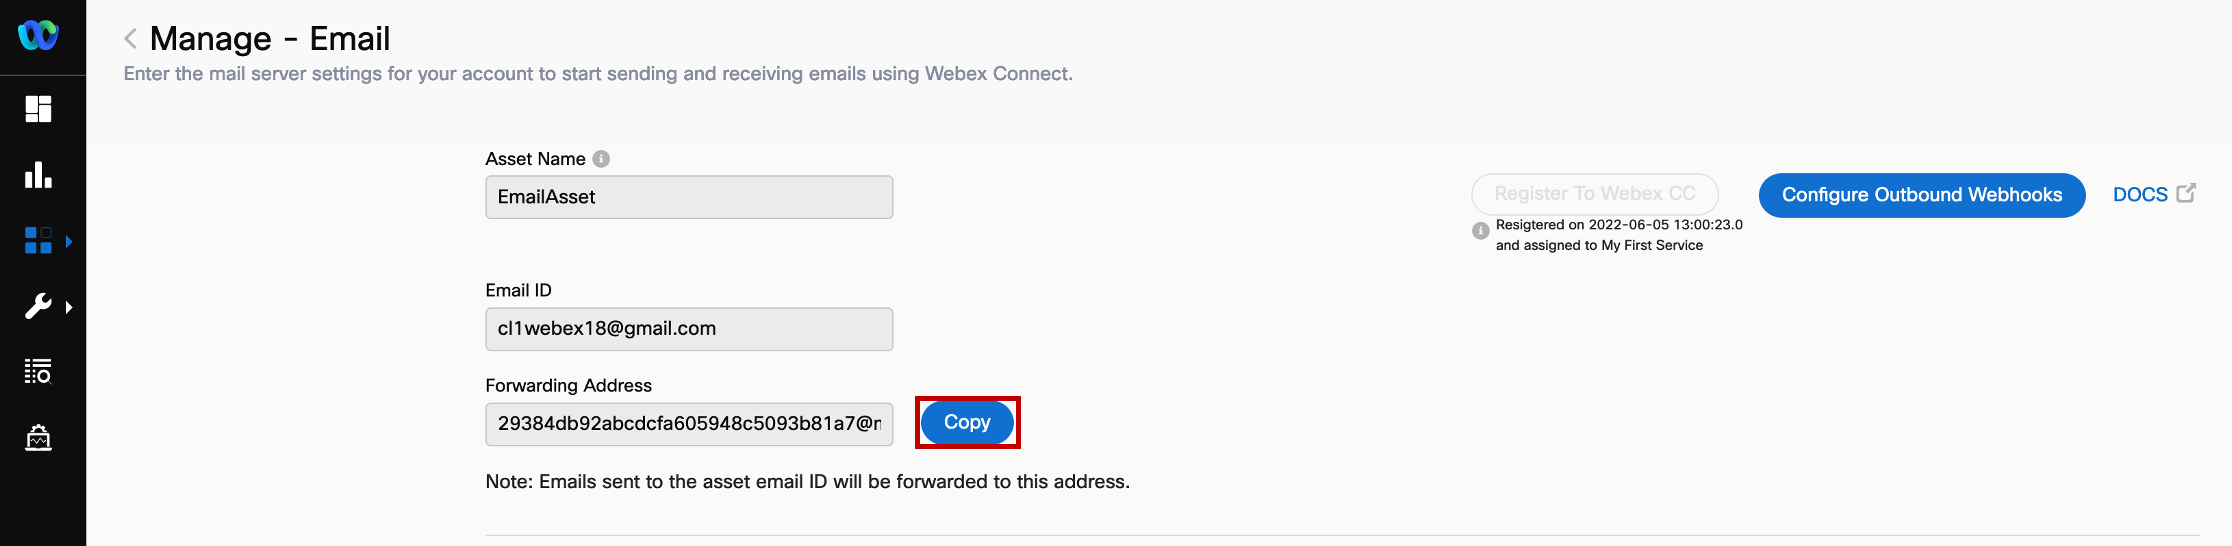
Copy the forwarding address from the created asset
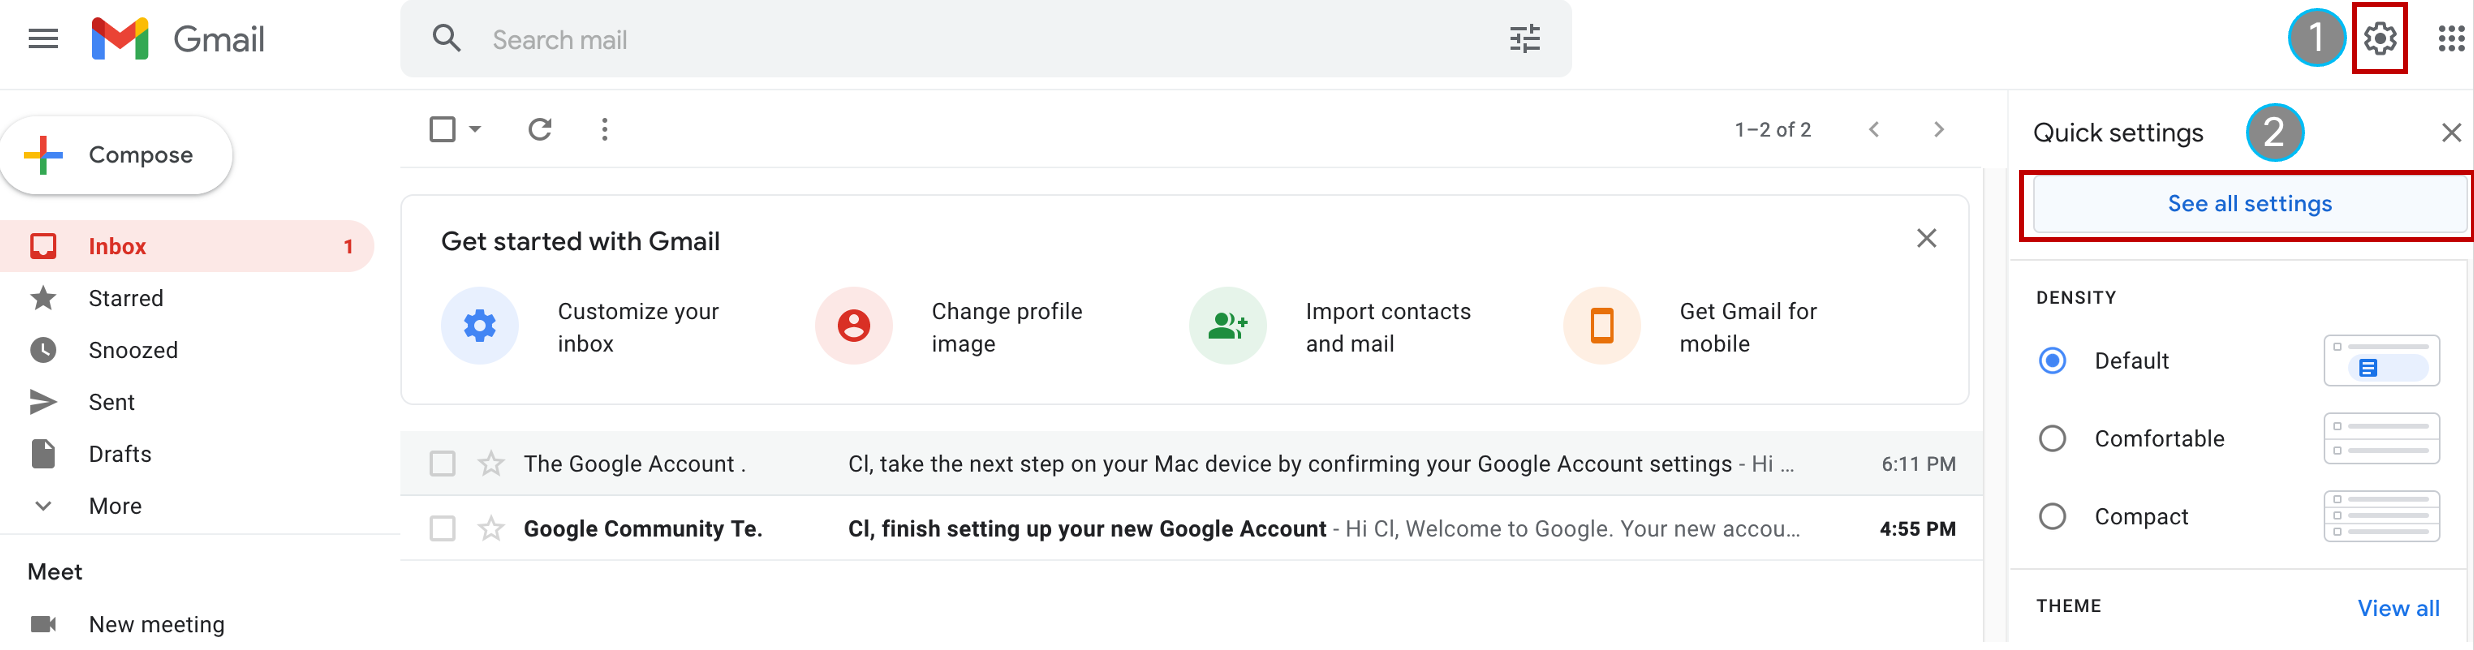
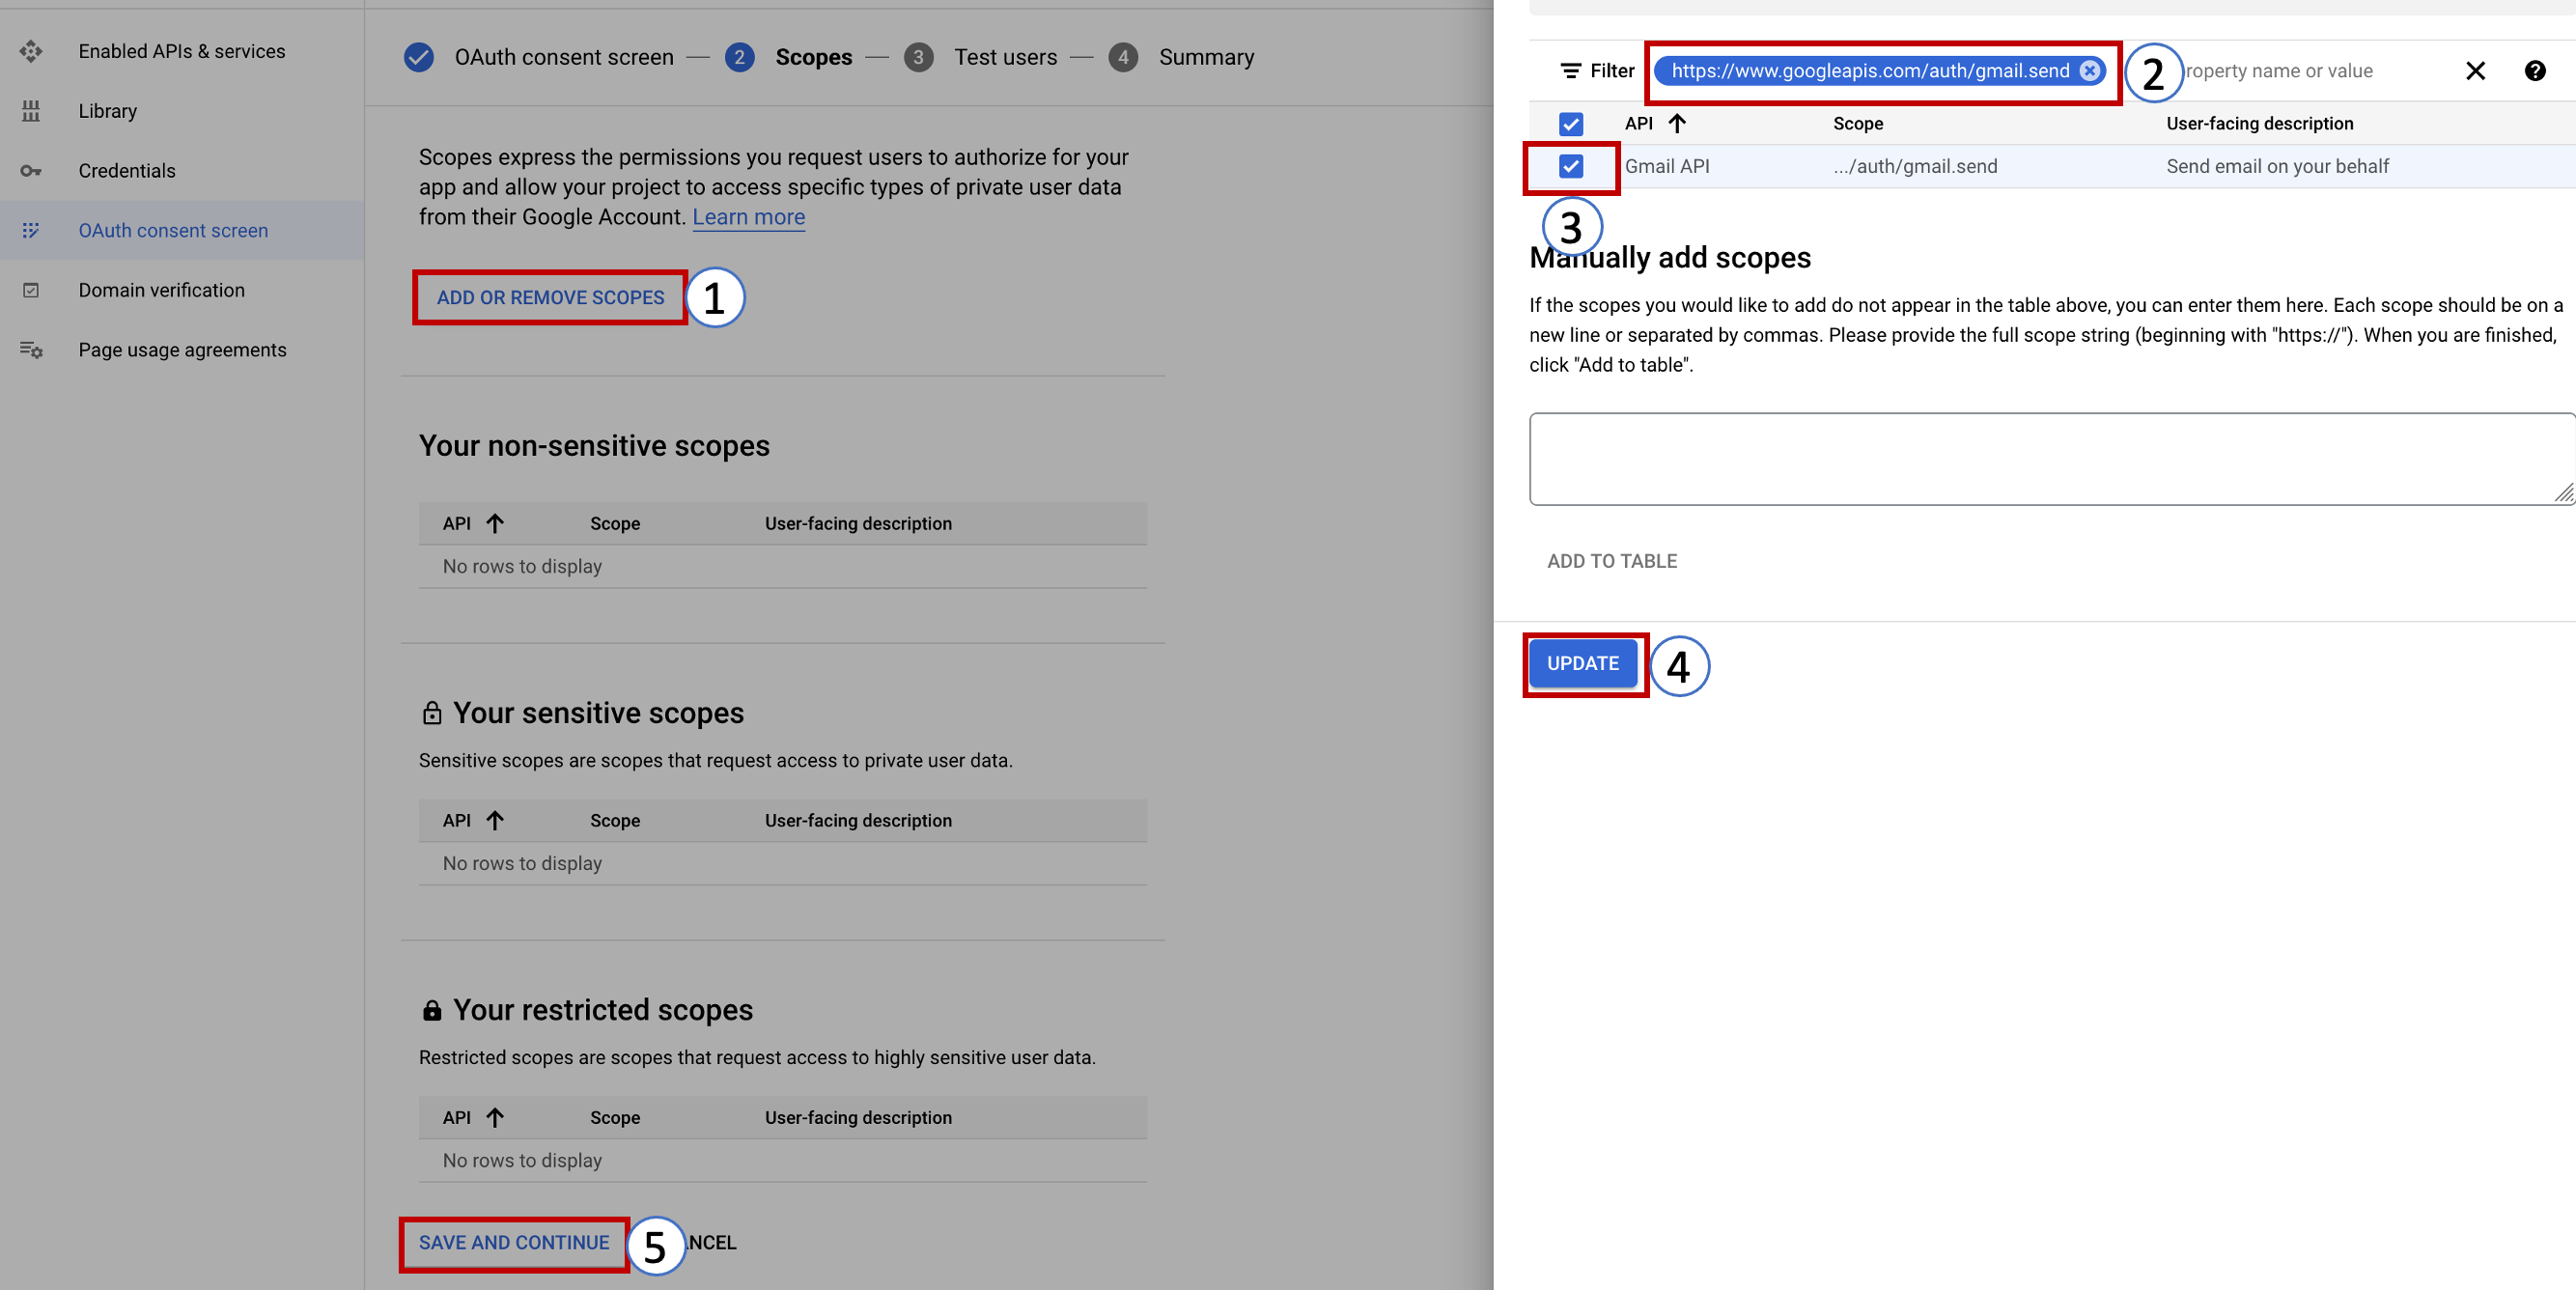
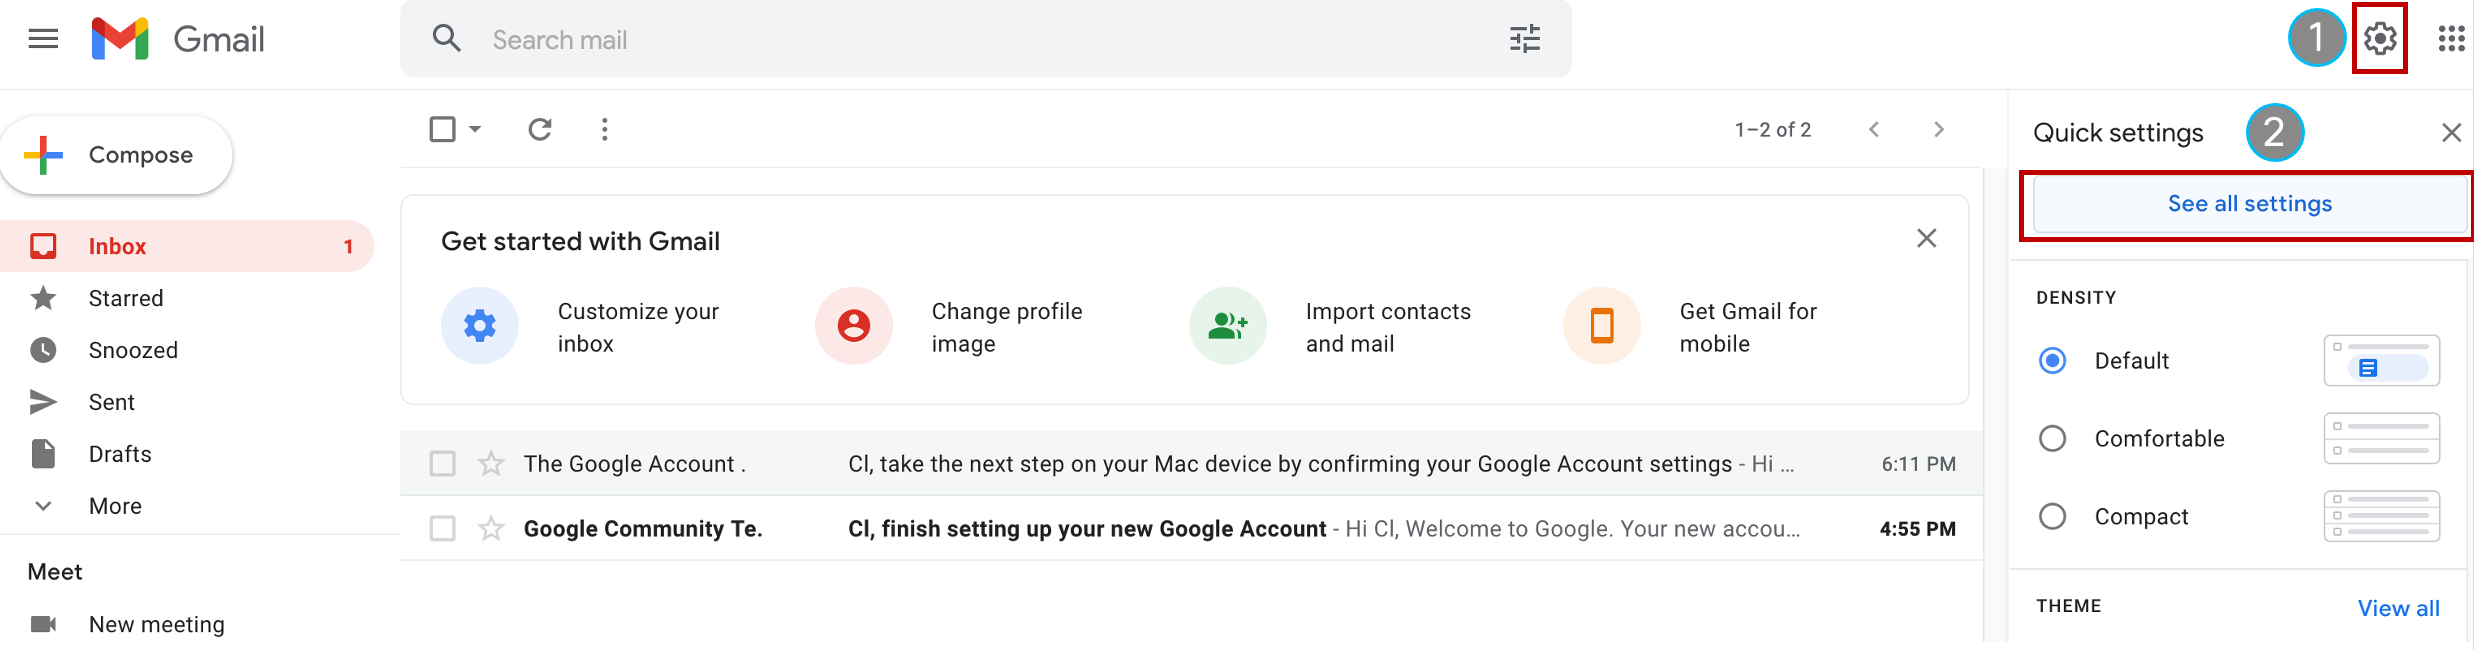
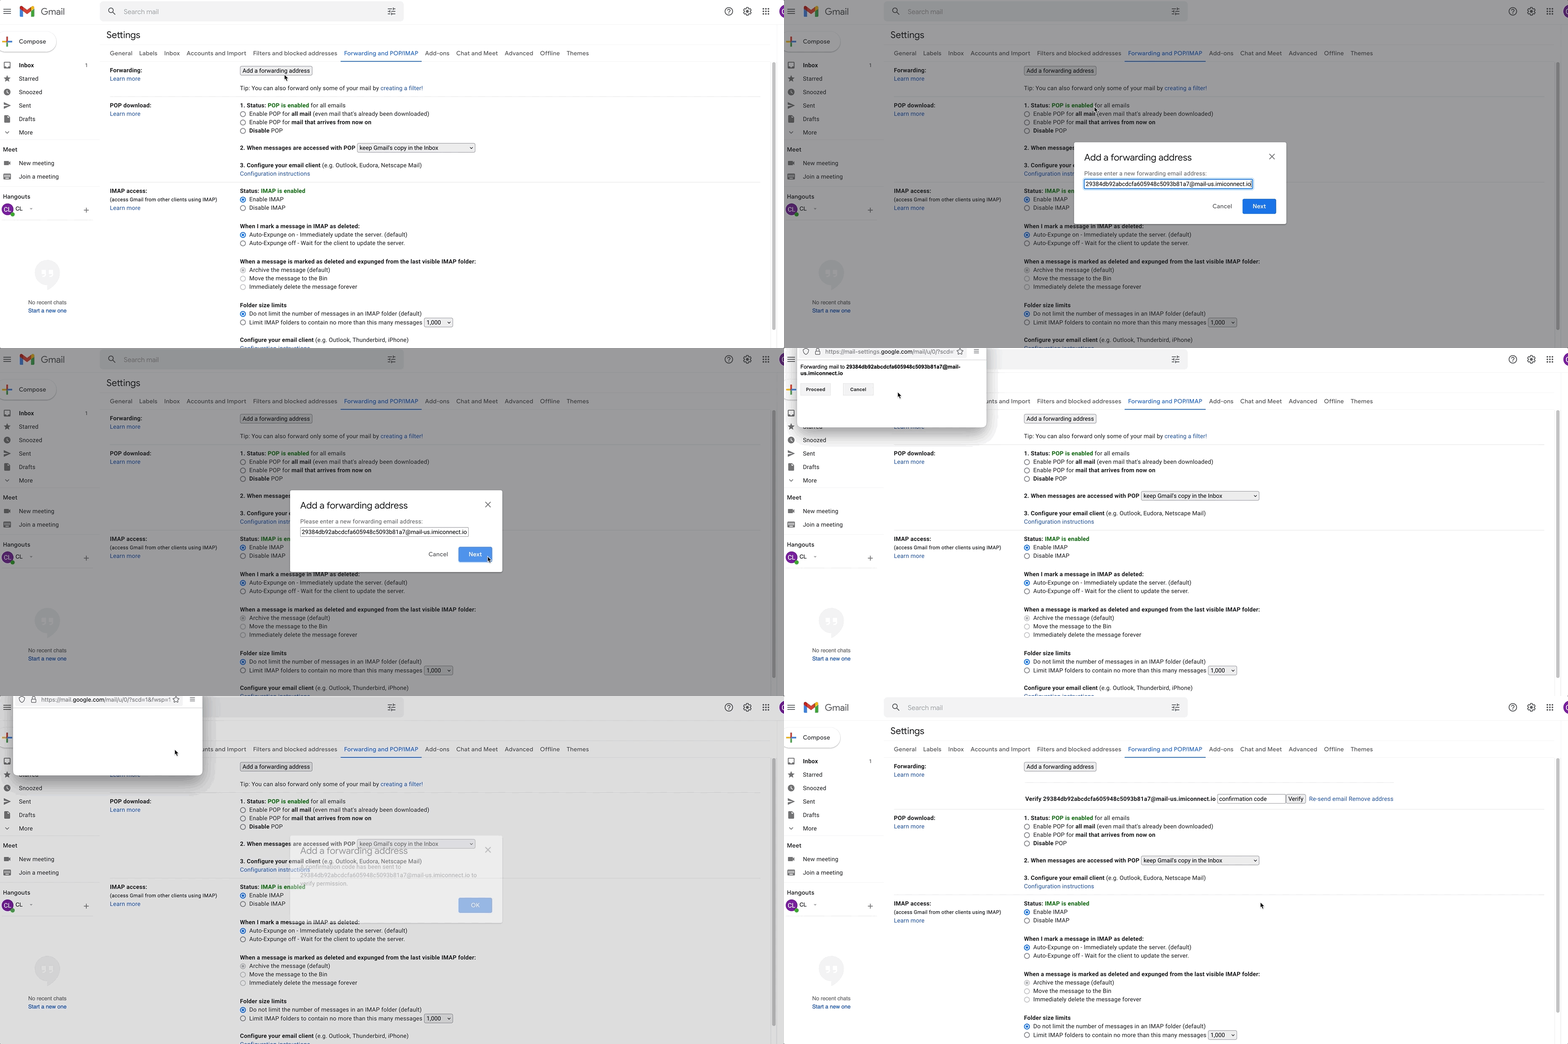
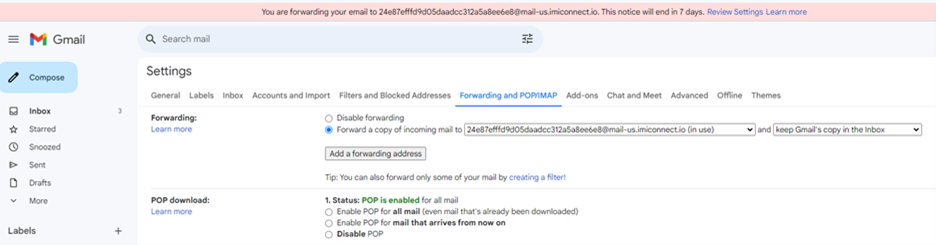
Gmail settings → Forwarding and POP/IMAP → Add a forwarding address → paste → Next → Proceed → OK
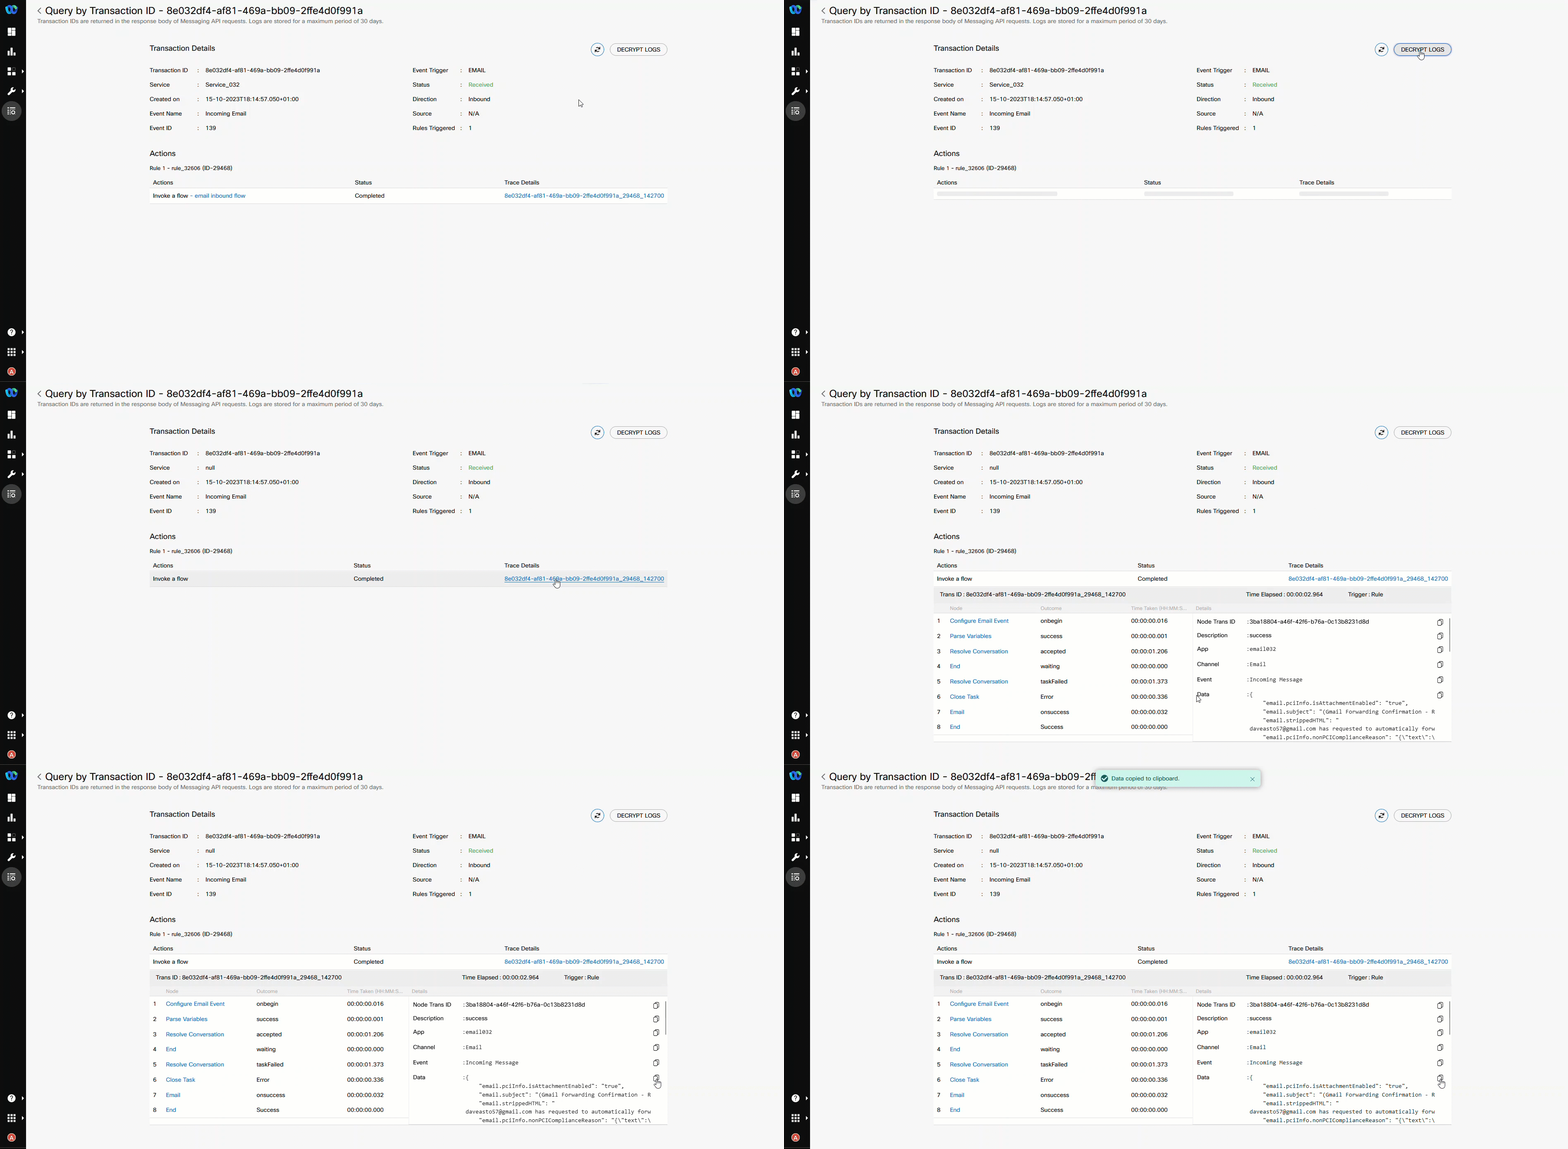
To fetch confirmation: Webex Connect → Debug Console → Query Historical Logs → Channel Email → Date Range Today/Last Hour → Search
Click the Message ID Link for Event Handled
decrypt logs → Trace Details → copy next to Data entry
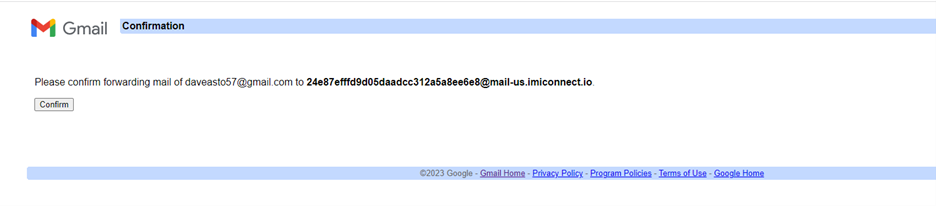
Paste URL into browser → Confirm
Forwarding now visible in Gmail's Forwarding and POP/IMAP tab
3. Email Entry Point and Queue creation
1. Create Entry Point
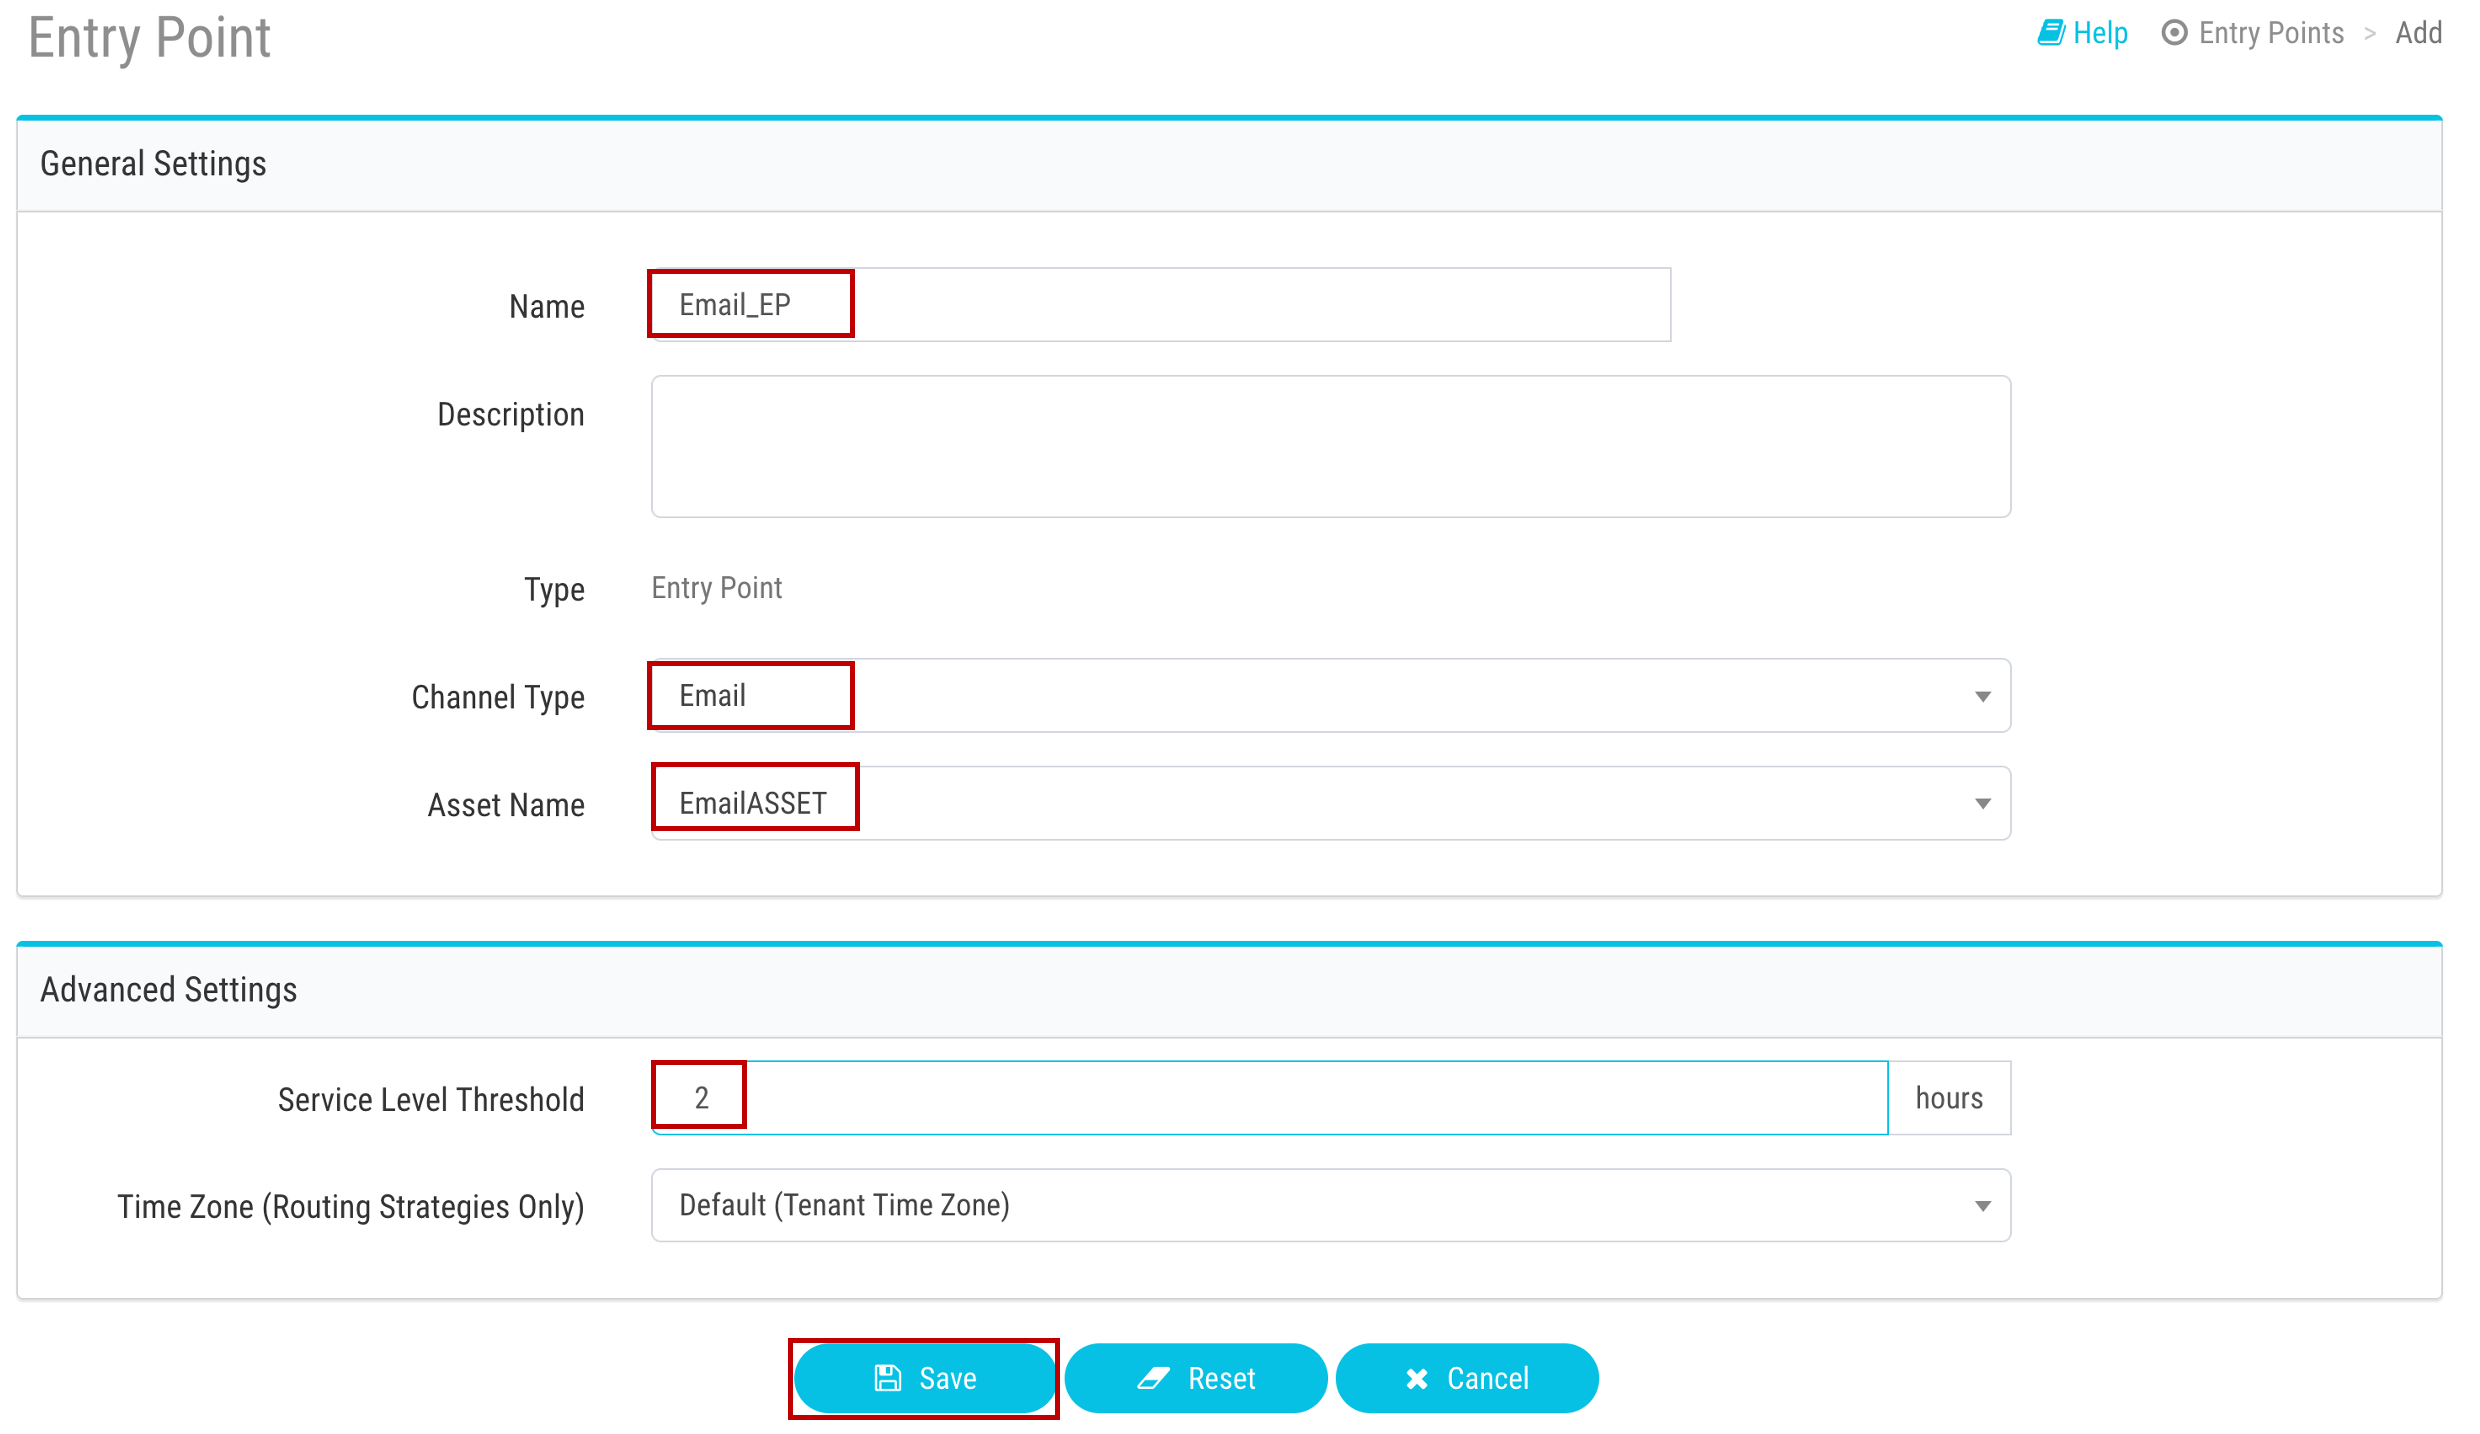
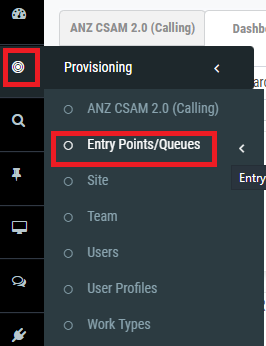
Management Portal → Provisioning → Entry Points/Queues → Entry Point → New Entry Point
Name Email_EP, Channel Type Email, Asset Name EmailAsset, Service Level Threshold 2 hours → Save
2. Create Two Queues
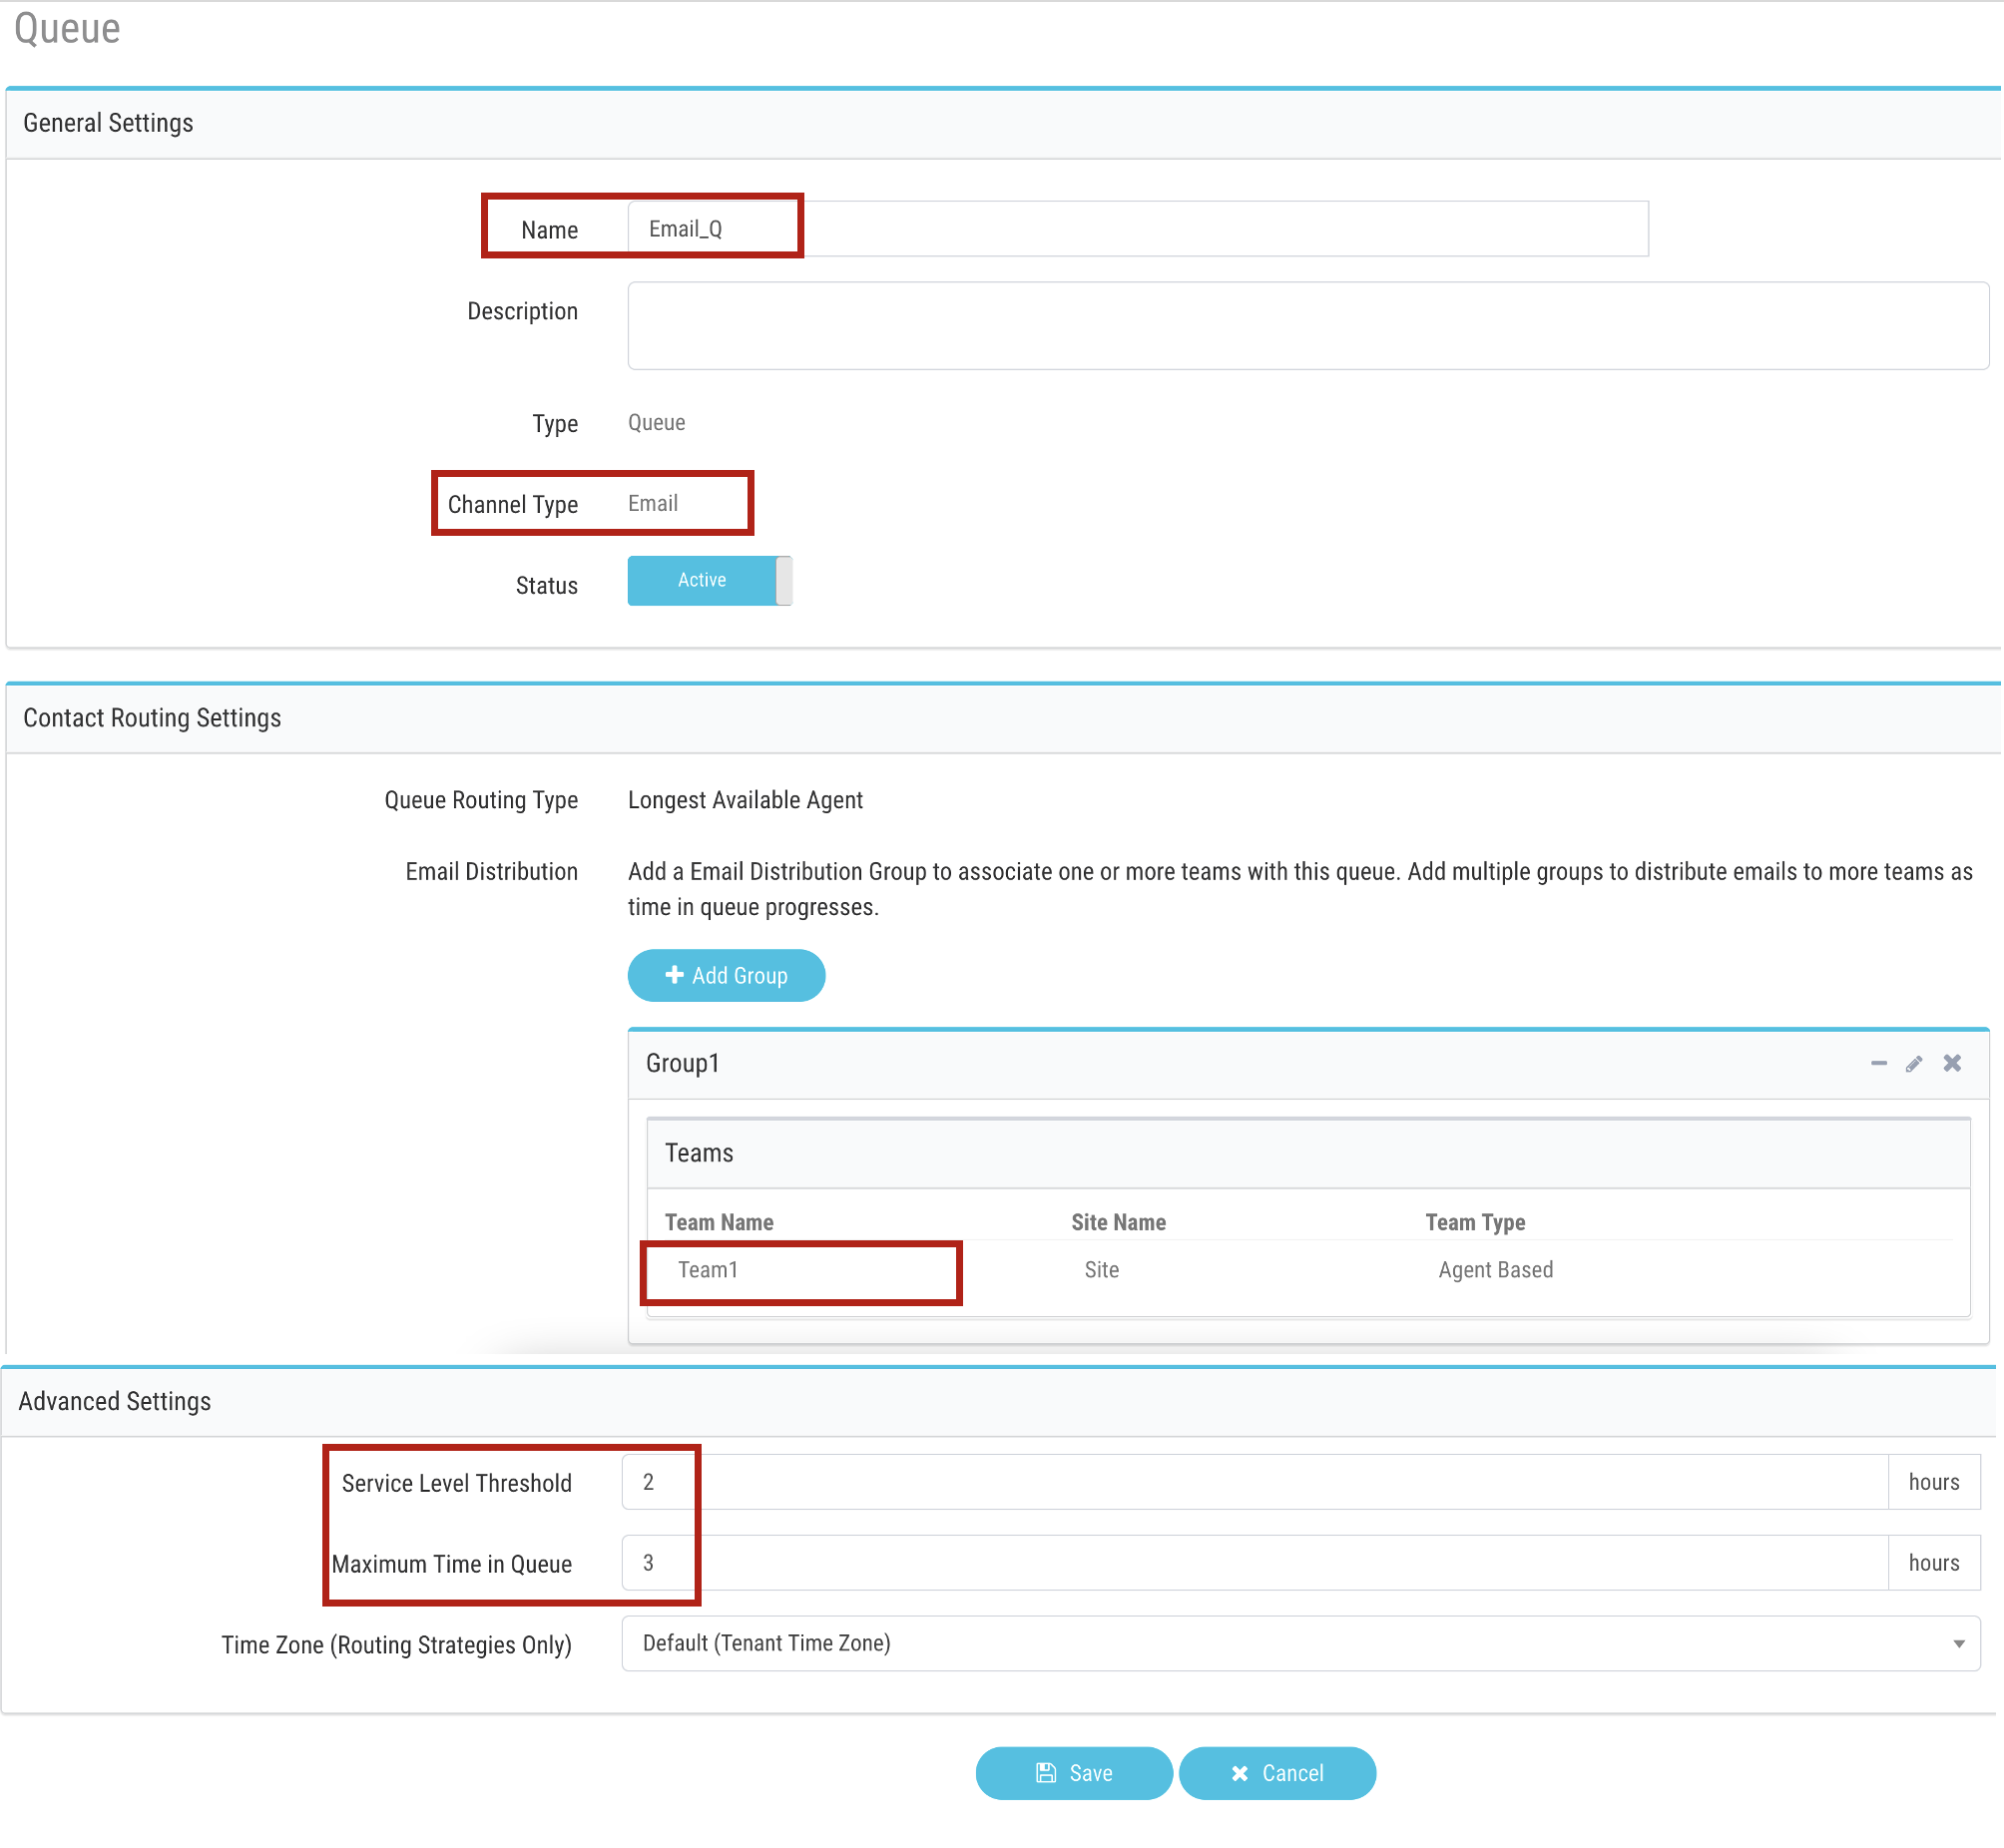
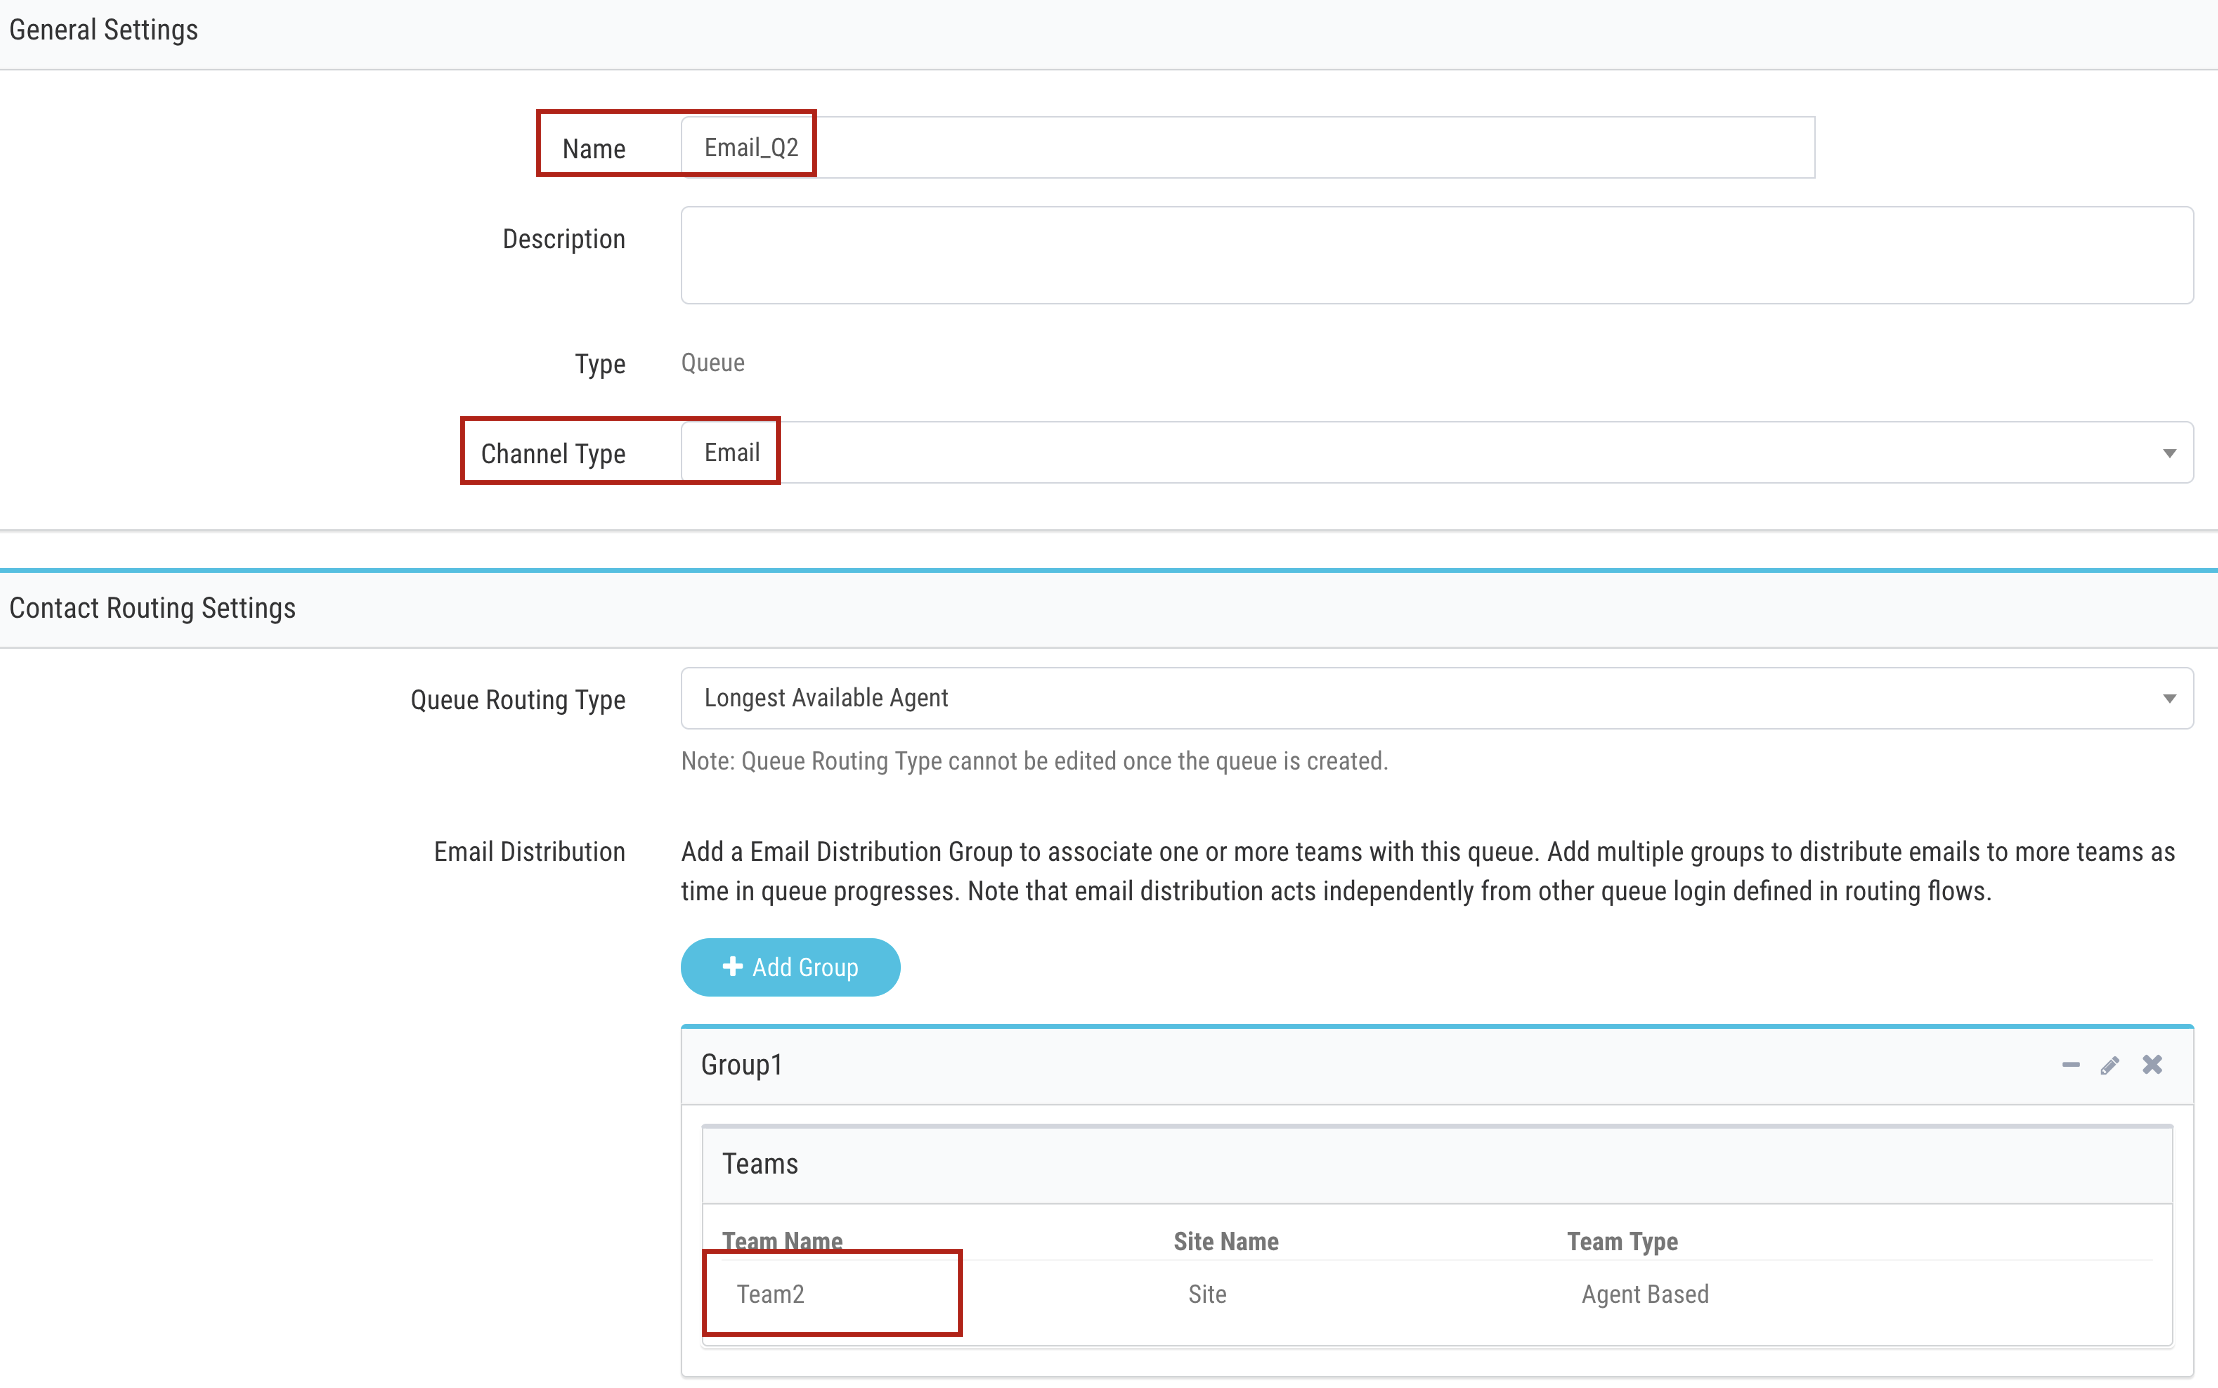
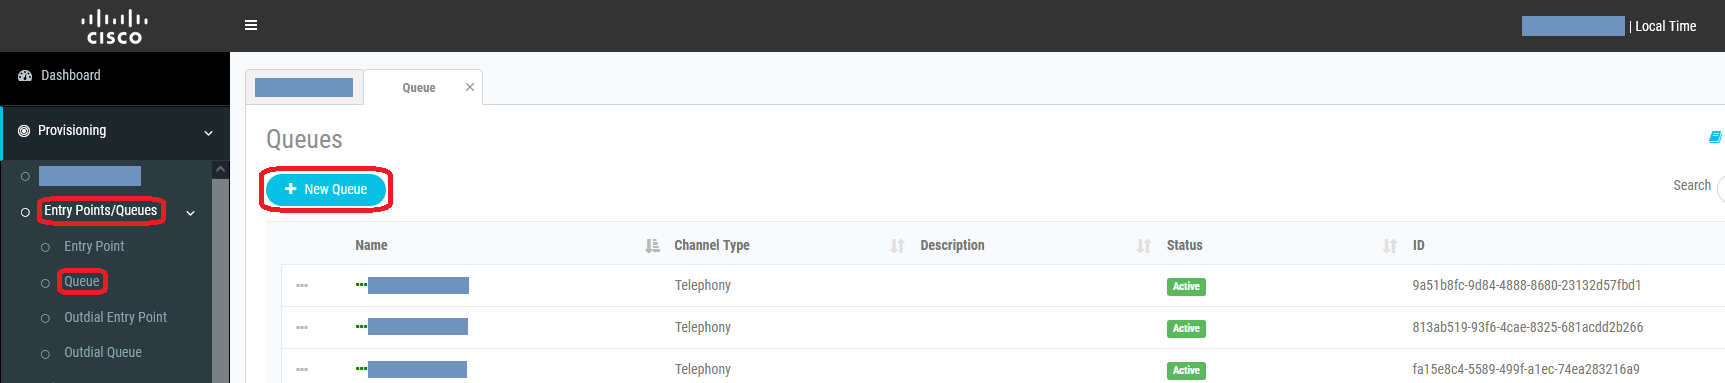
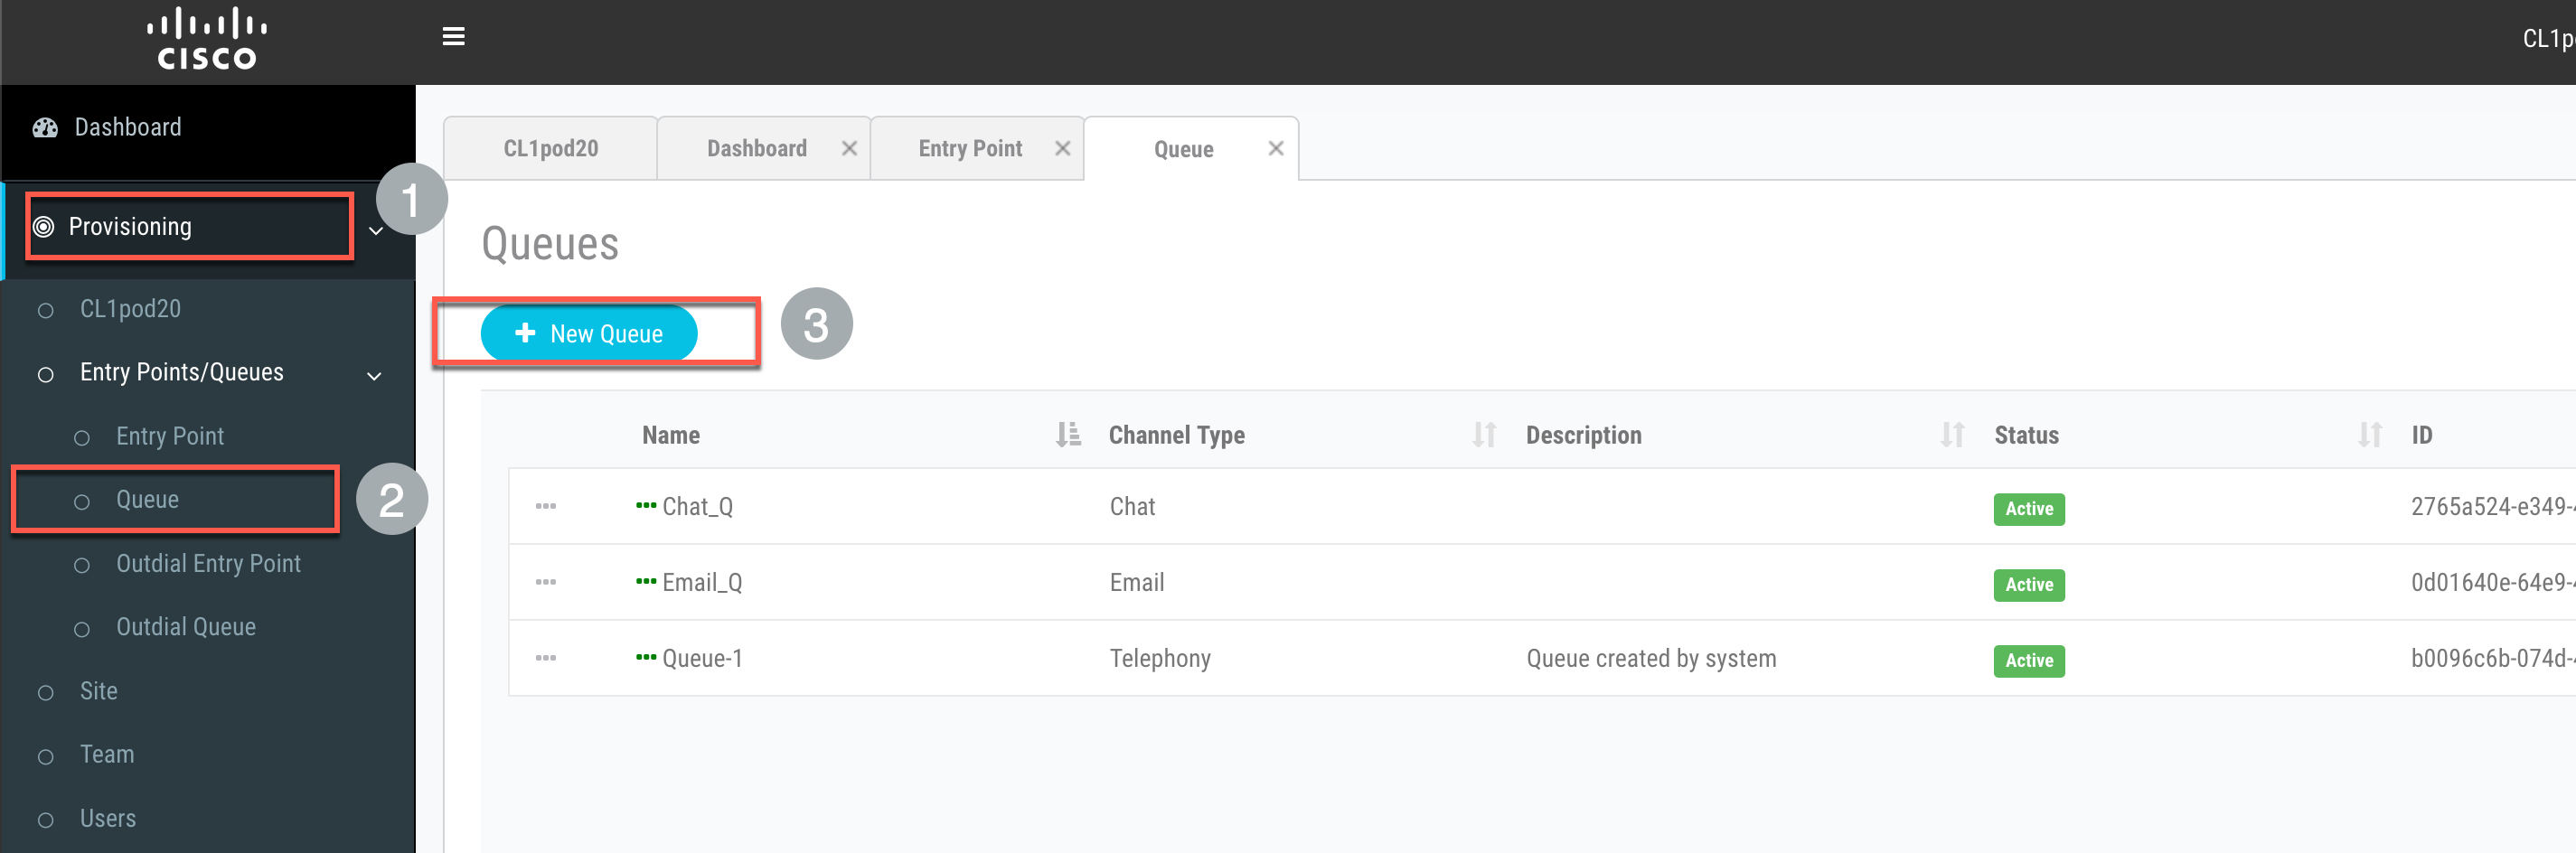
Provisioning → Entry Points/Queues → Queue → New Queue
Queue 1: Name Email_Q, Channel Type Email, Queue Routing Type Longest Available Agent, Email Distribution → Add Group → Team1, Service Level 2 hours, Max Time 3 hours → Save
Queue 2: Name Email_Q2, Channel Type Email, Email Distribution → Add Group → Team2
4. Create/Upload Email flow
Download from GitHub: Webex Connect Flows → v3.0 → Template → Media Specific Workflows → Email Inbound Flow.workflow.zip
Unzip
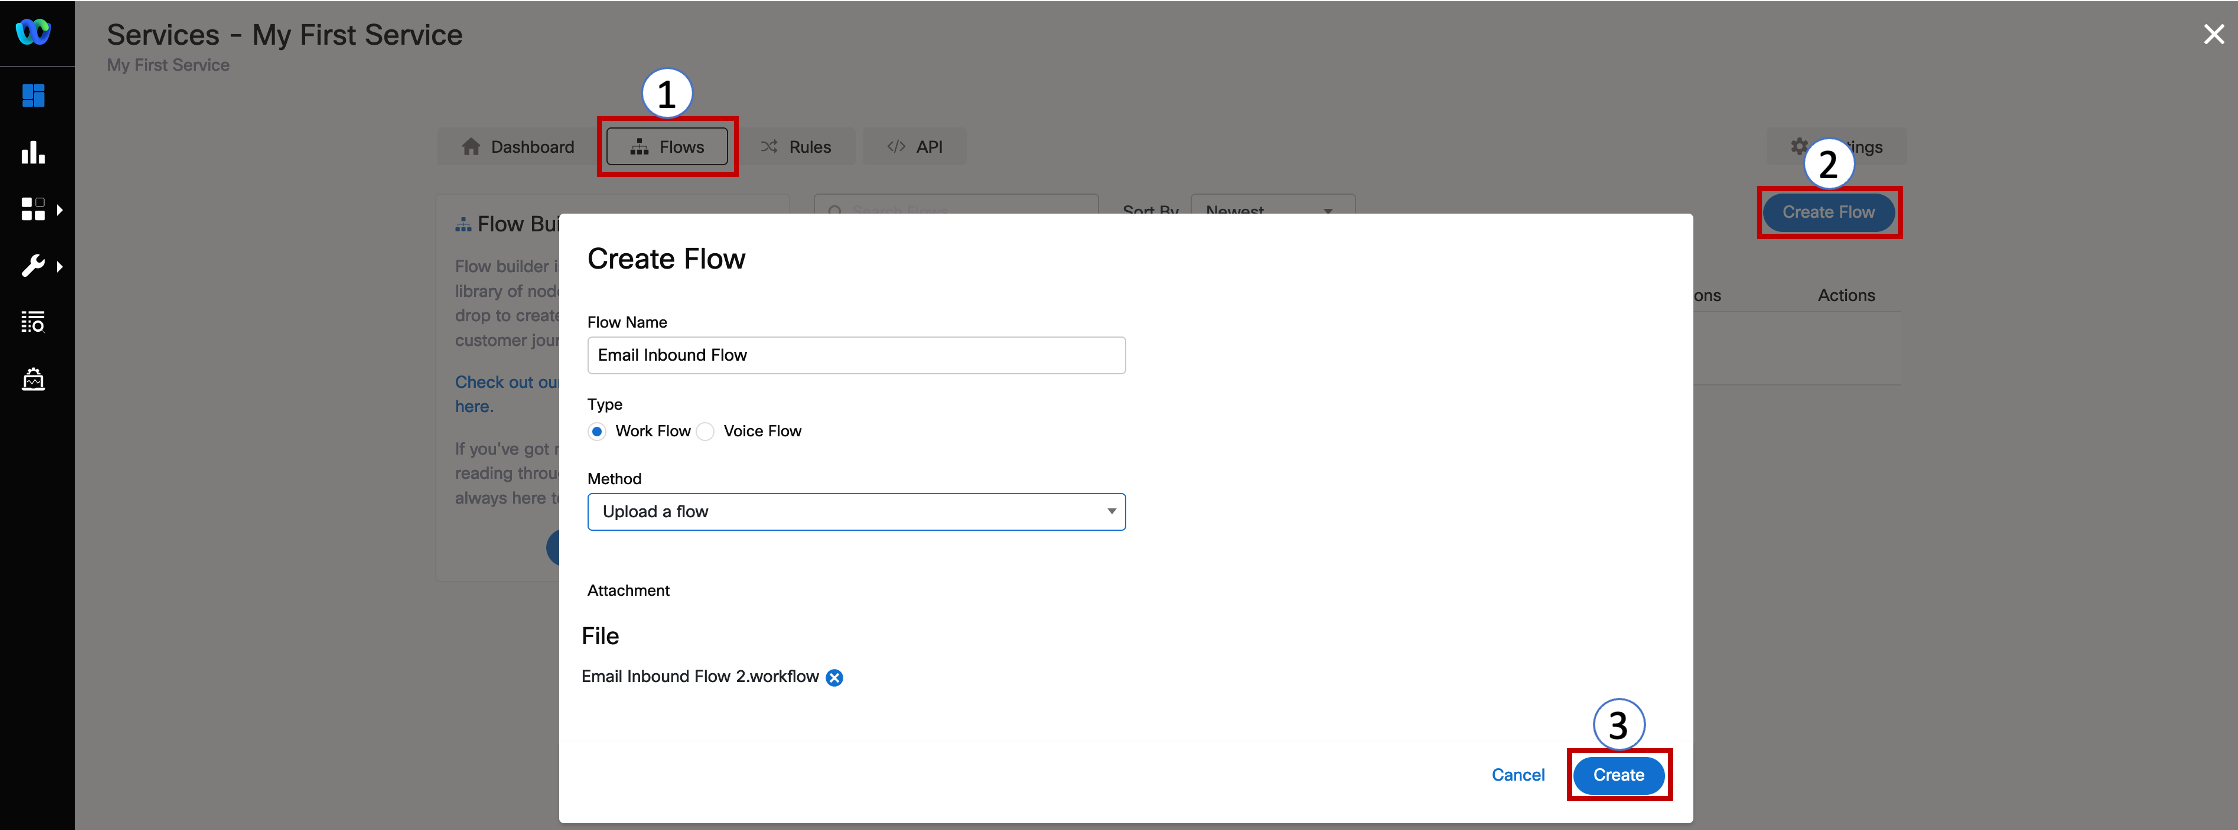
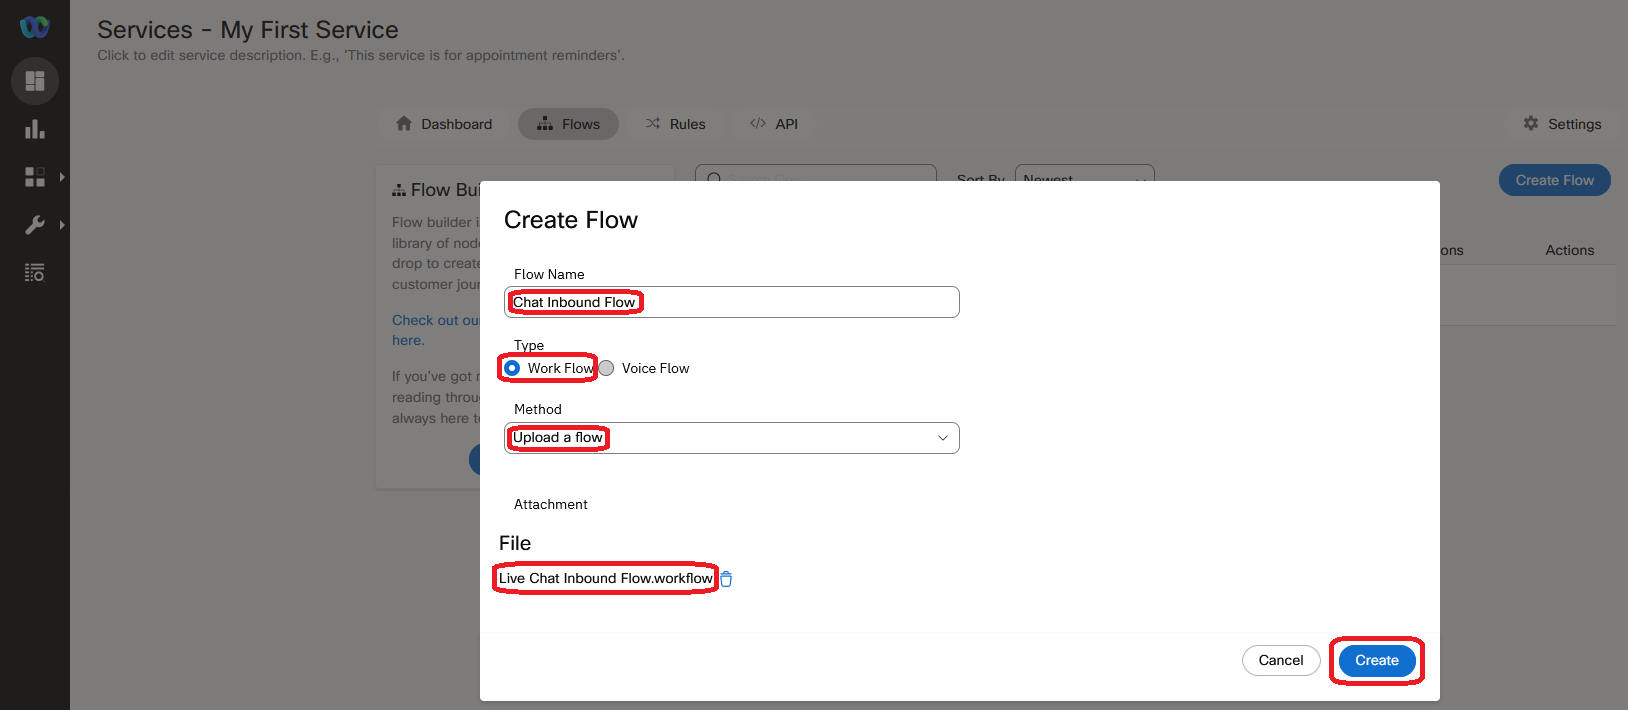
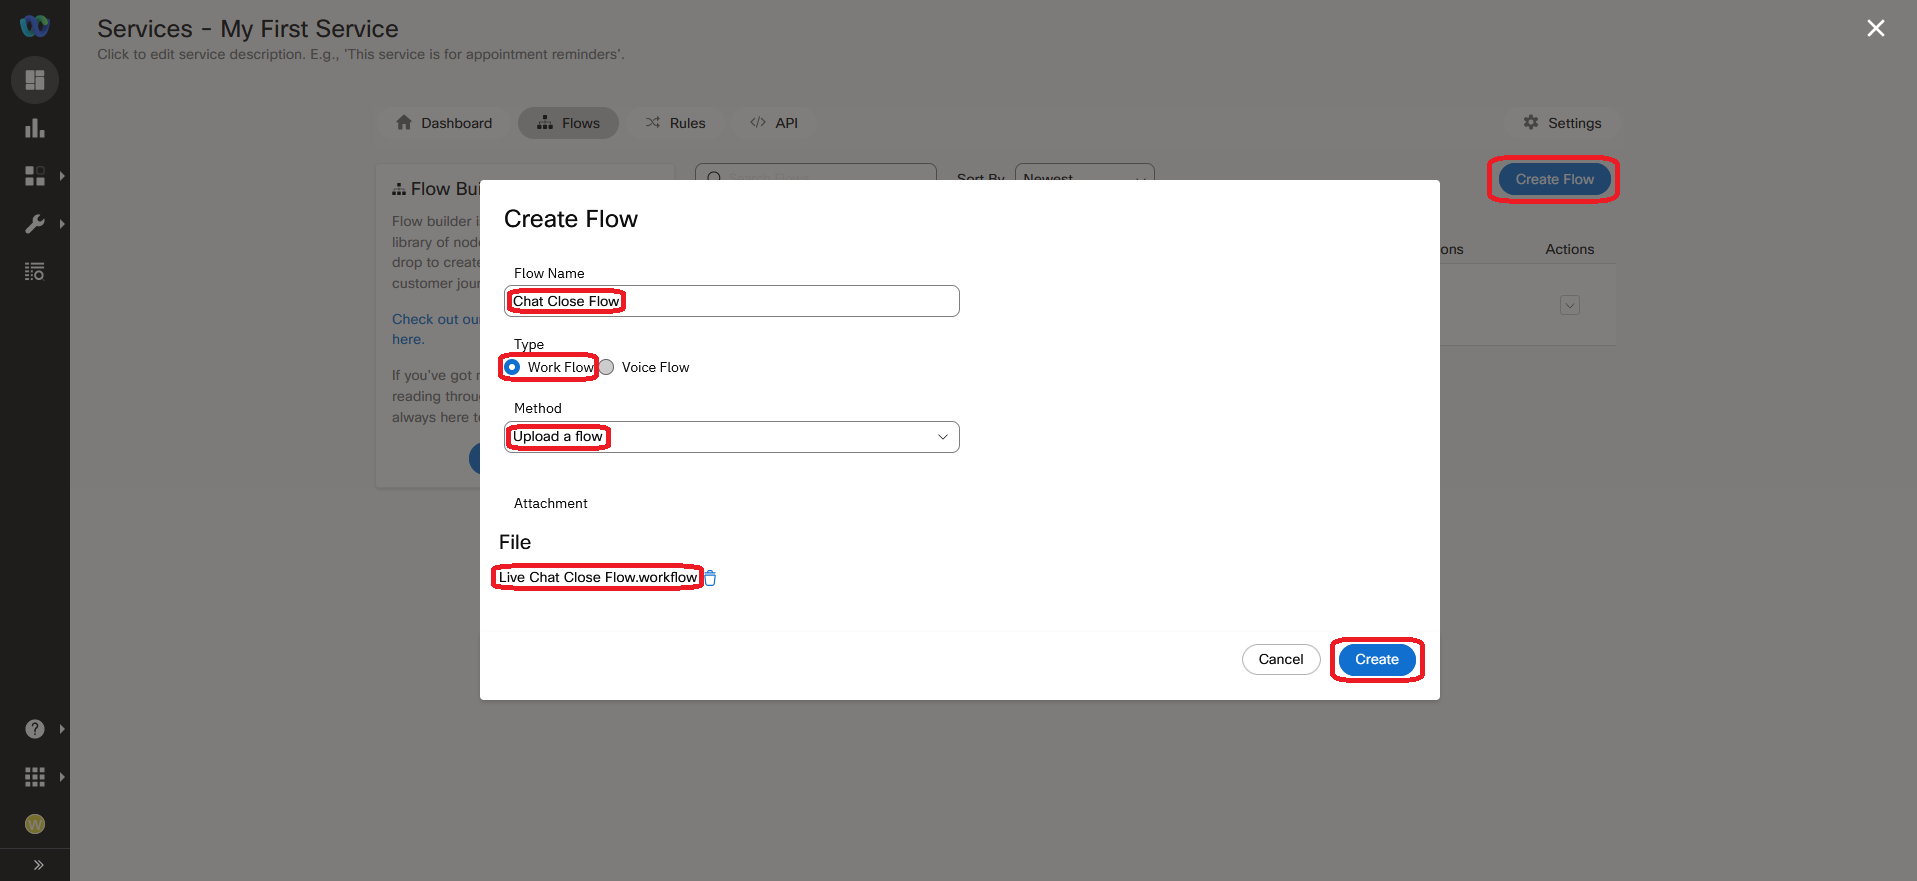
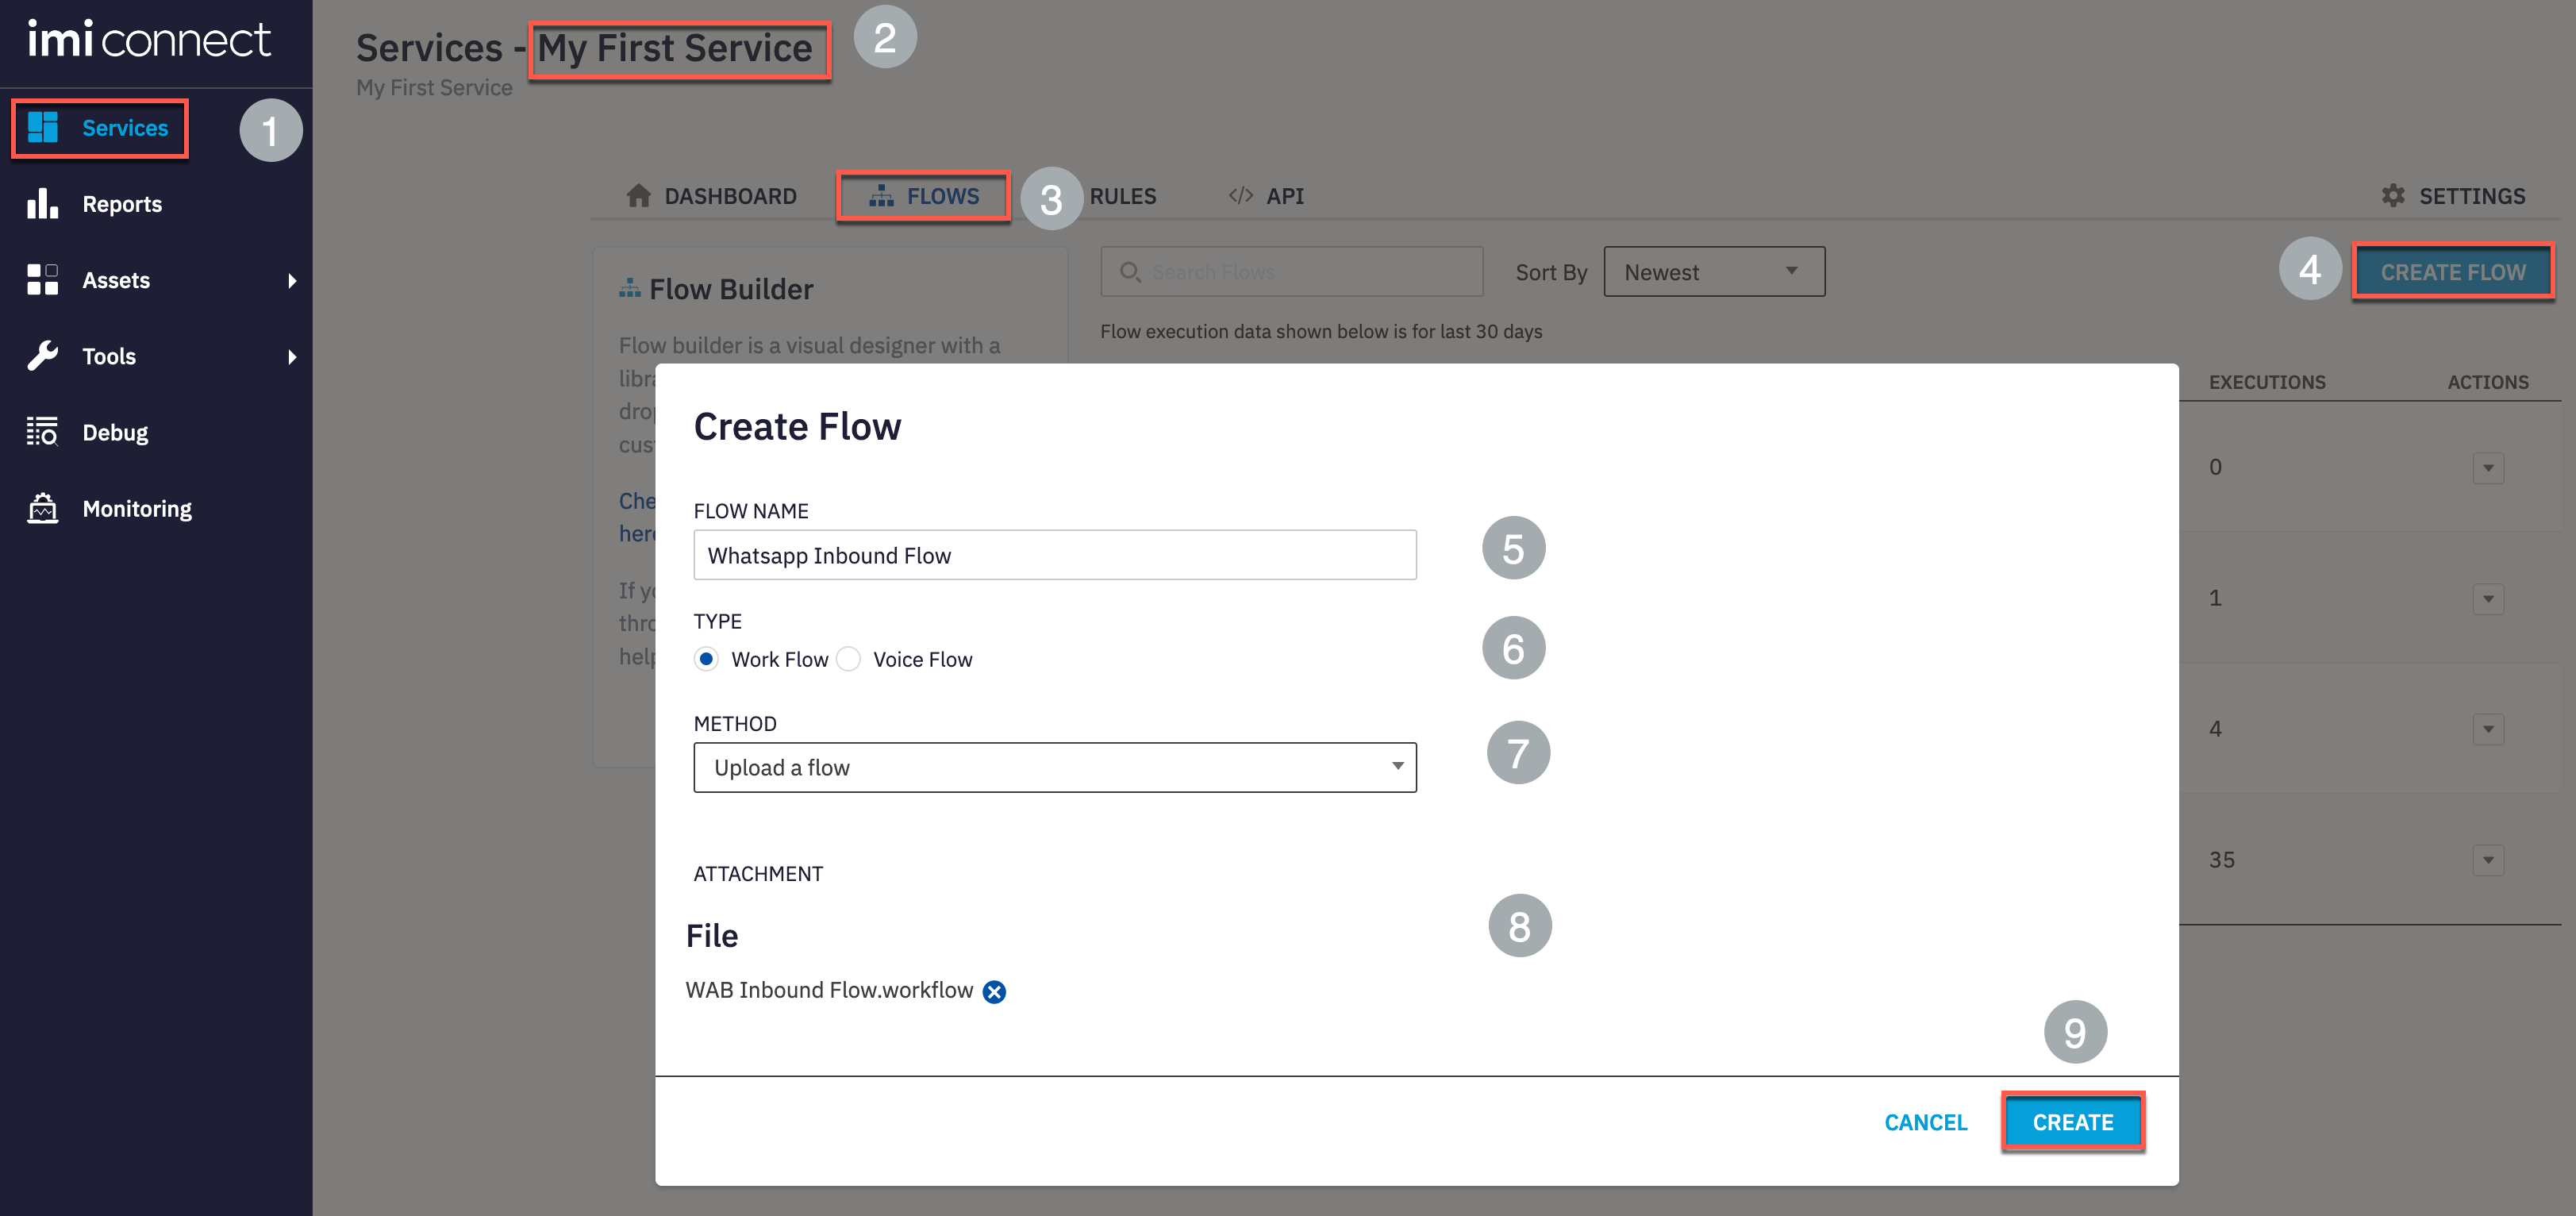
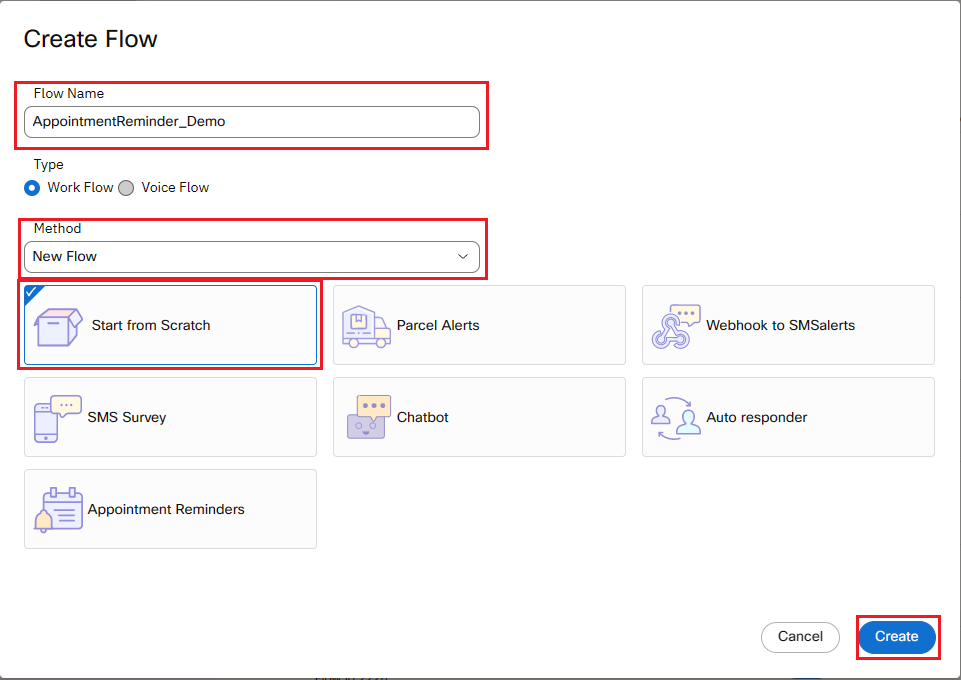
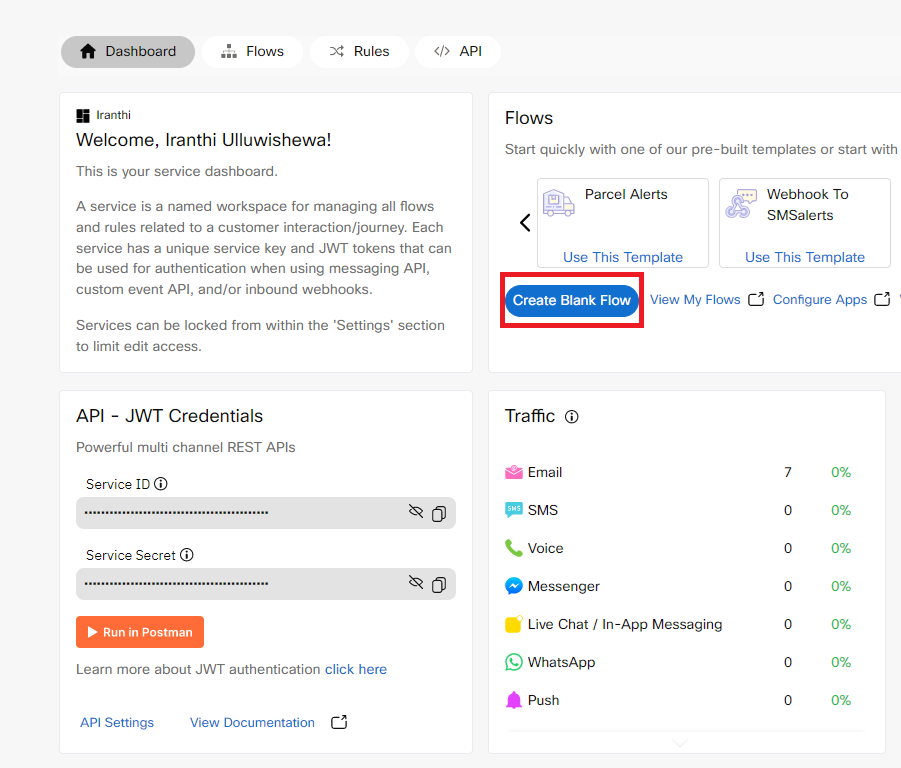
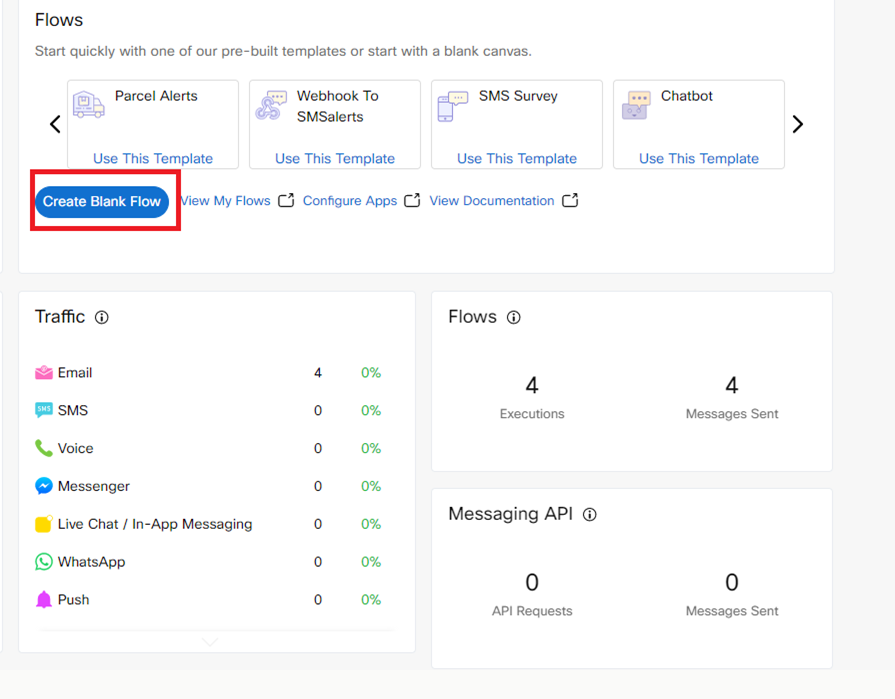
Webex Connect → Services → My First Service → FLOWS → CREATE FLOW
Flow Name Email Inbound Flow, Type Work Flow, Method Upload a flow
Drag and drop the .workflow file → CREATE → SAVE
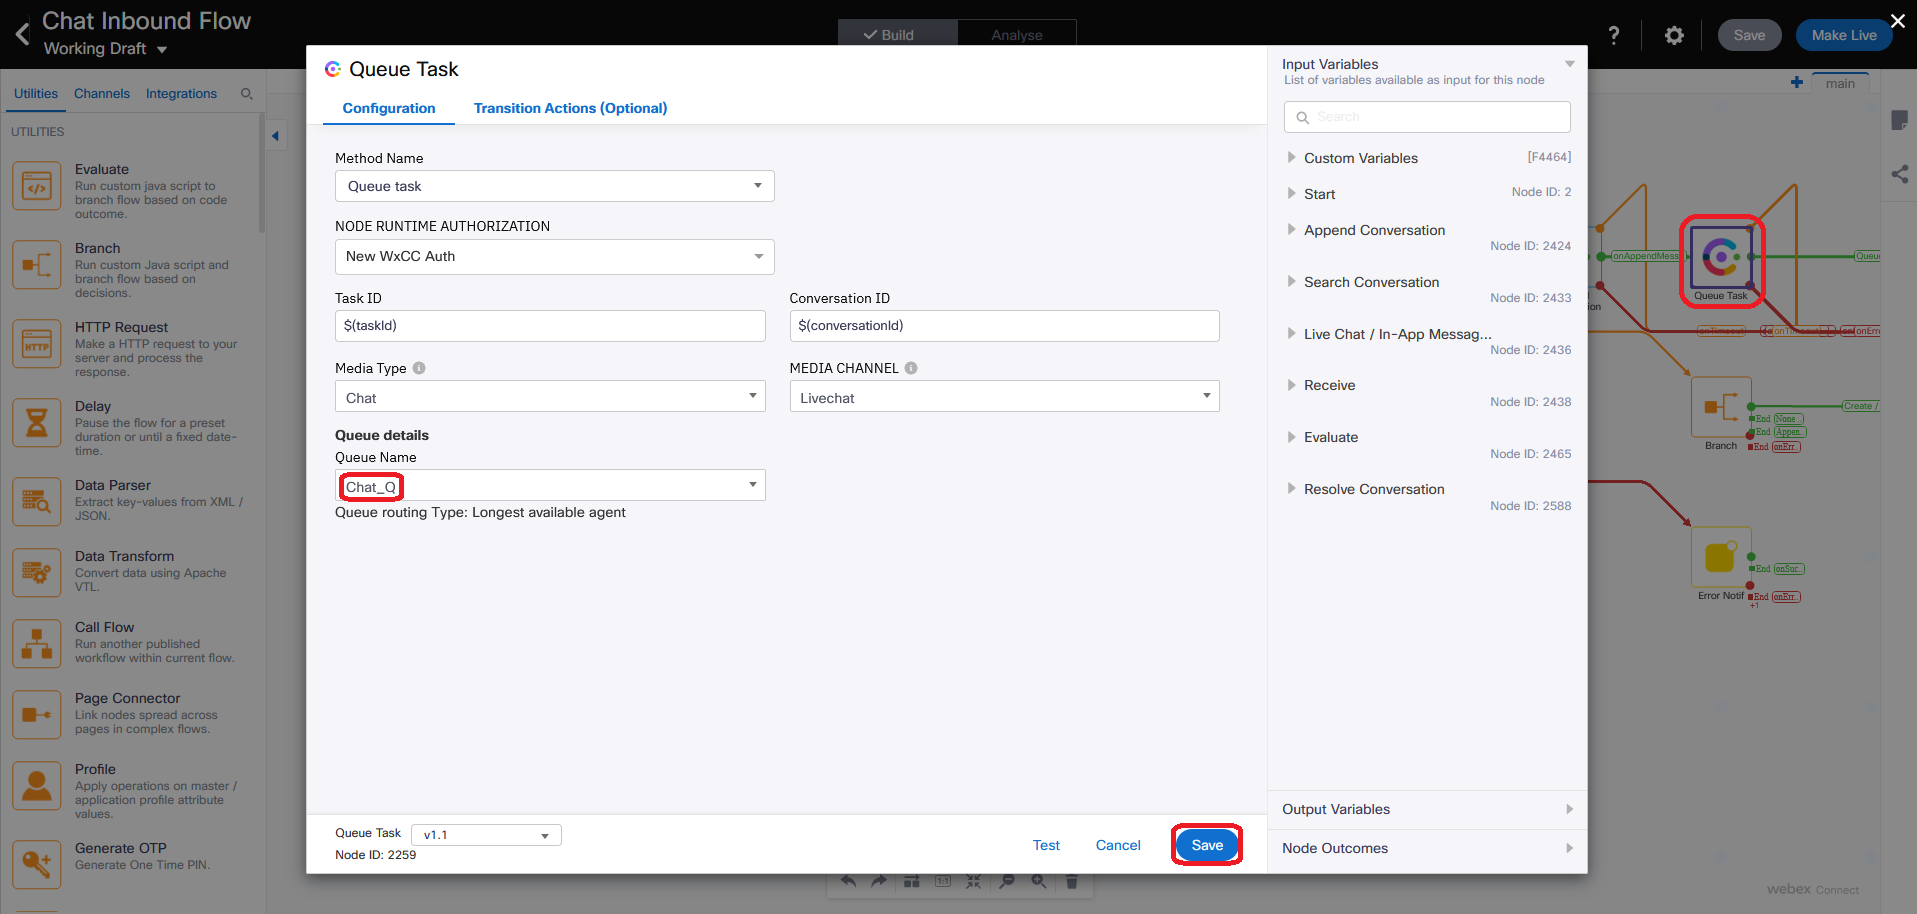
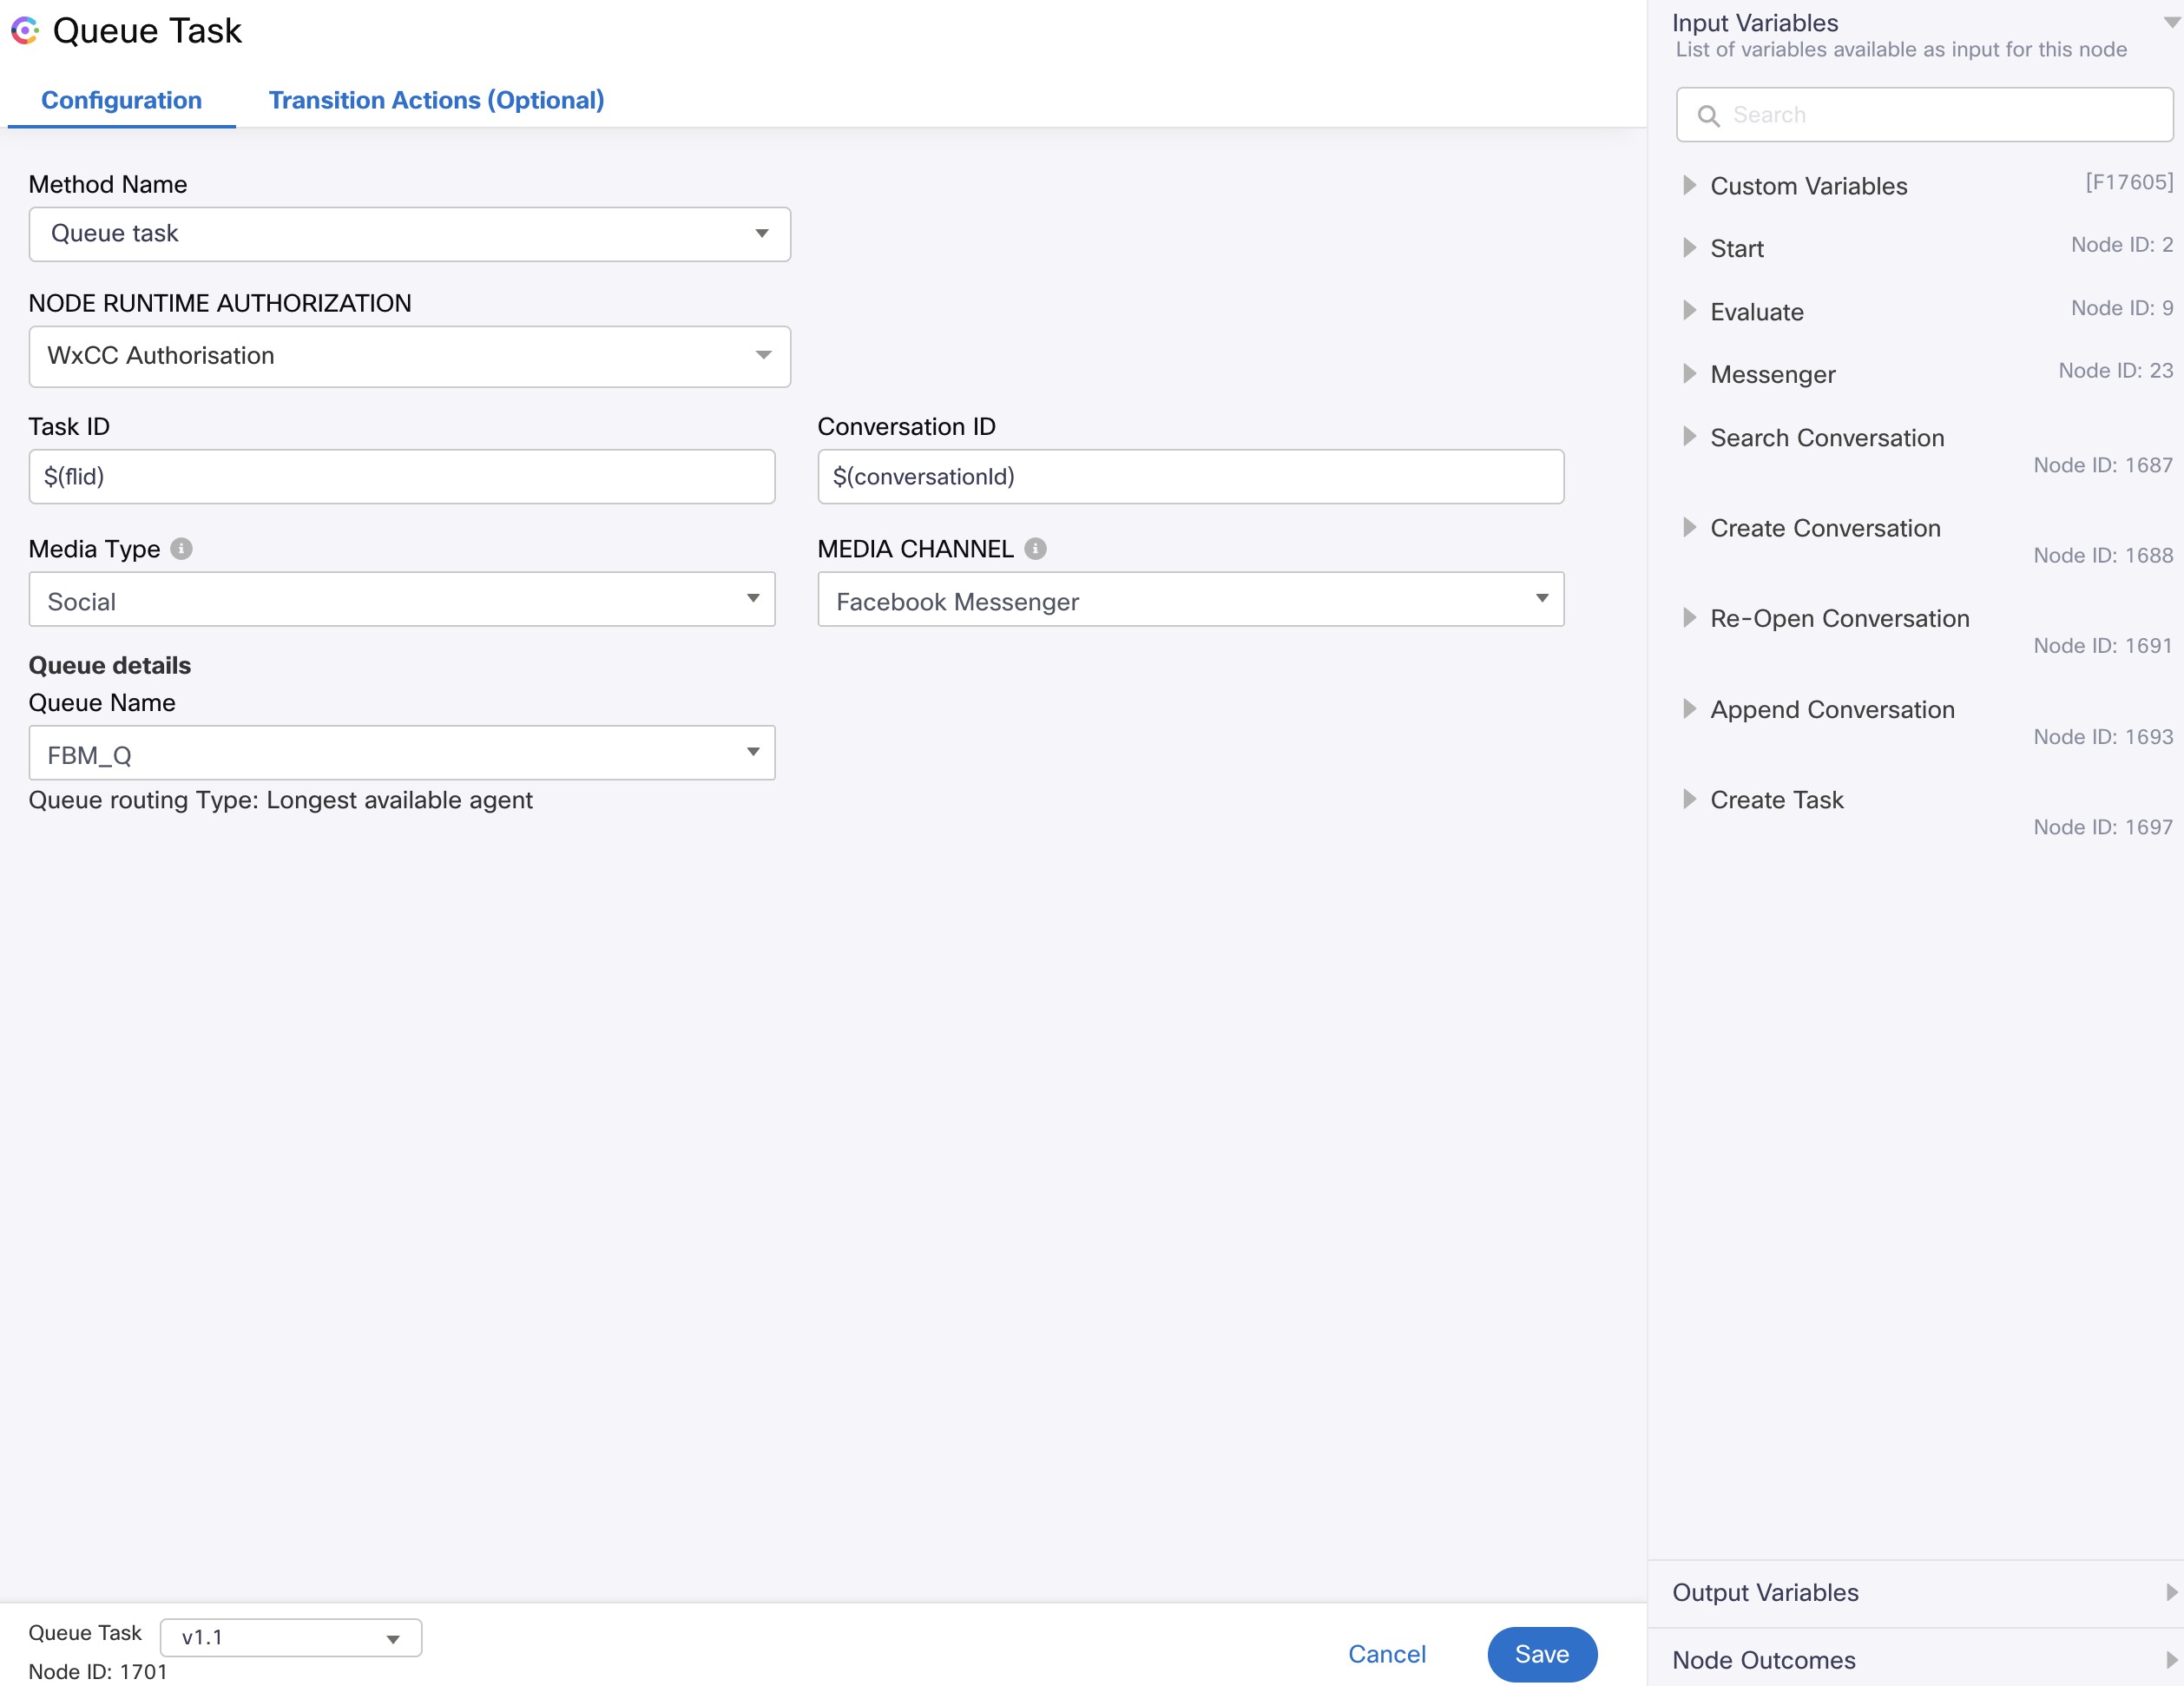
Find Queue Task → double click → Queue Name Email_Q → SAVE
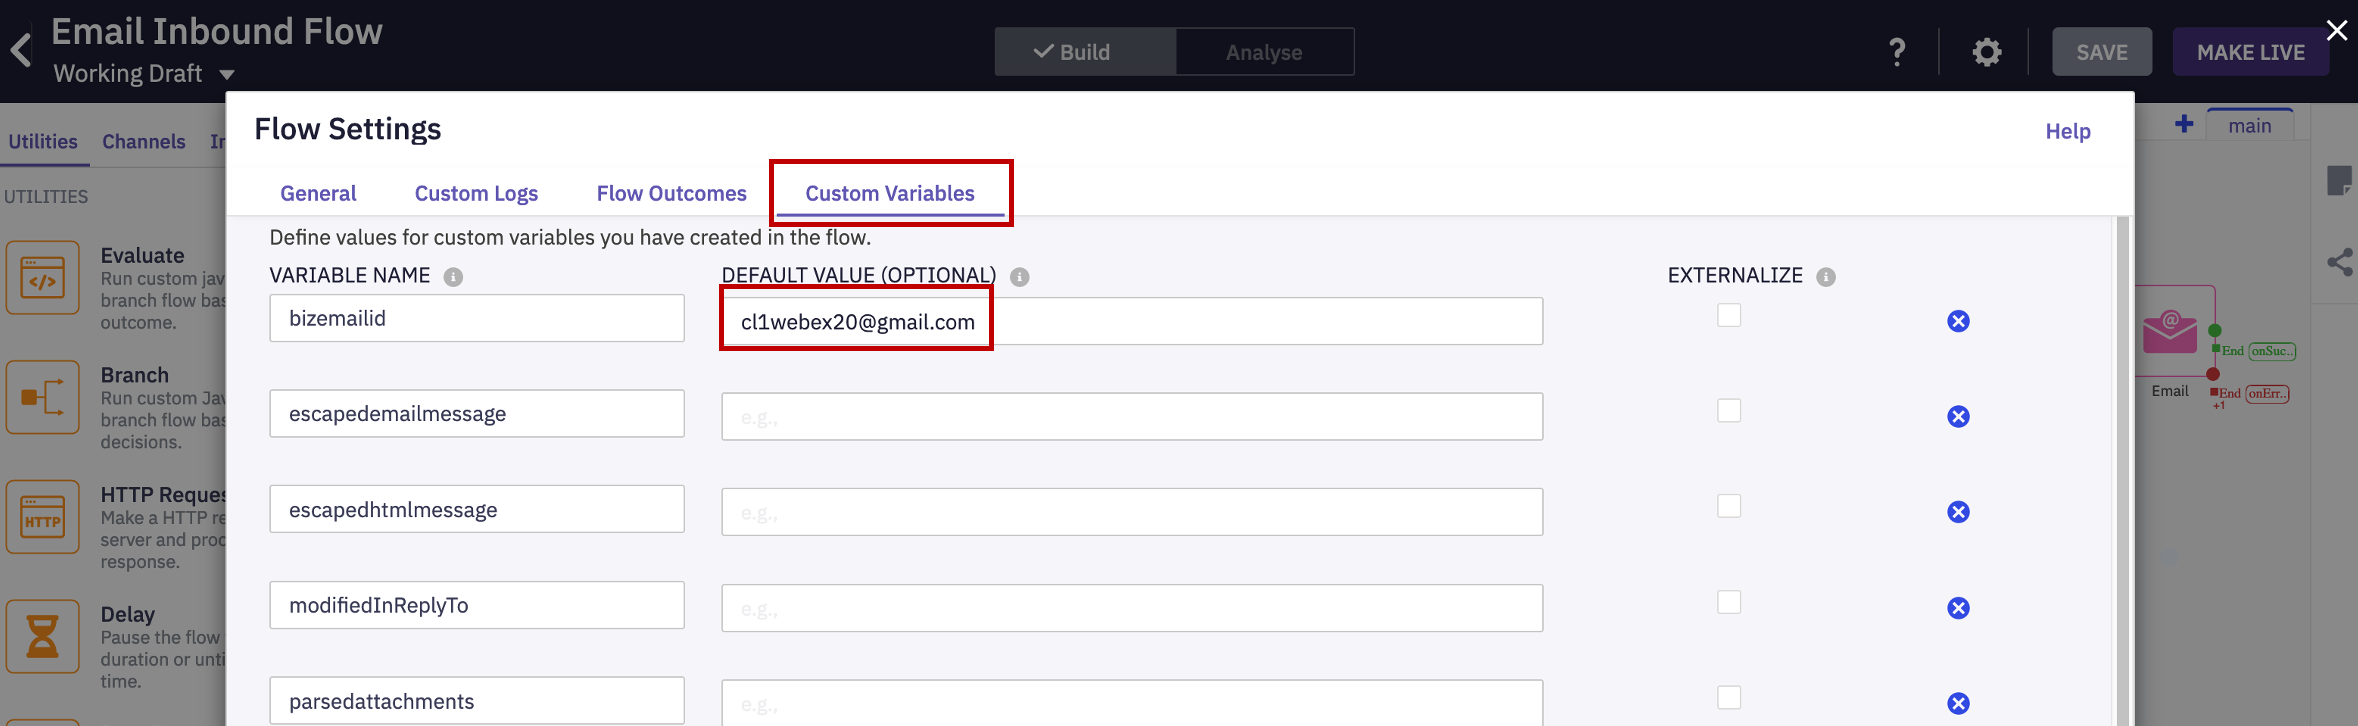
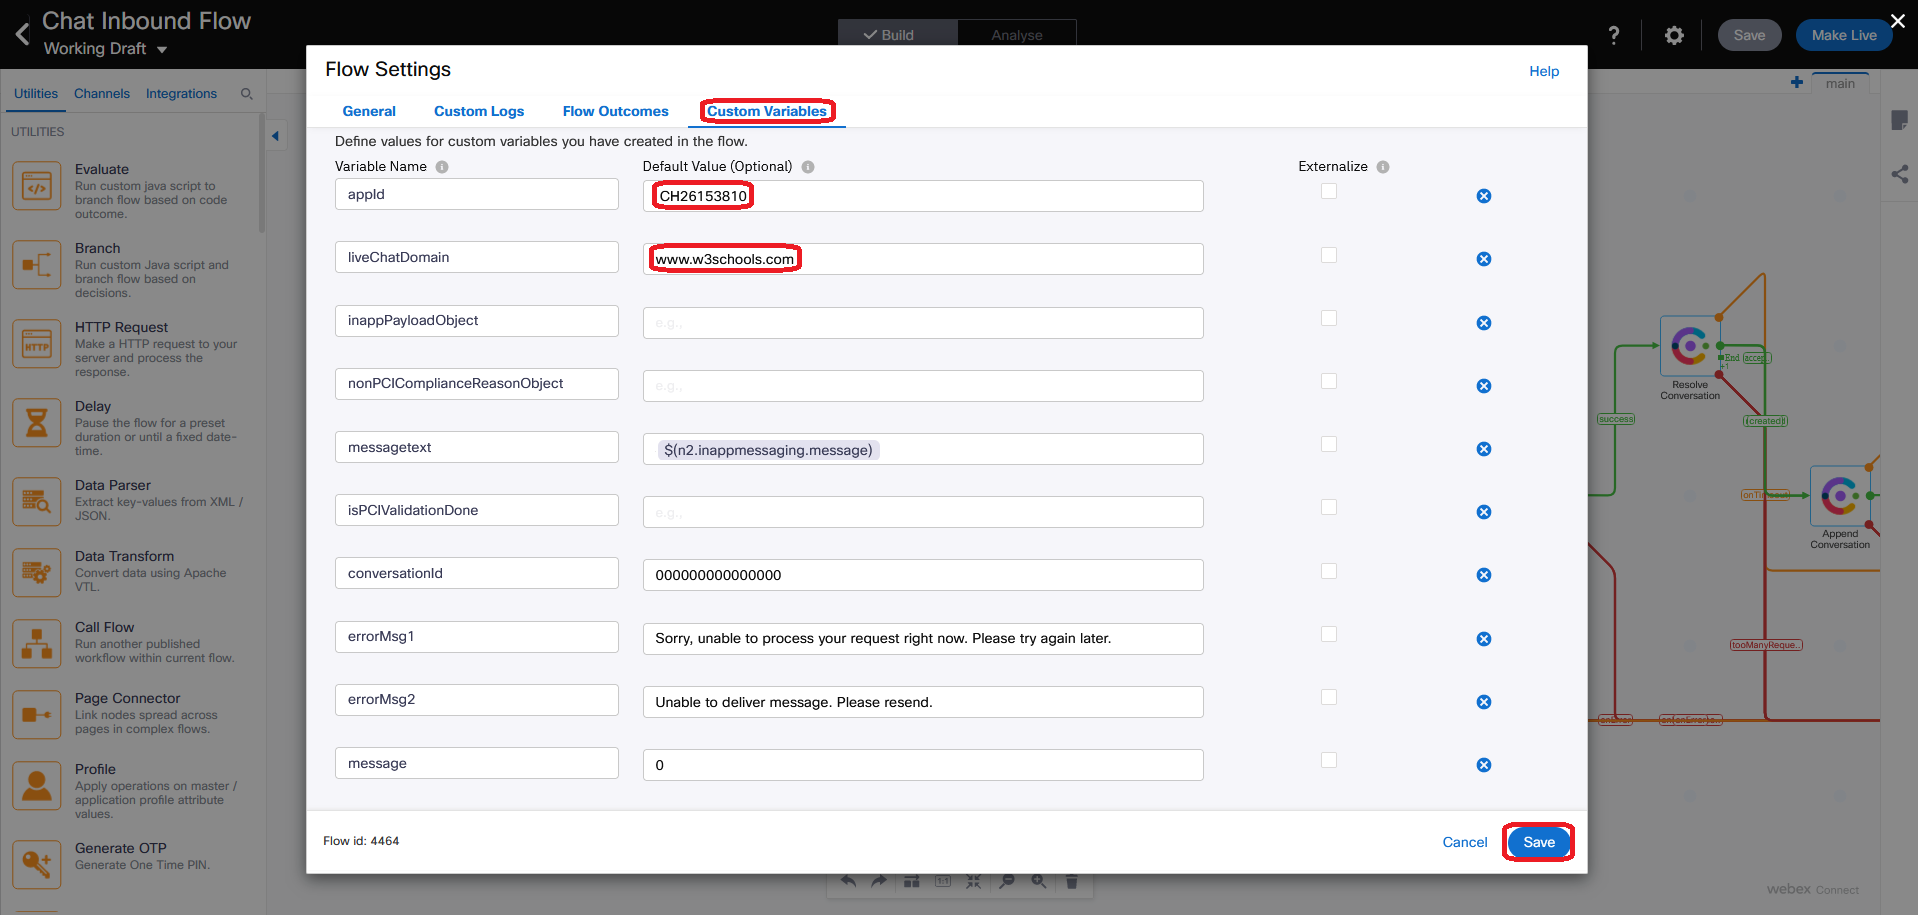
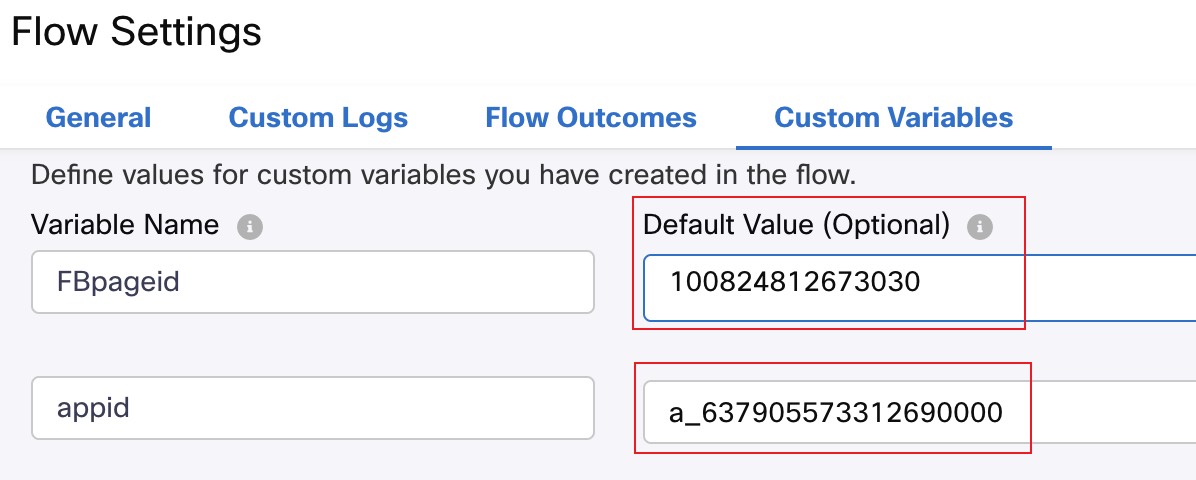
Settings (top right) → Custom variables → update bizemailid with your Gmail address → SAVE
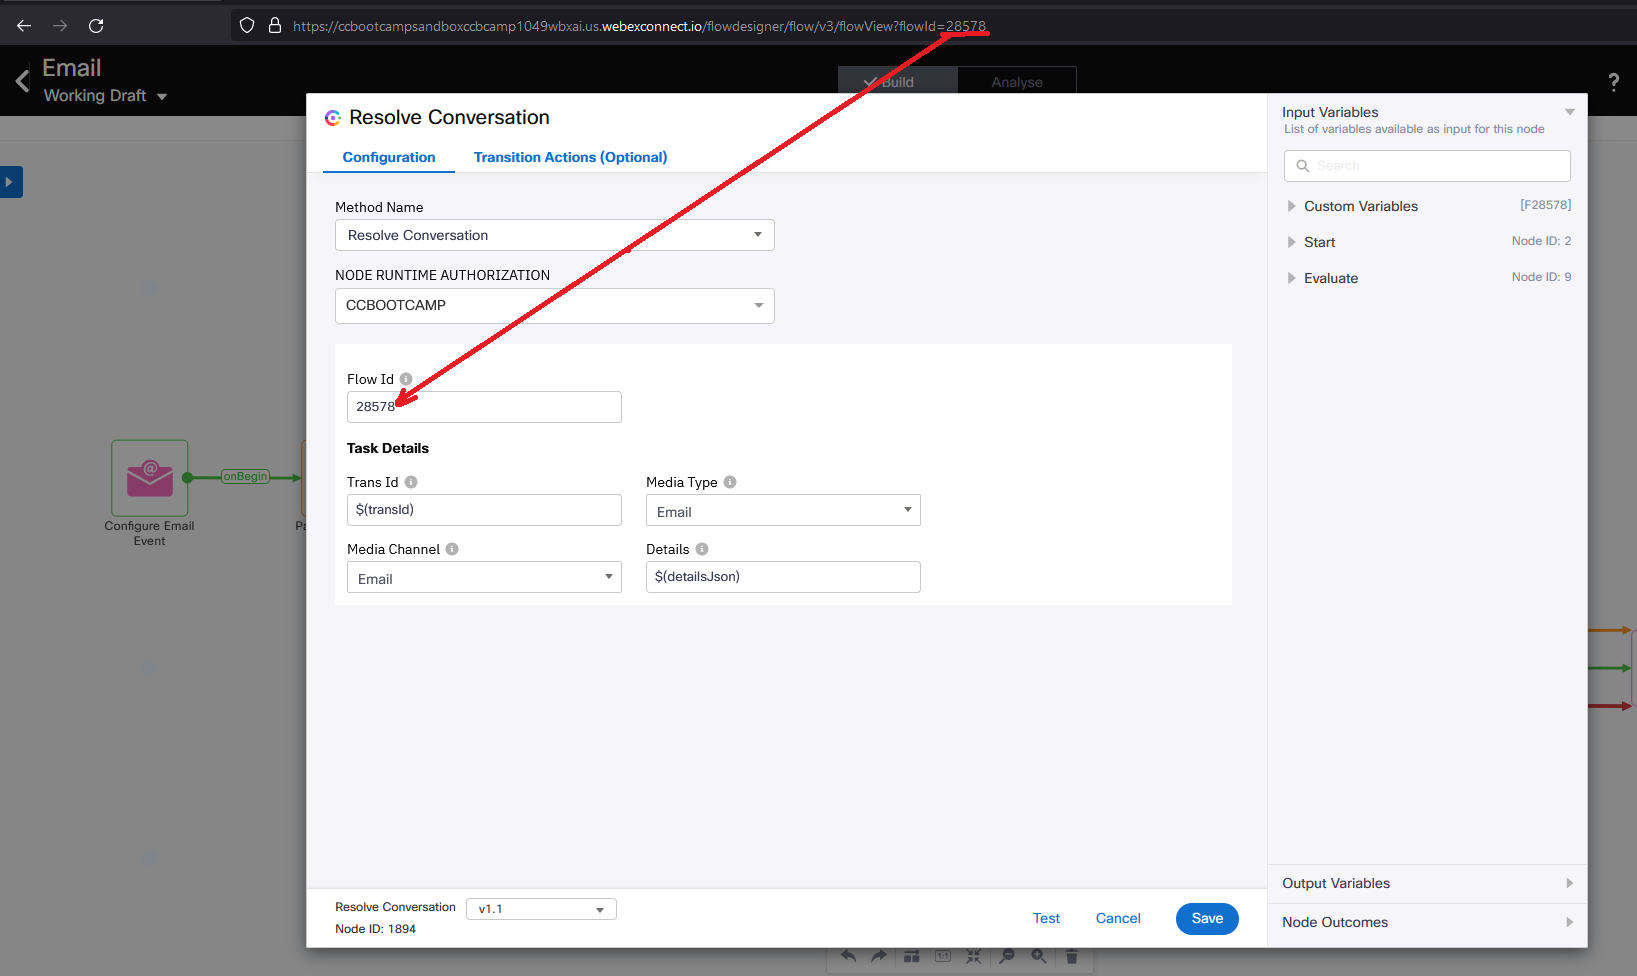
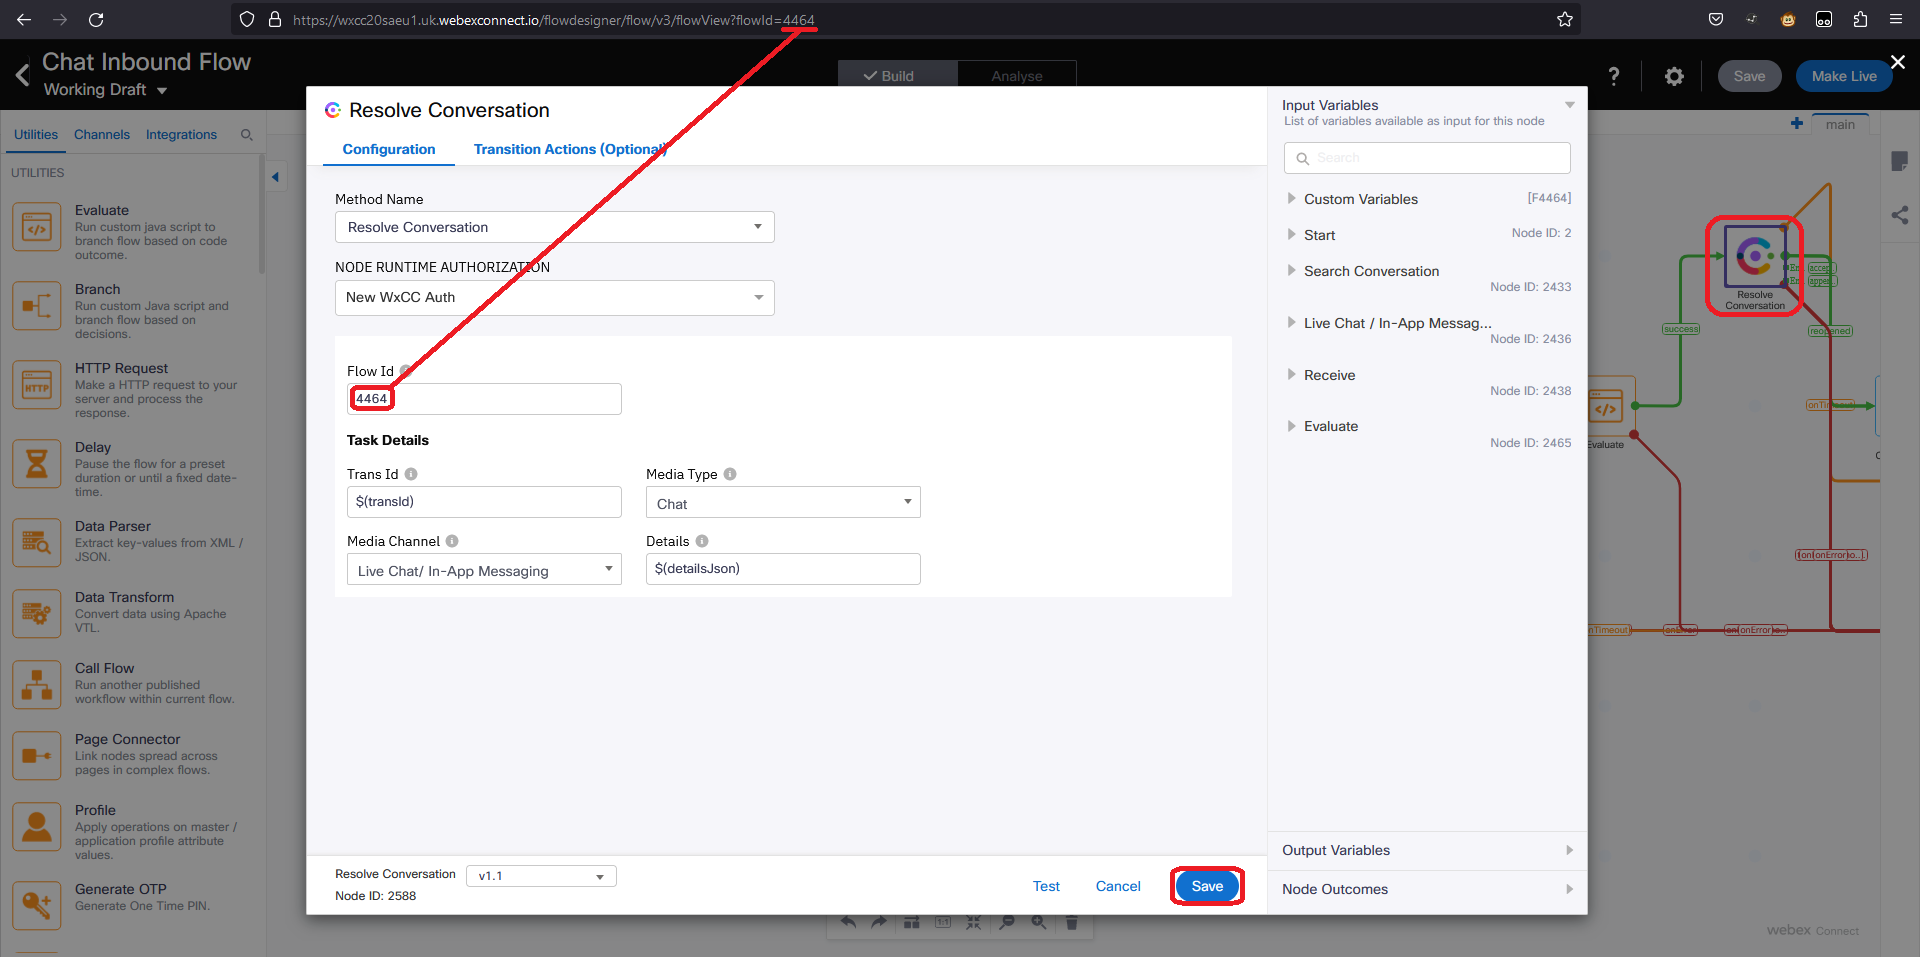
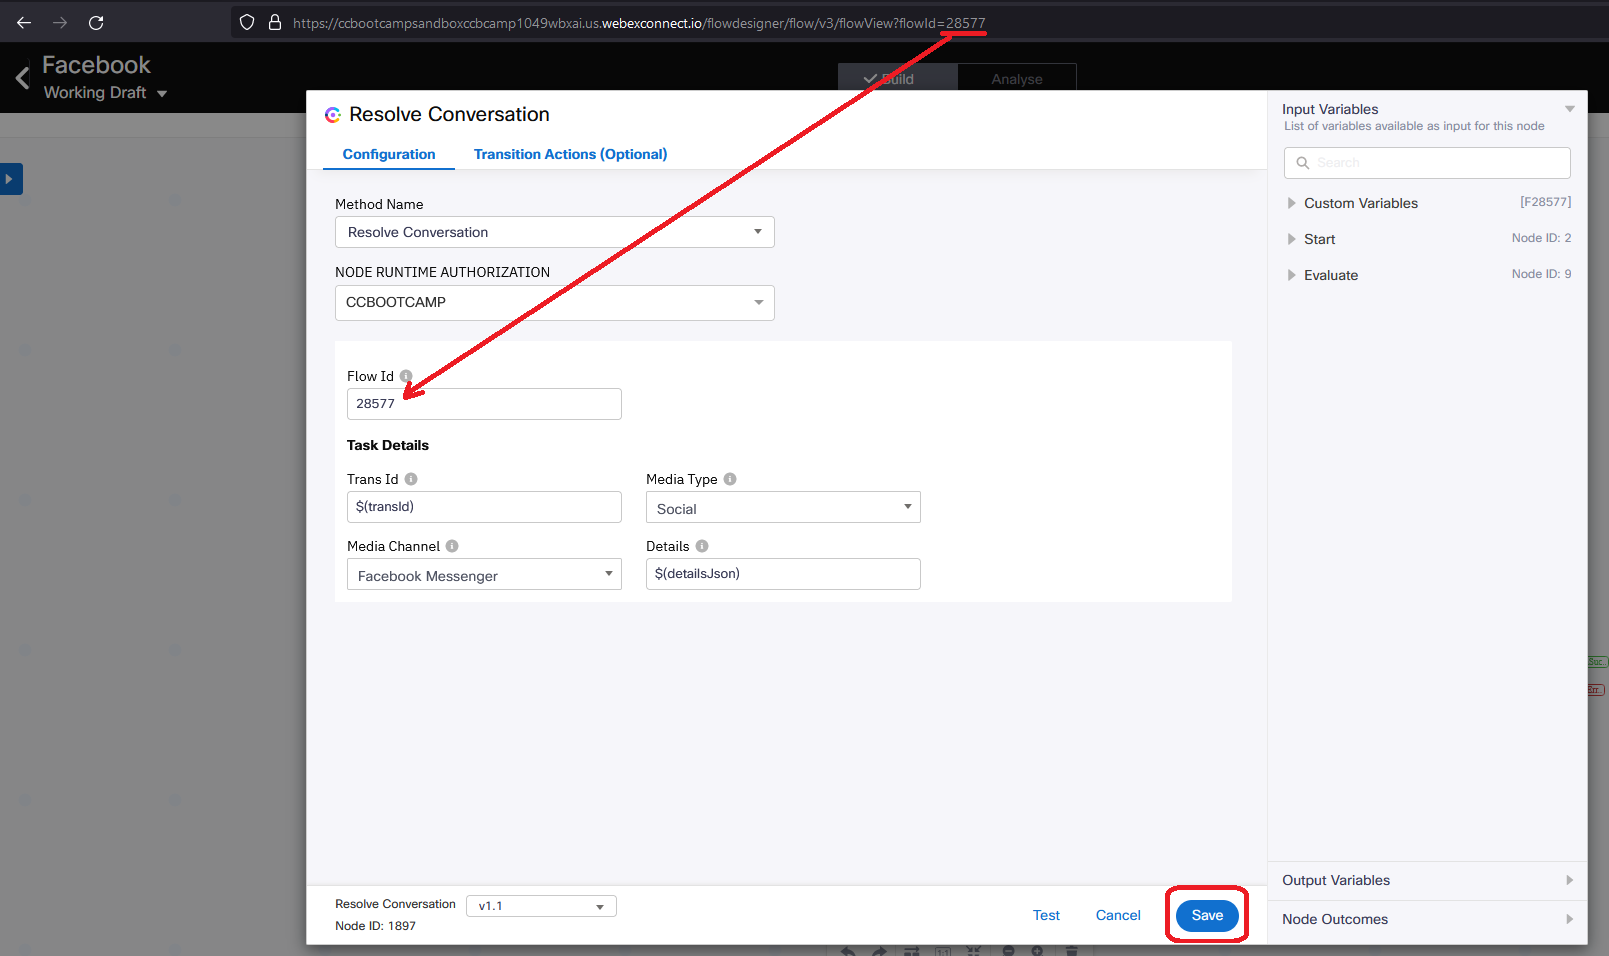
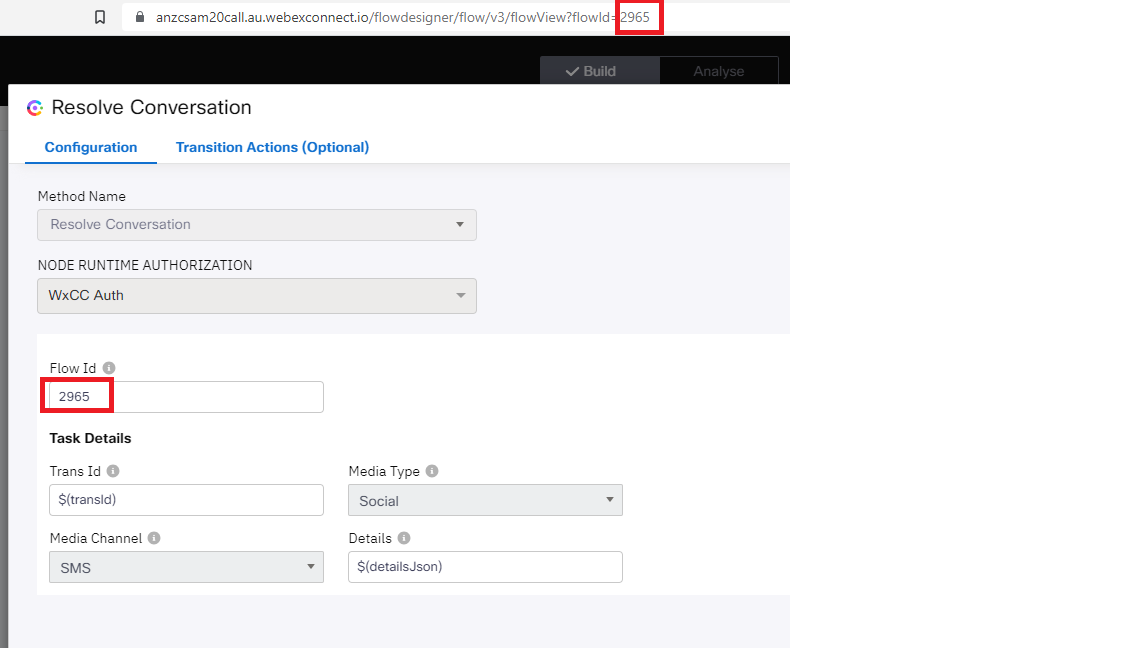
Resolve Conversation node → Flow Id = flowId from browser URL → Save
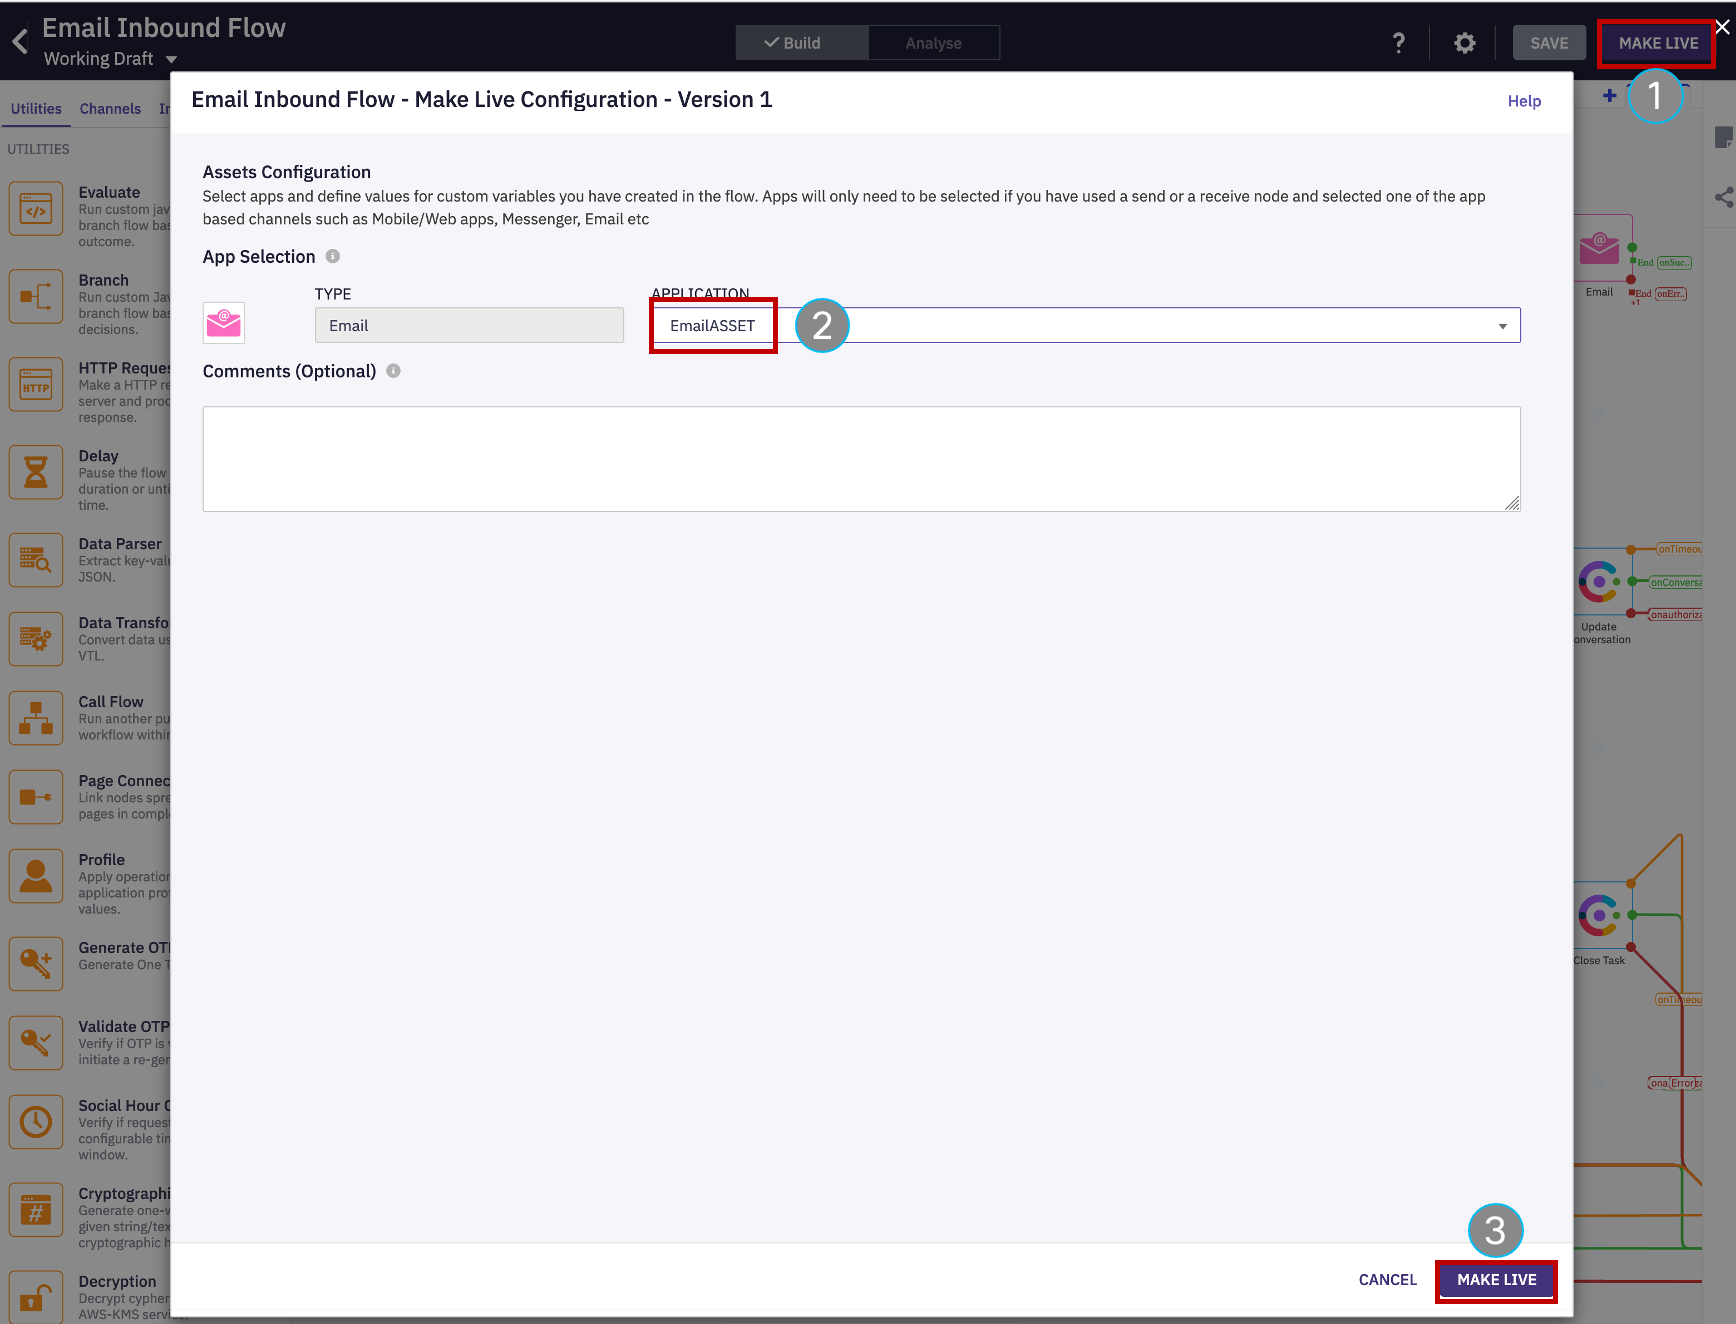
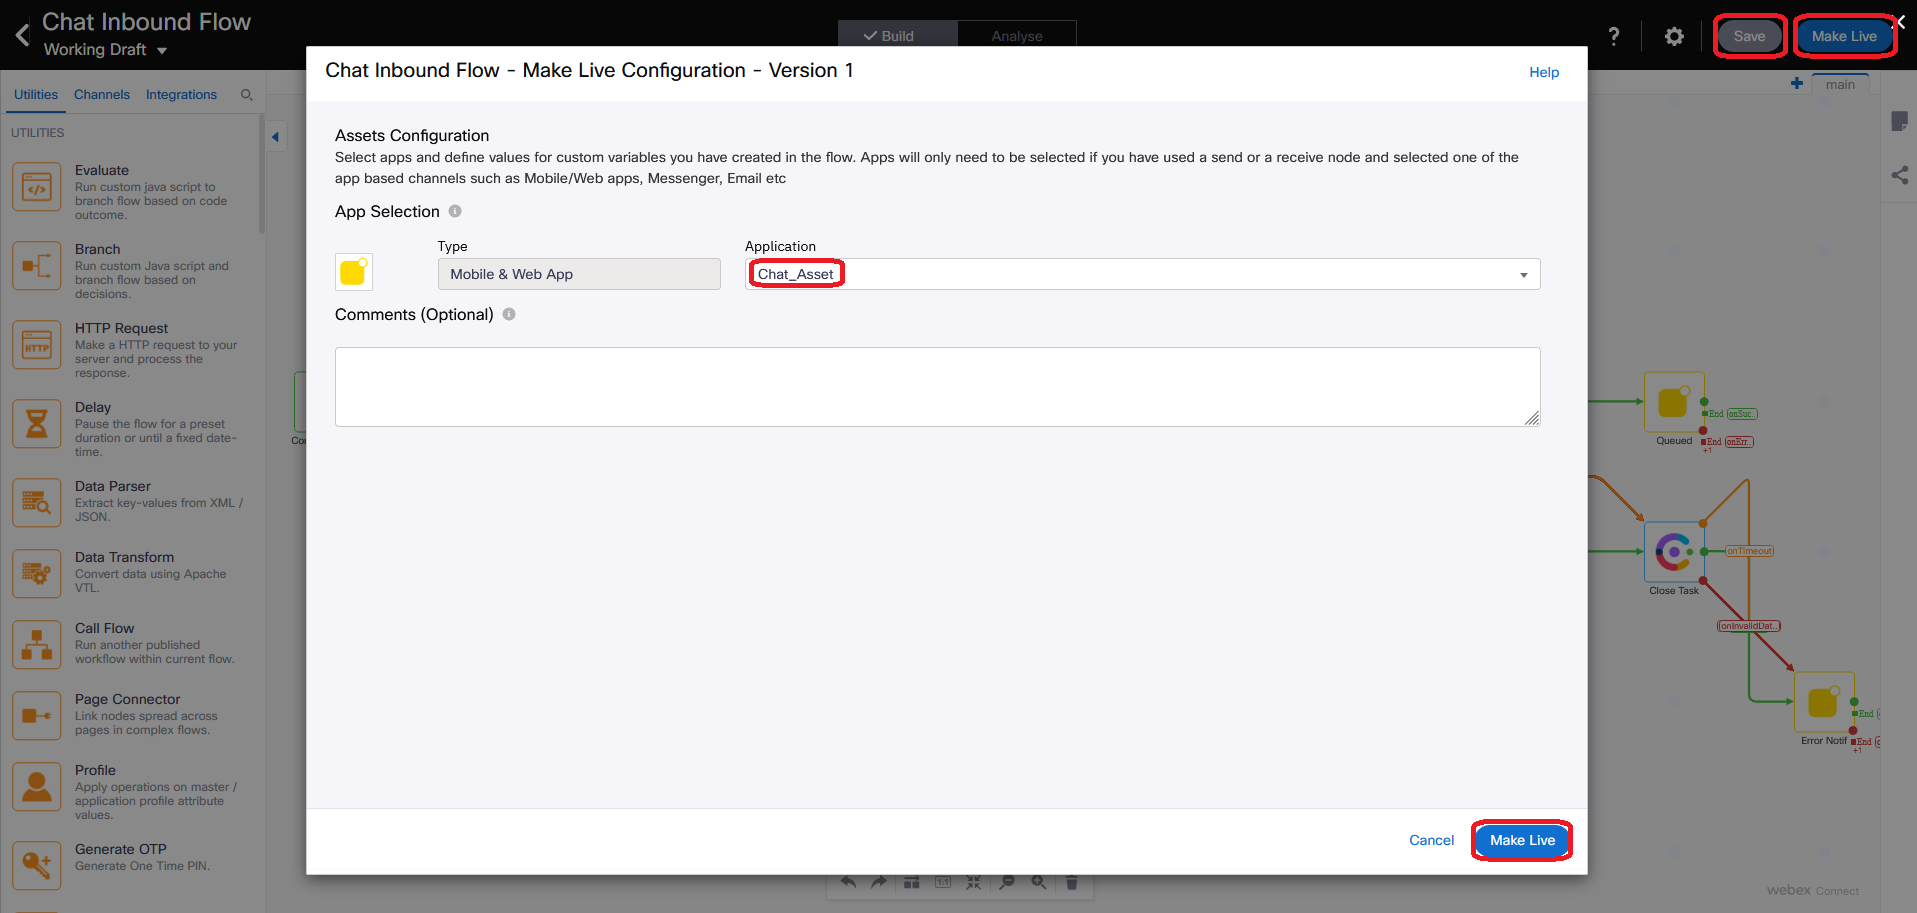
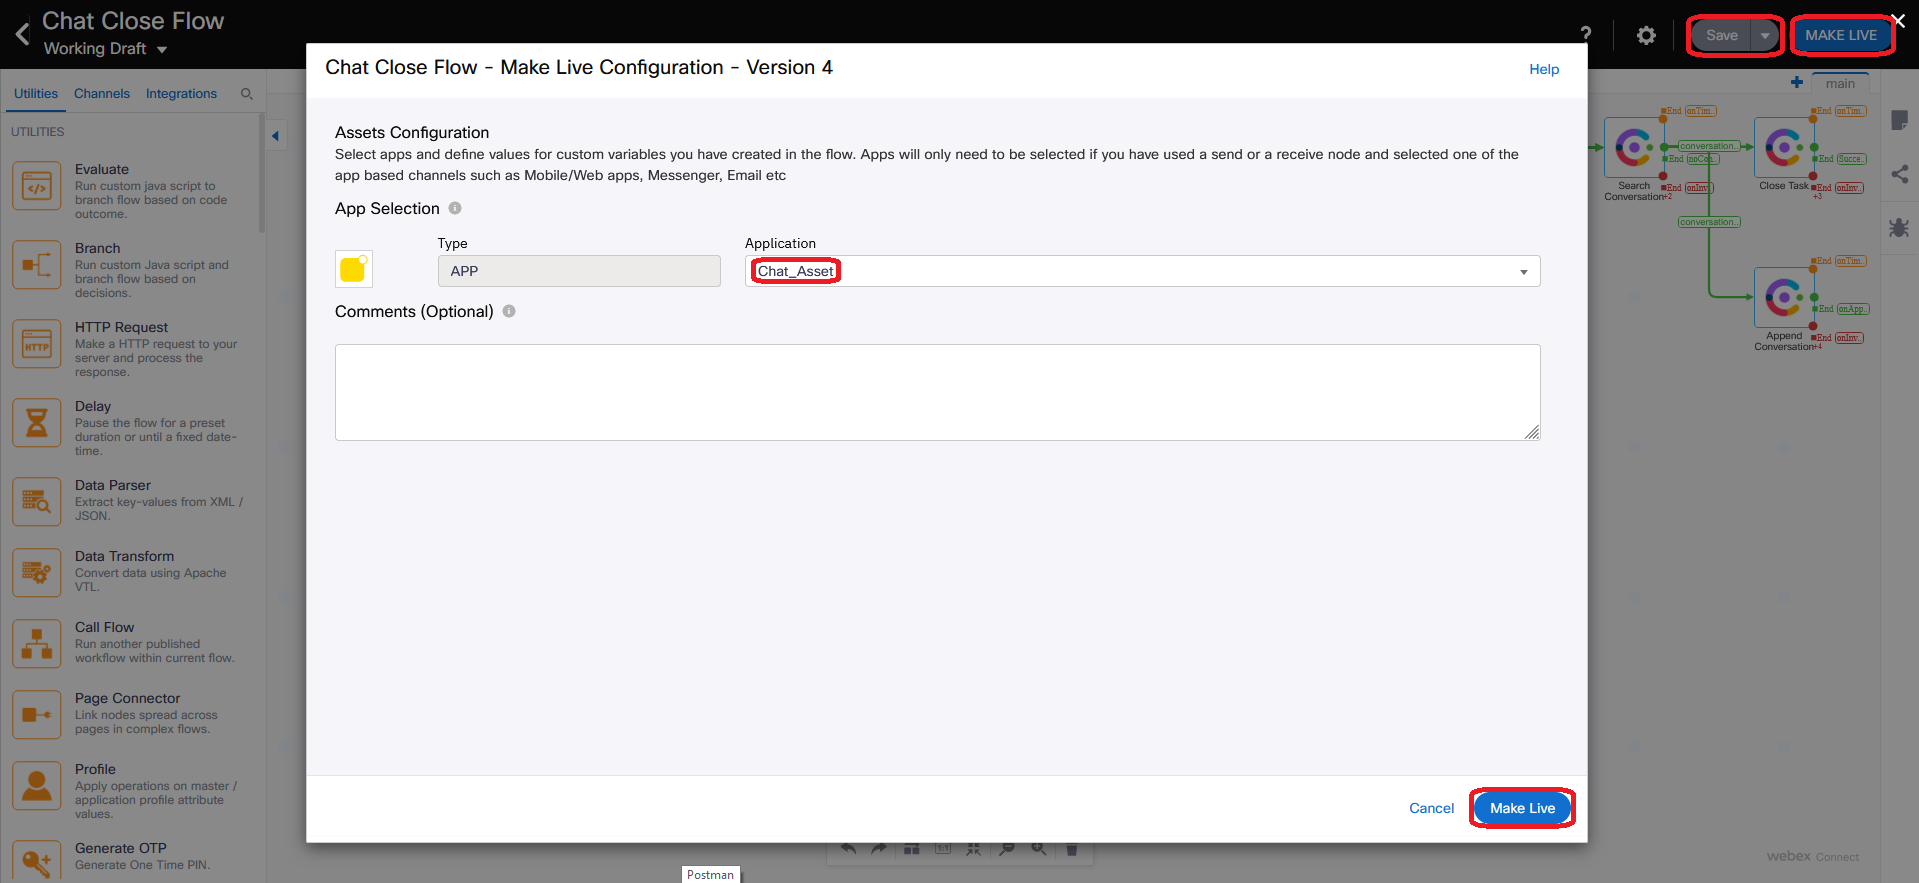
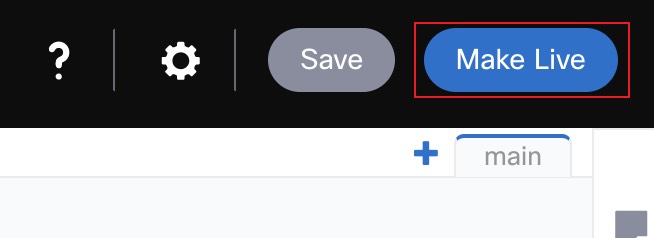
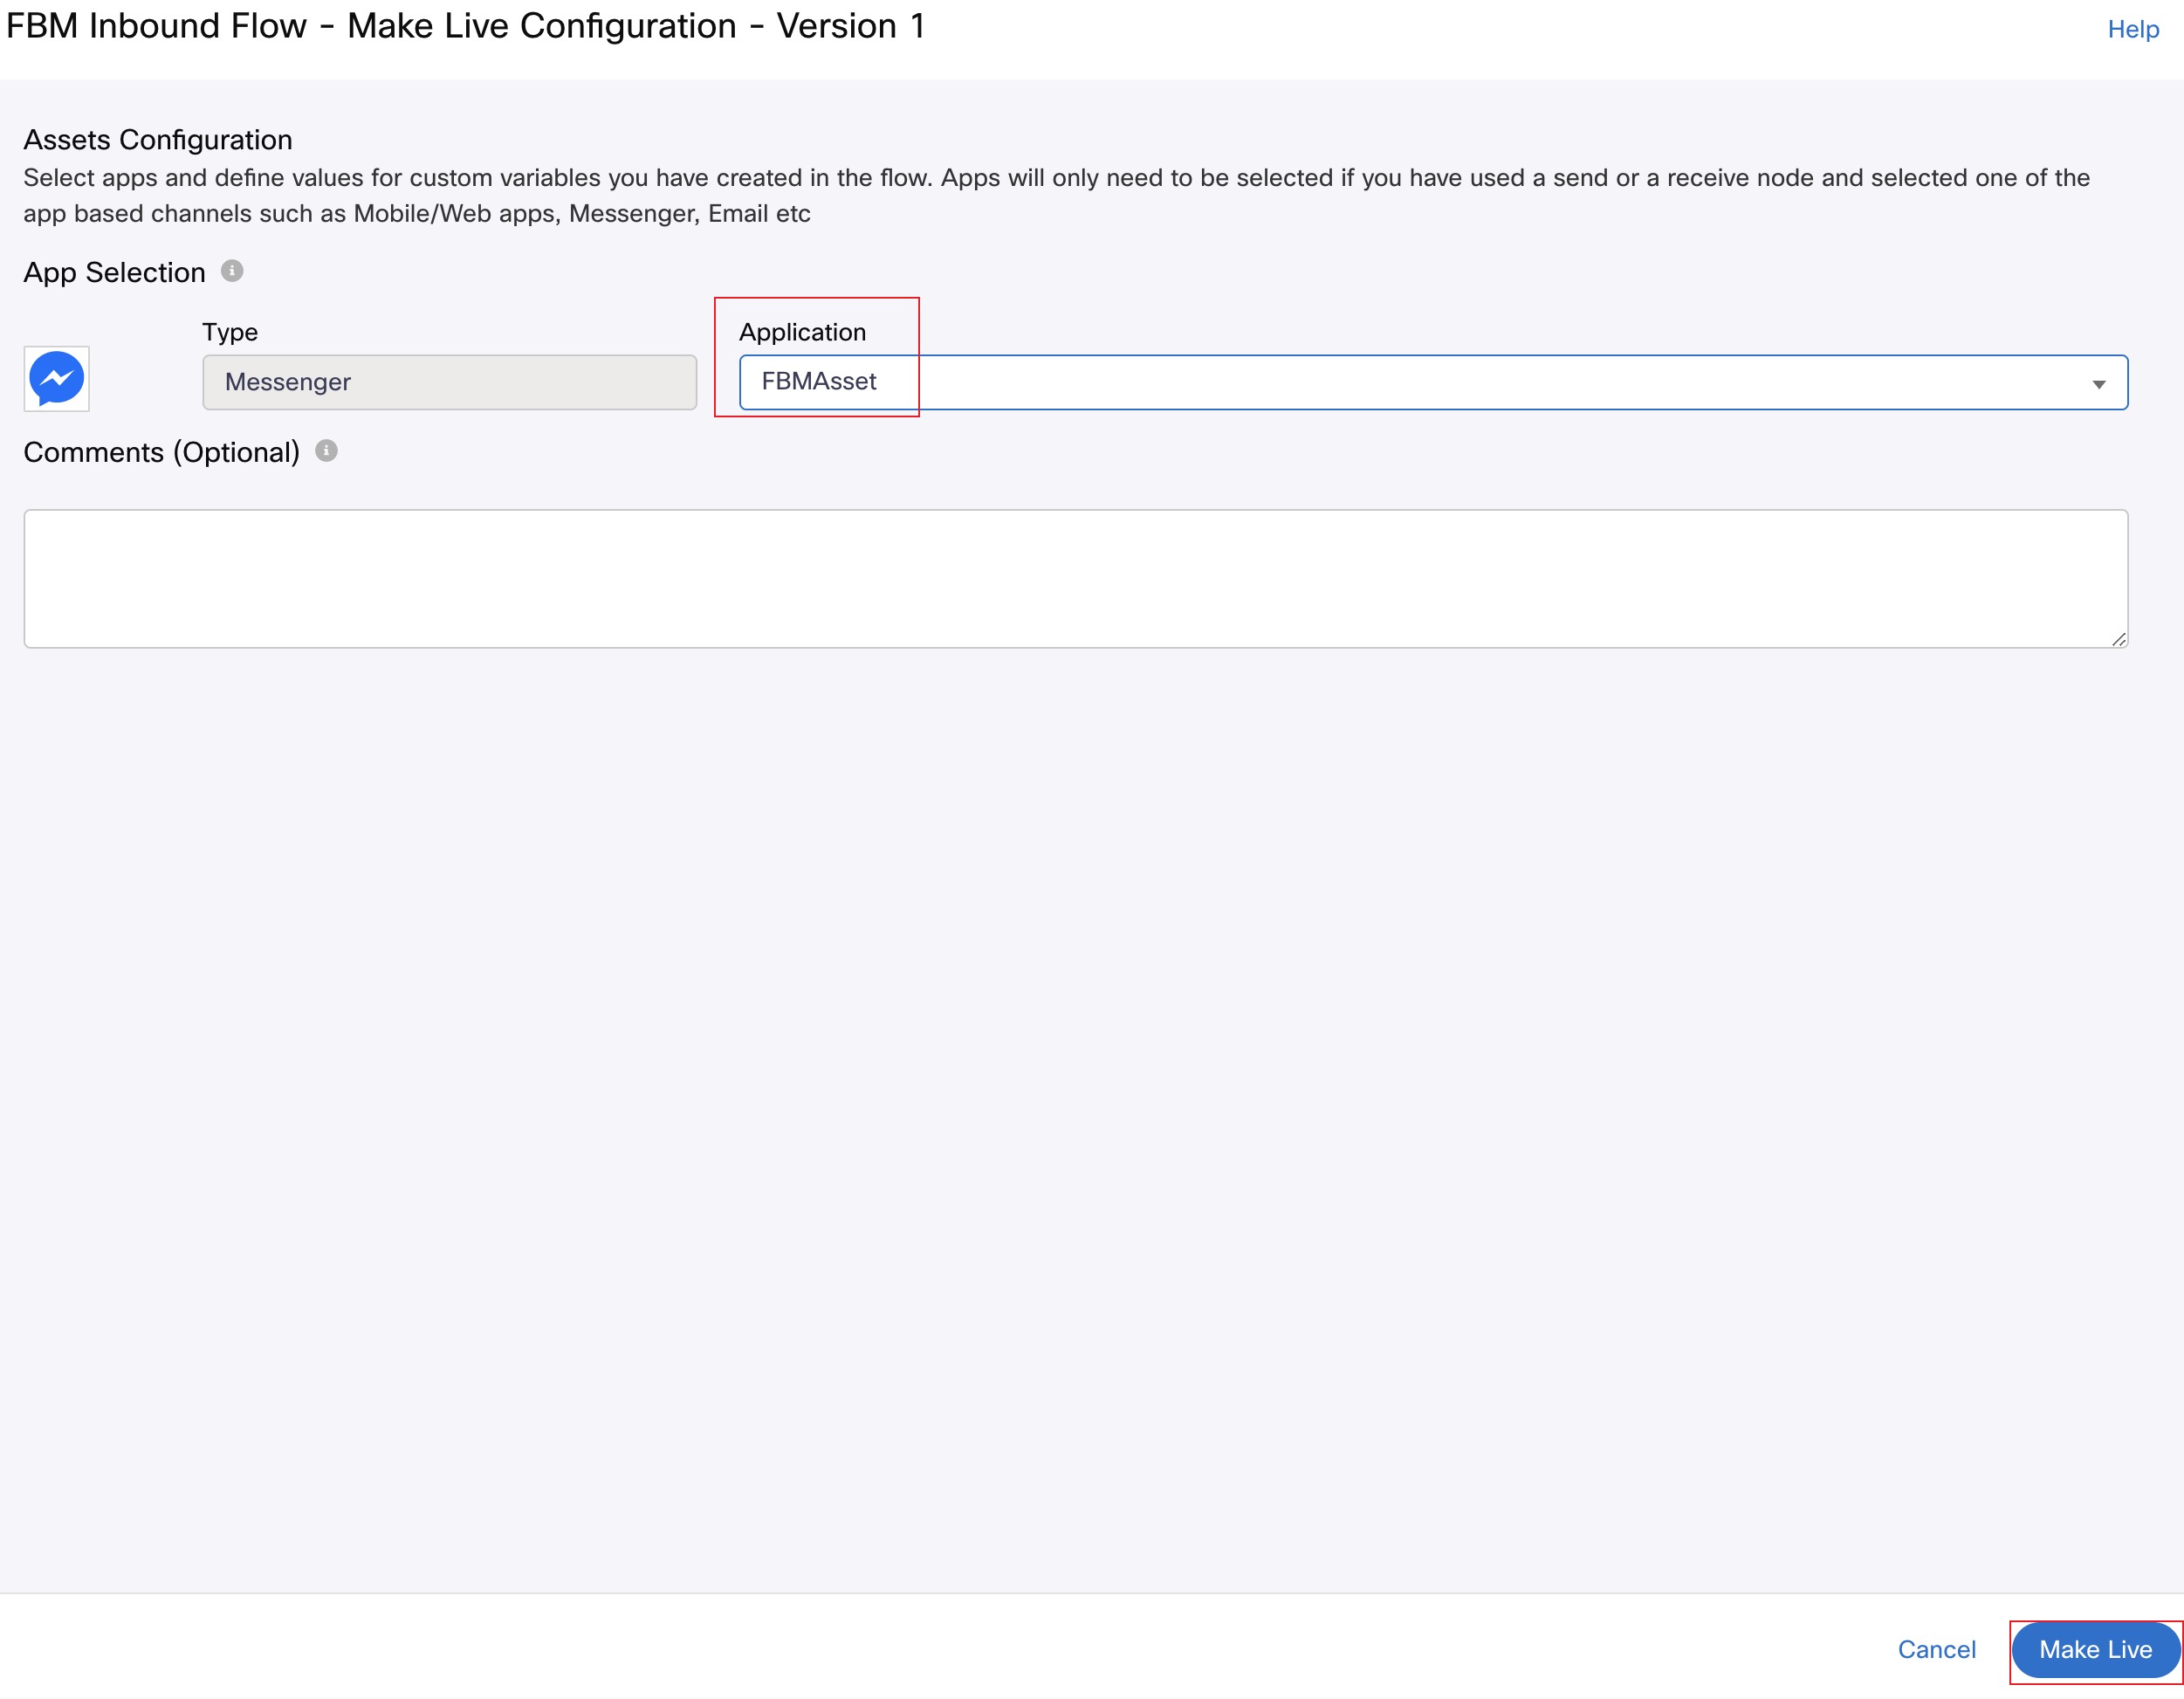
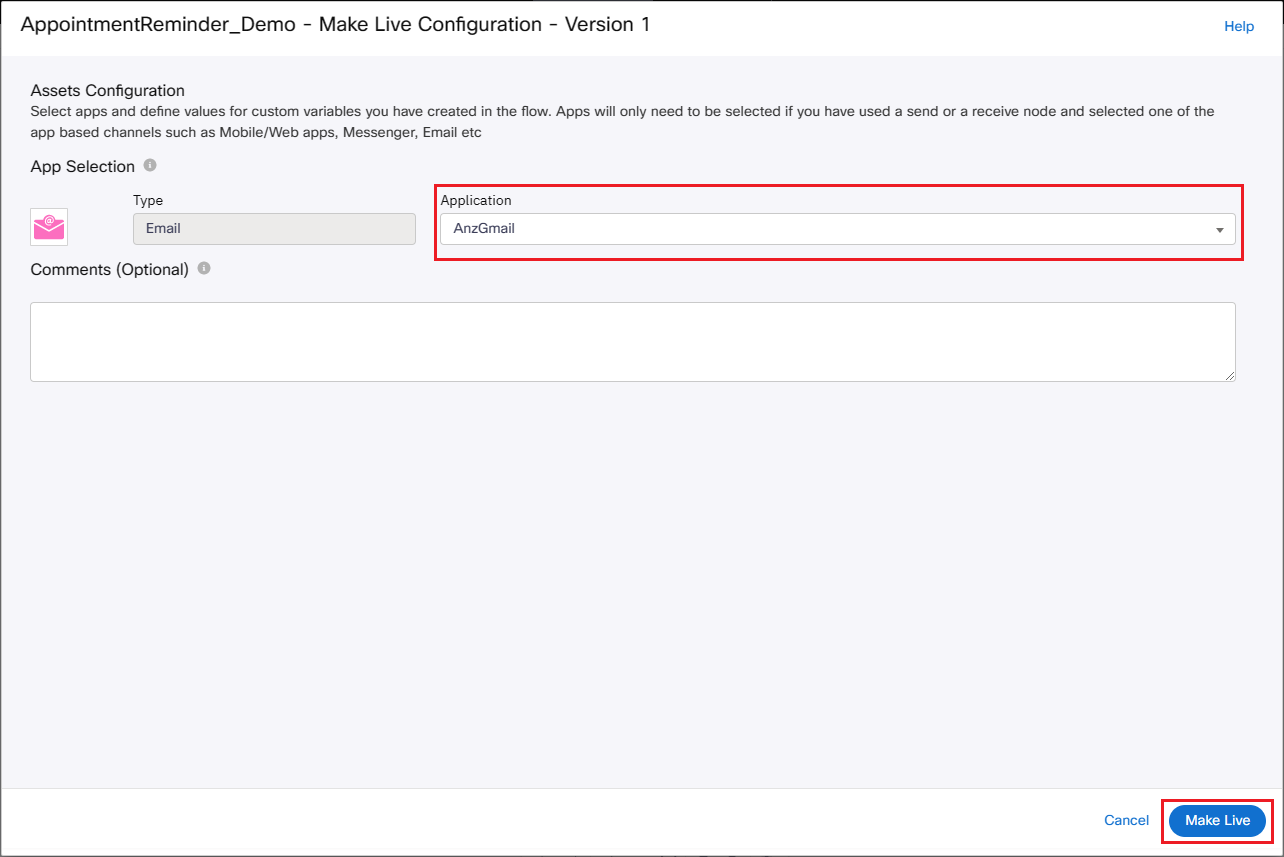
Make Live → select Application/Asset → Make Live
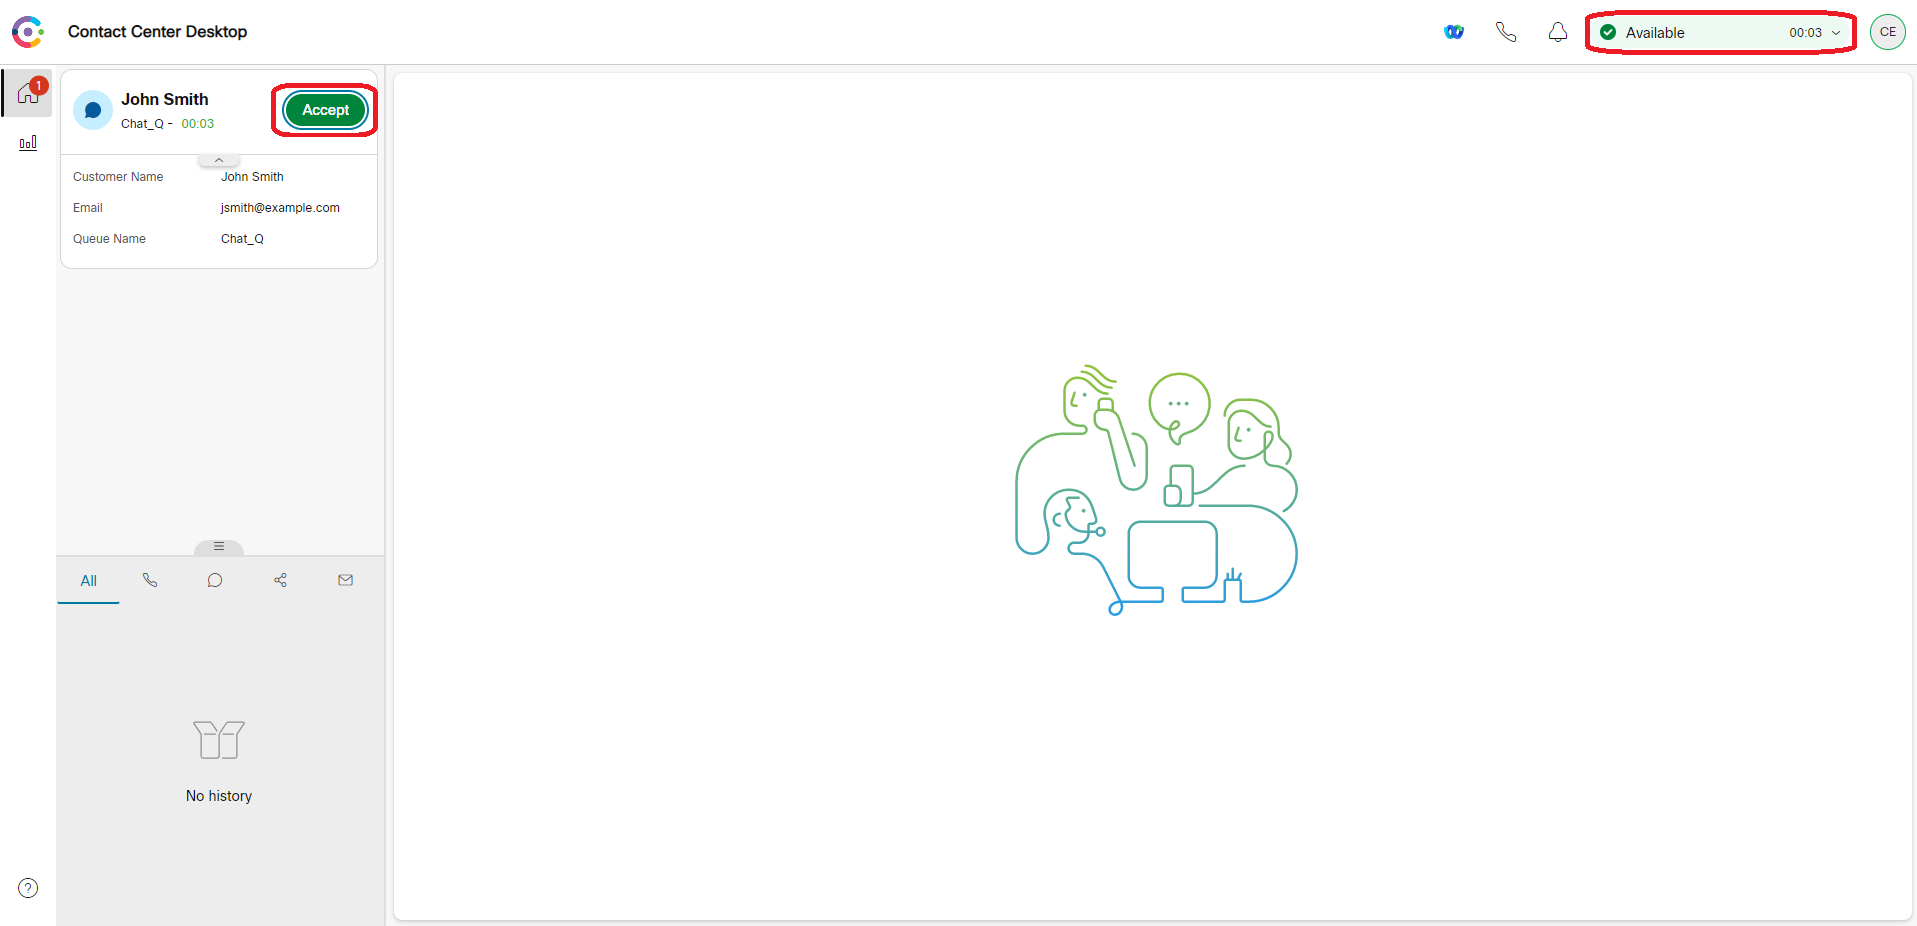
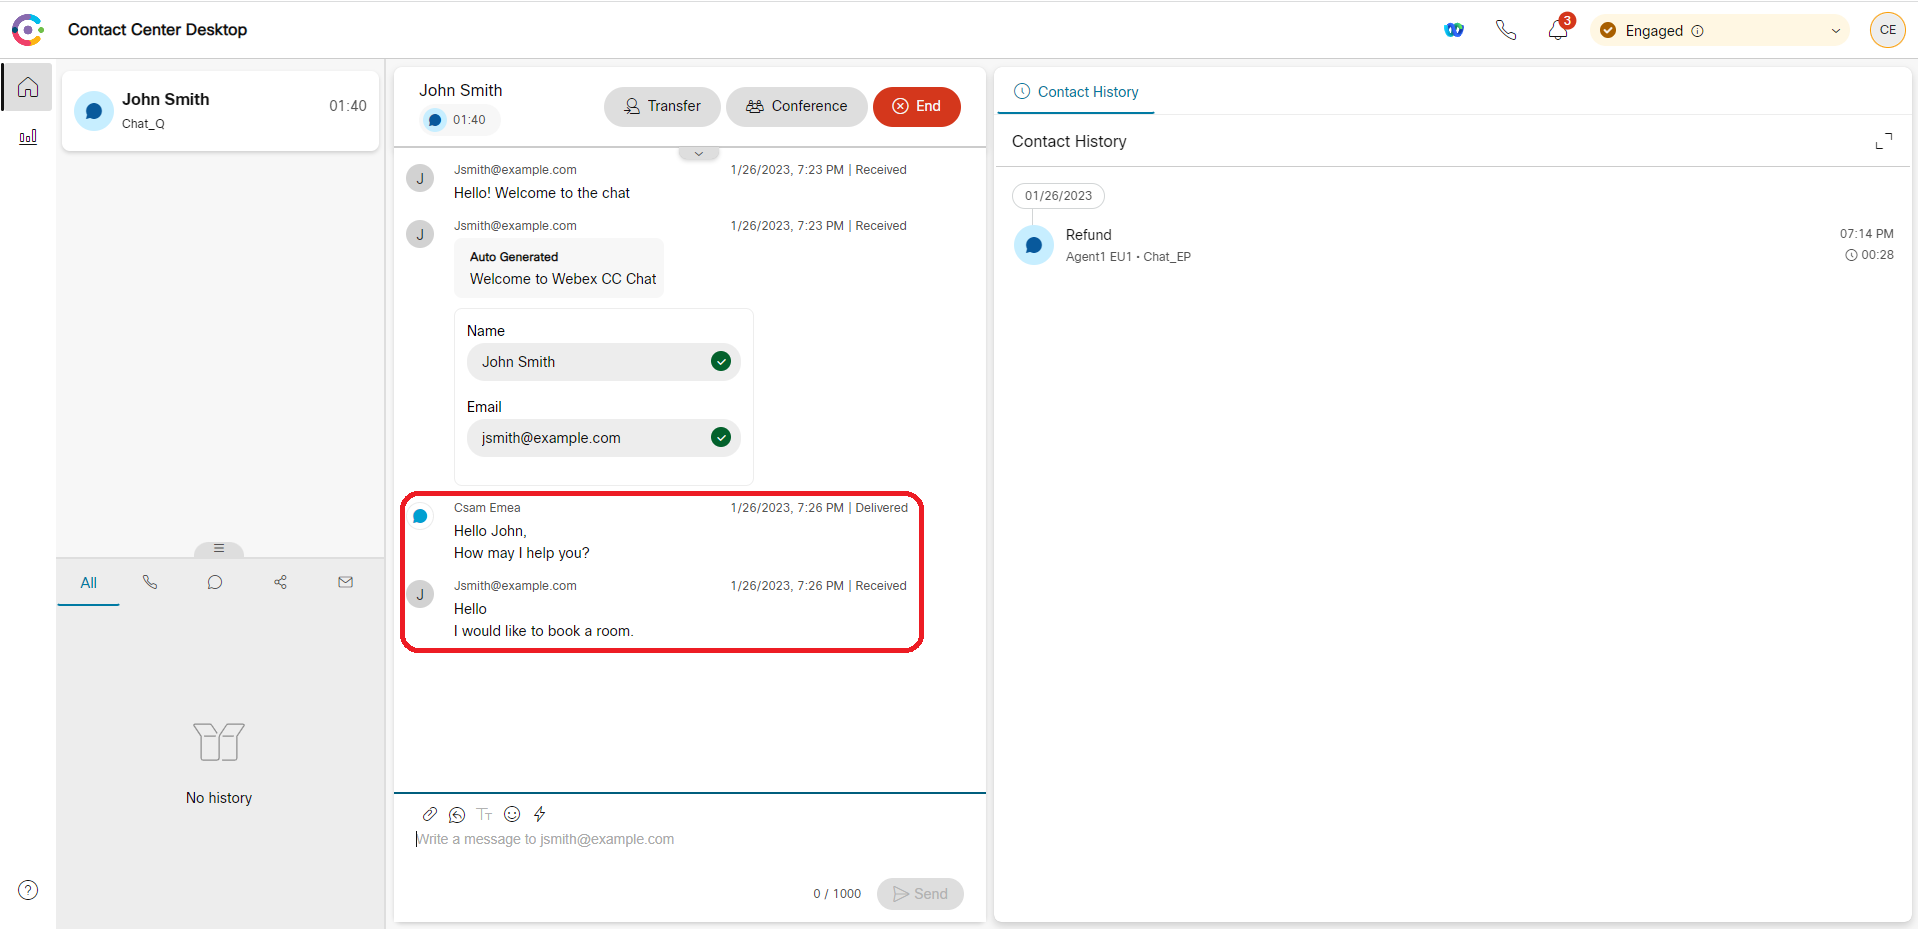
5. Verification: Send an Email and accept the task
Send email from personal account to the configured support address
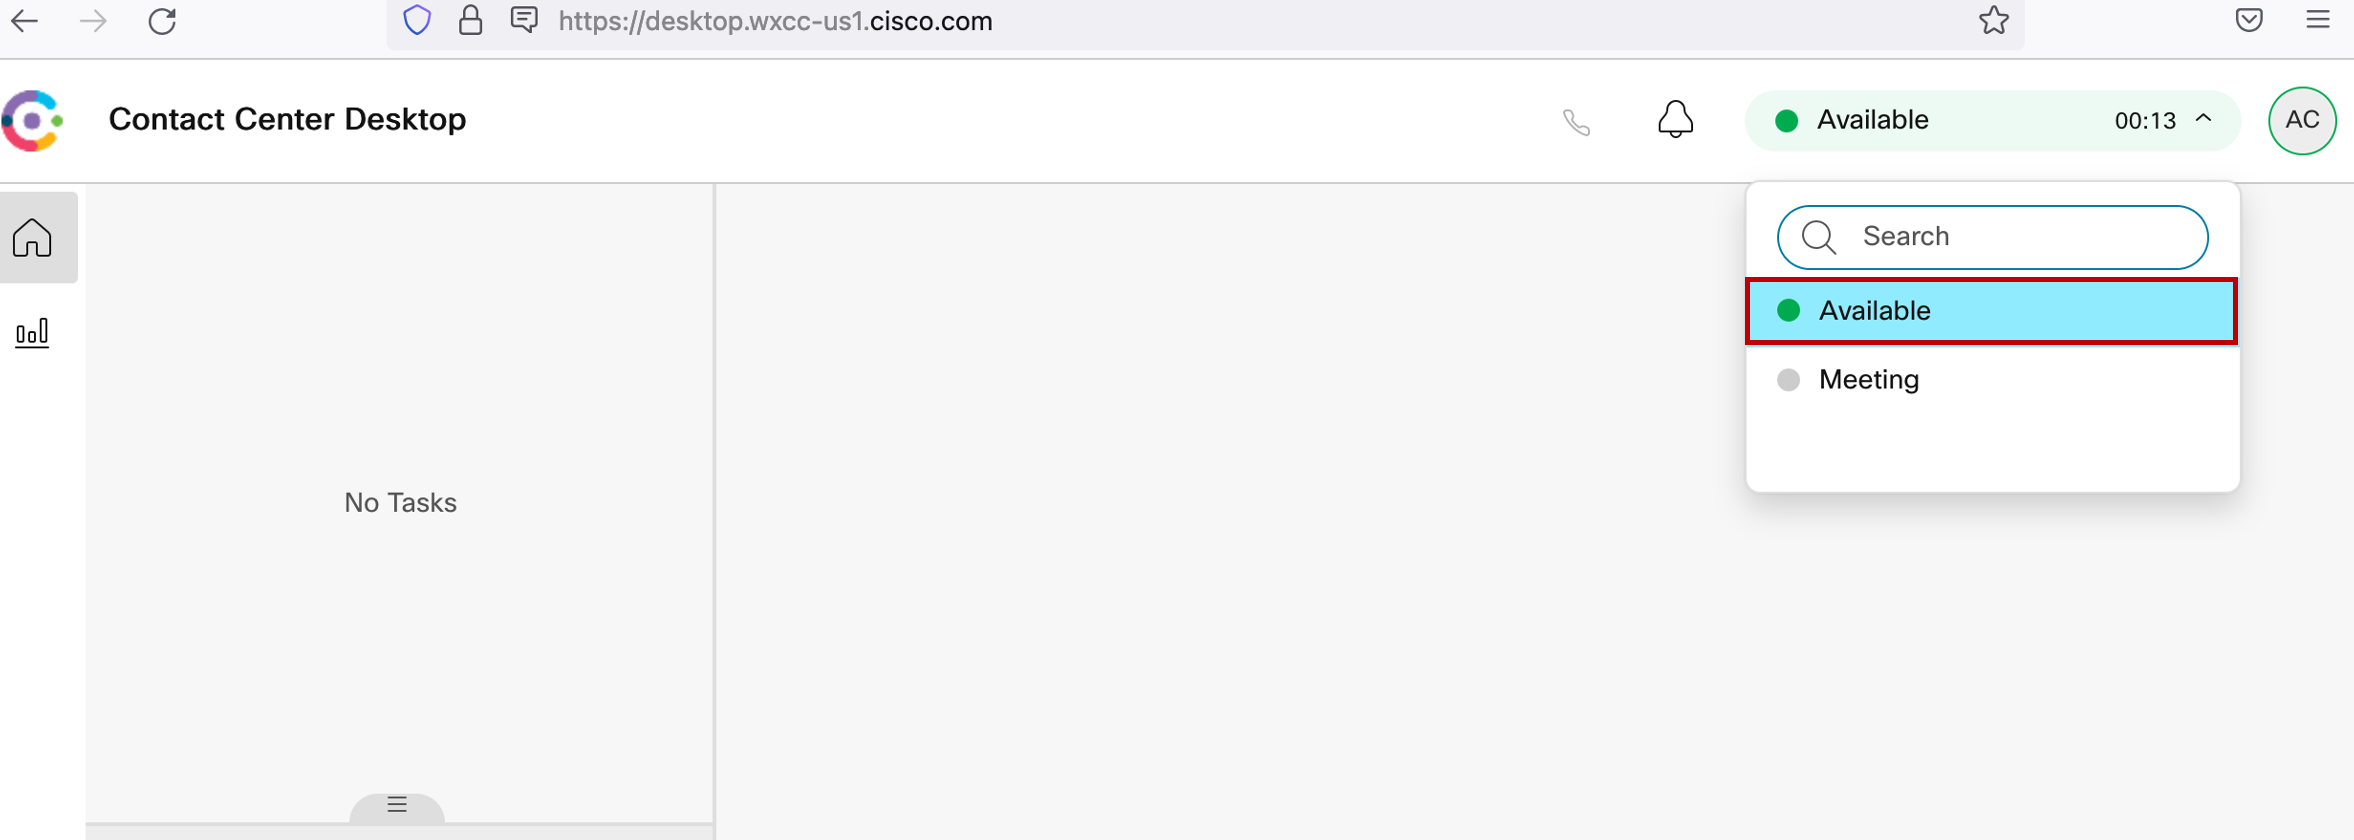
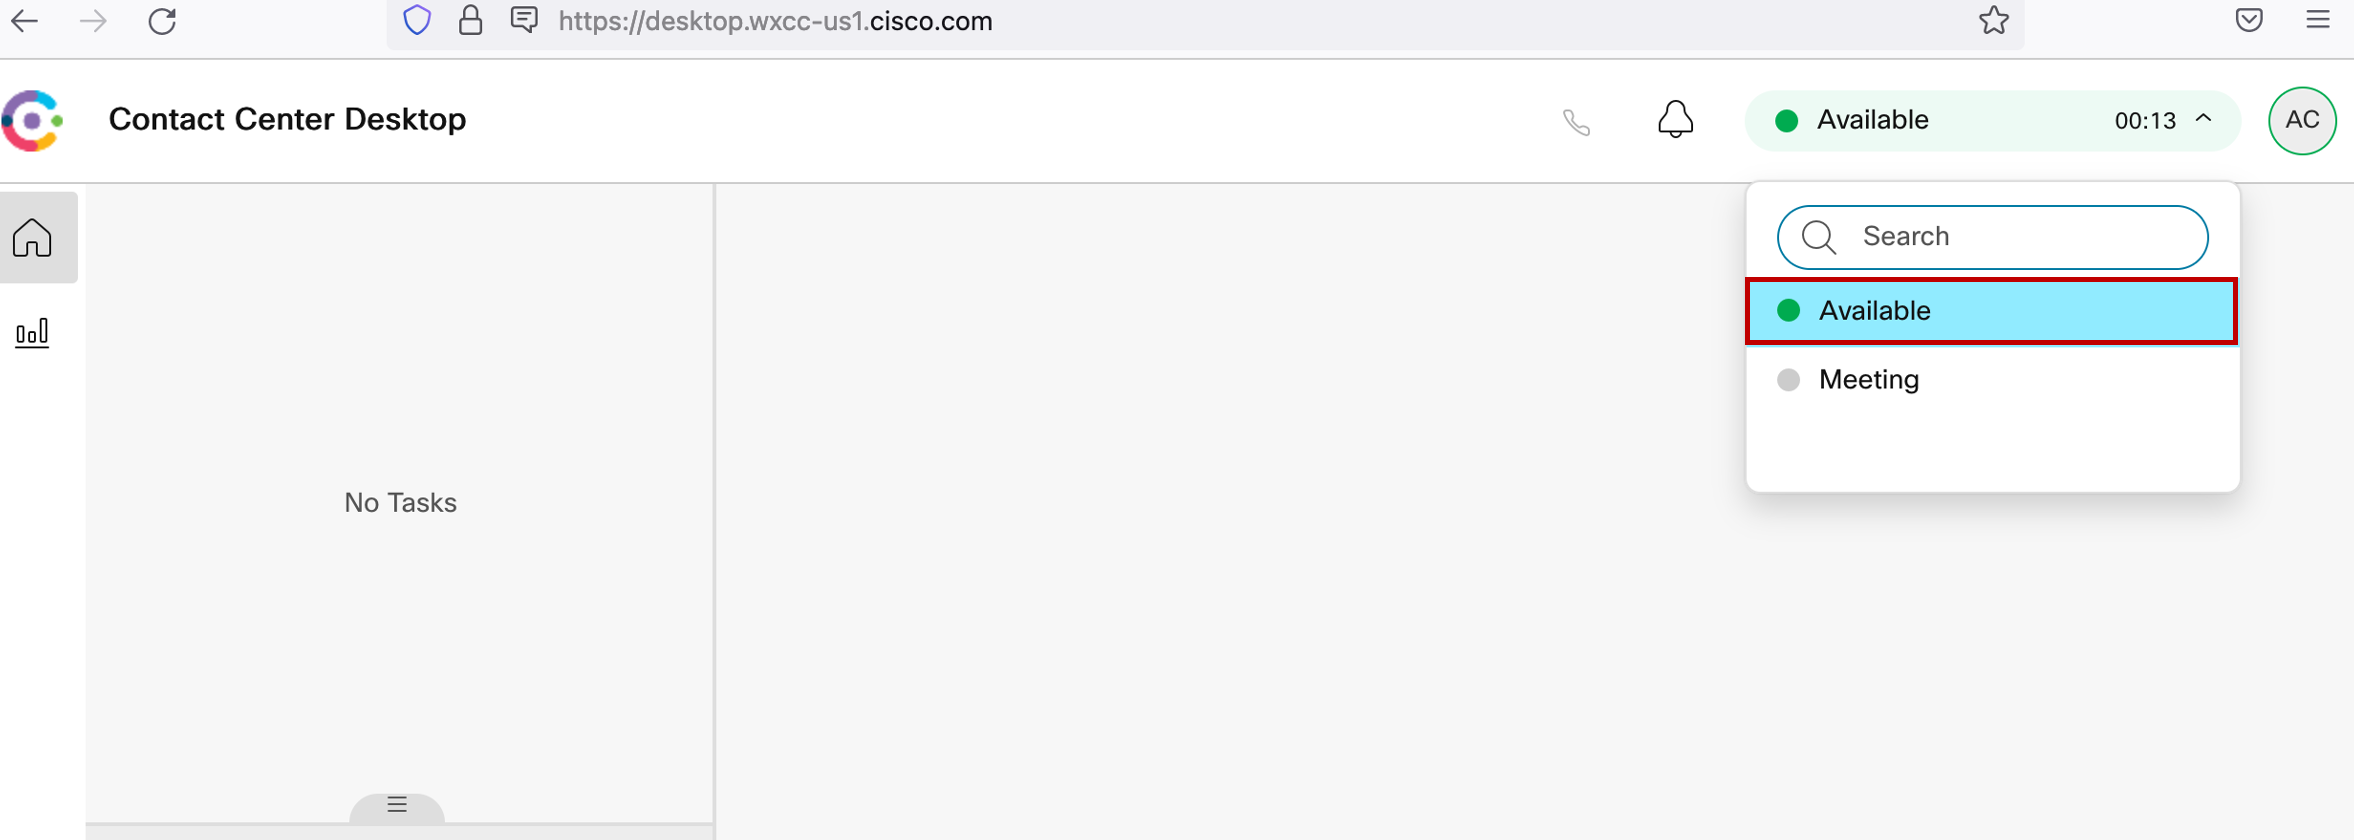
Agent Desktop → make agent Available
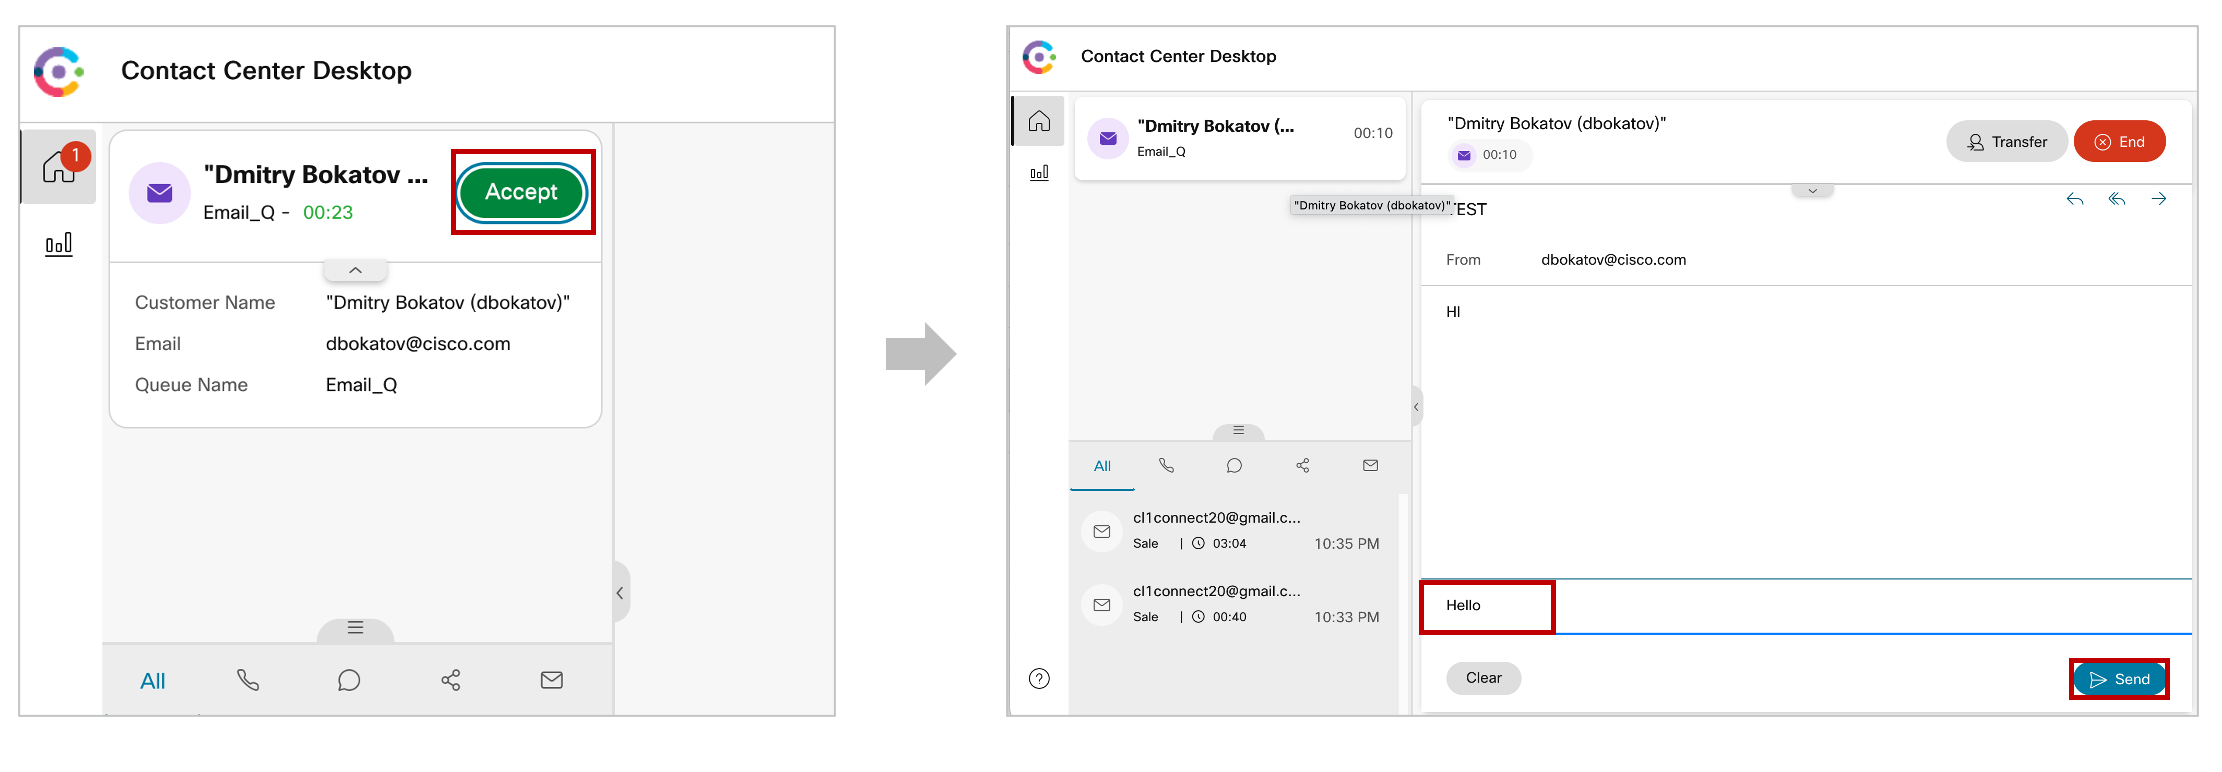
Accept → Reply → Send
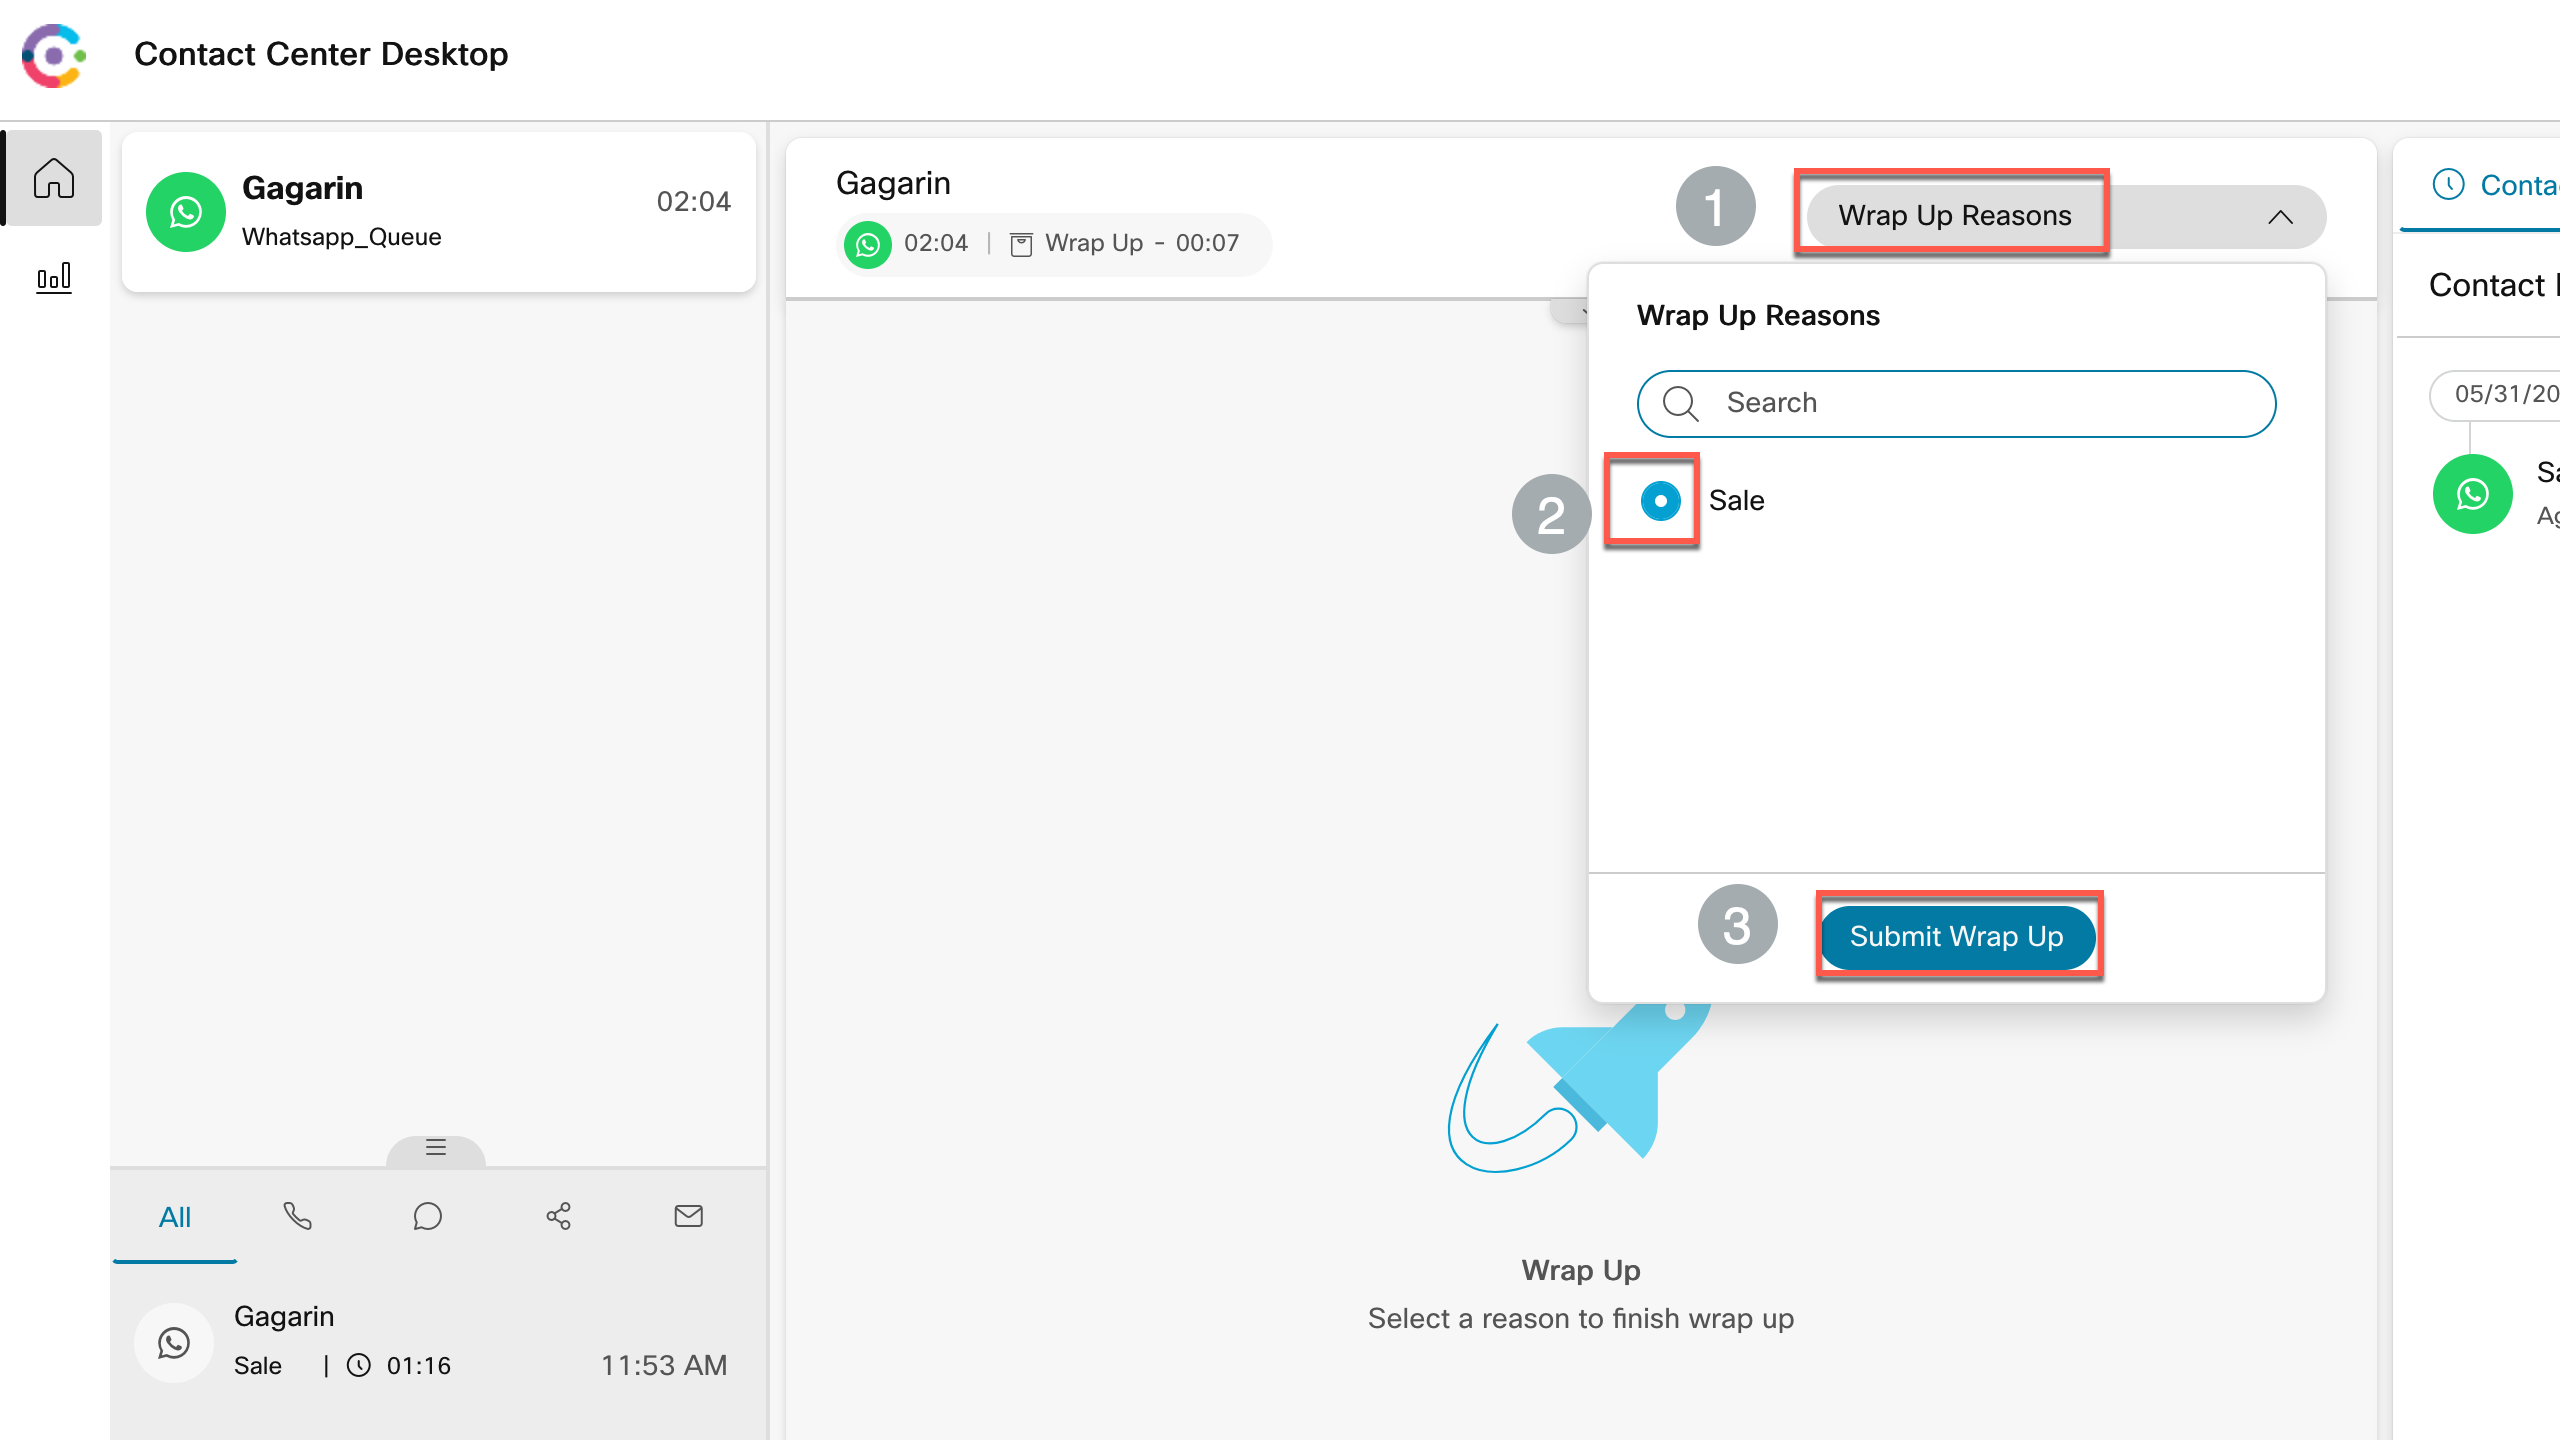
Add wrap up and close.
Lab 12.8 — Chat Channel Configuration
1. [Optional] Create a service
Skip if My First Service already exists.
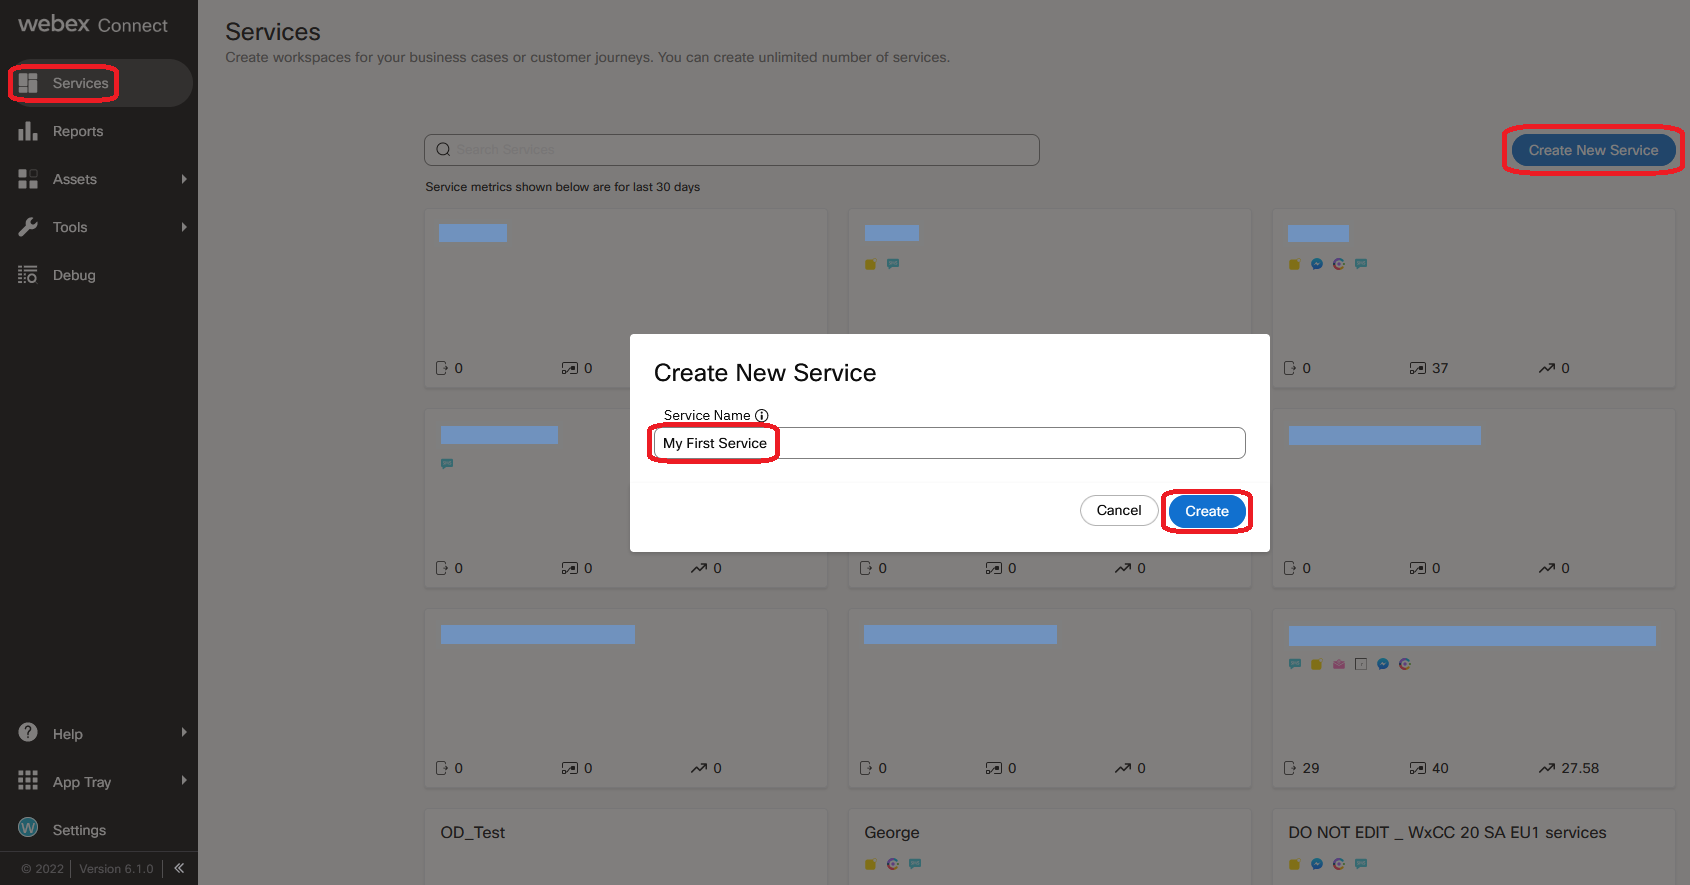
Connect Portal → Services → Create New Service → name My First Service → Create
2. Configure and Register Chat Asset
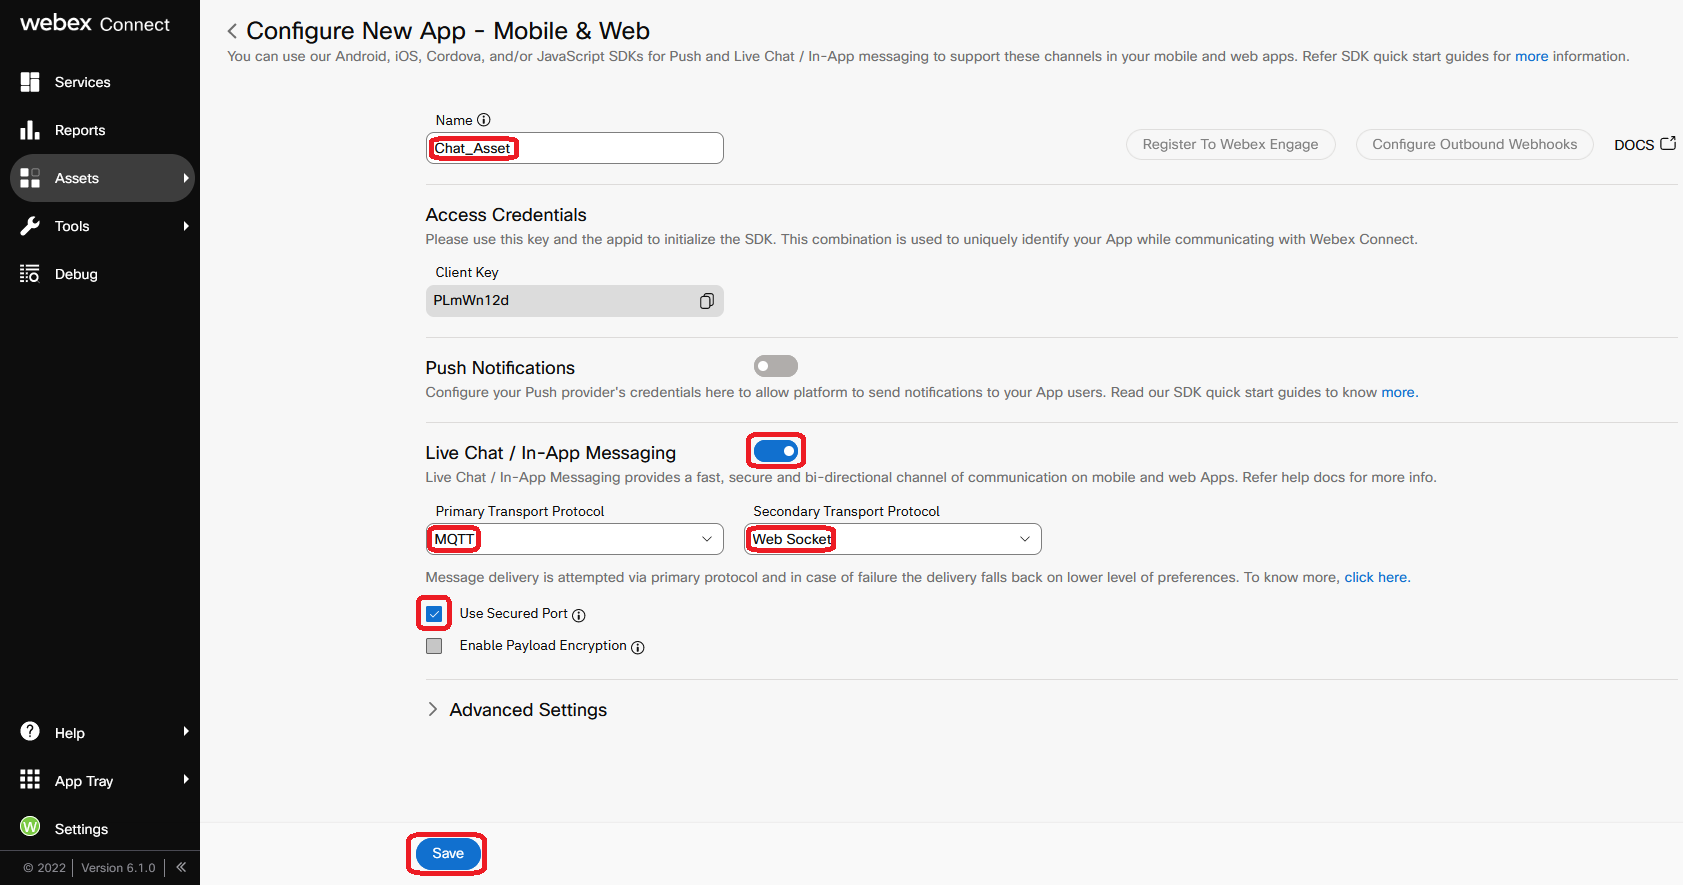
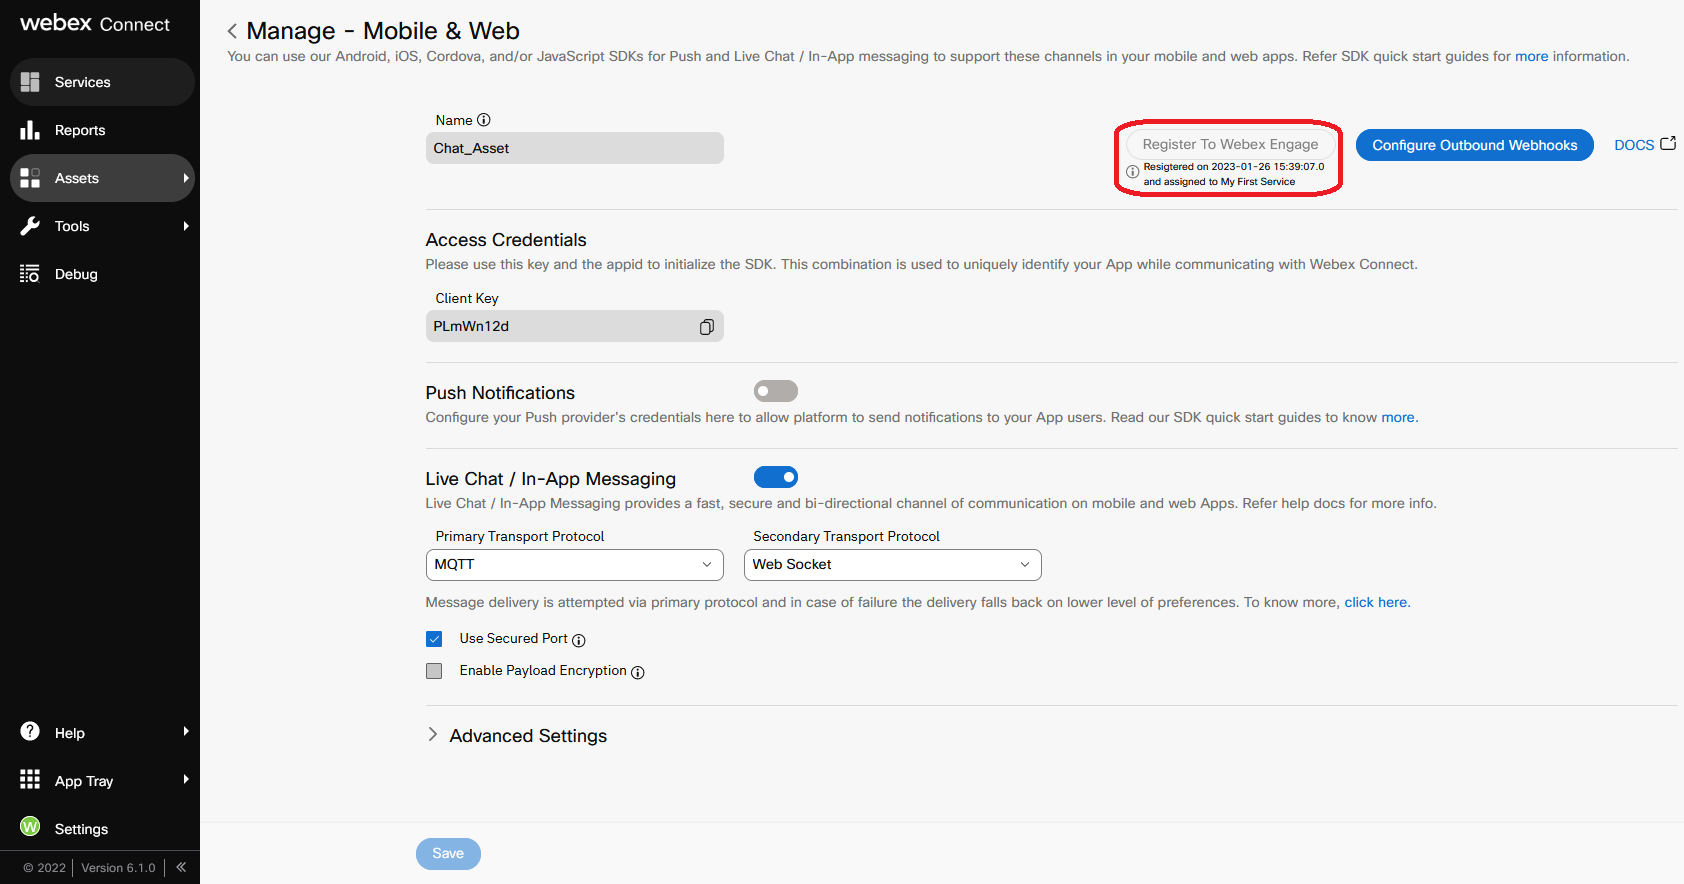
Connect → Assets → Apps → Configure New App → Mobile / Web
Name Chat_Asset
Enable Live Chat / In-App Messaging → Primary Transport MQTT, Secondary Web Socket, tick Use Secured Port → Save
If your request cannot be processed, press Save again.
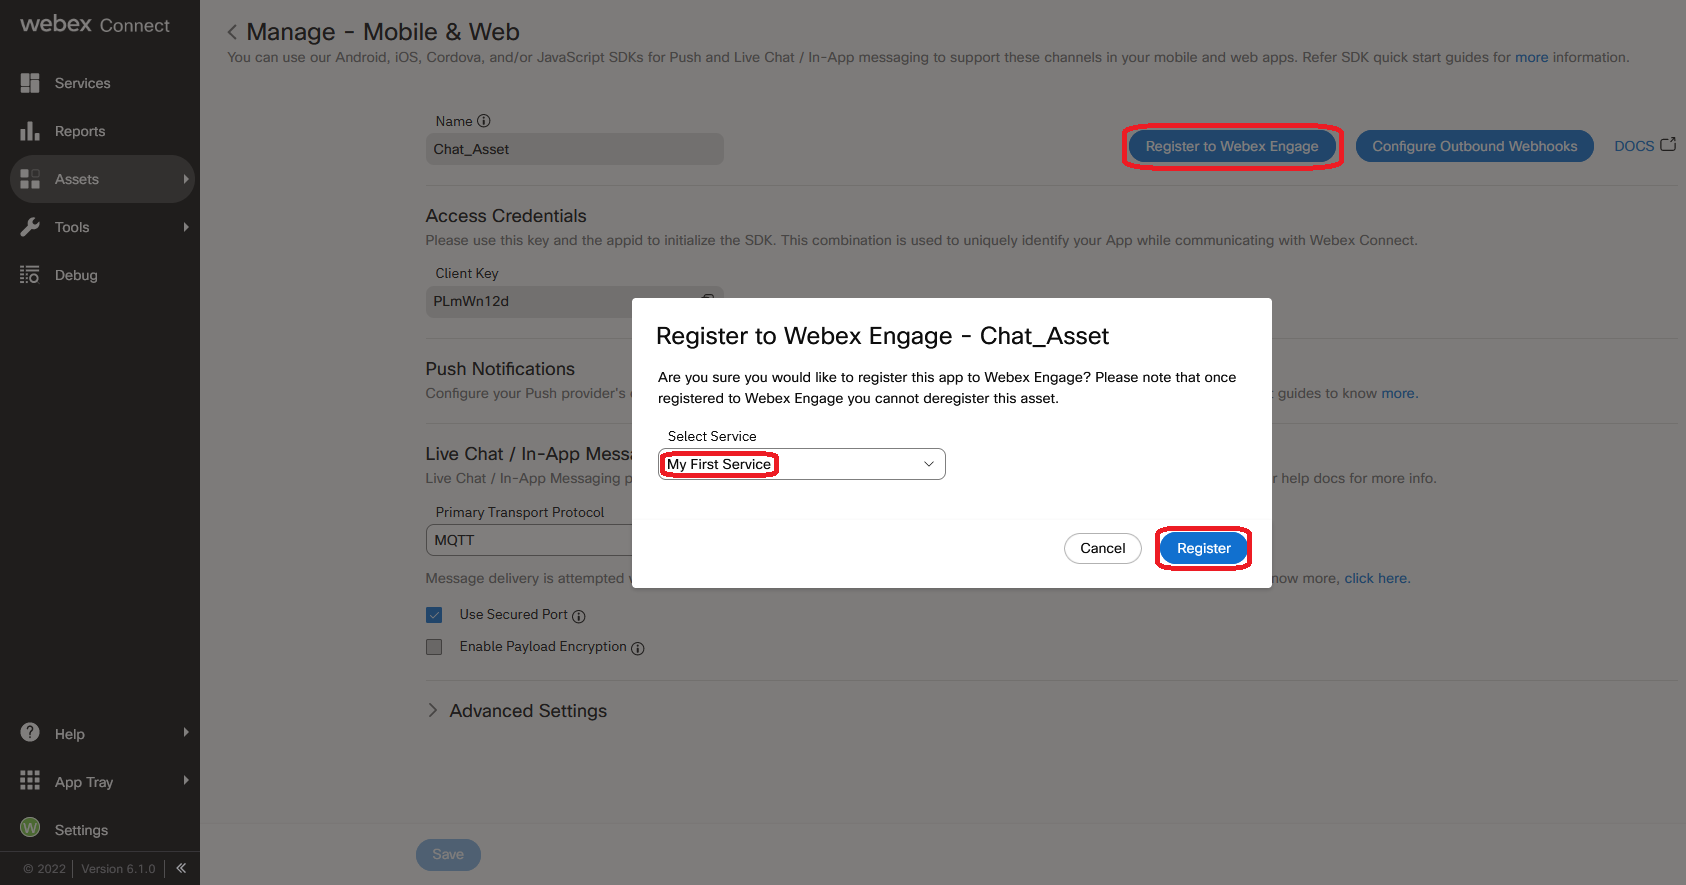
Register To Webex Engage → My First Service → Register
Verify registration
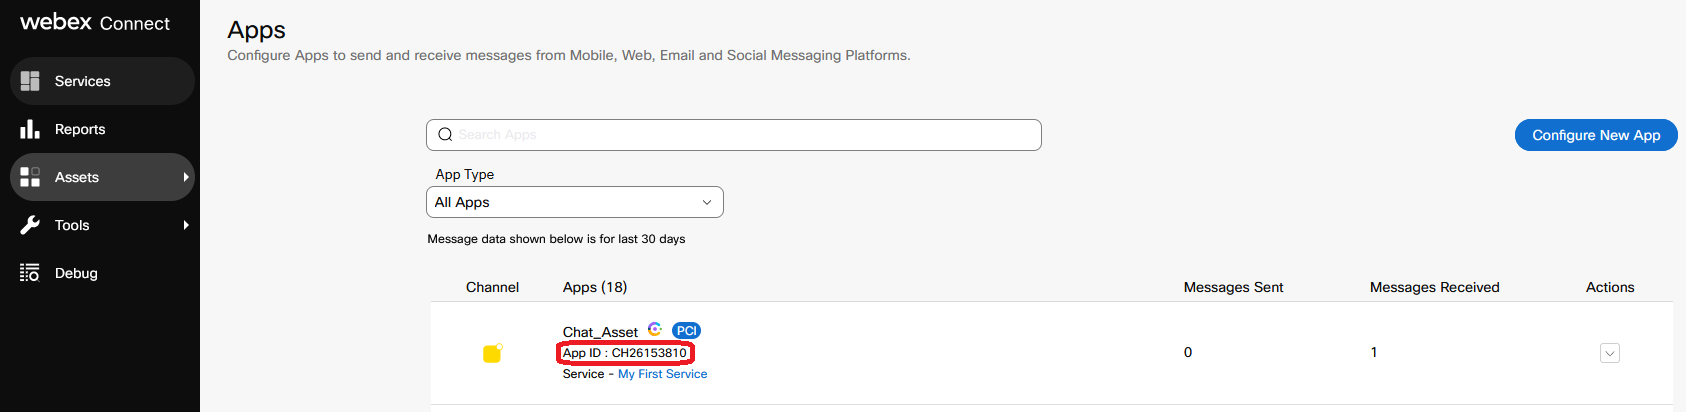
Copy App ID from Chat_Asset for later
3. Create Entry Point for Chat
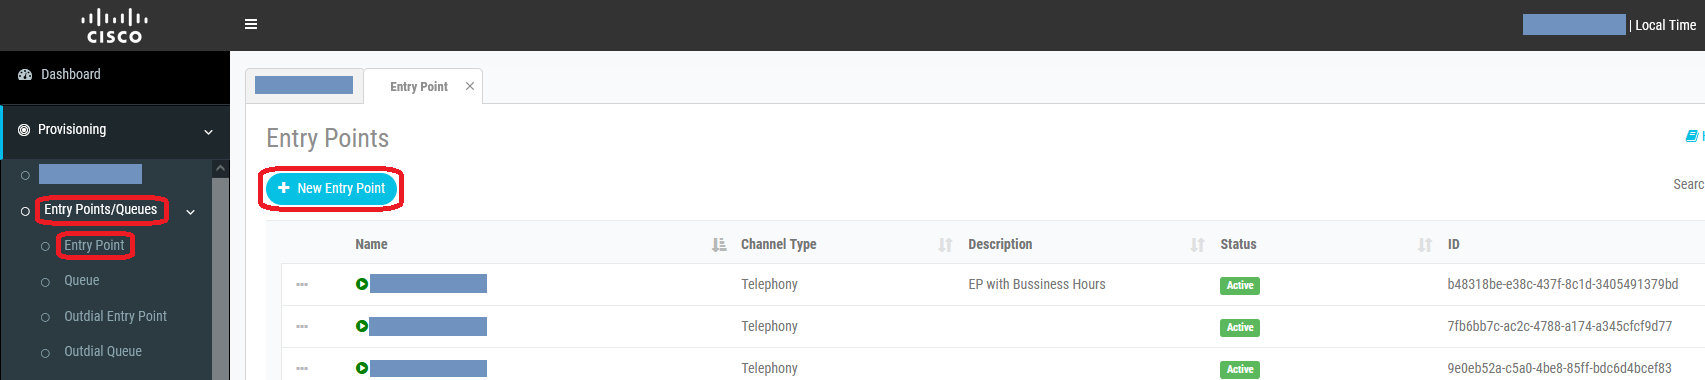
Management Portal → Provisioning → Entry Point/Queues → Entry Point → New Entry Point
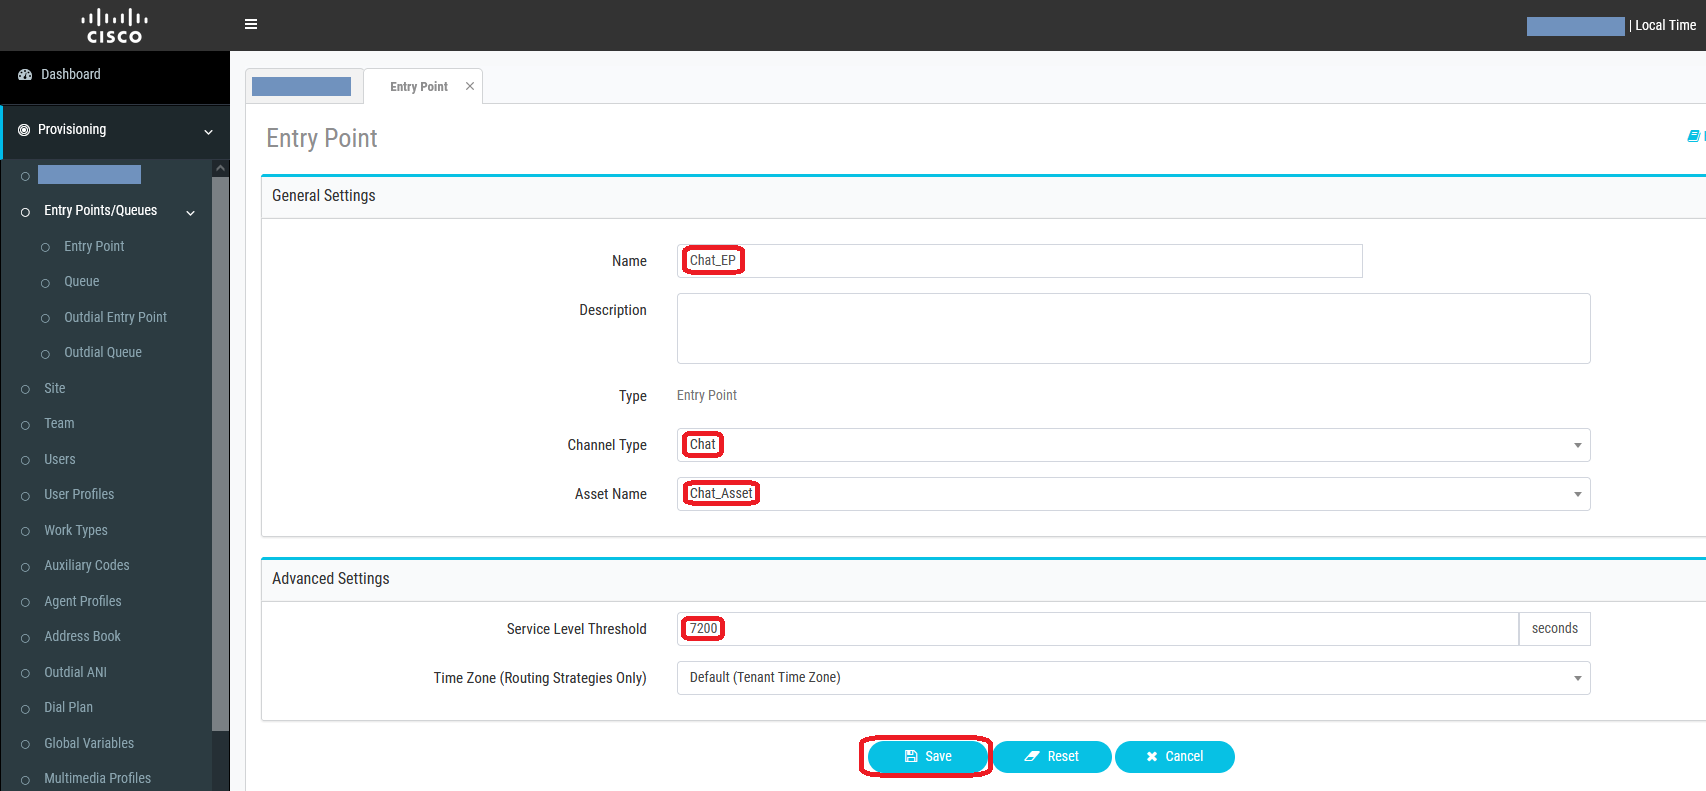
Name Chat_EP, Channel Type Chat, Asset Name Chat_Asset, Service Level Threshold 7200 seconds → Save
4. Create Queue for Chat
Provisioning → Entry Point/Queues → Queue → New Queue
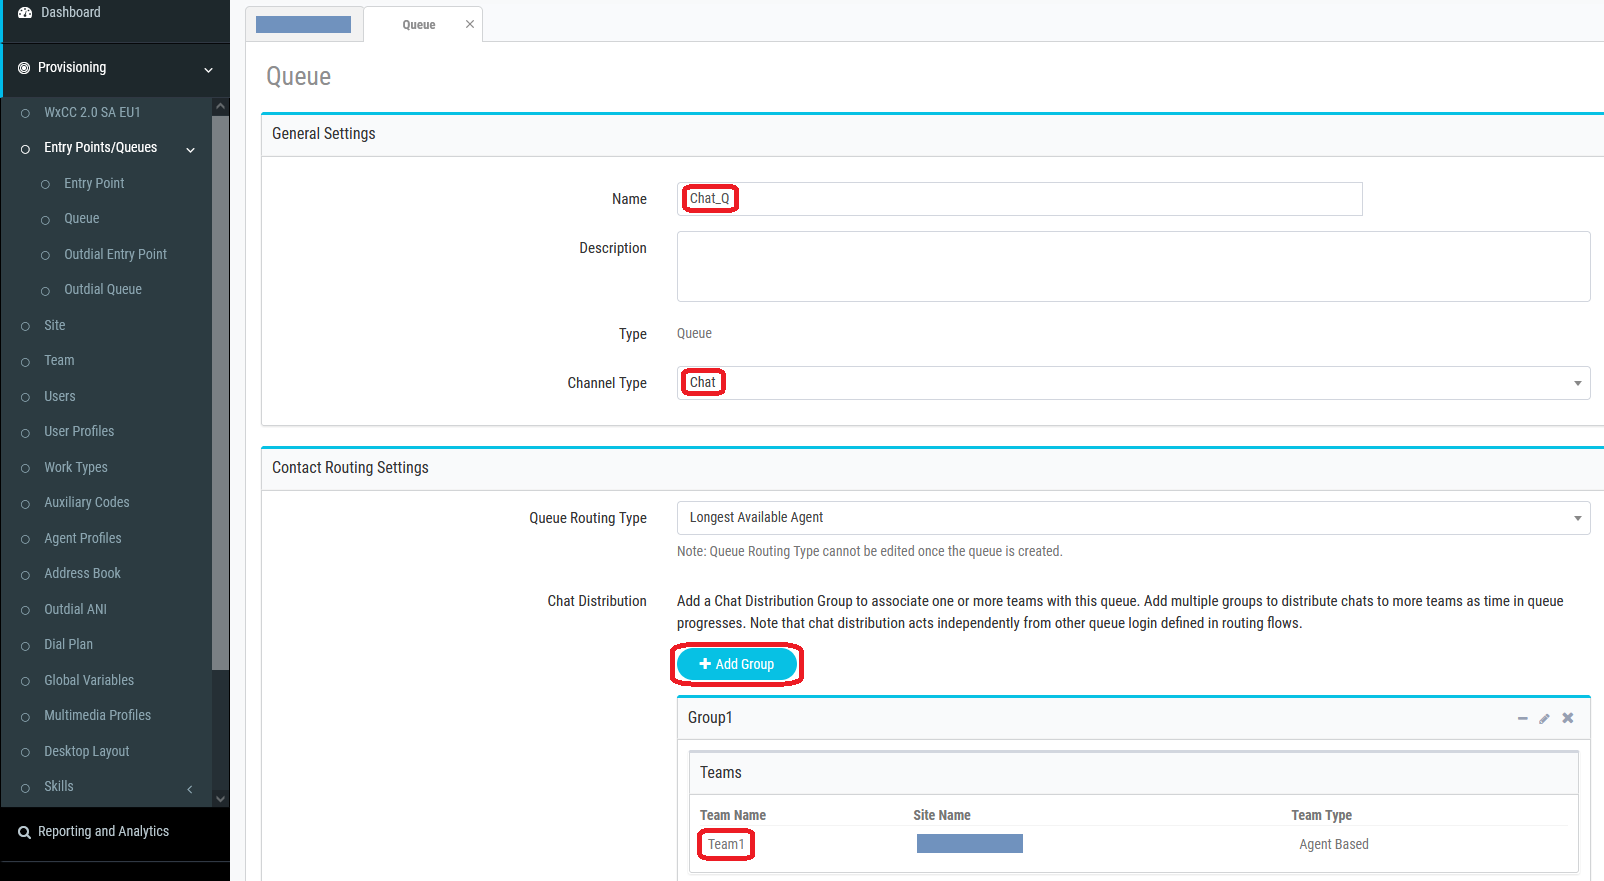
Name Chat_Q, Channel Type Chat, Queue Routing Type Longest Available Agent, Chat Distribution → Add Group → Team1
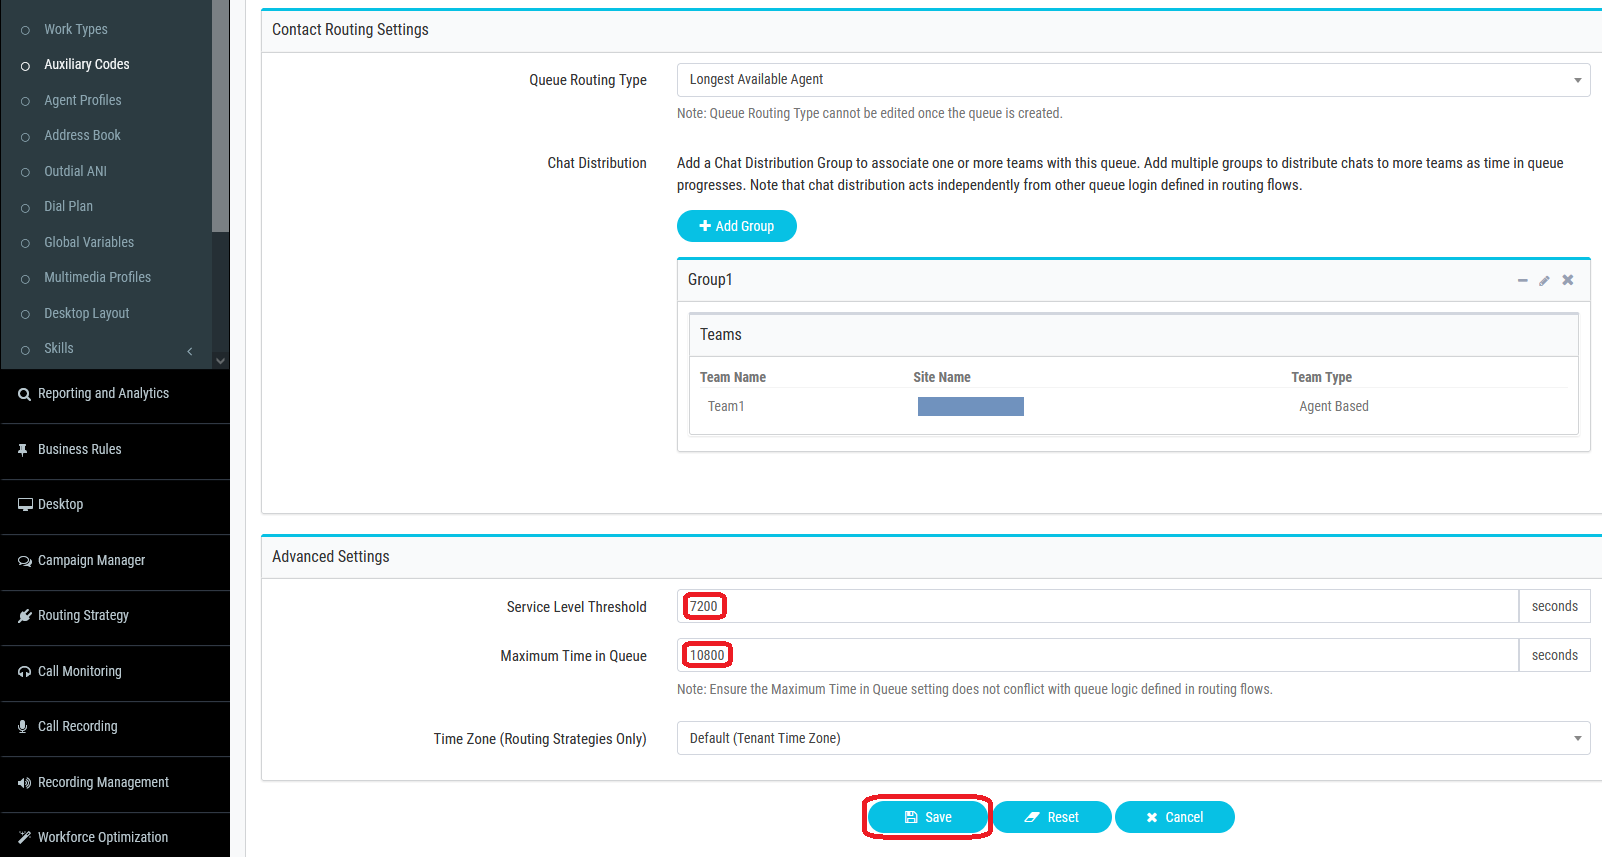
Service Level 7200 sec, Max Time 10800 sec → Save
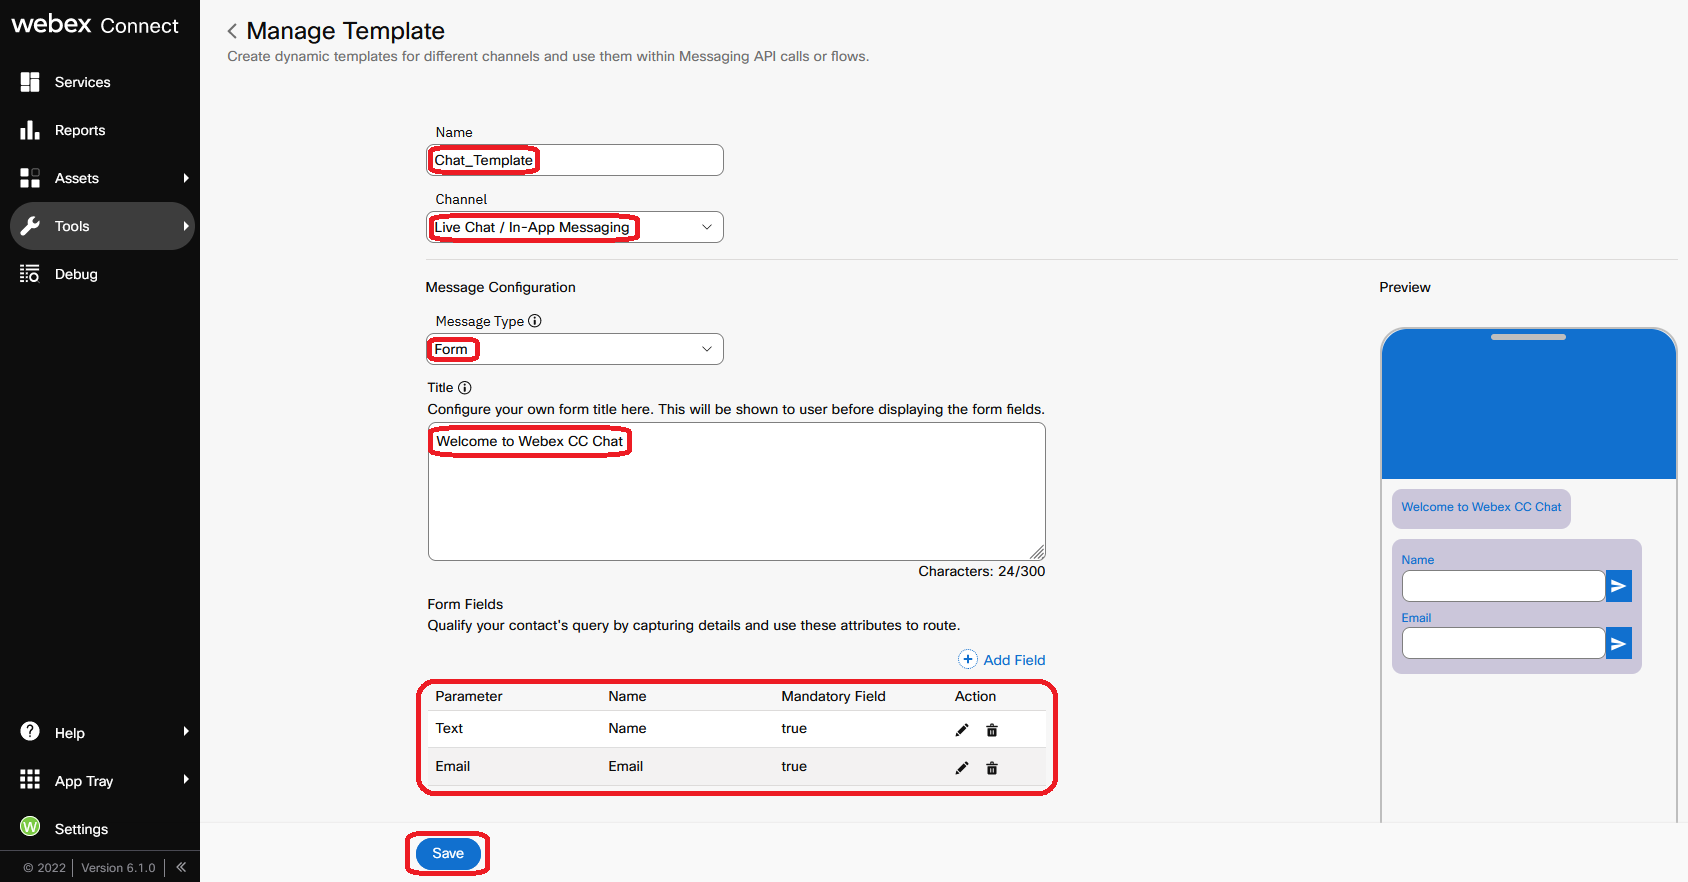
5. Create Chat Template
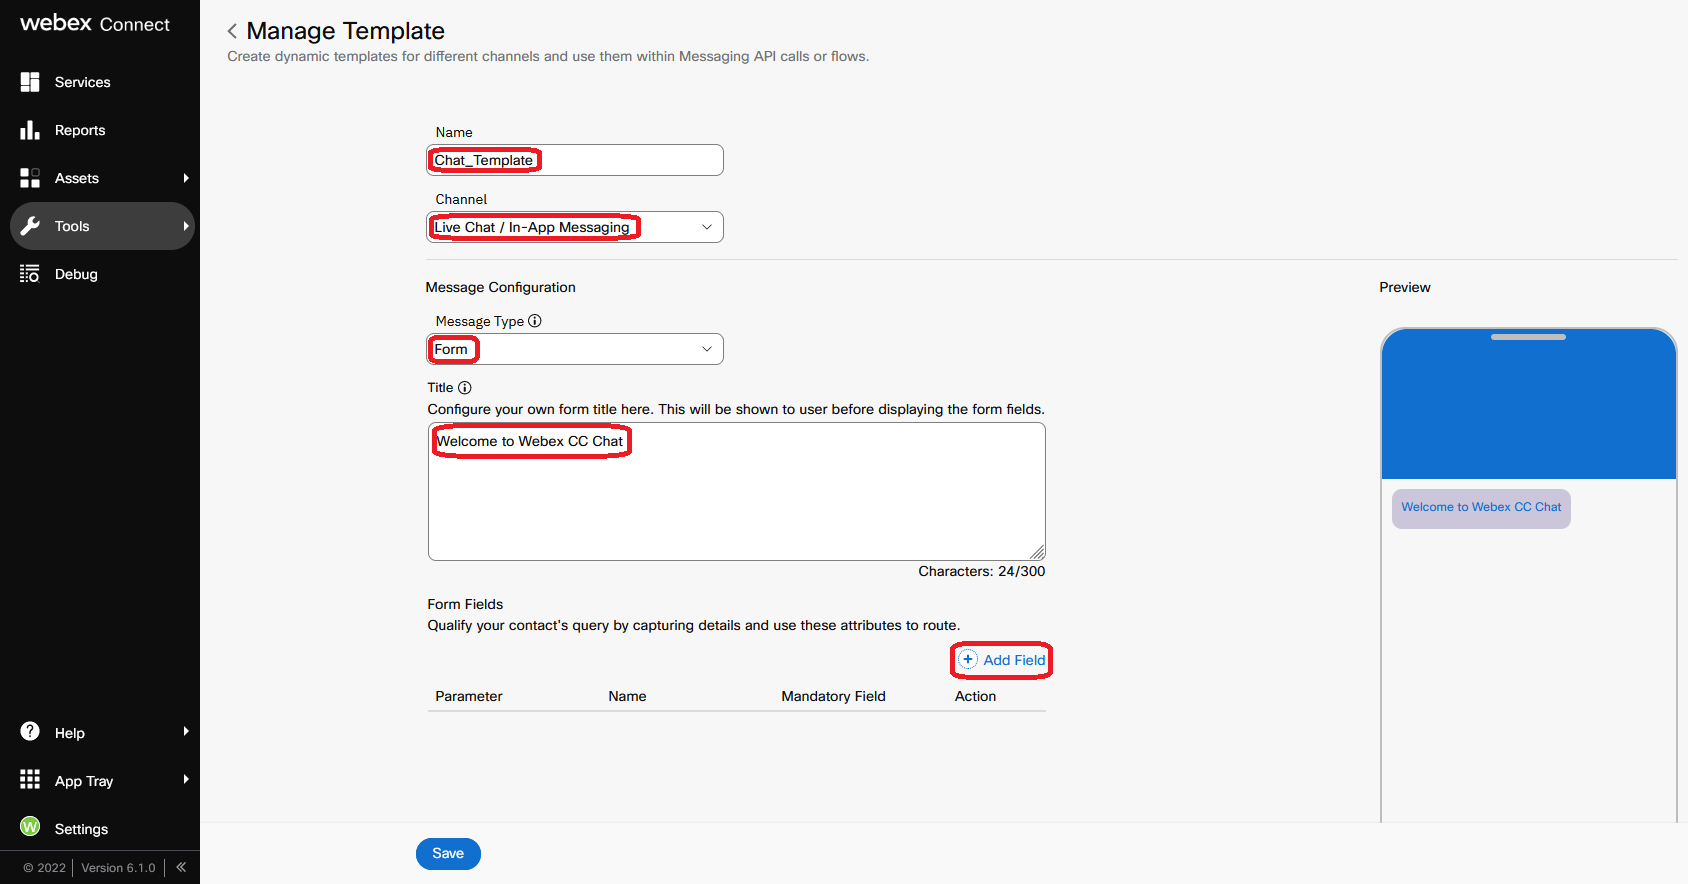
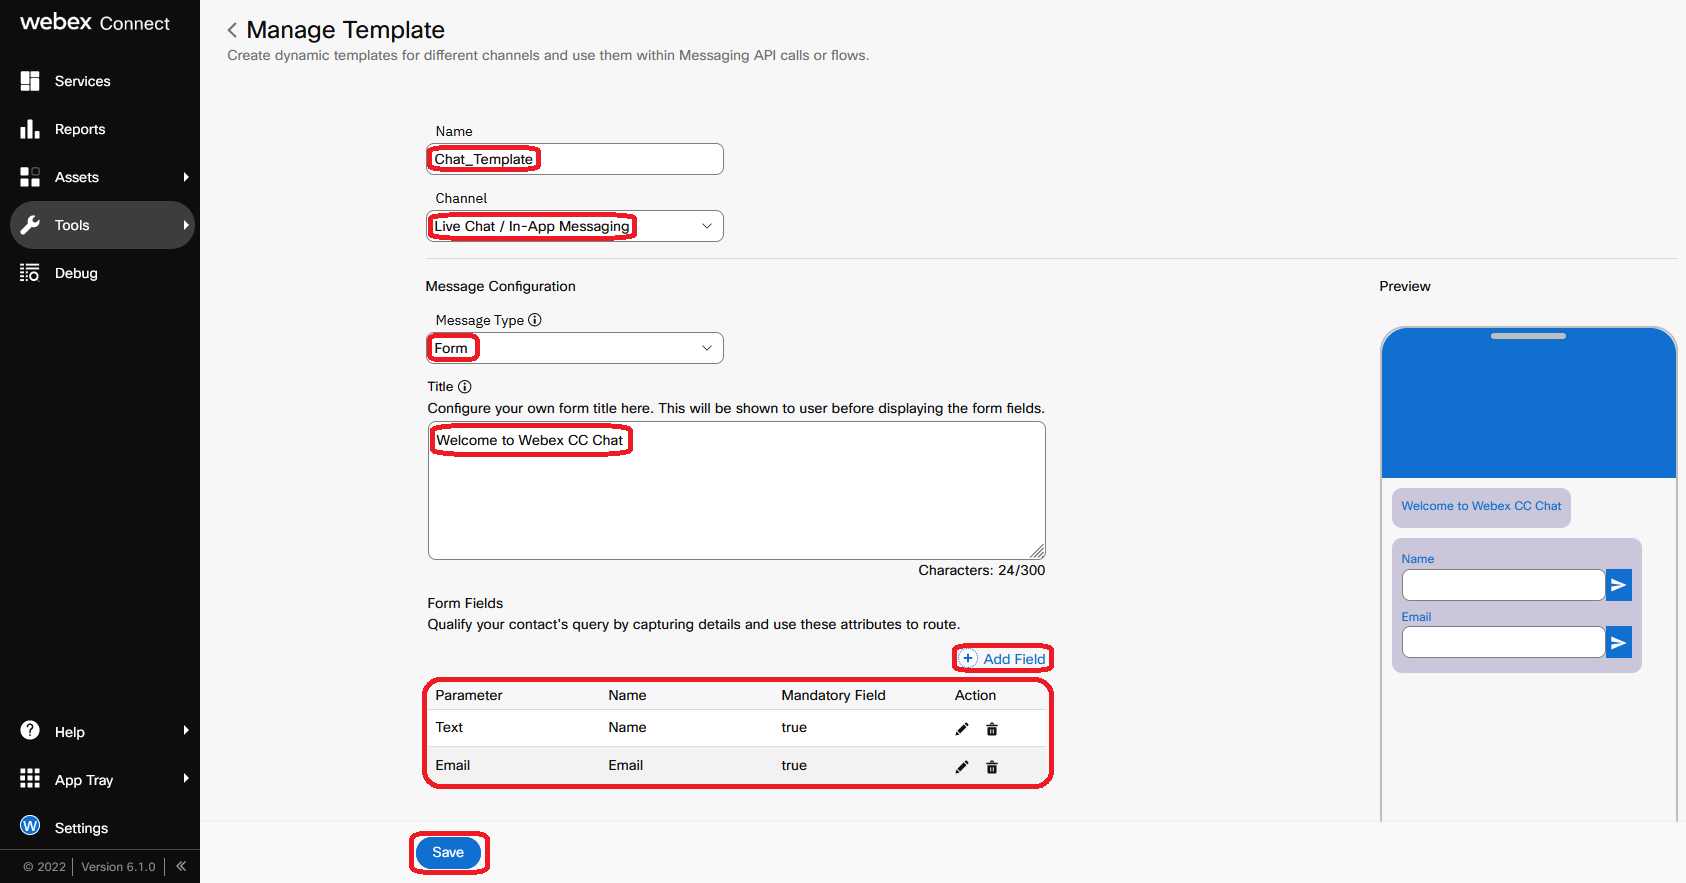
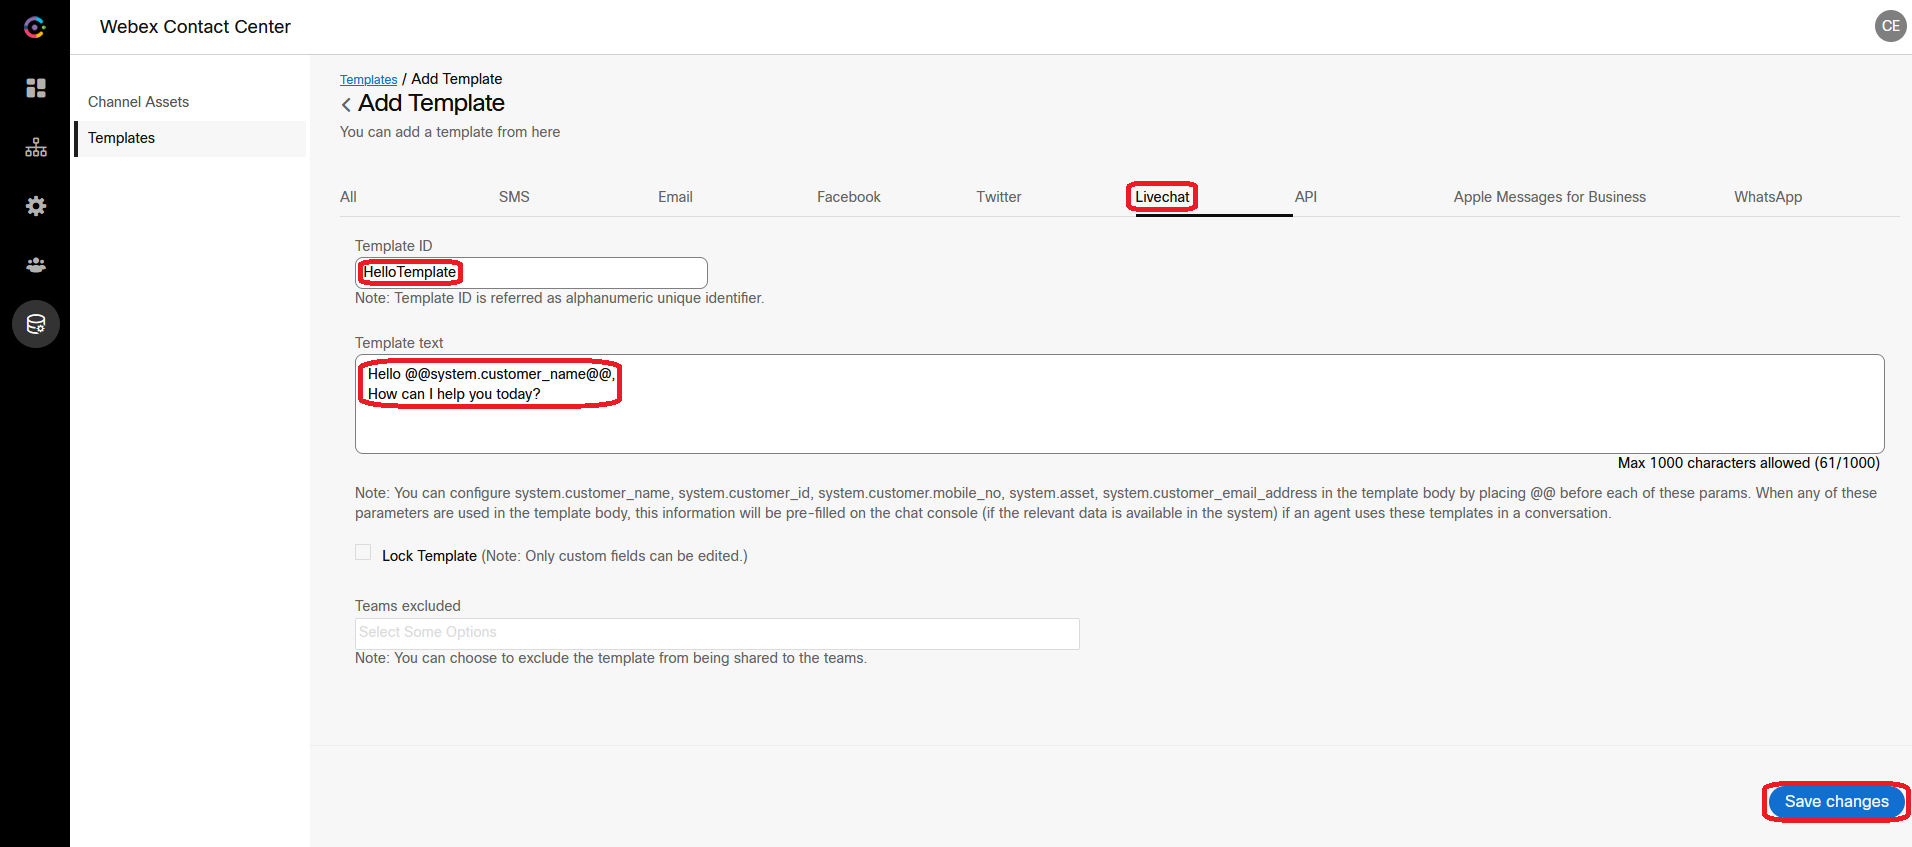
Connect UI → Tools → Templates → Add new Template
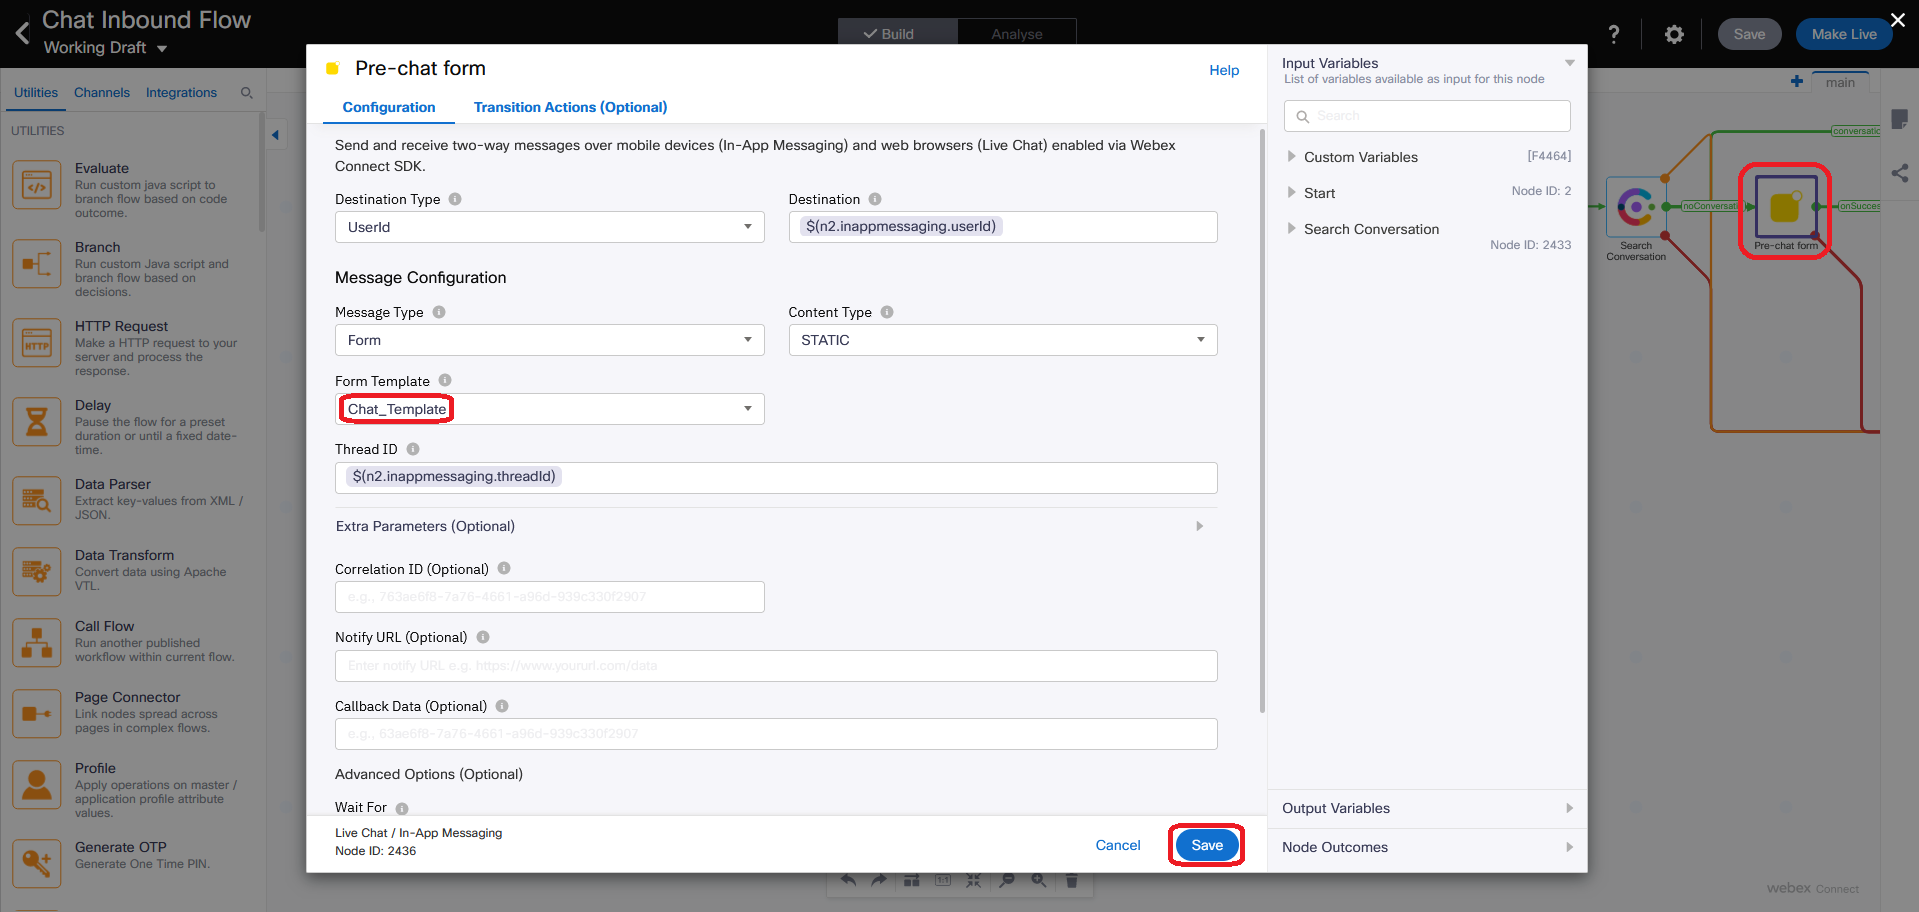
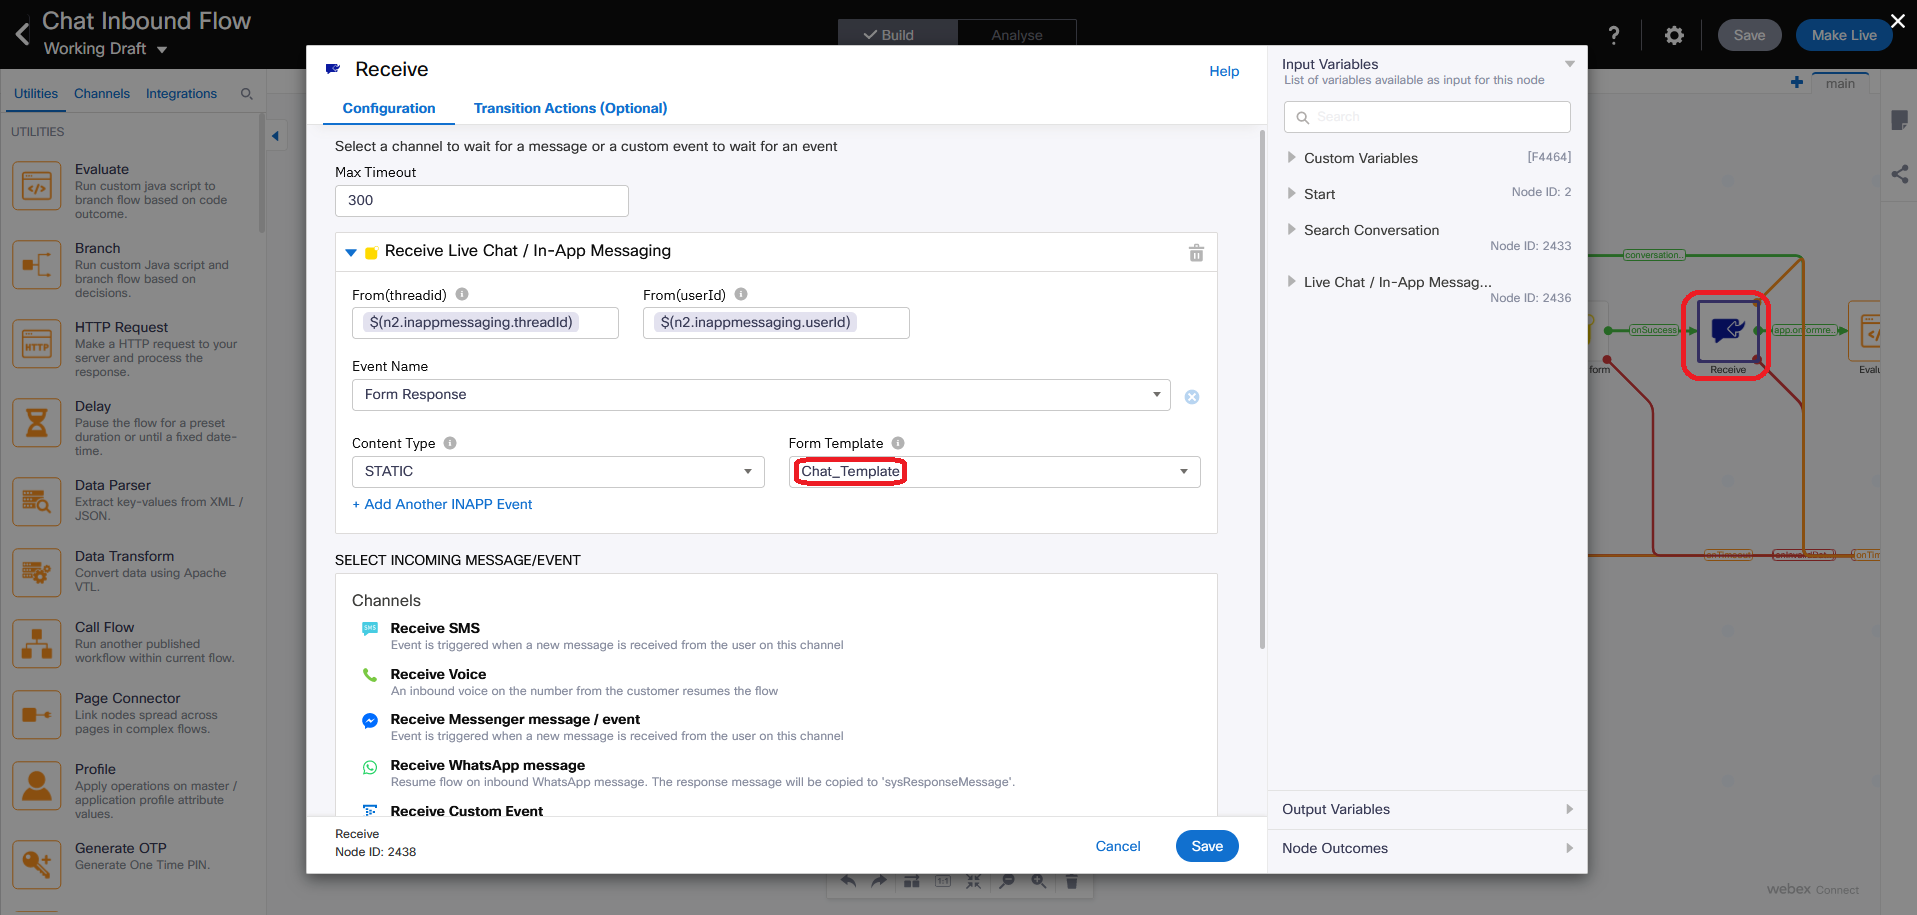
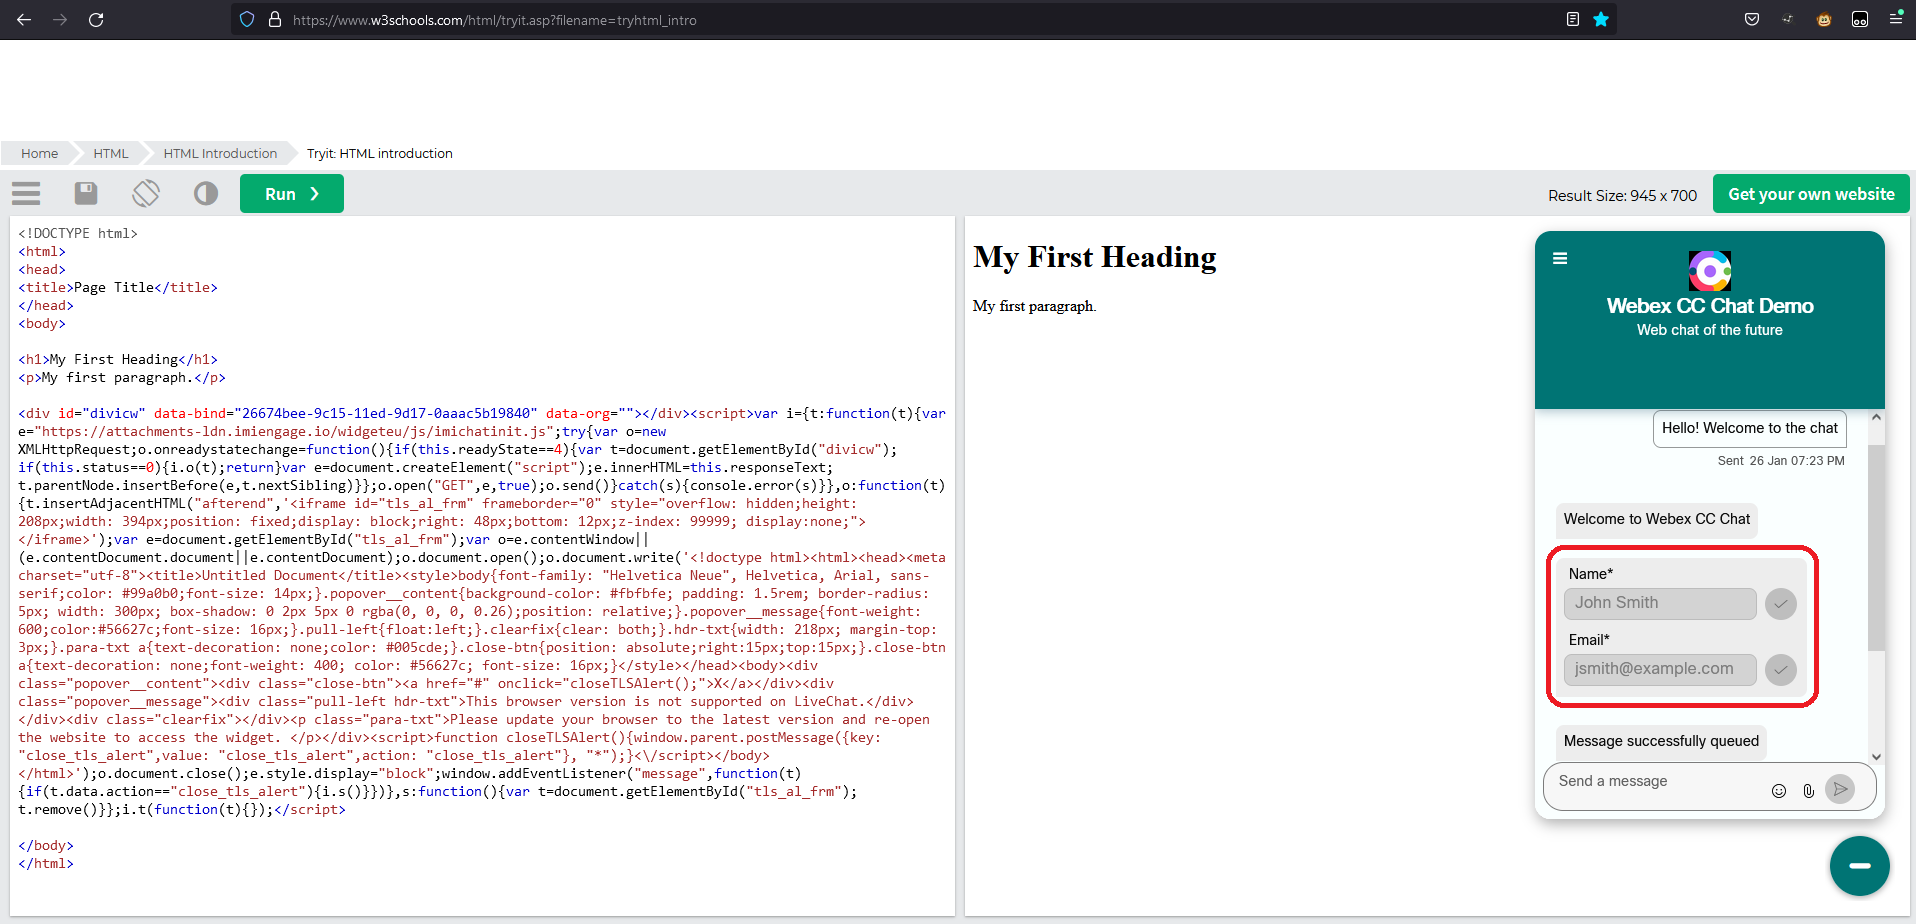
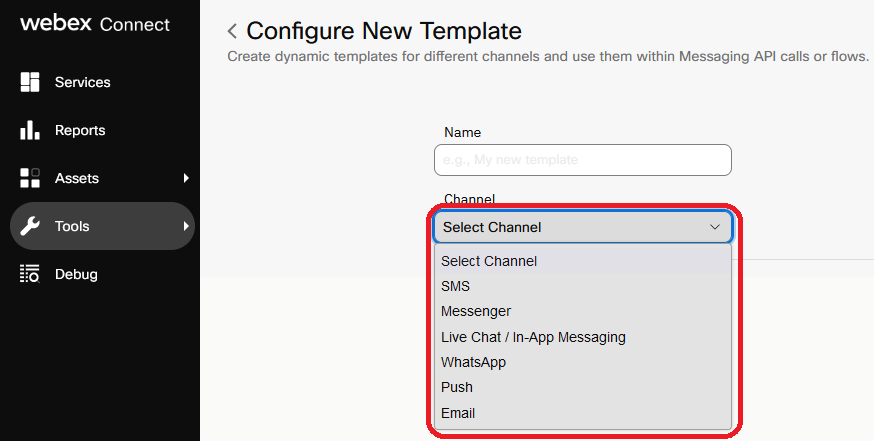
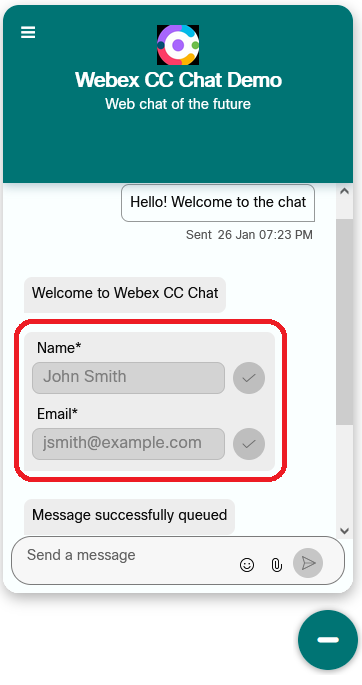
Name Chat_Template, Channel Live Chat / In-App Messaging, Message Type Form, Title Welcome to Webex CC Chat
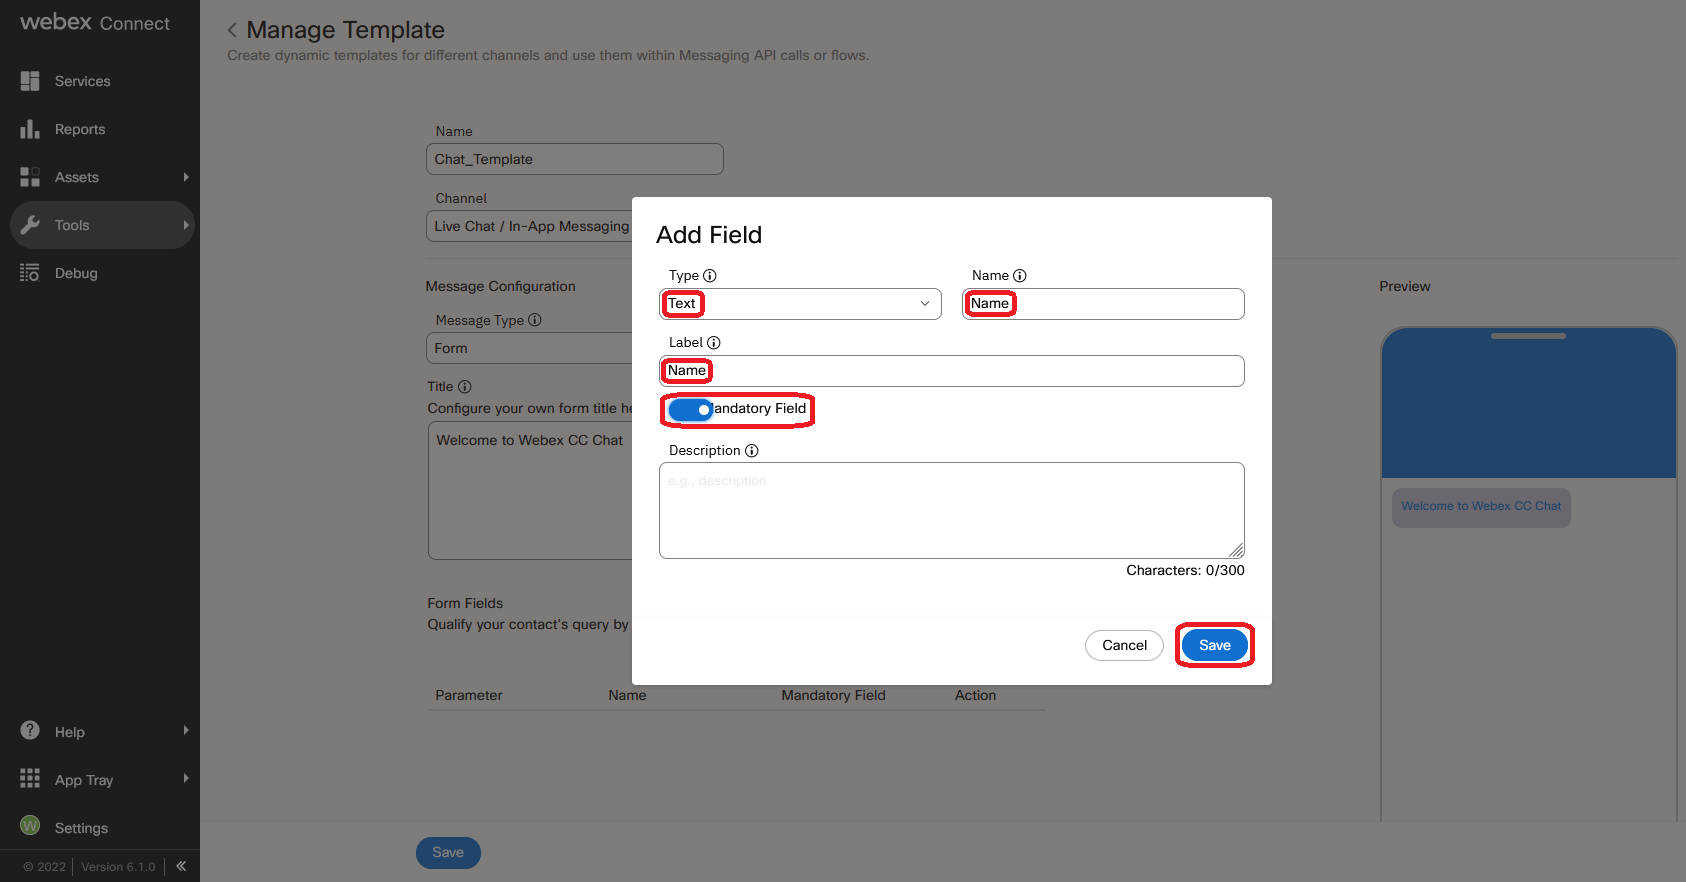
Add Name field:
Parameter
Value
Type
Text
Name
Name
Label
Name
Mandatory Field
On
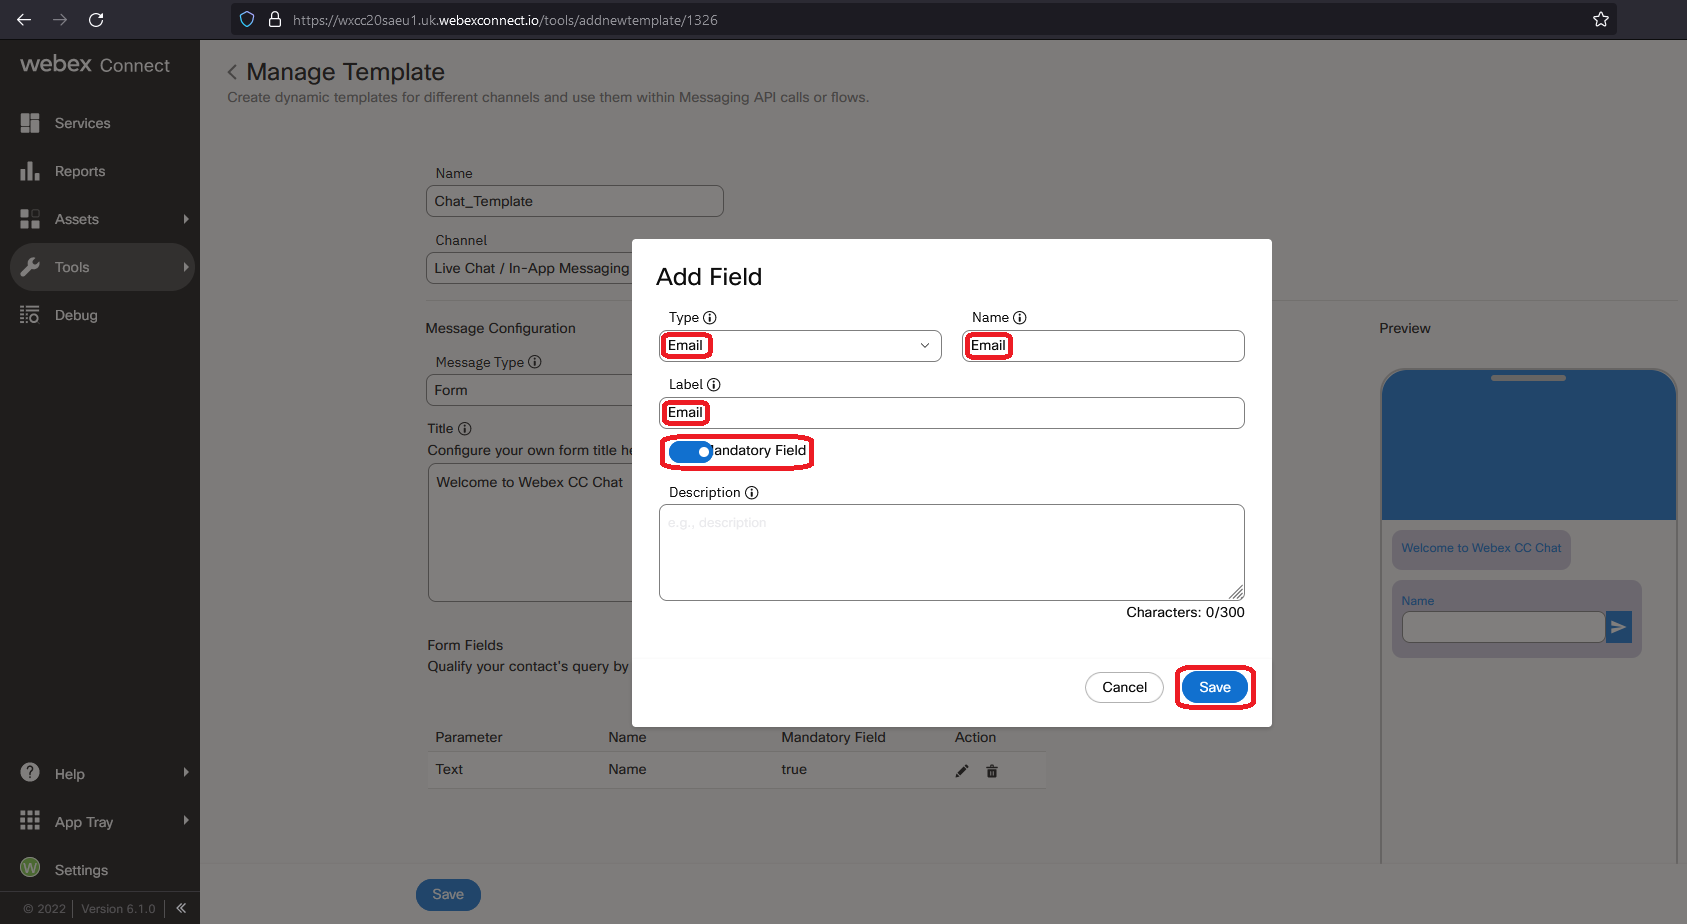
Add Email field:
Parameter
Value
Type
Email
Name
Email
Label
Email
Mandatory Field
On
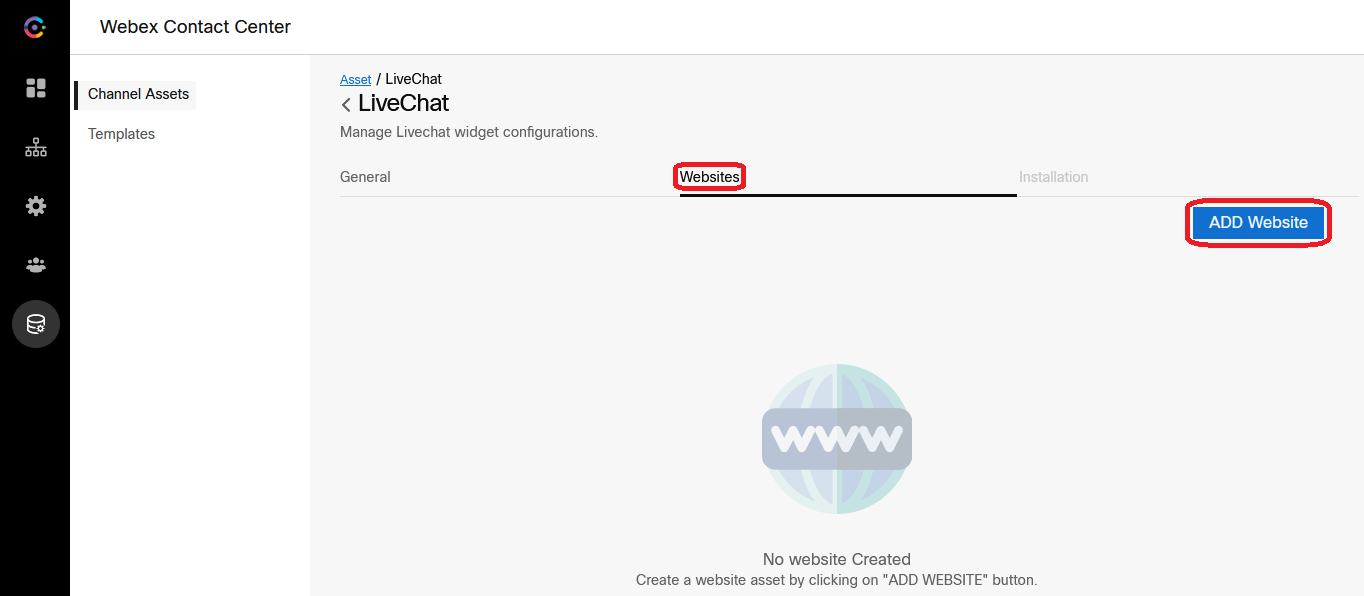
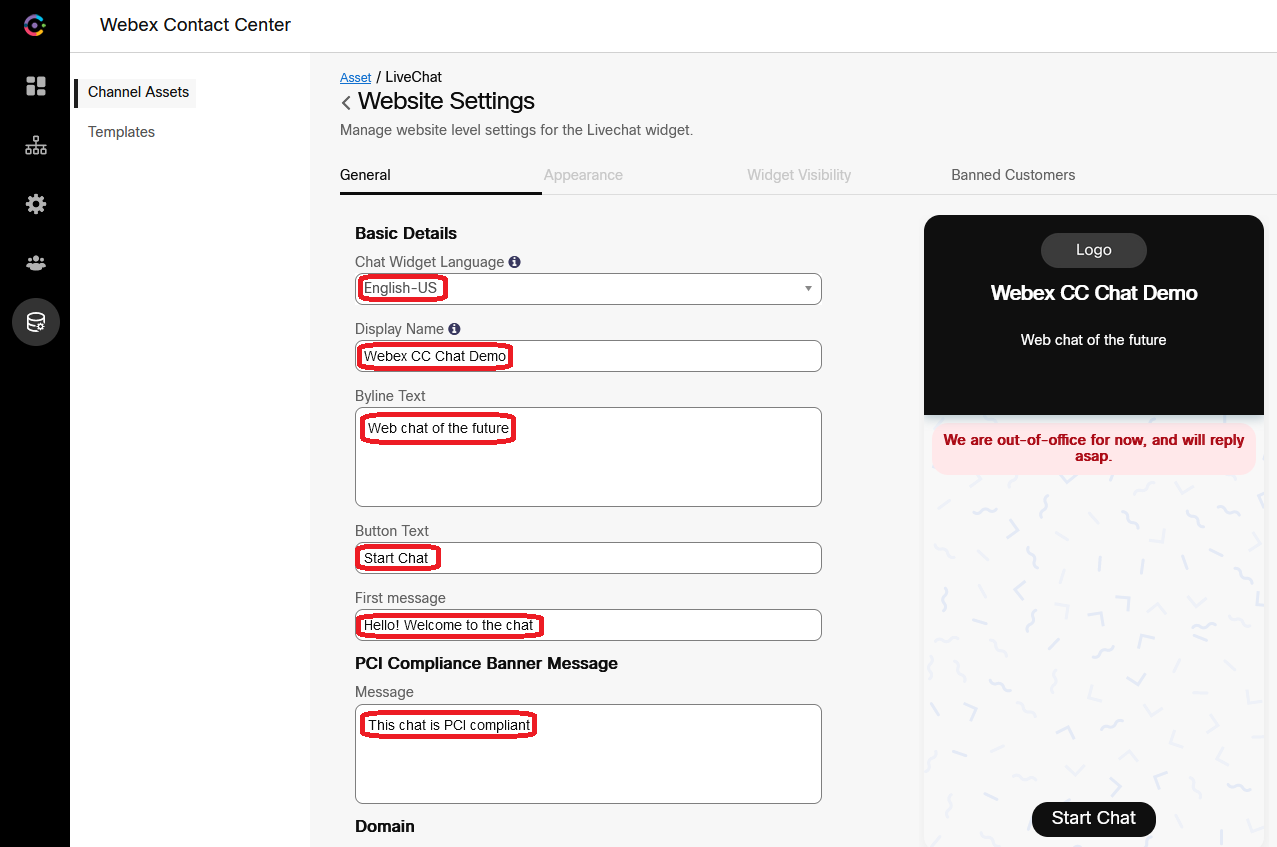
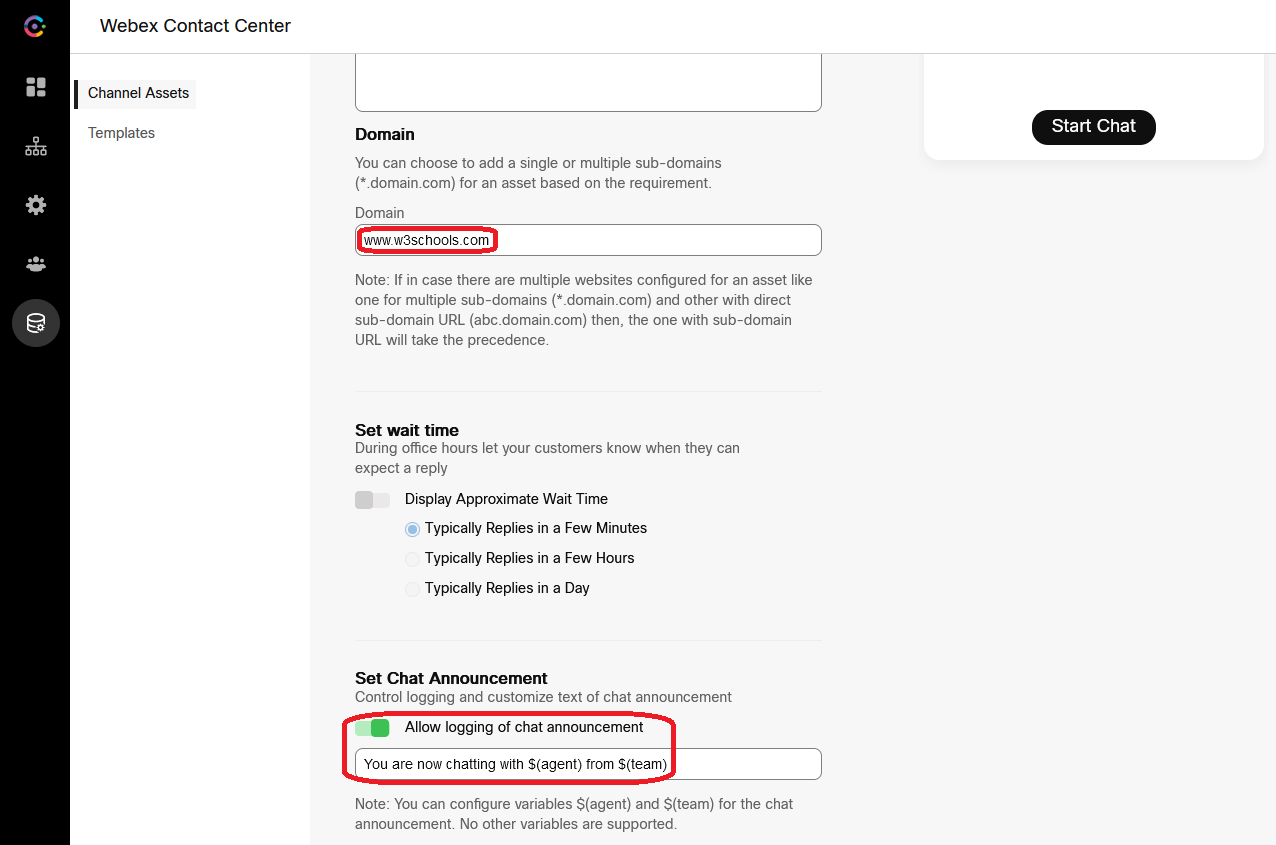
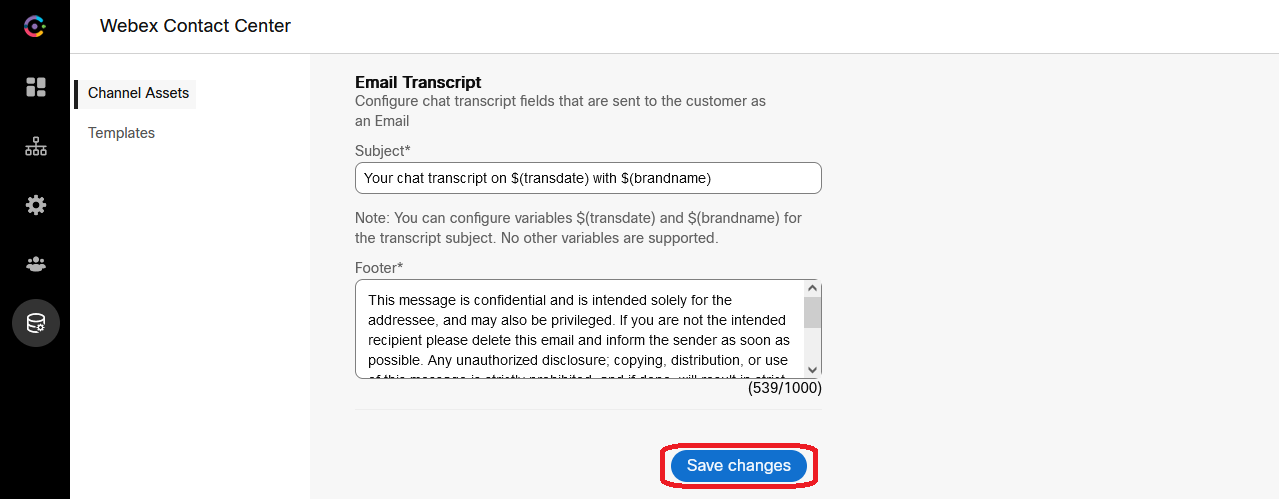
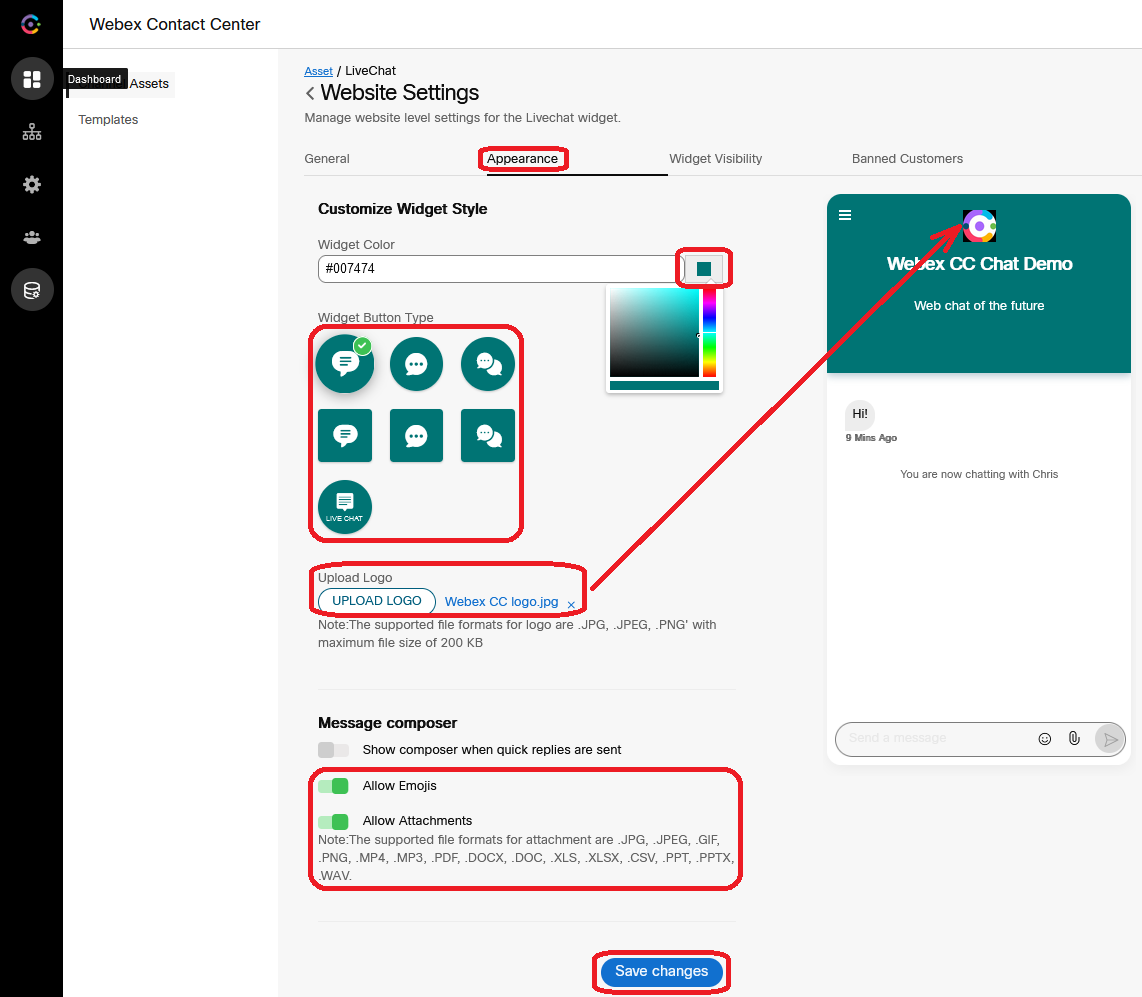
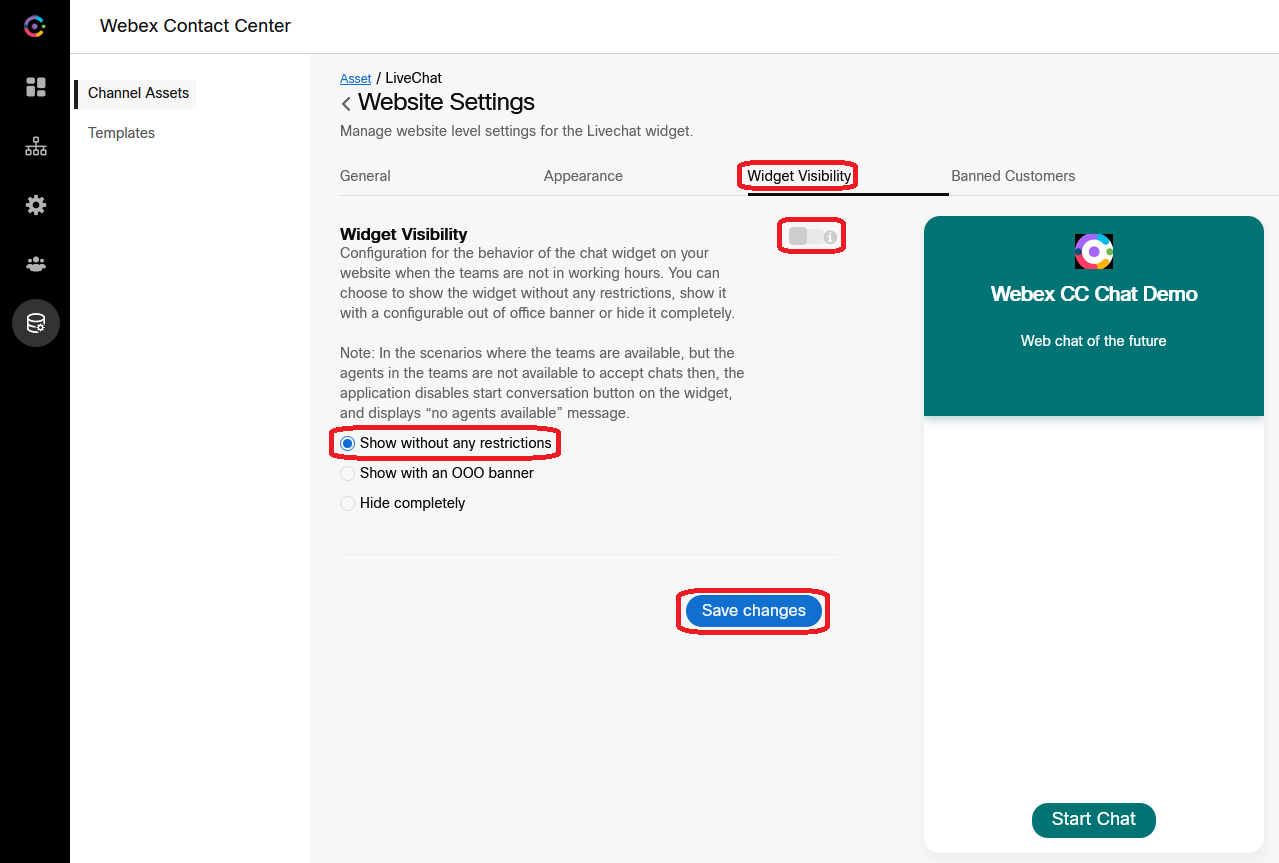
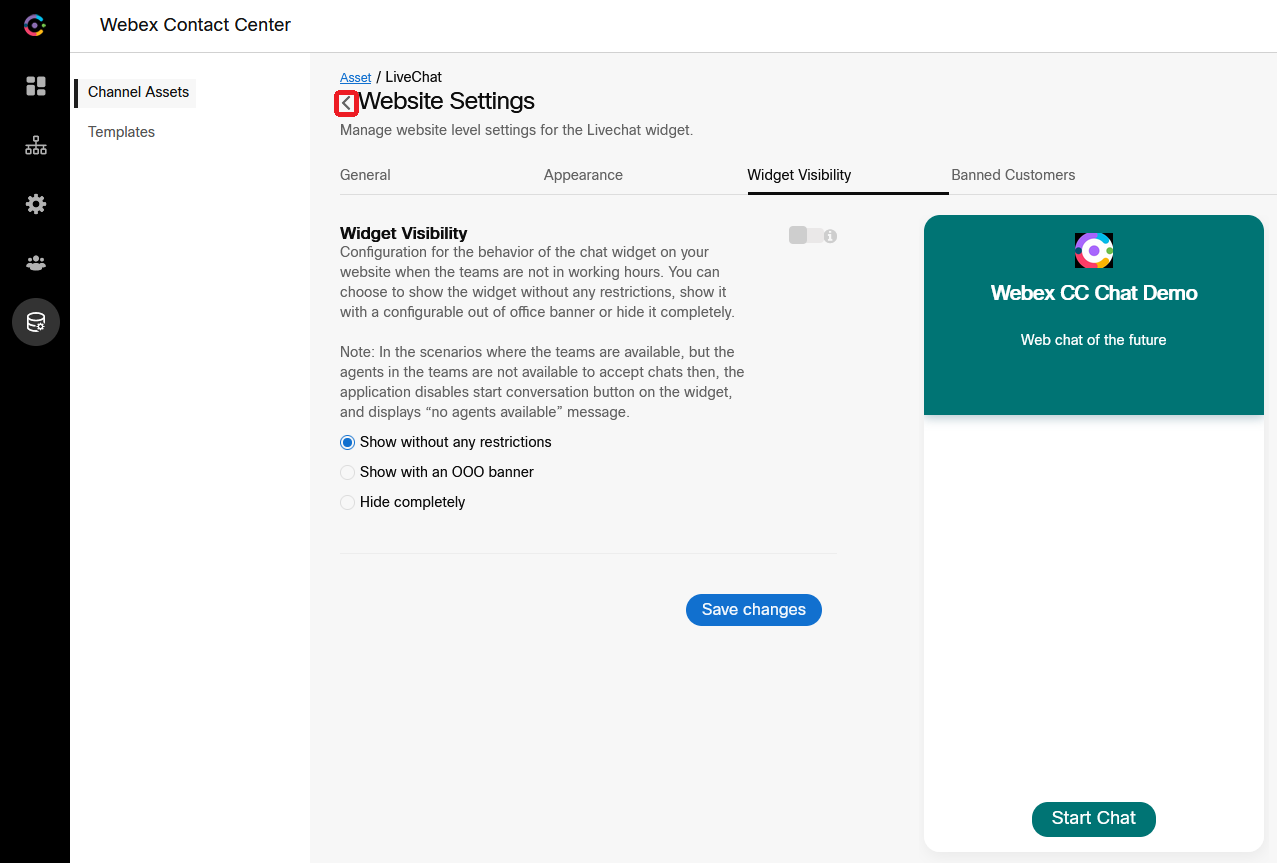
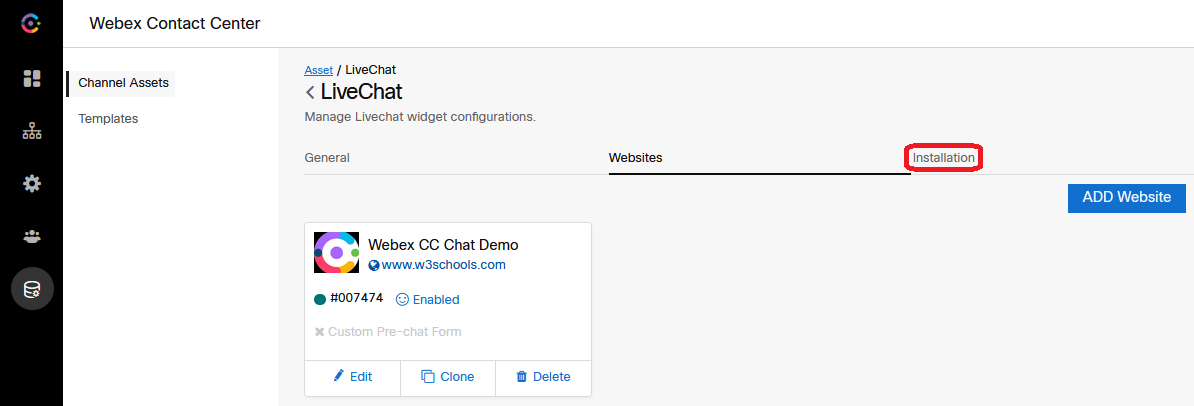
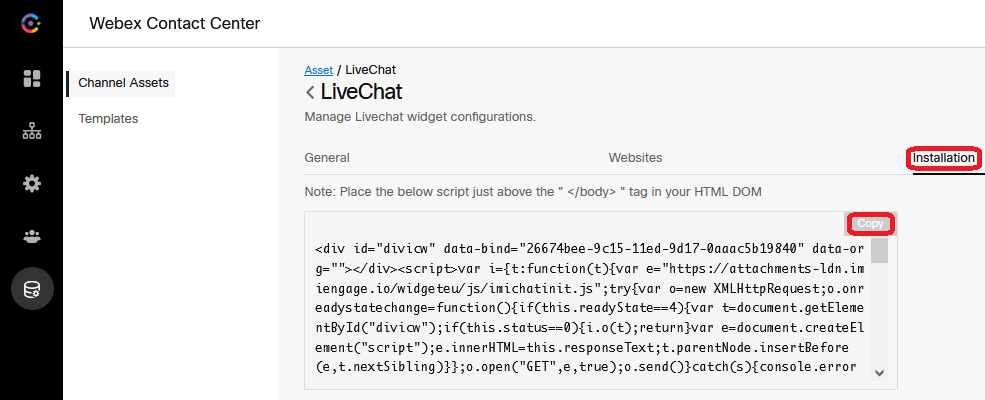
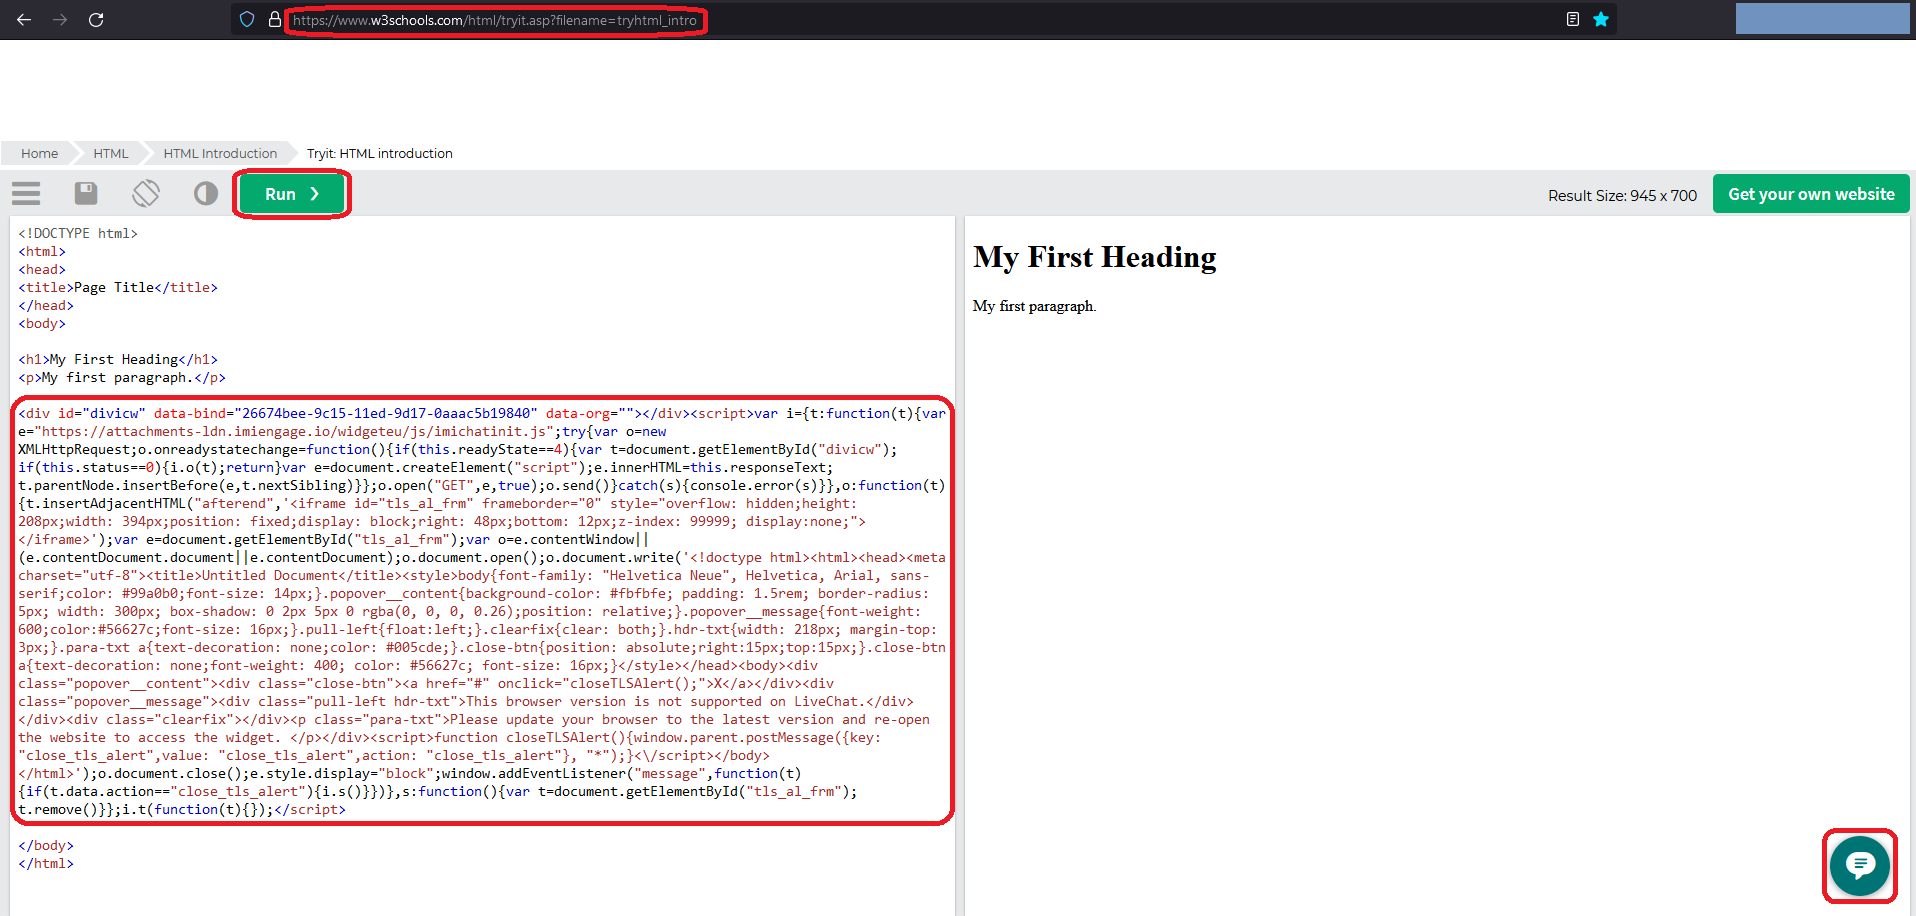
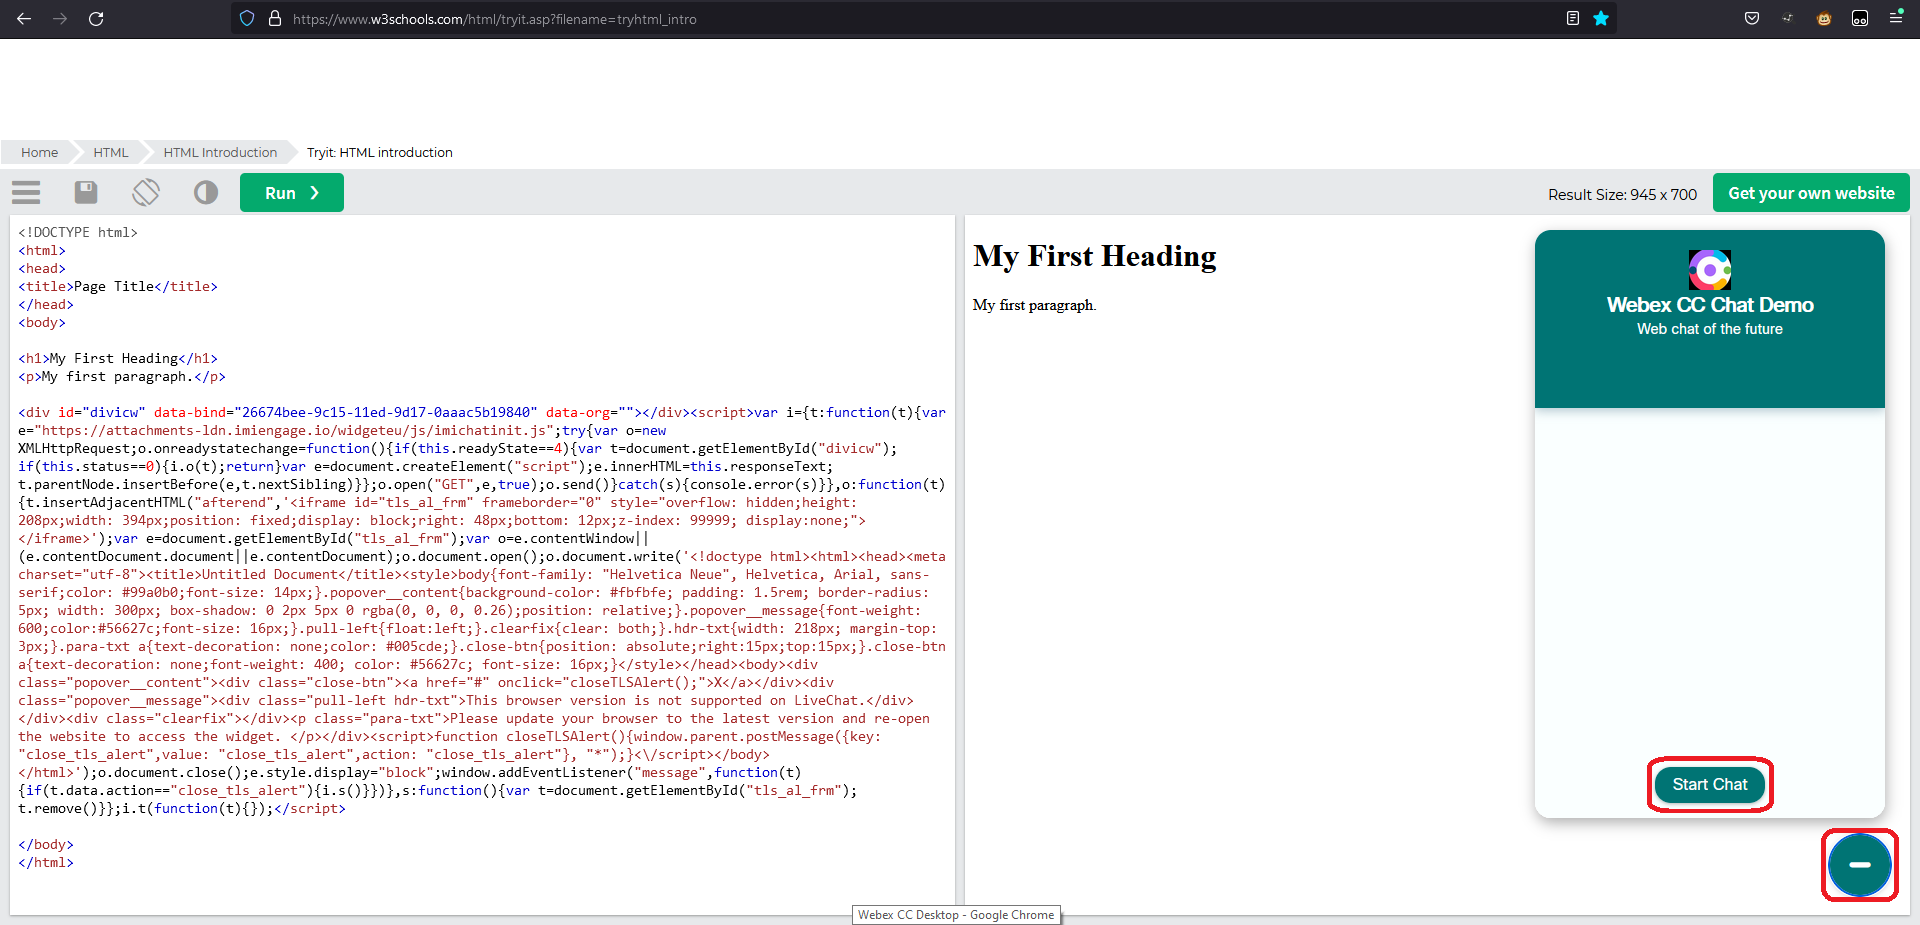
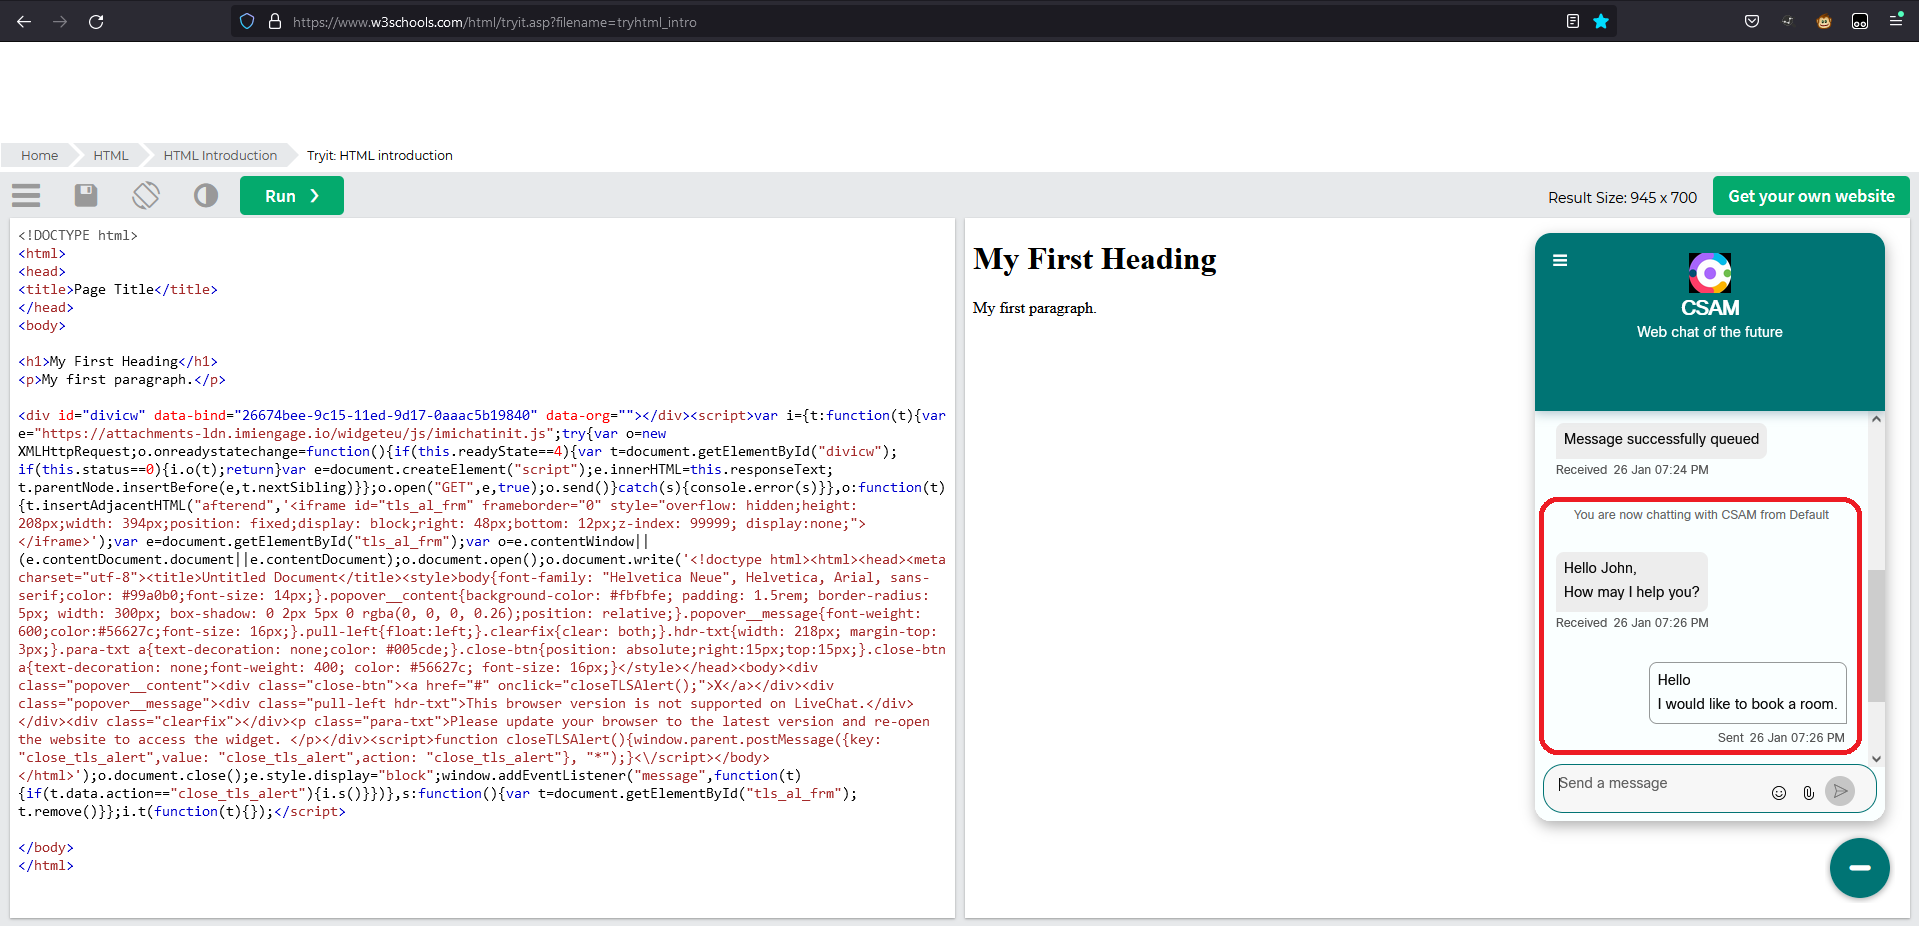
6. Website Widget Configuration
WxCC Management Portal → cross-launch Engage (New Digital Channels)
Register to Webex Engage → select service → Register
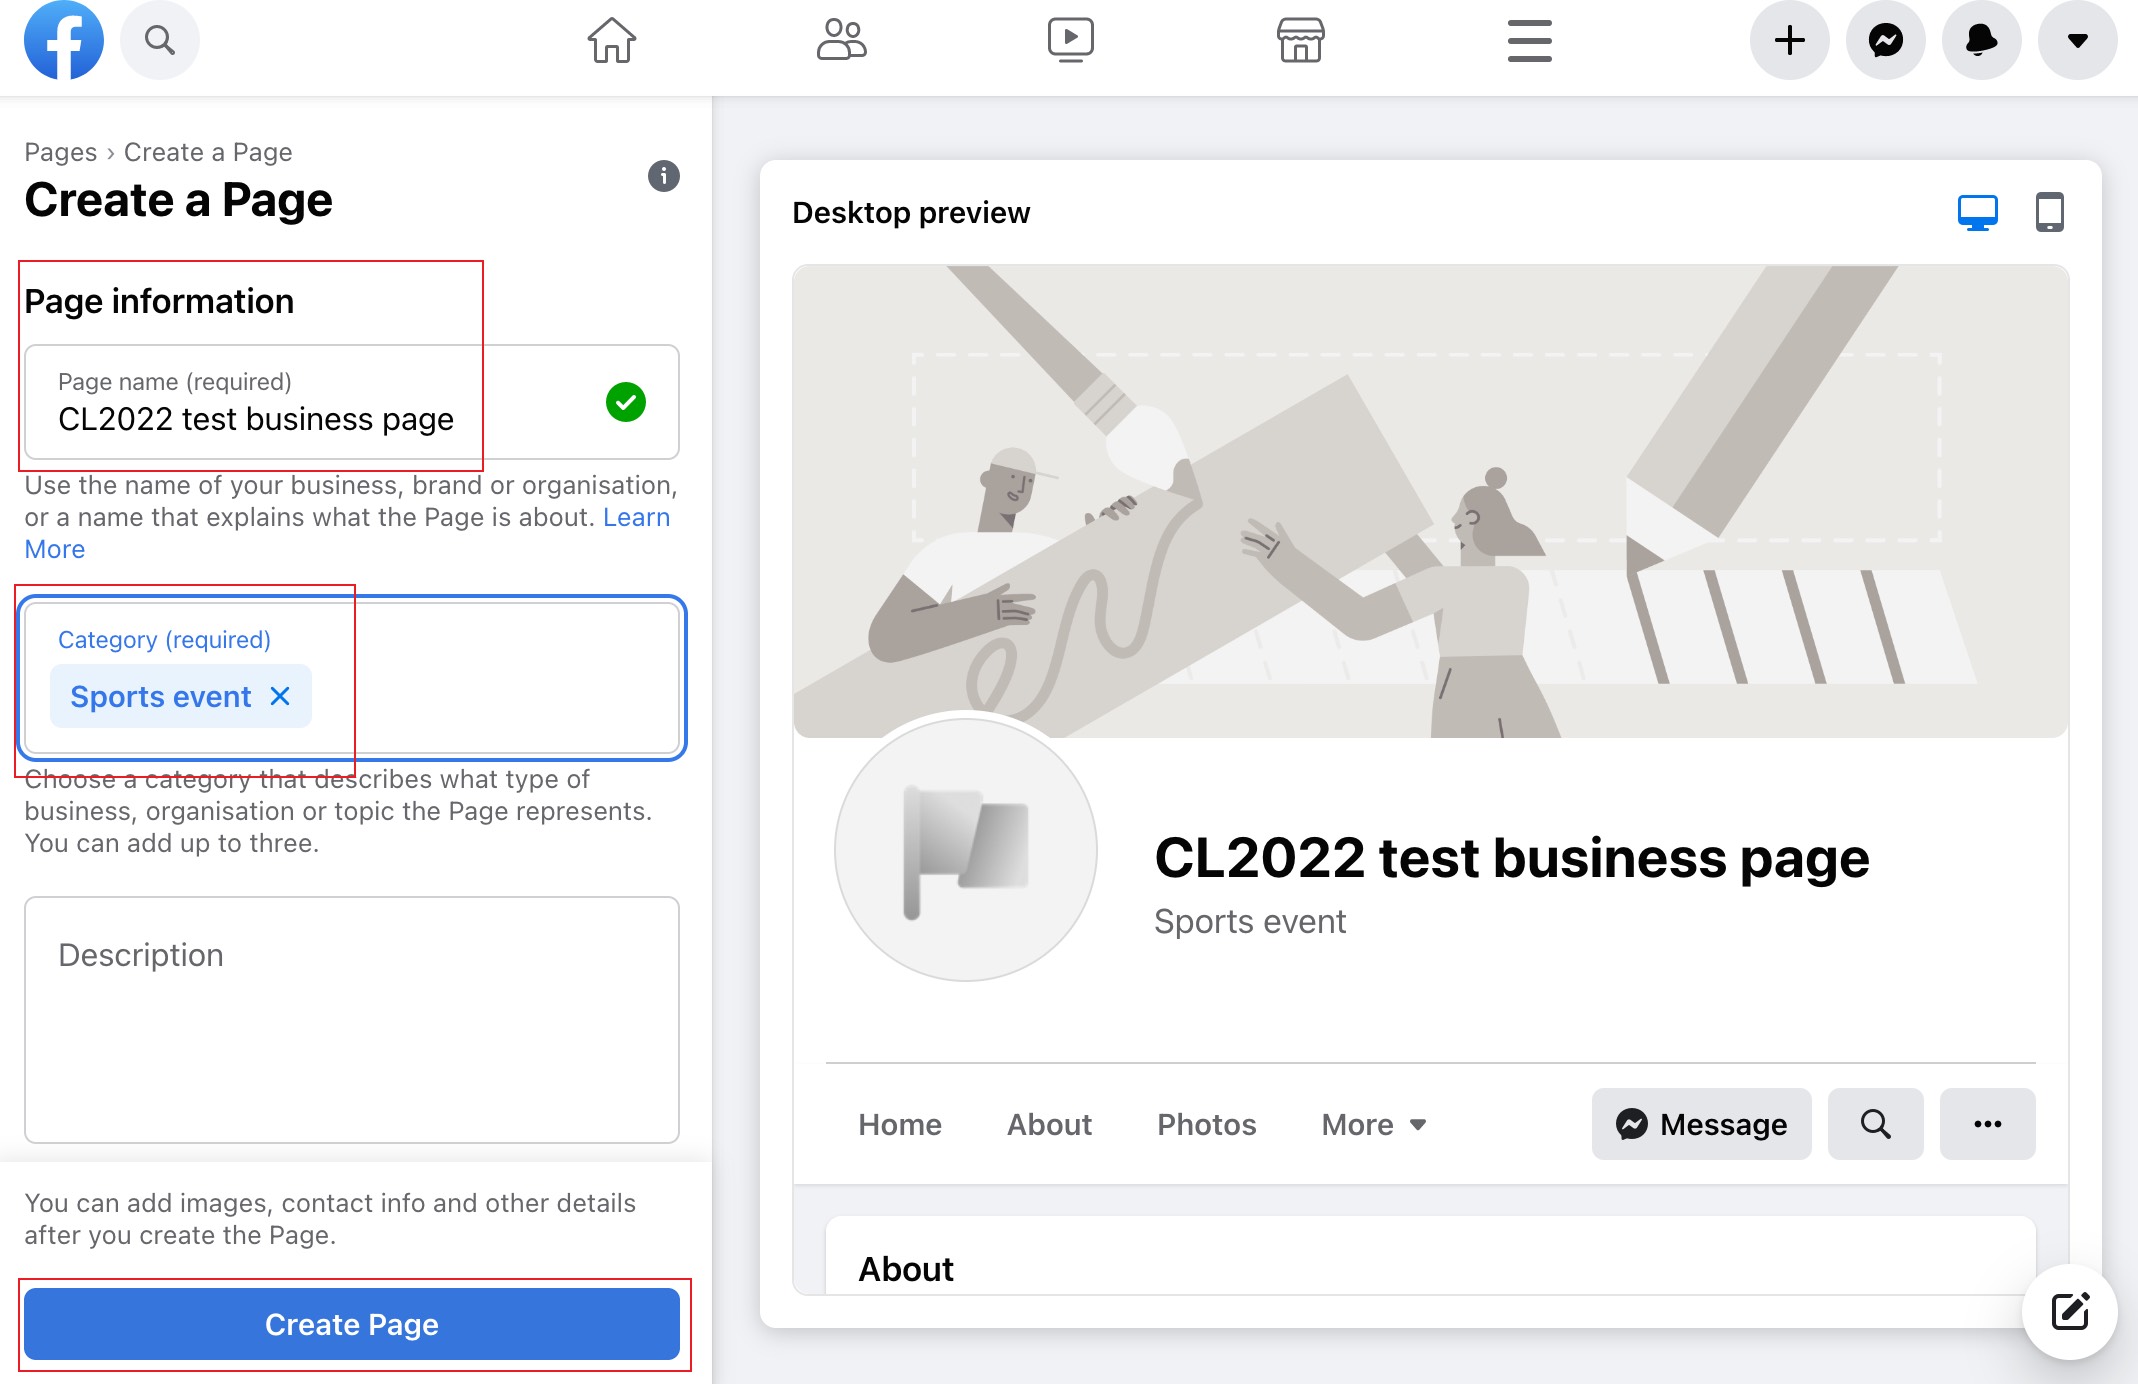
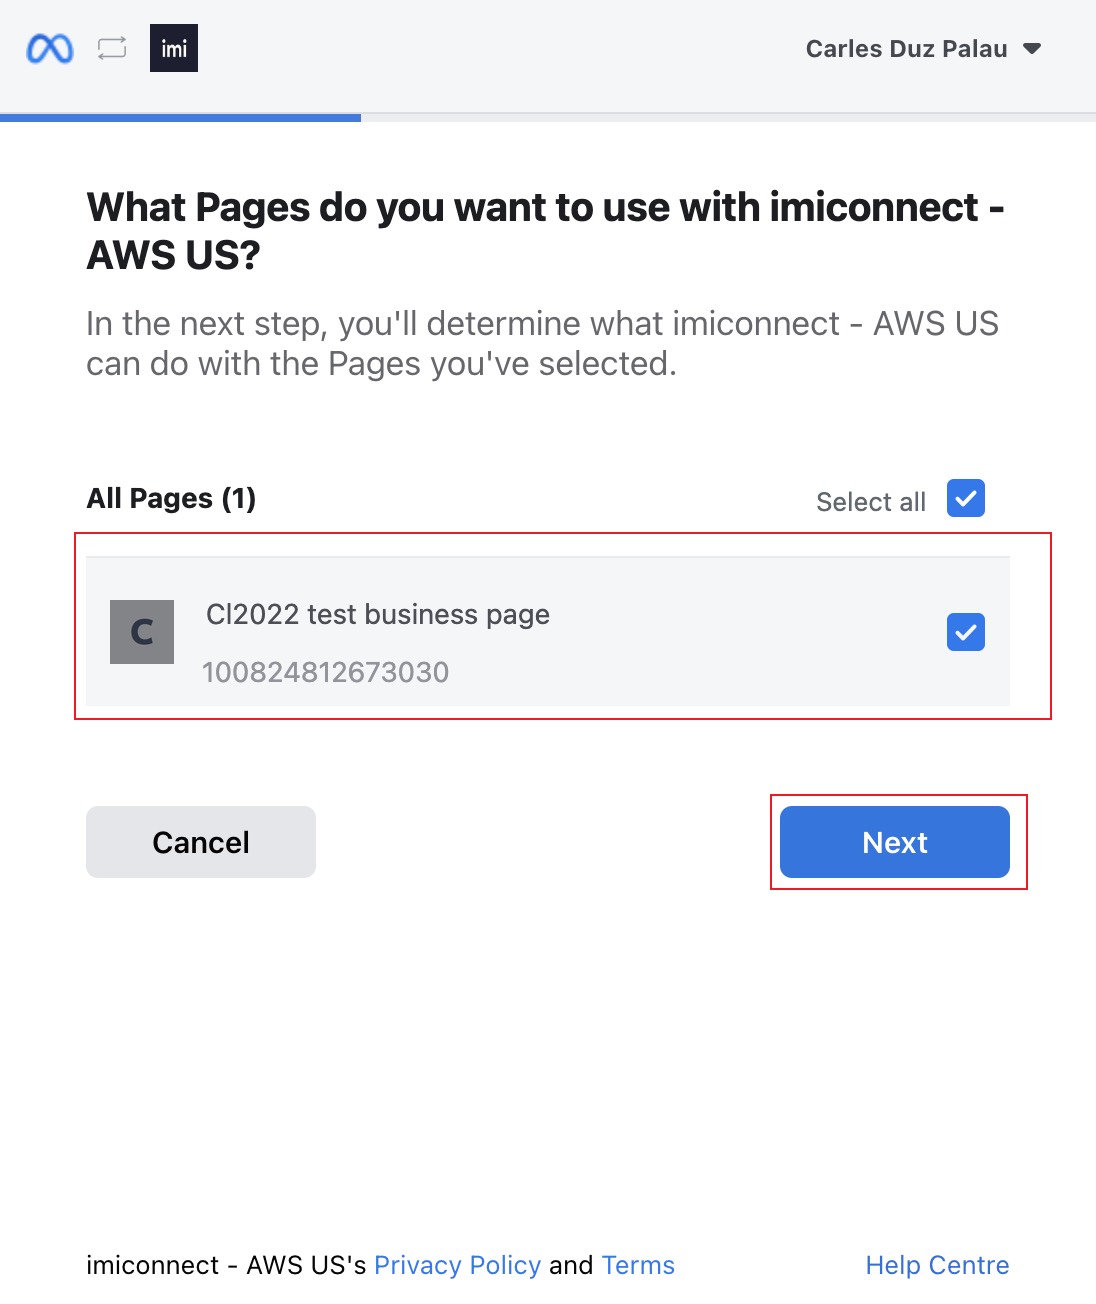
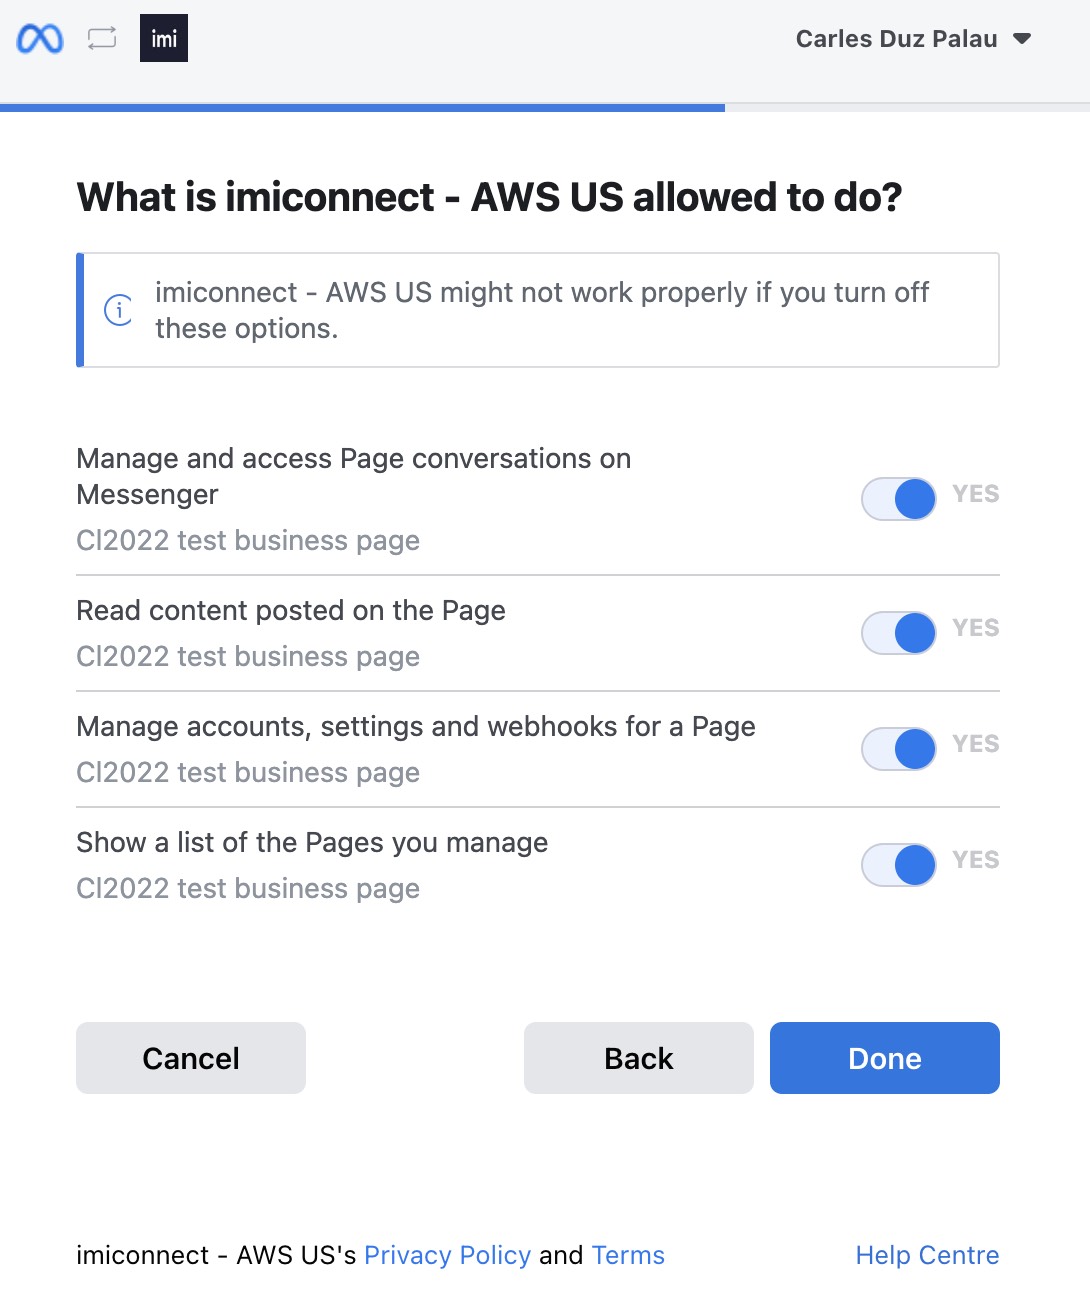
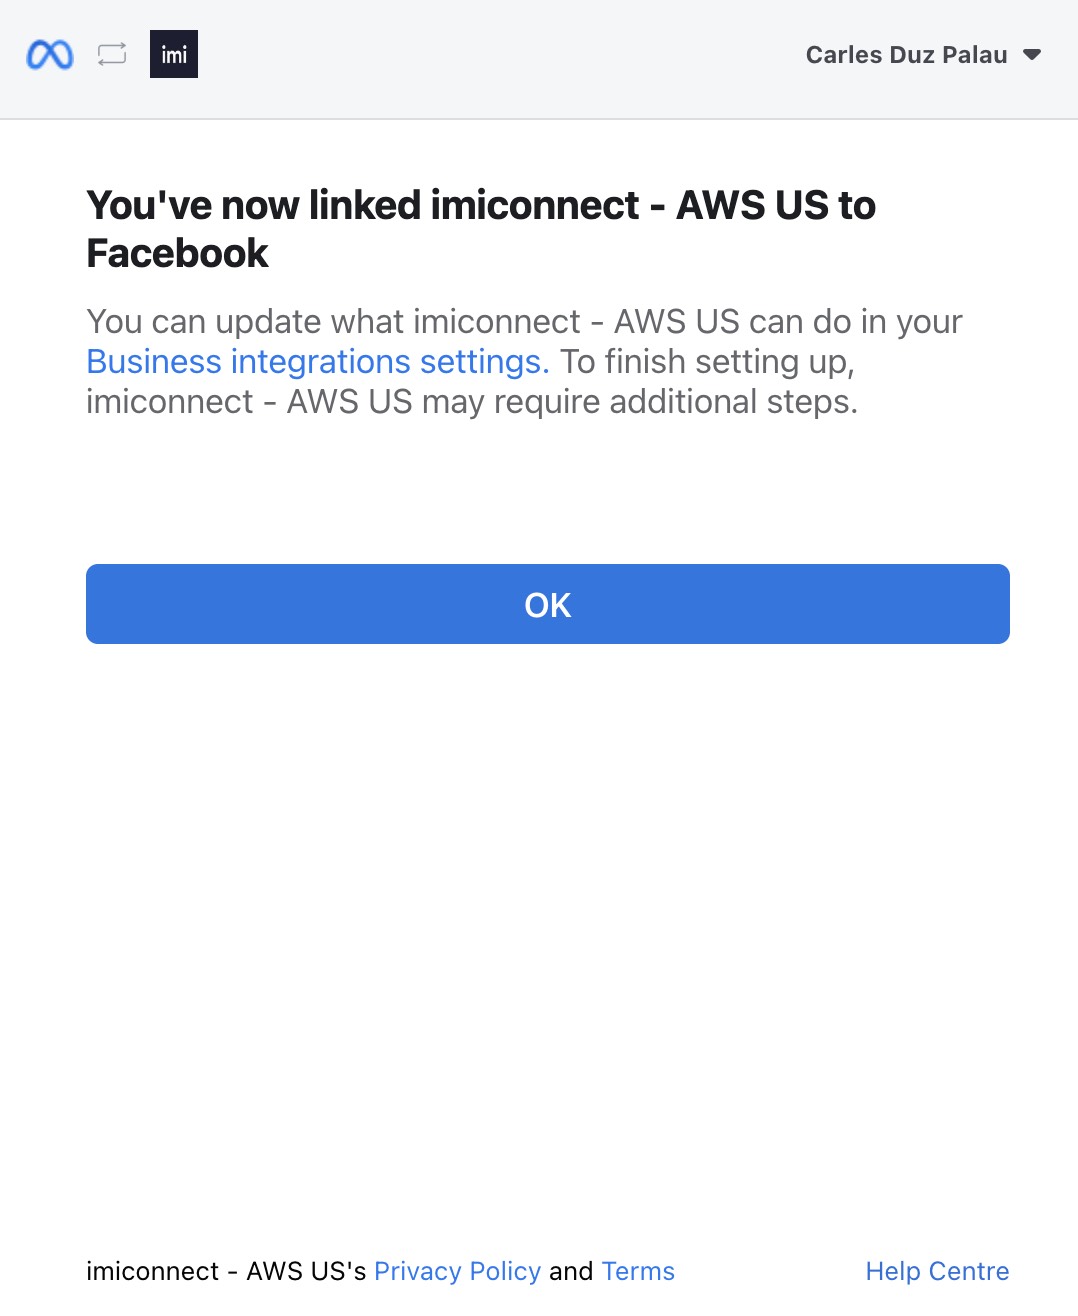
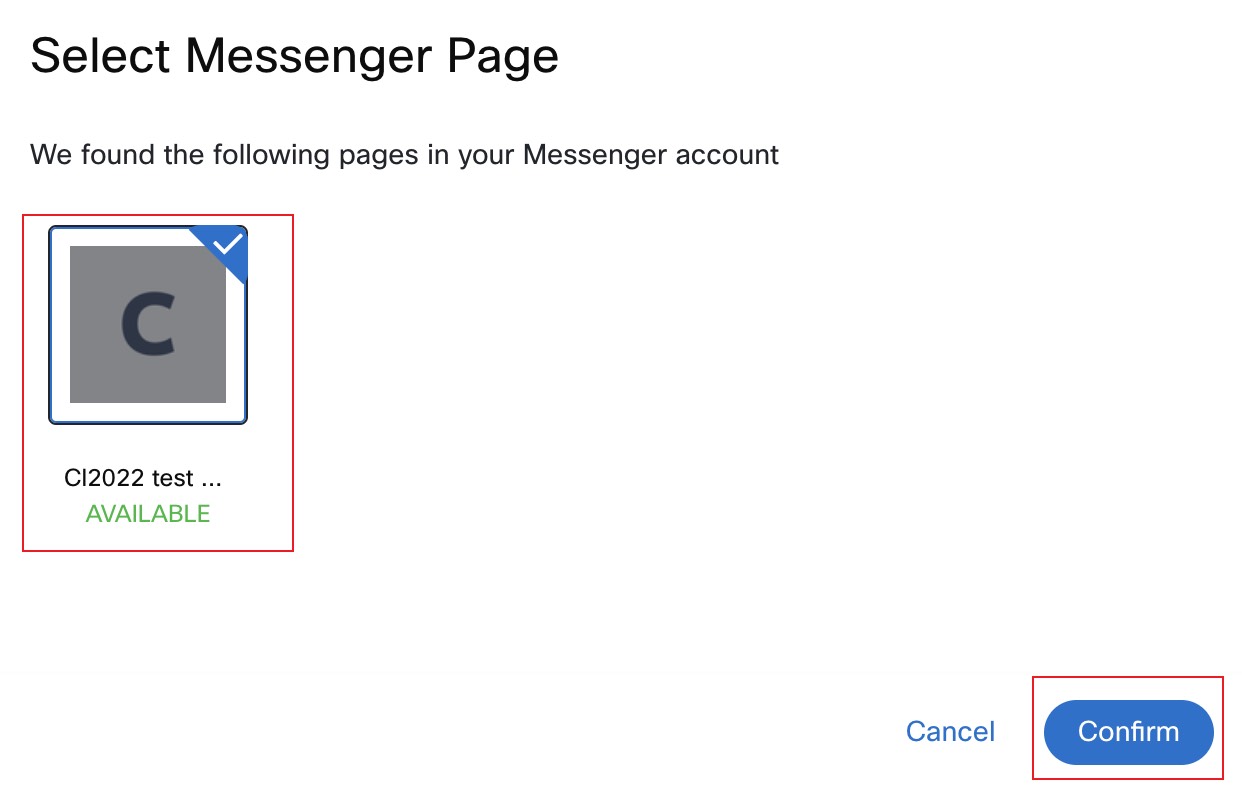
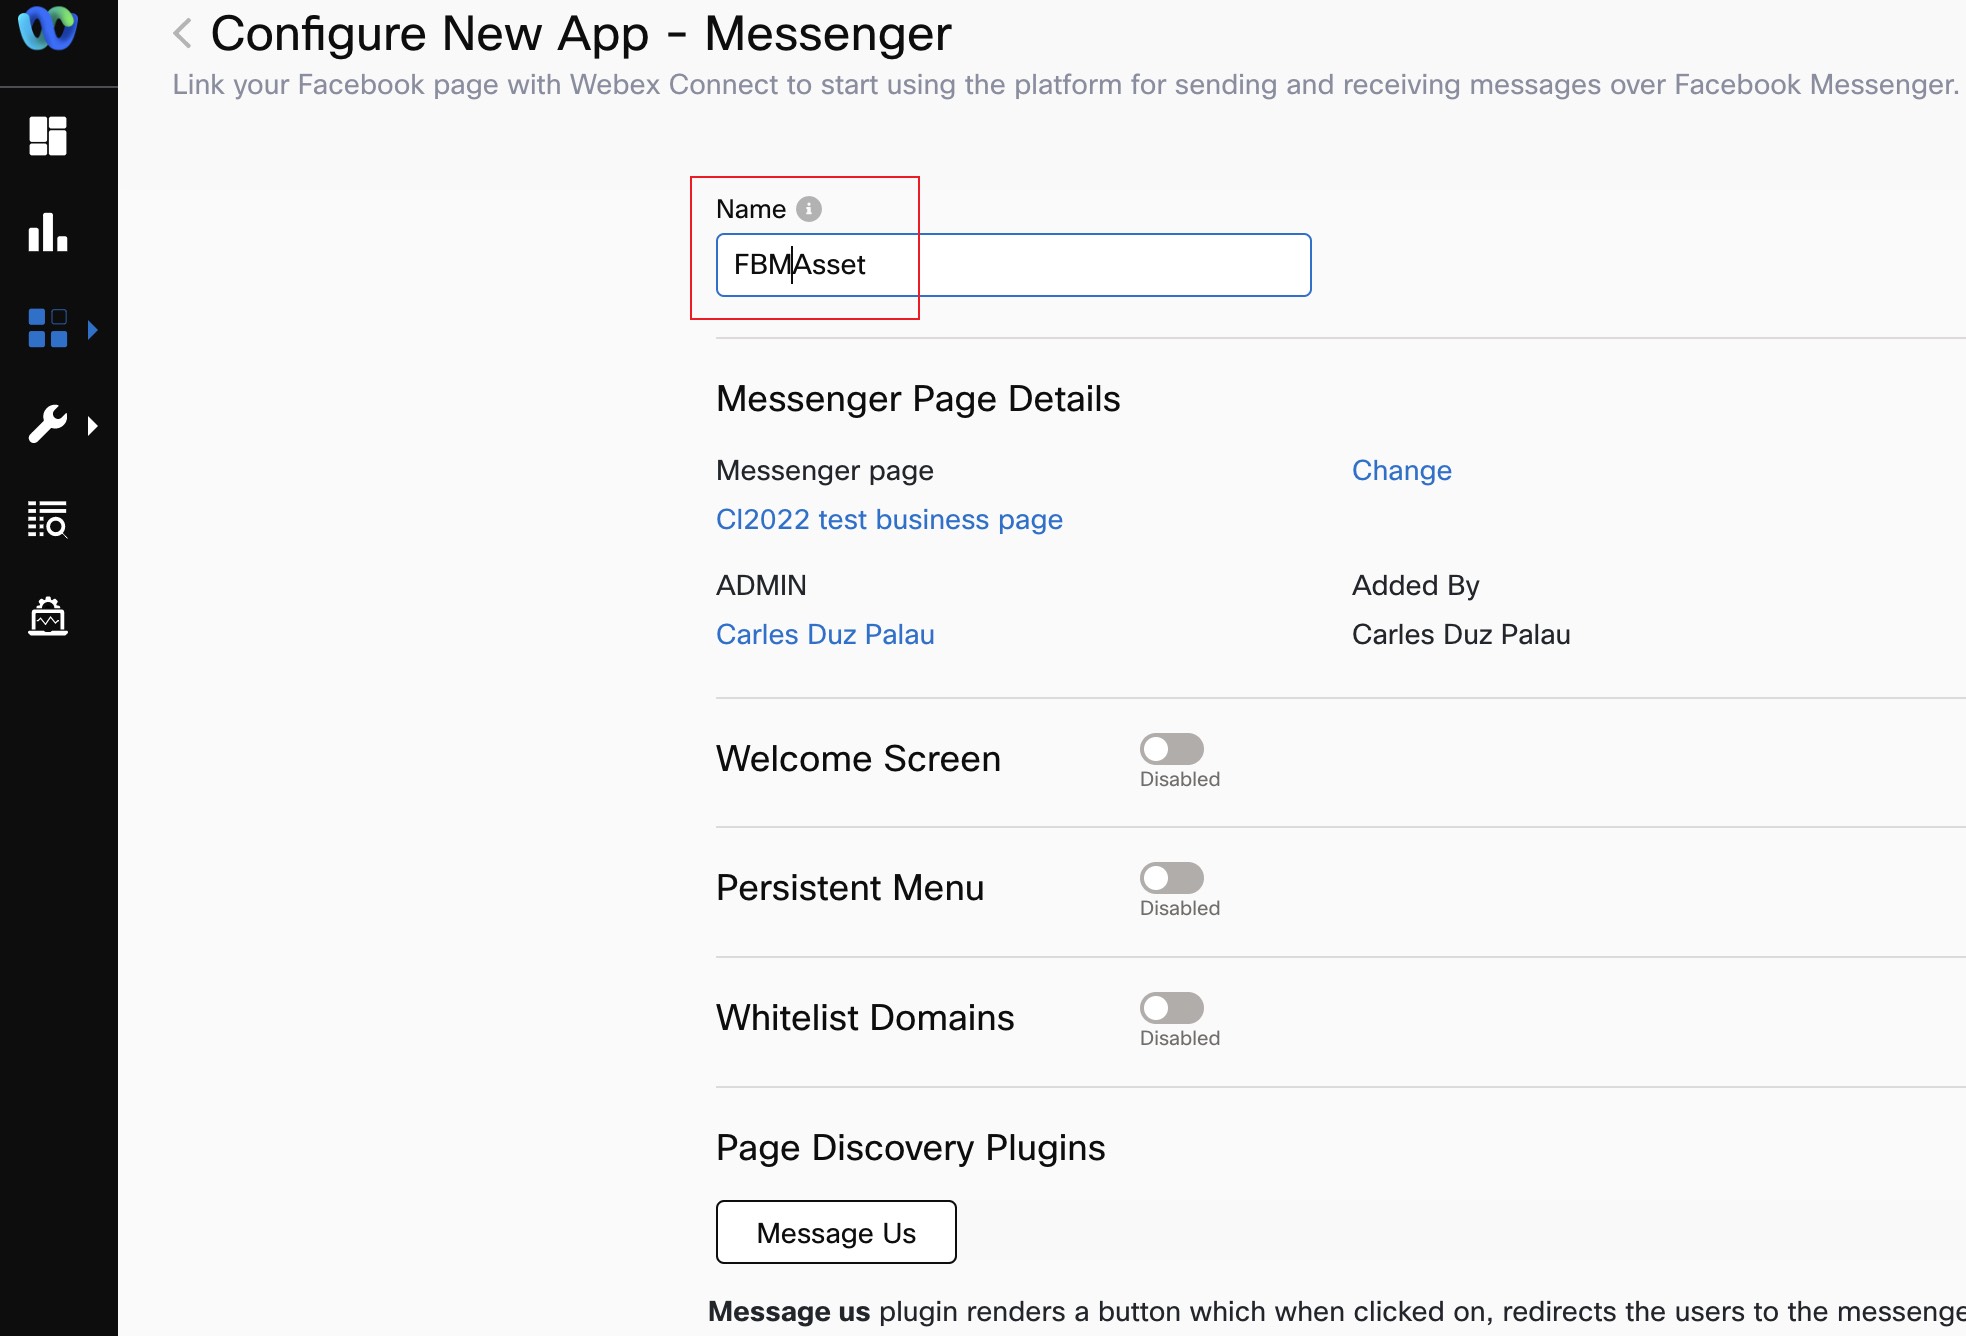
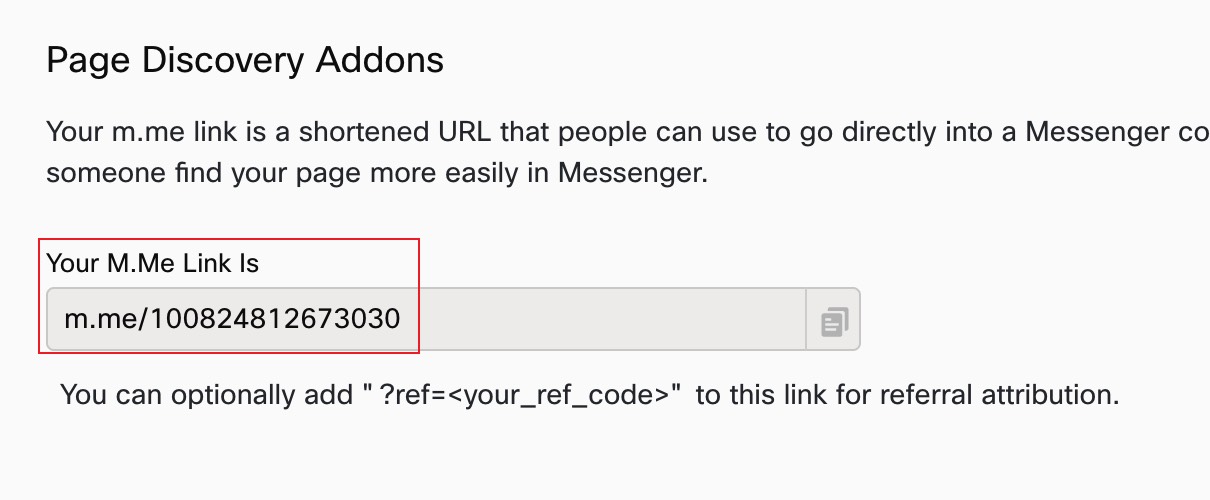
IMPORTANT: scroll to Page Discovery Addons → note the M.Me link (used to trigger Facebook Messenger interaction). The numeric string in the M.Me link is the Facebook Page ID.
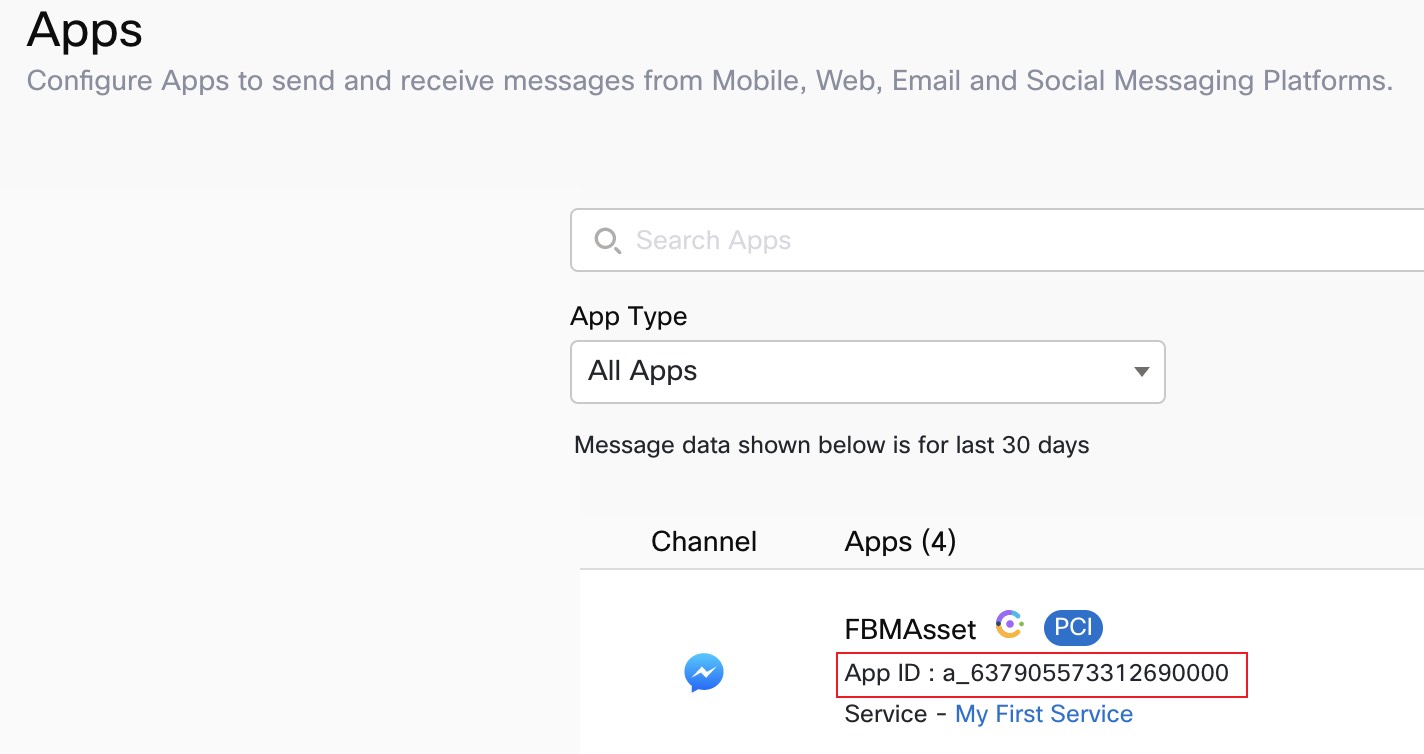
Back to Assets Apps → note the App ID
3. Create Entry Point and Queue
Entry Point
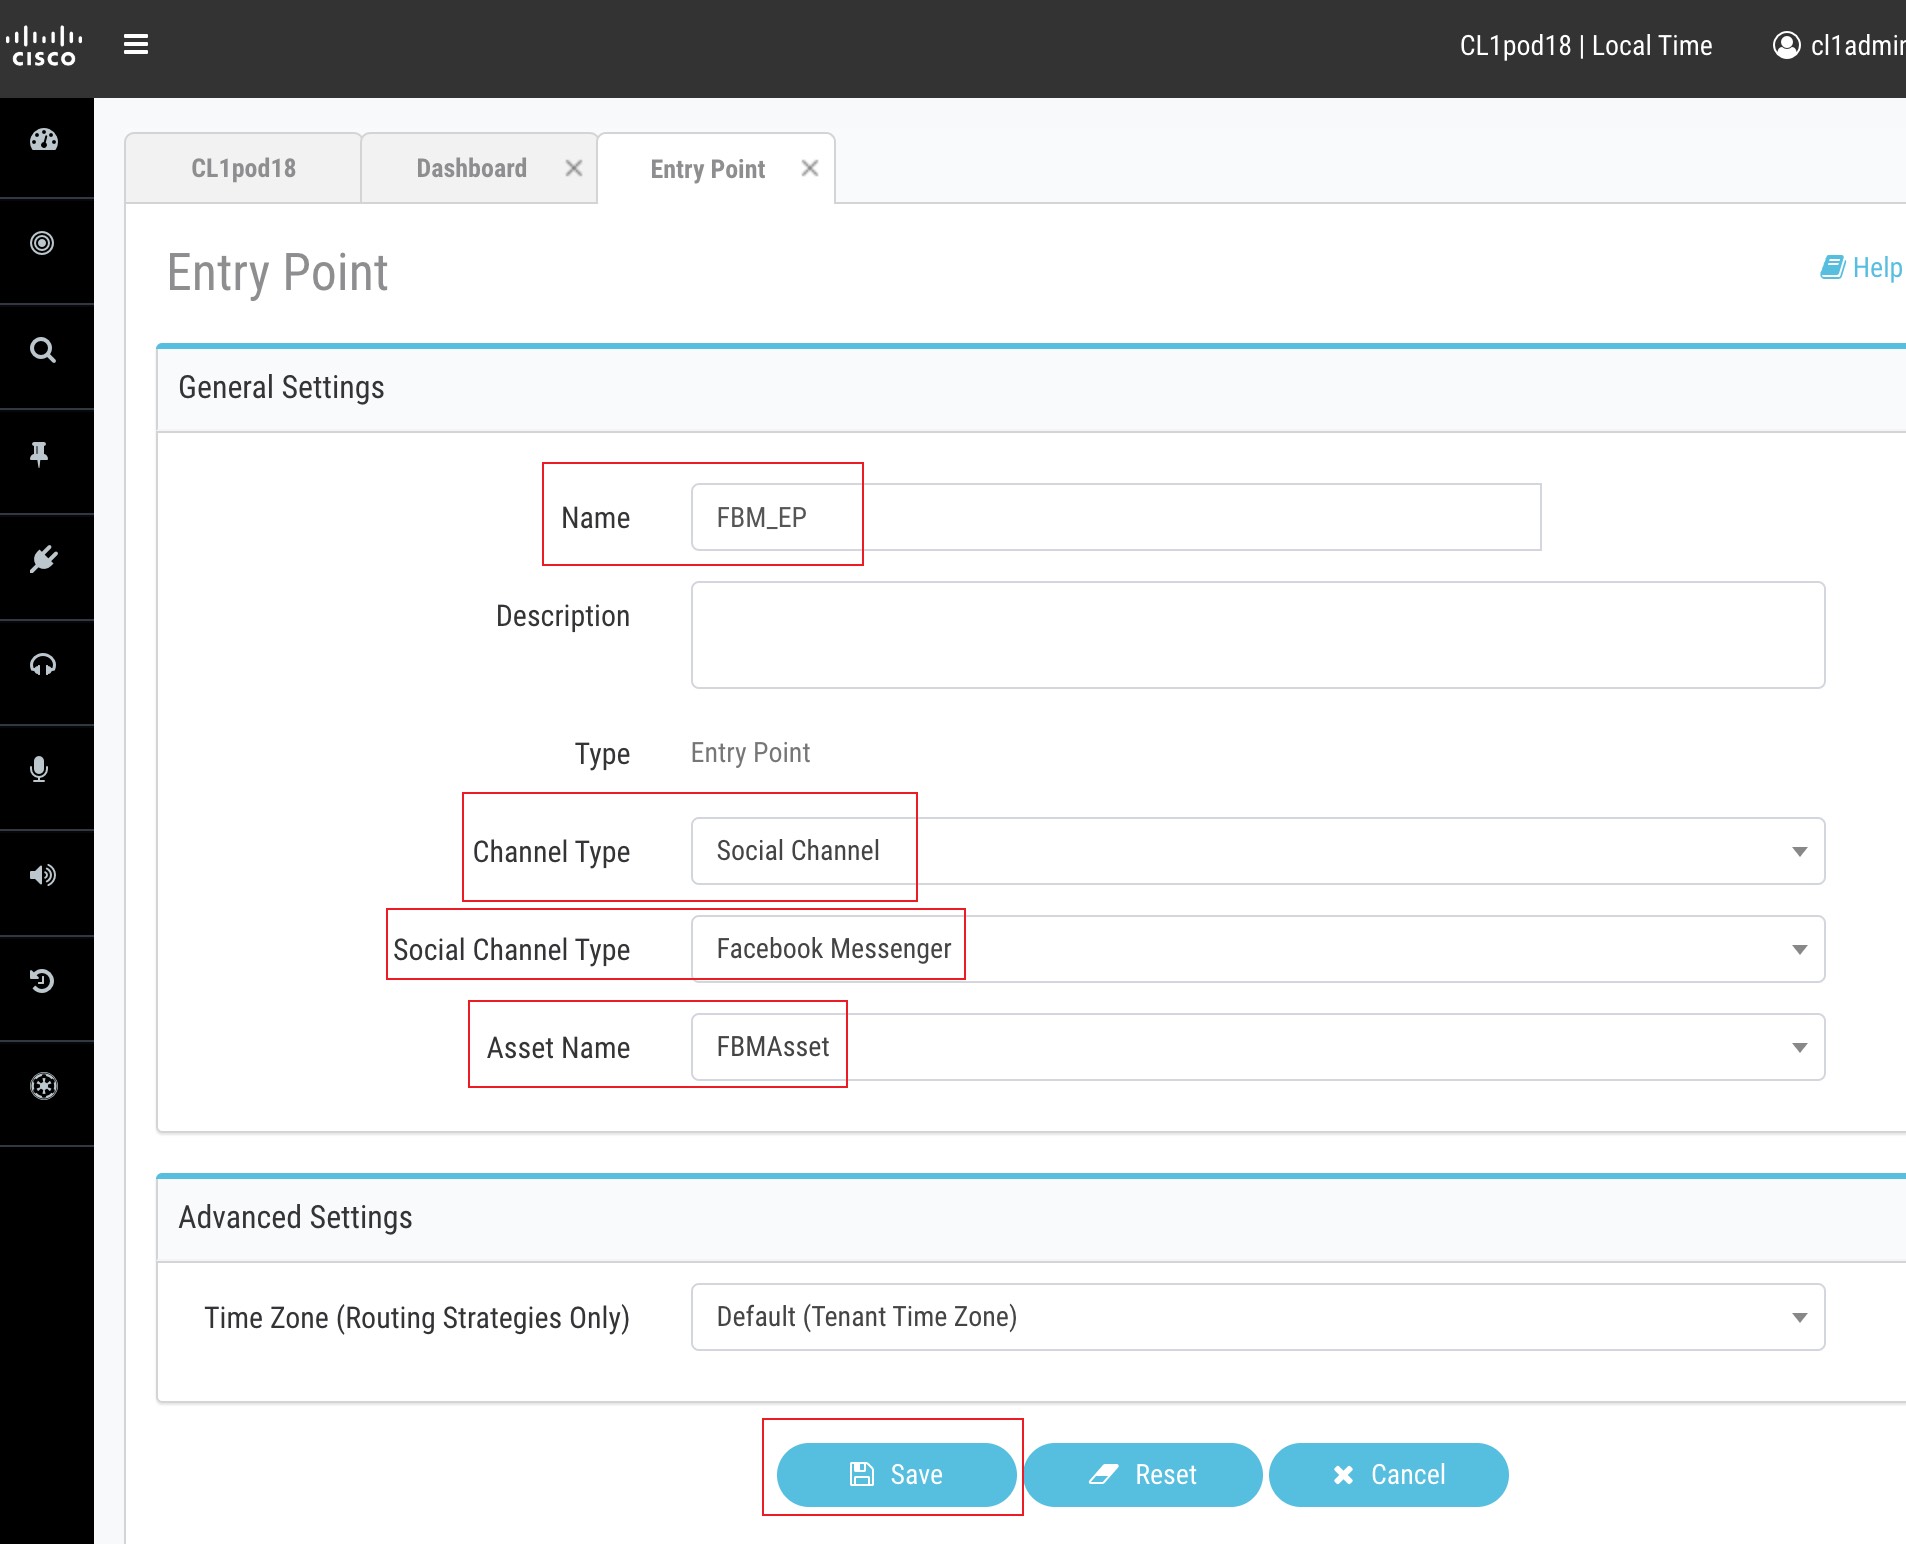
Management Portal → Provisioning → Entry Points/Queues → Entry Point → New Entry Point
Name FBM_EP, Channel Type Social Channel, Social Channel Type Facebook Messenger, Asset Name (your Connect asset) → Save
Queue
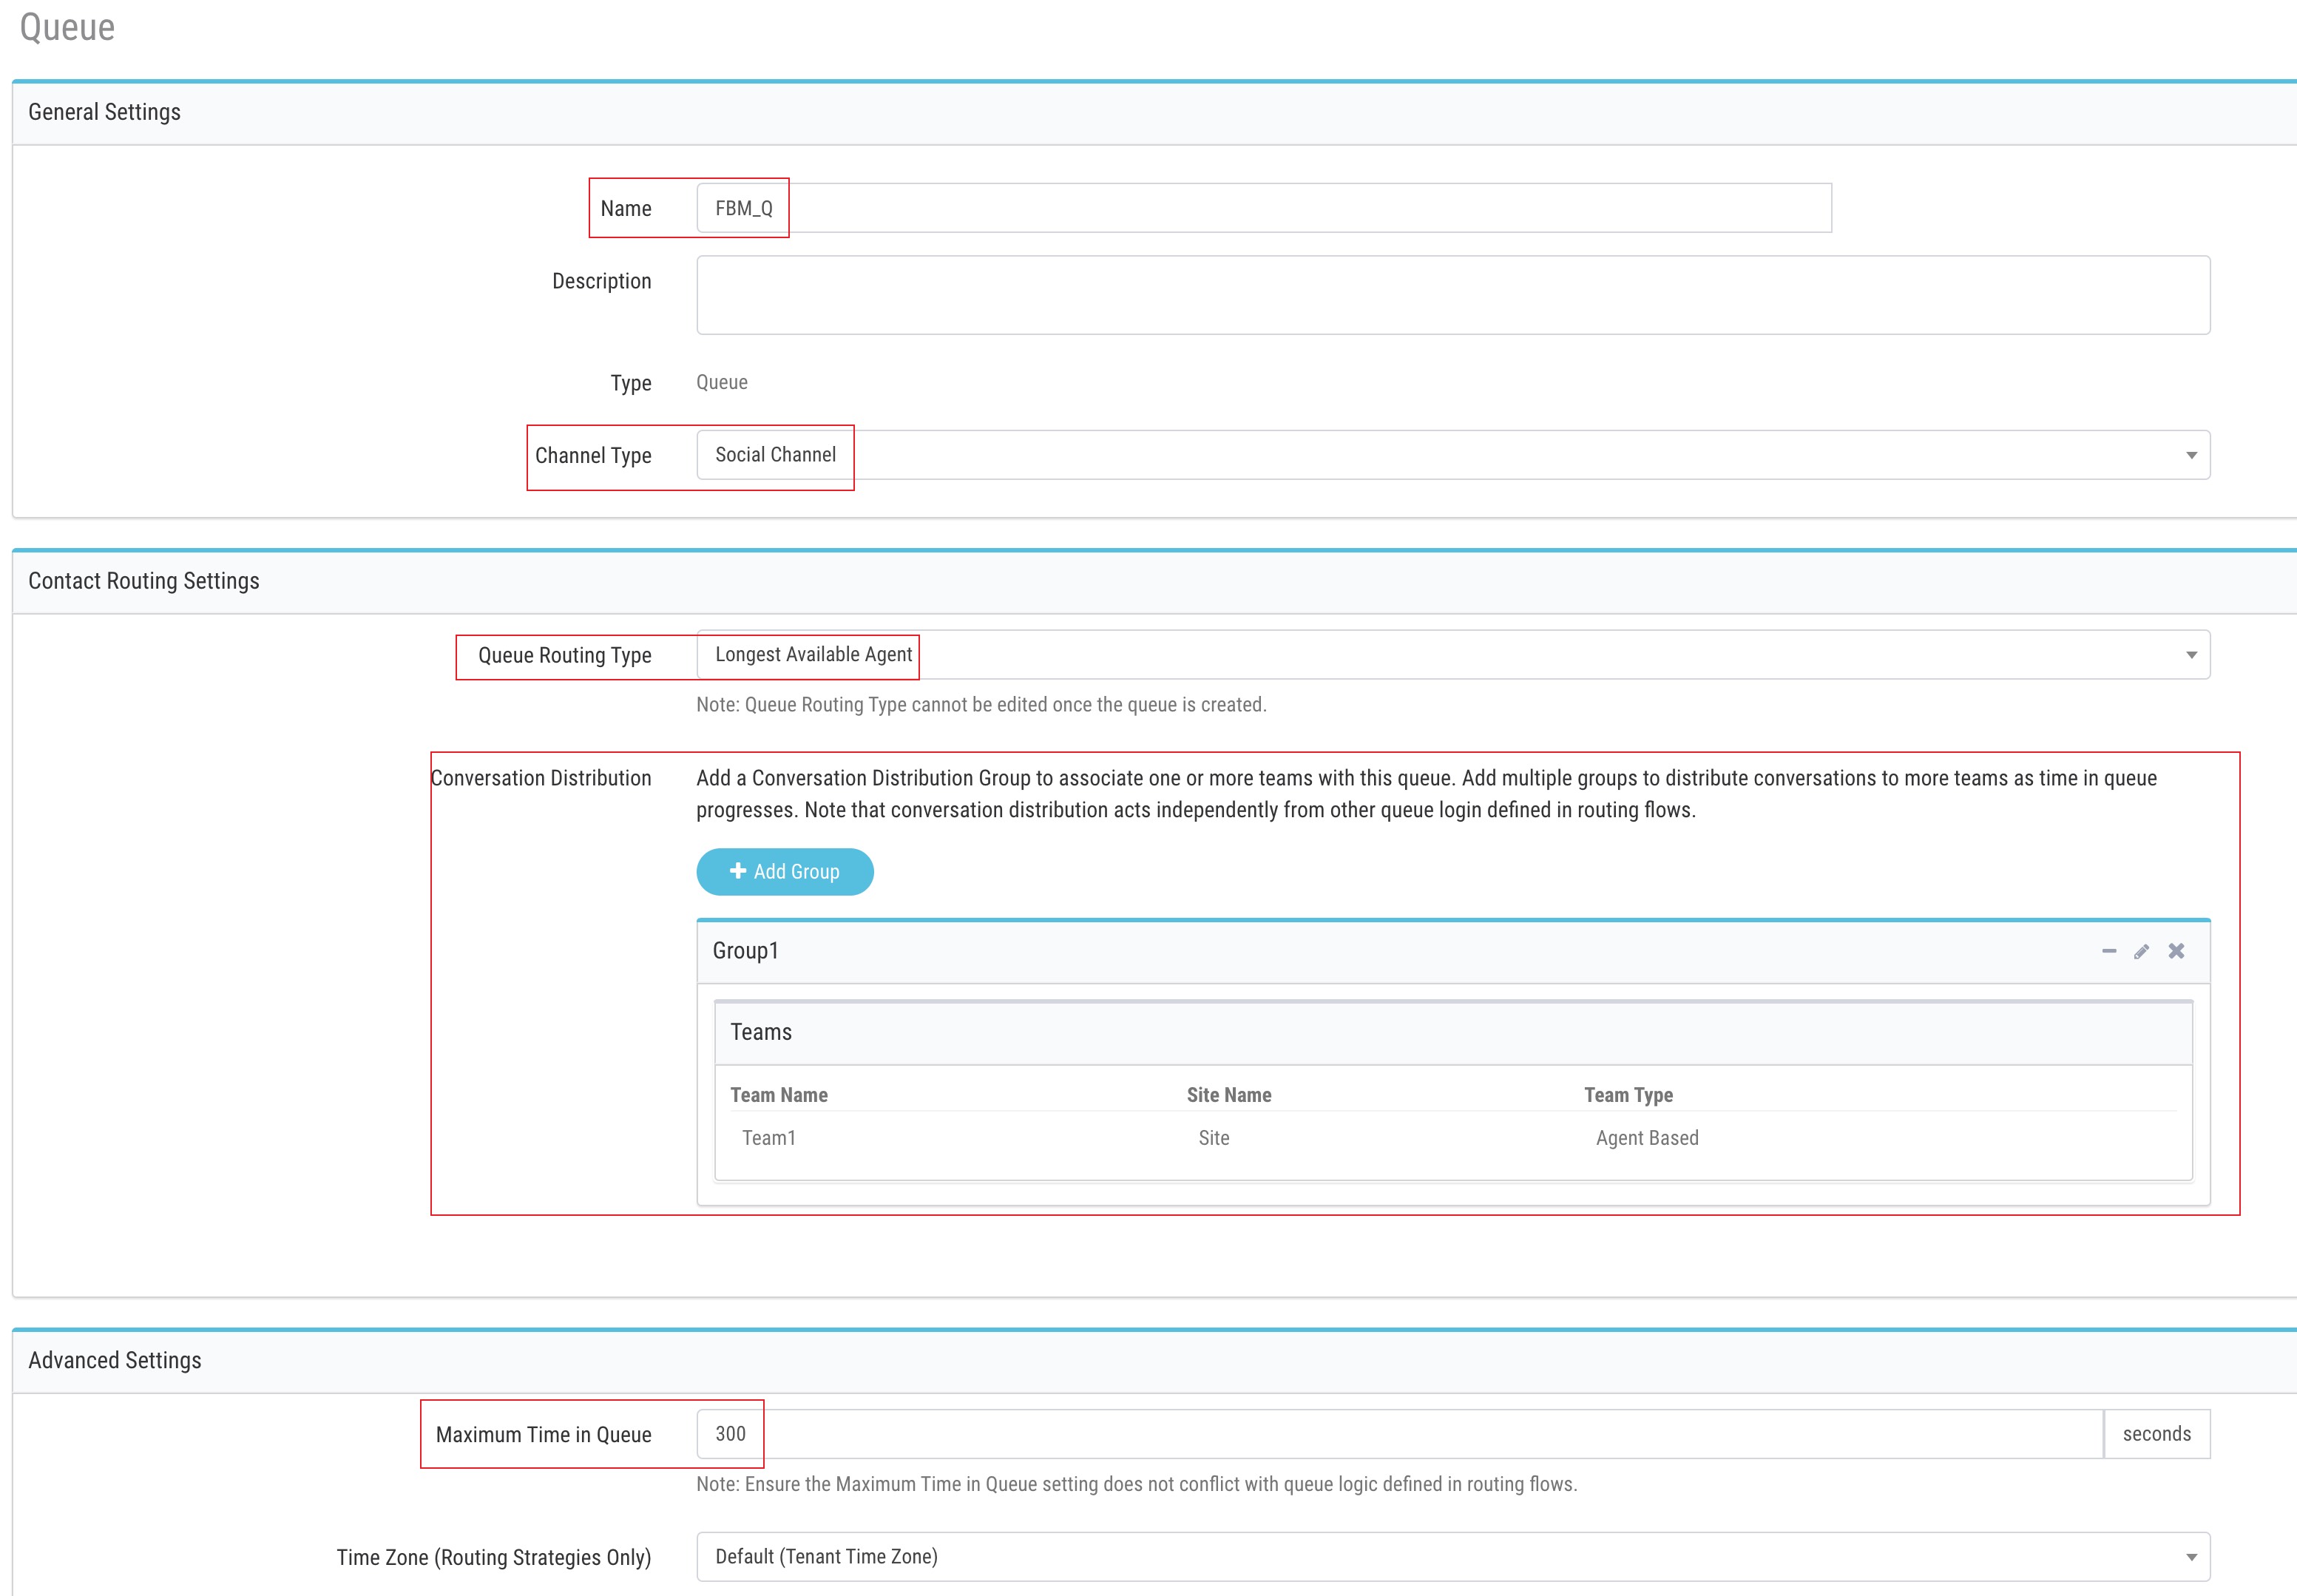
Provisioning → Entry Points/Queues → Queue → New Queue
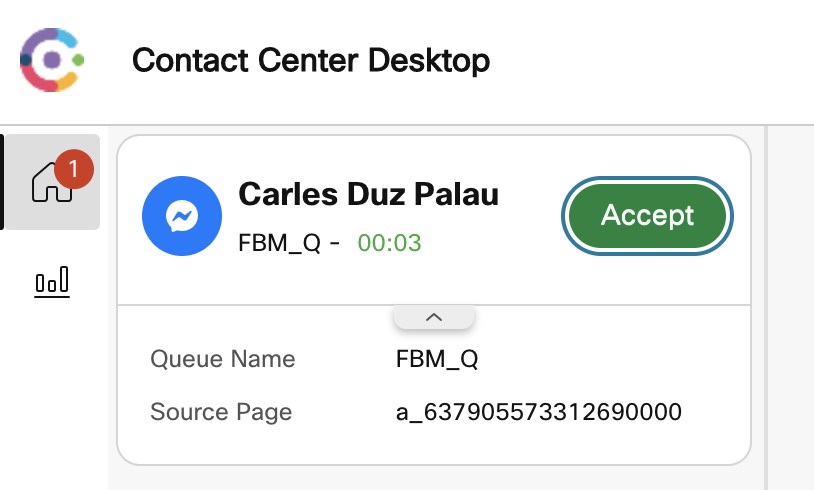
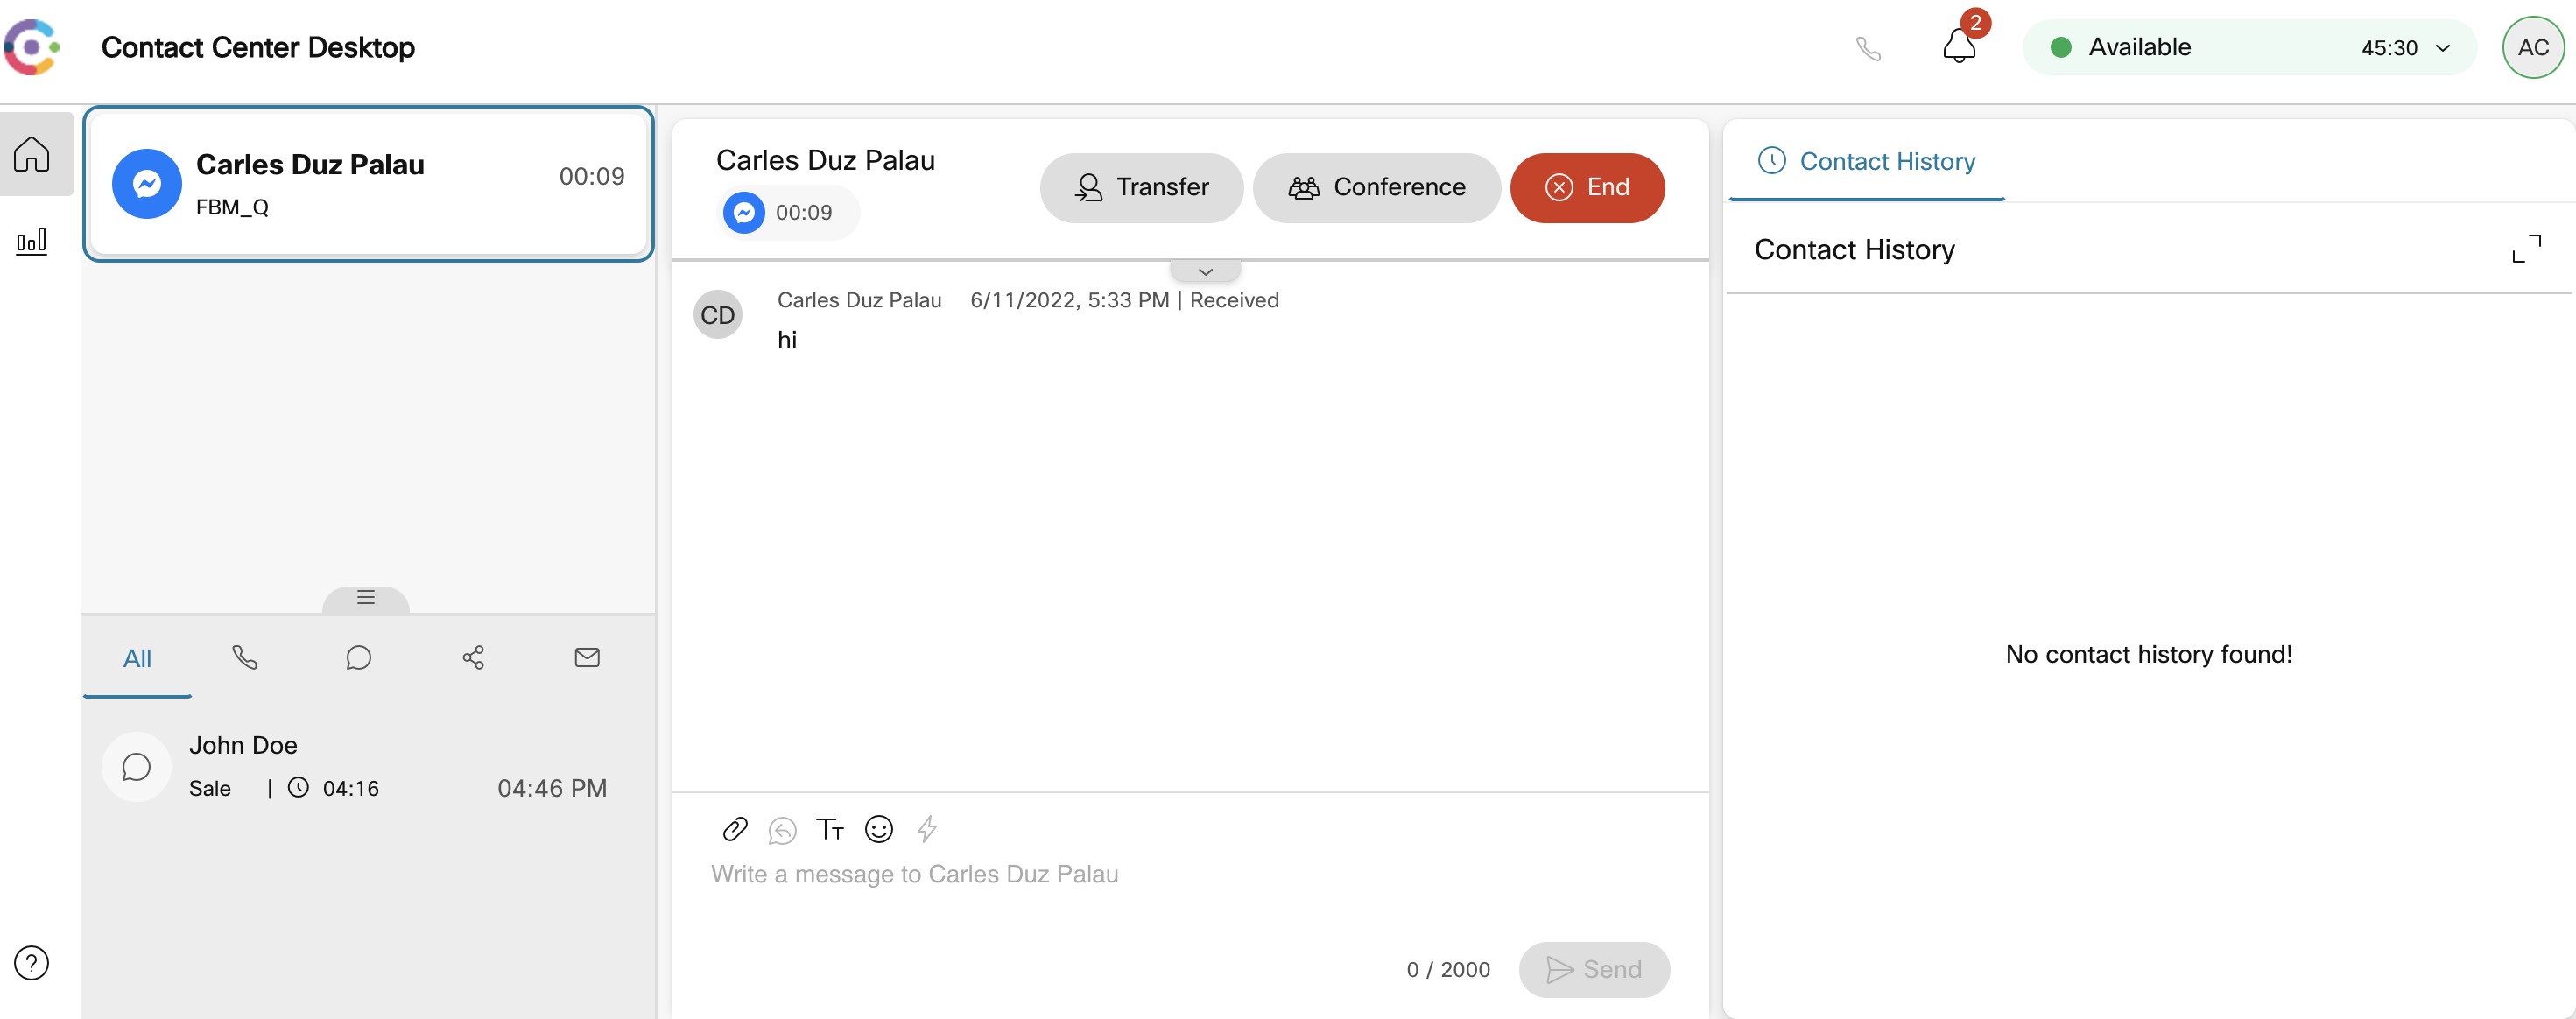
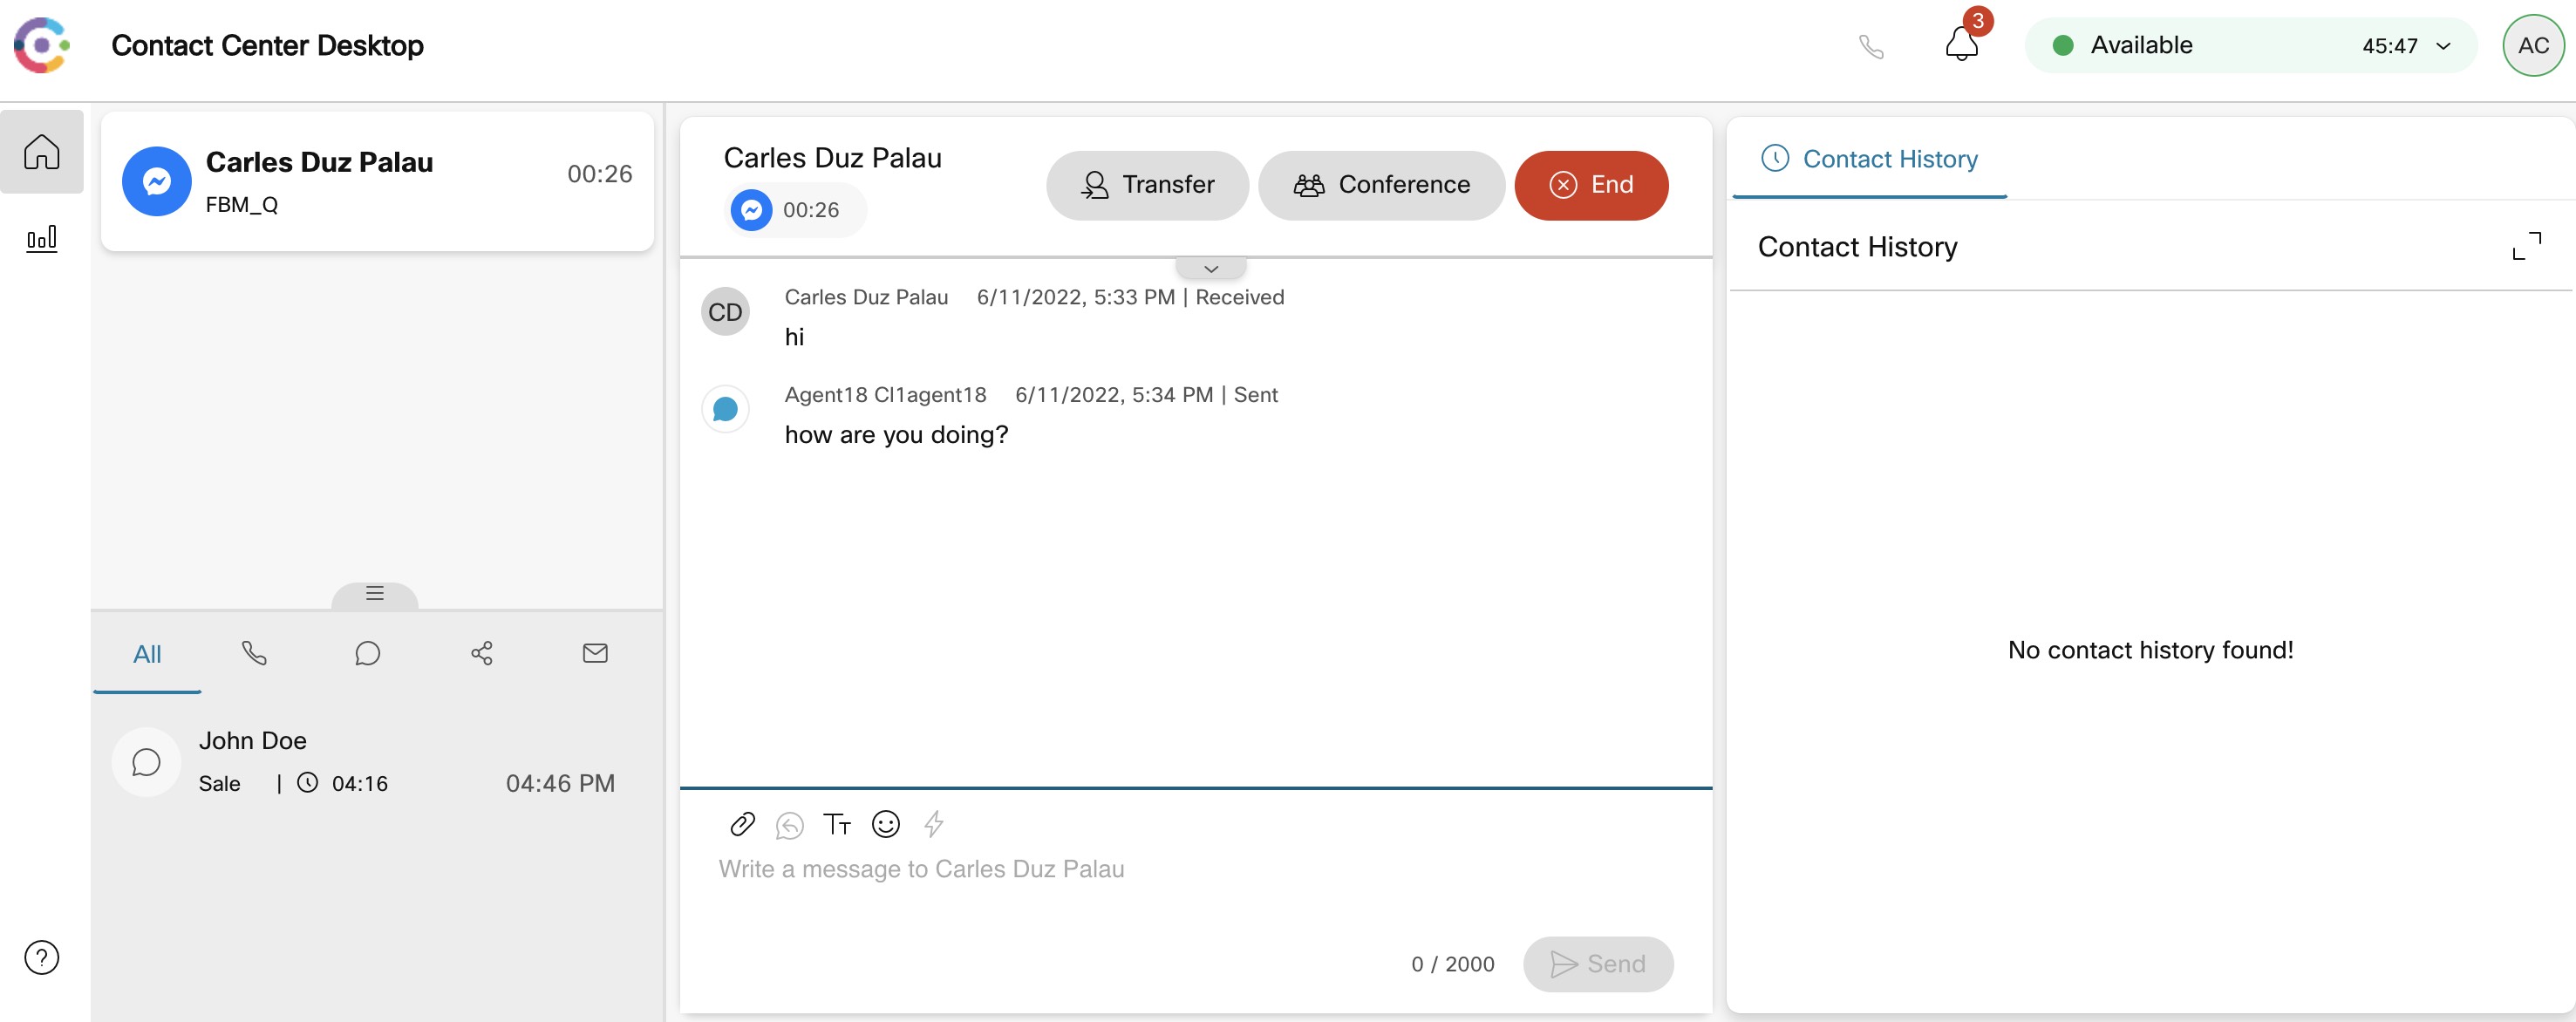
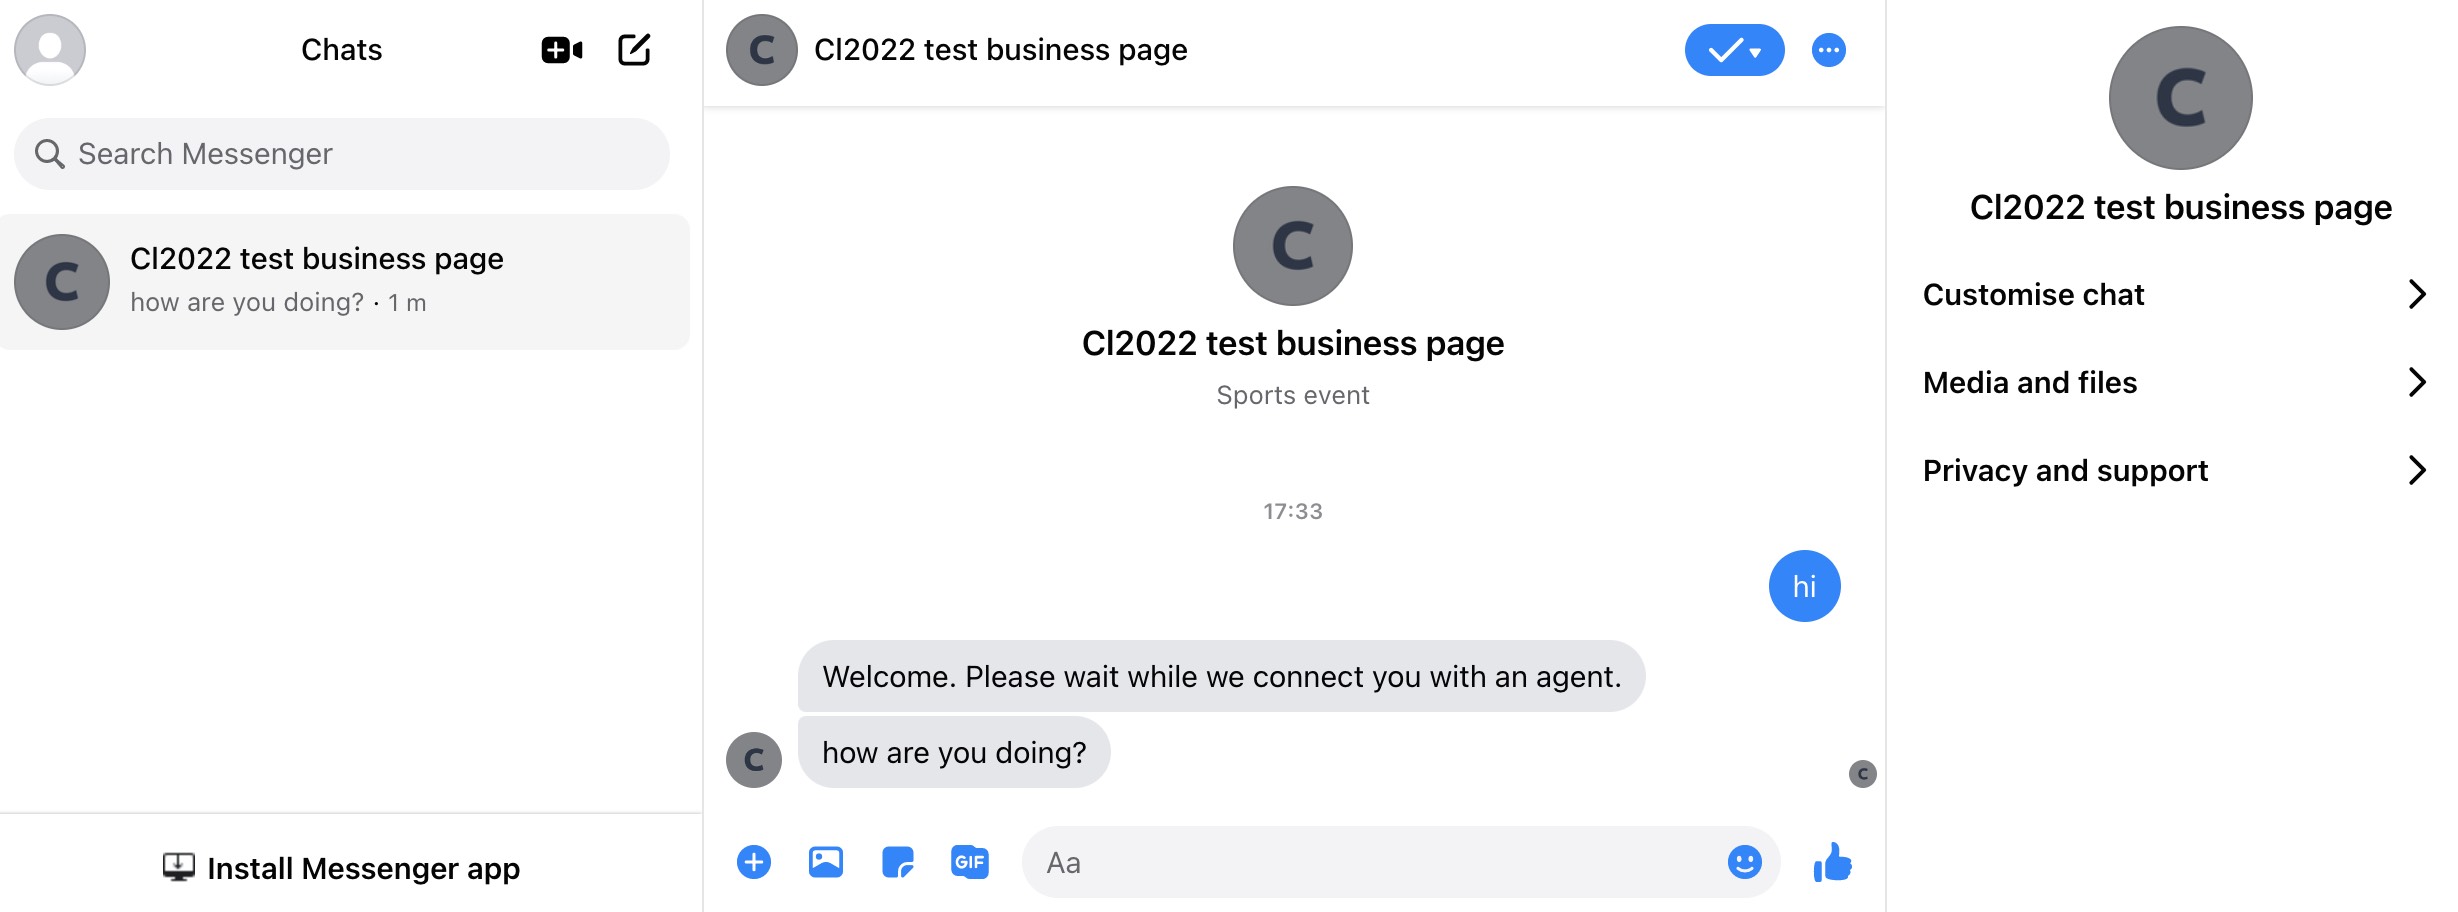
Name FBM_Q, Channel Type Social Channel, Queue Routing Type Longest Available Agent, Add Group → agent teams, Max Time in Queue 300 → Save
4. Create/Upload Facebook Messenger flow
1. Initial flow loading
Download Facebook Inbound Flow.workflow.zip from GitHub → unzip
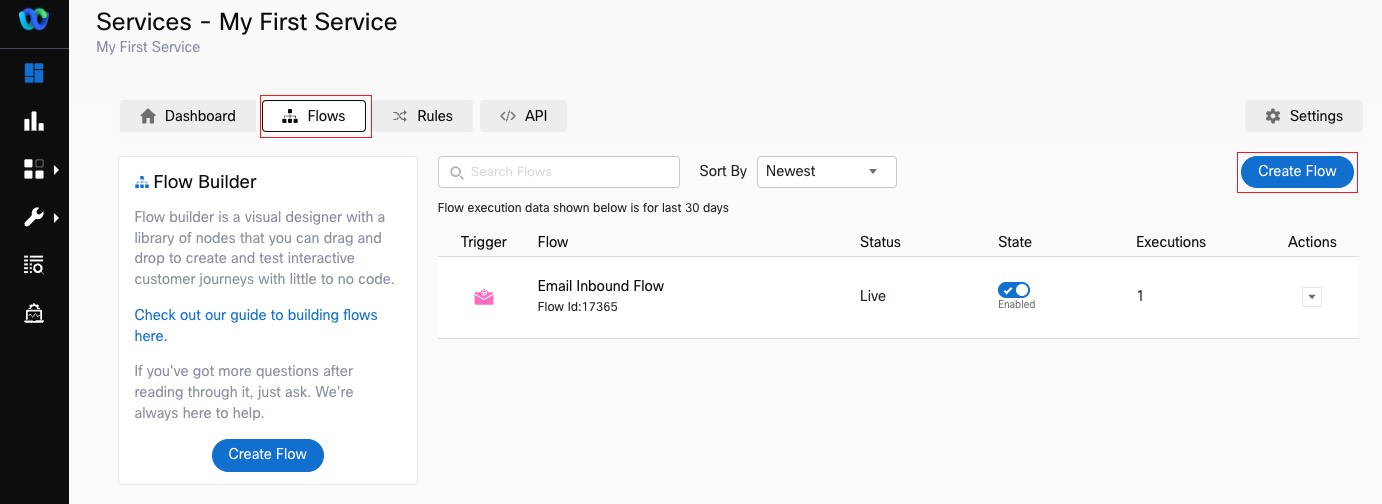
Webex Connect → My First Service → FLOWS → CREATE FLOW
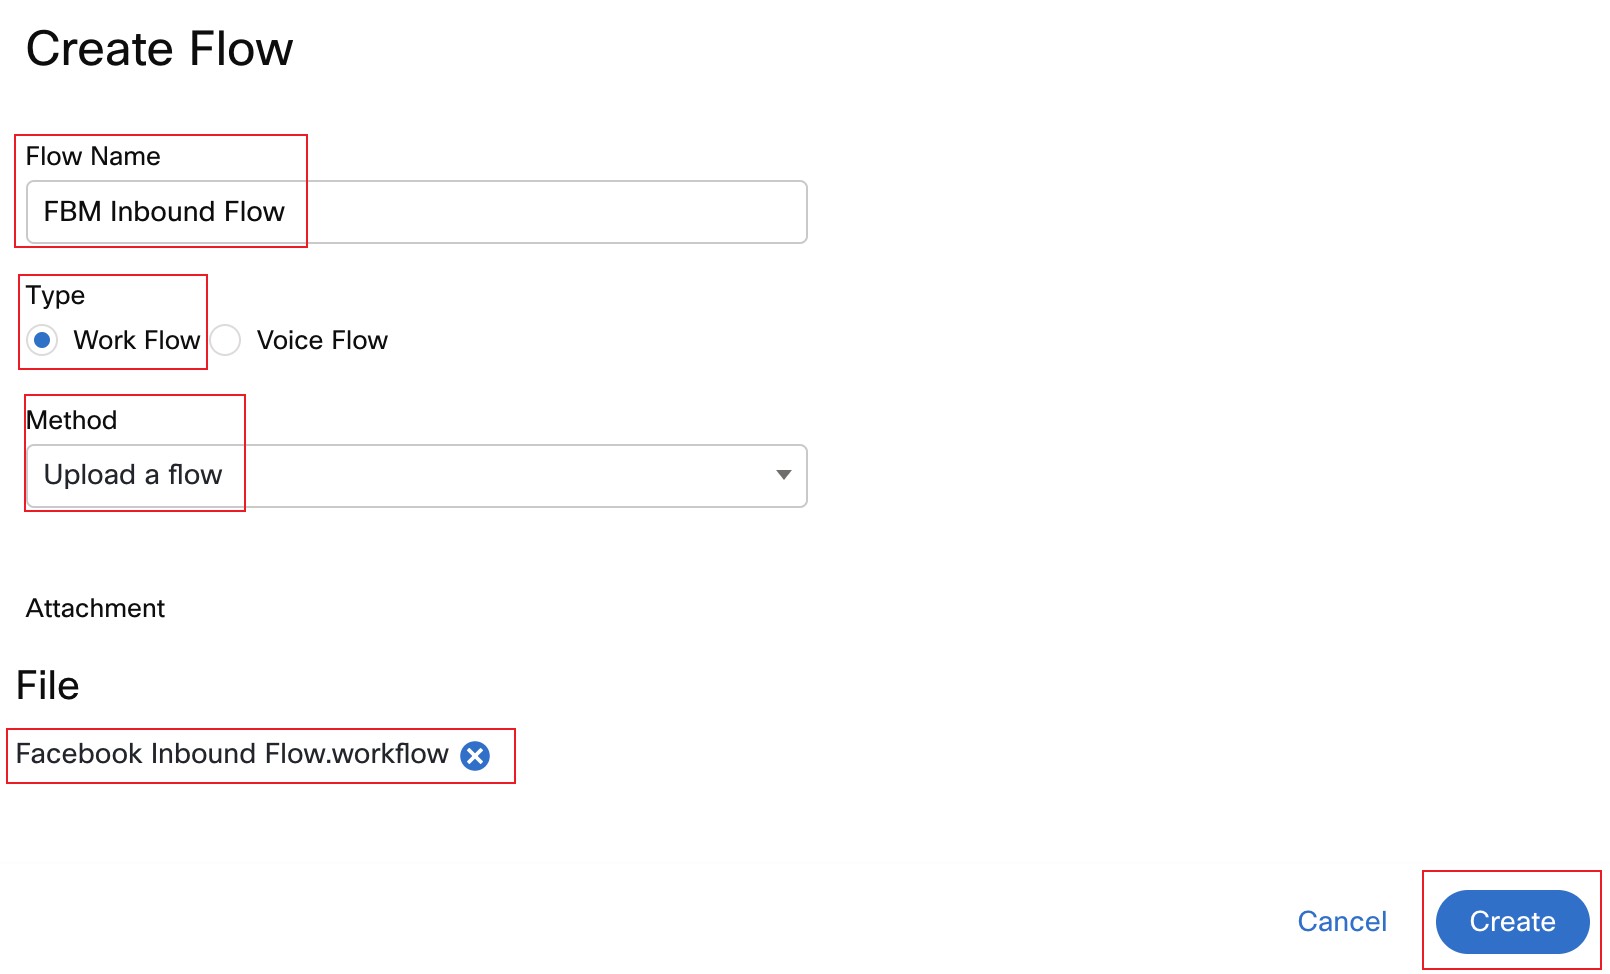
Flow Name FBM Inbound Flow, Type Work Flow, Method Upload a flow → drag file → CREATE → SAVE
2. Start node and Custom Variables
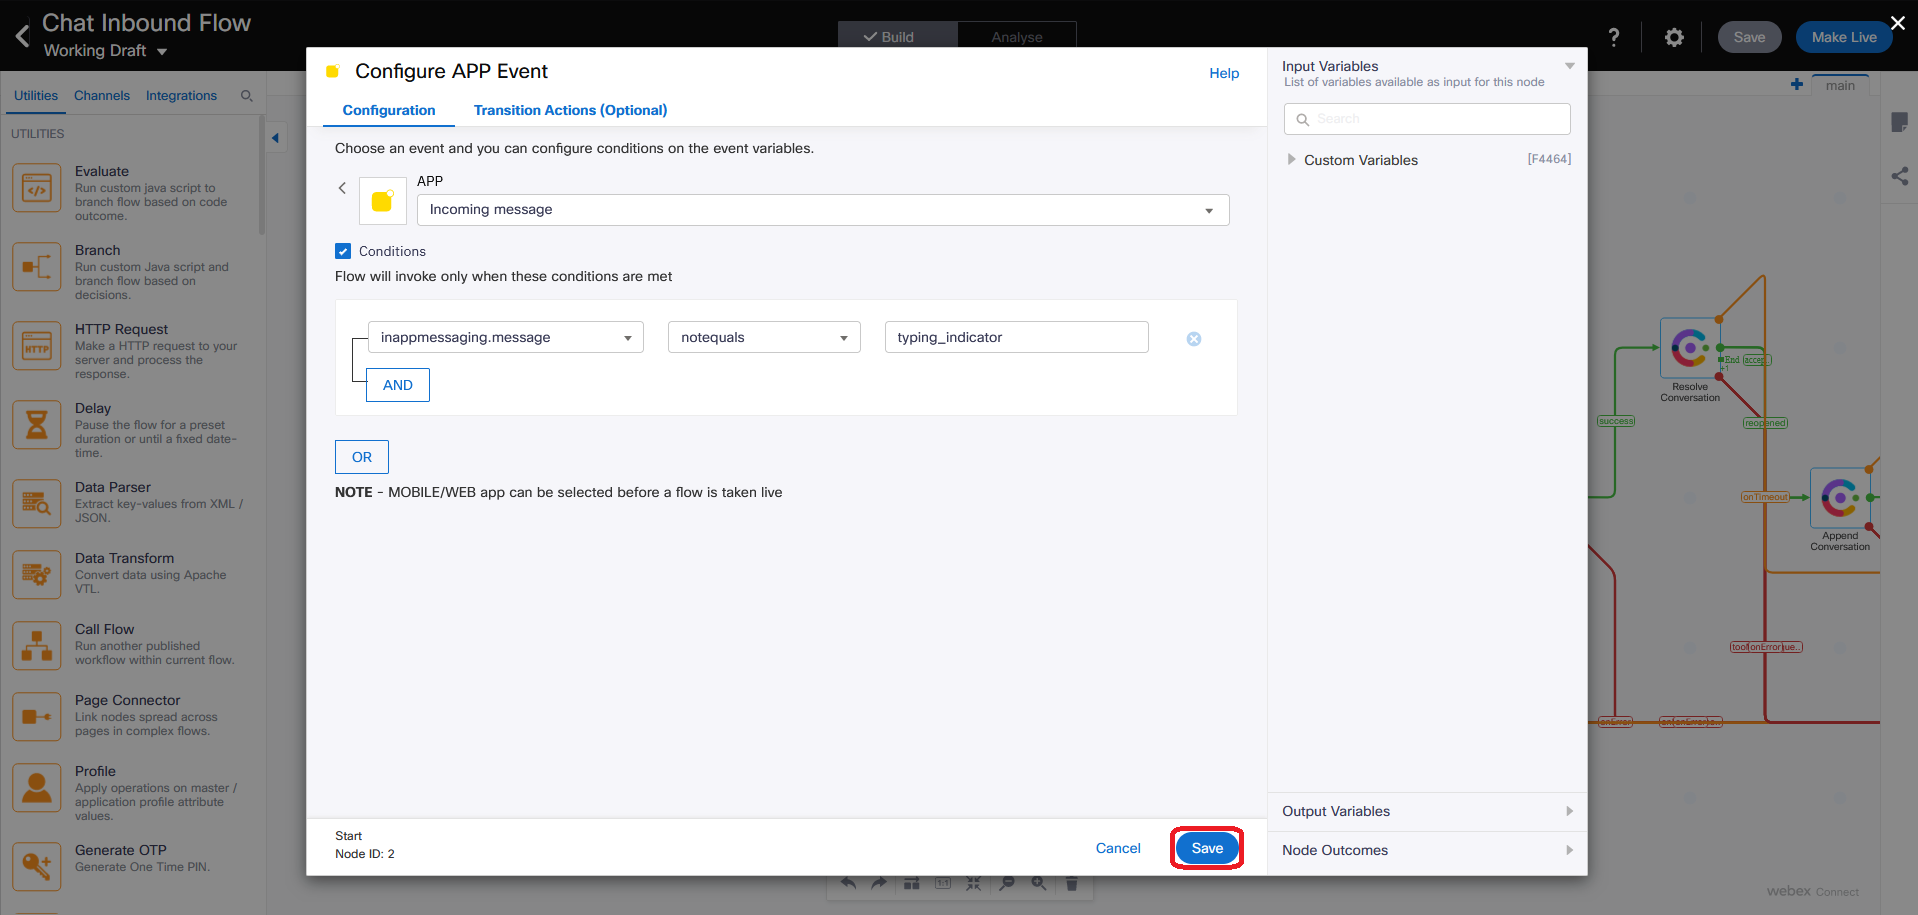
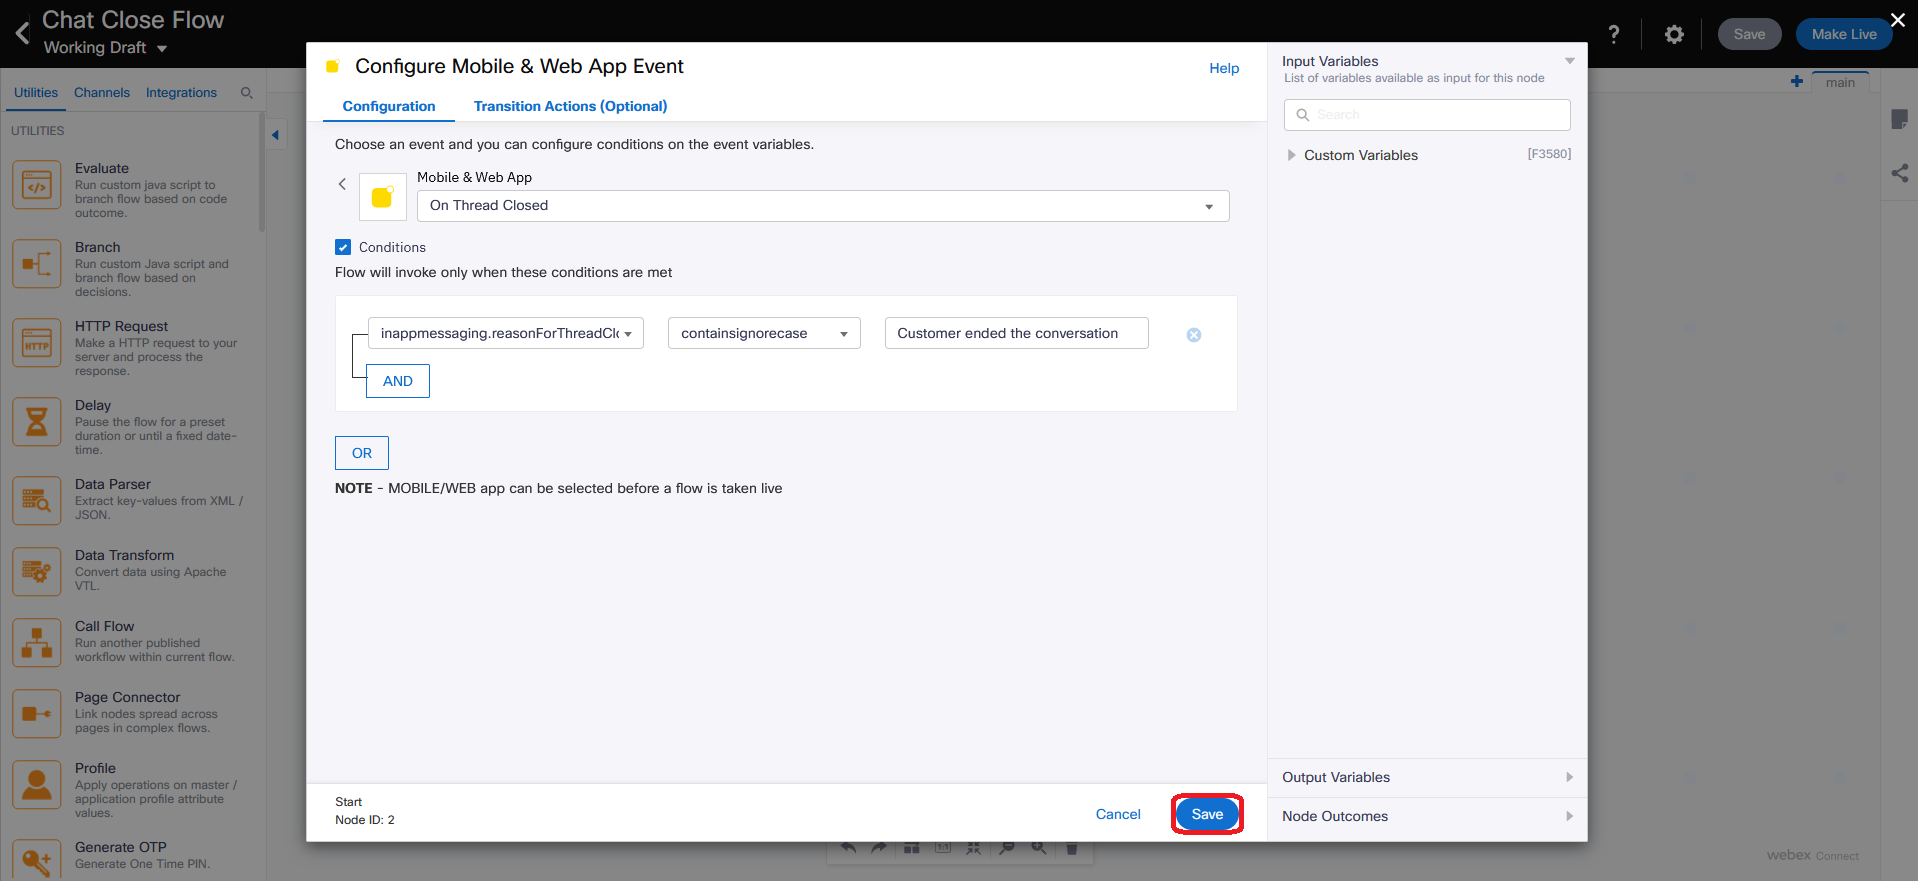
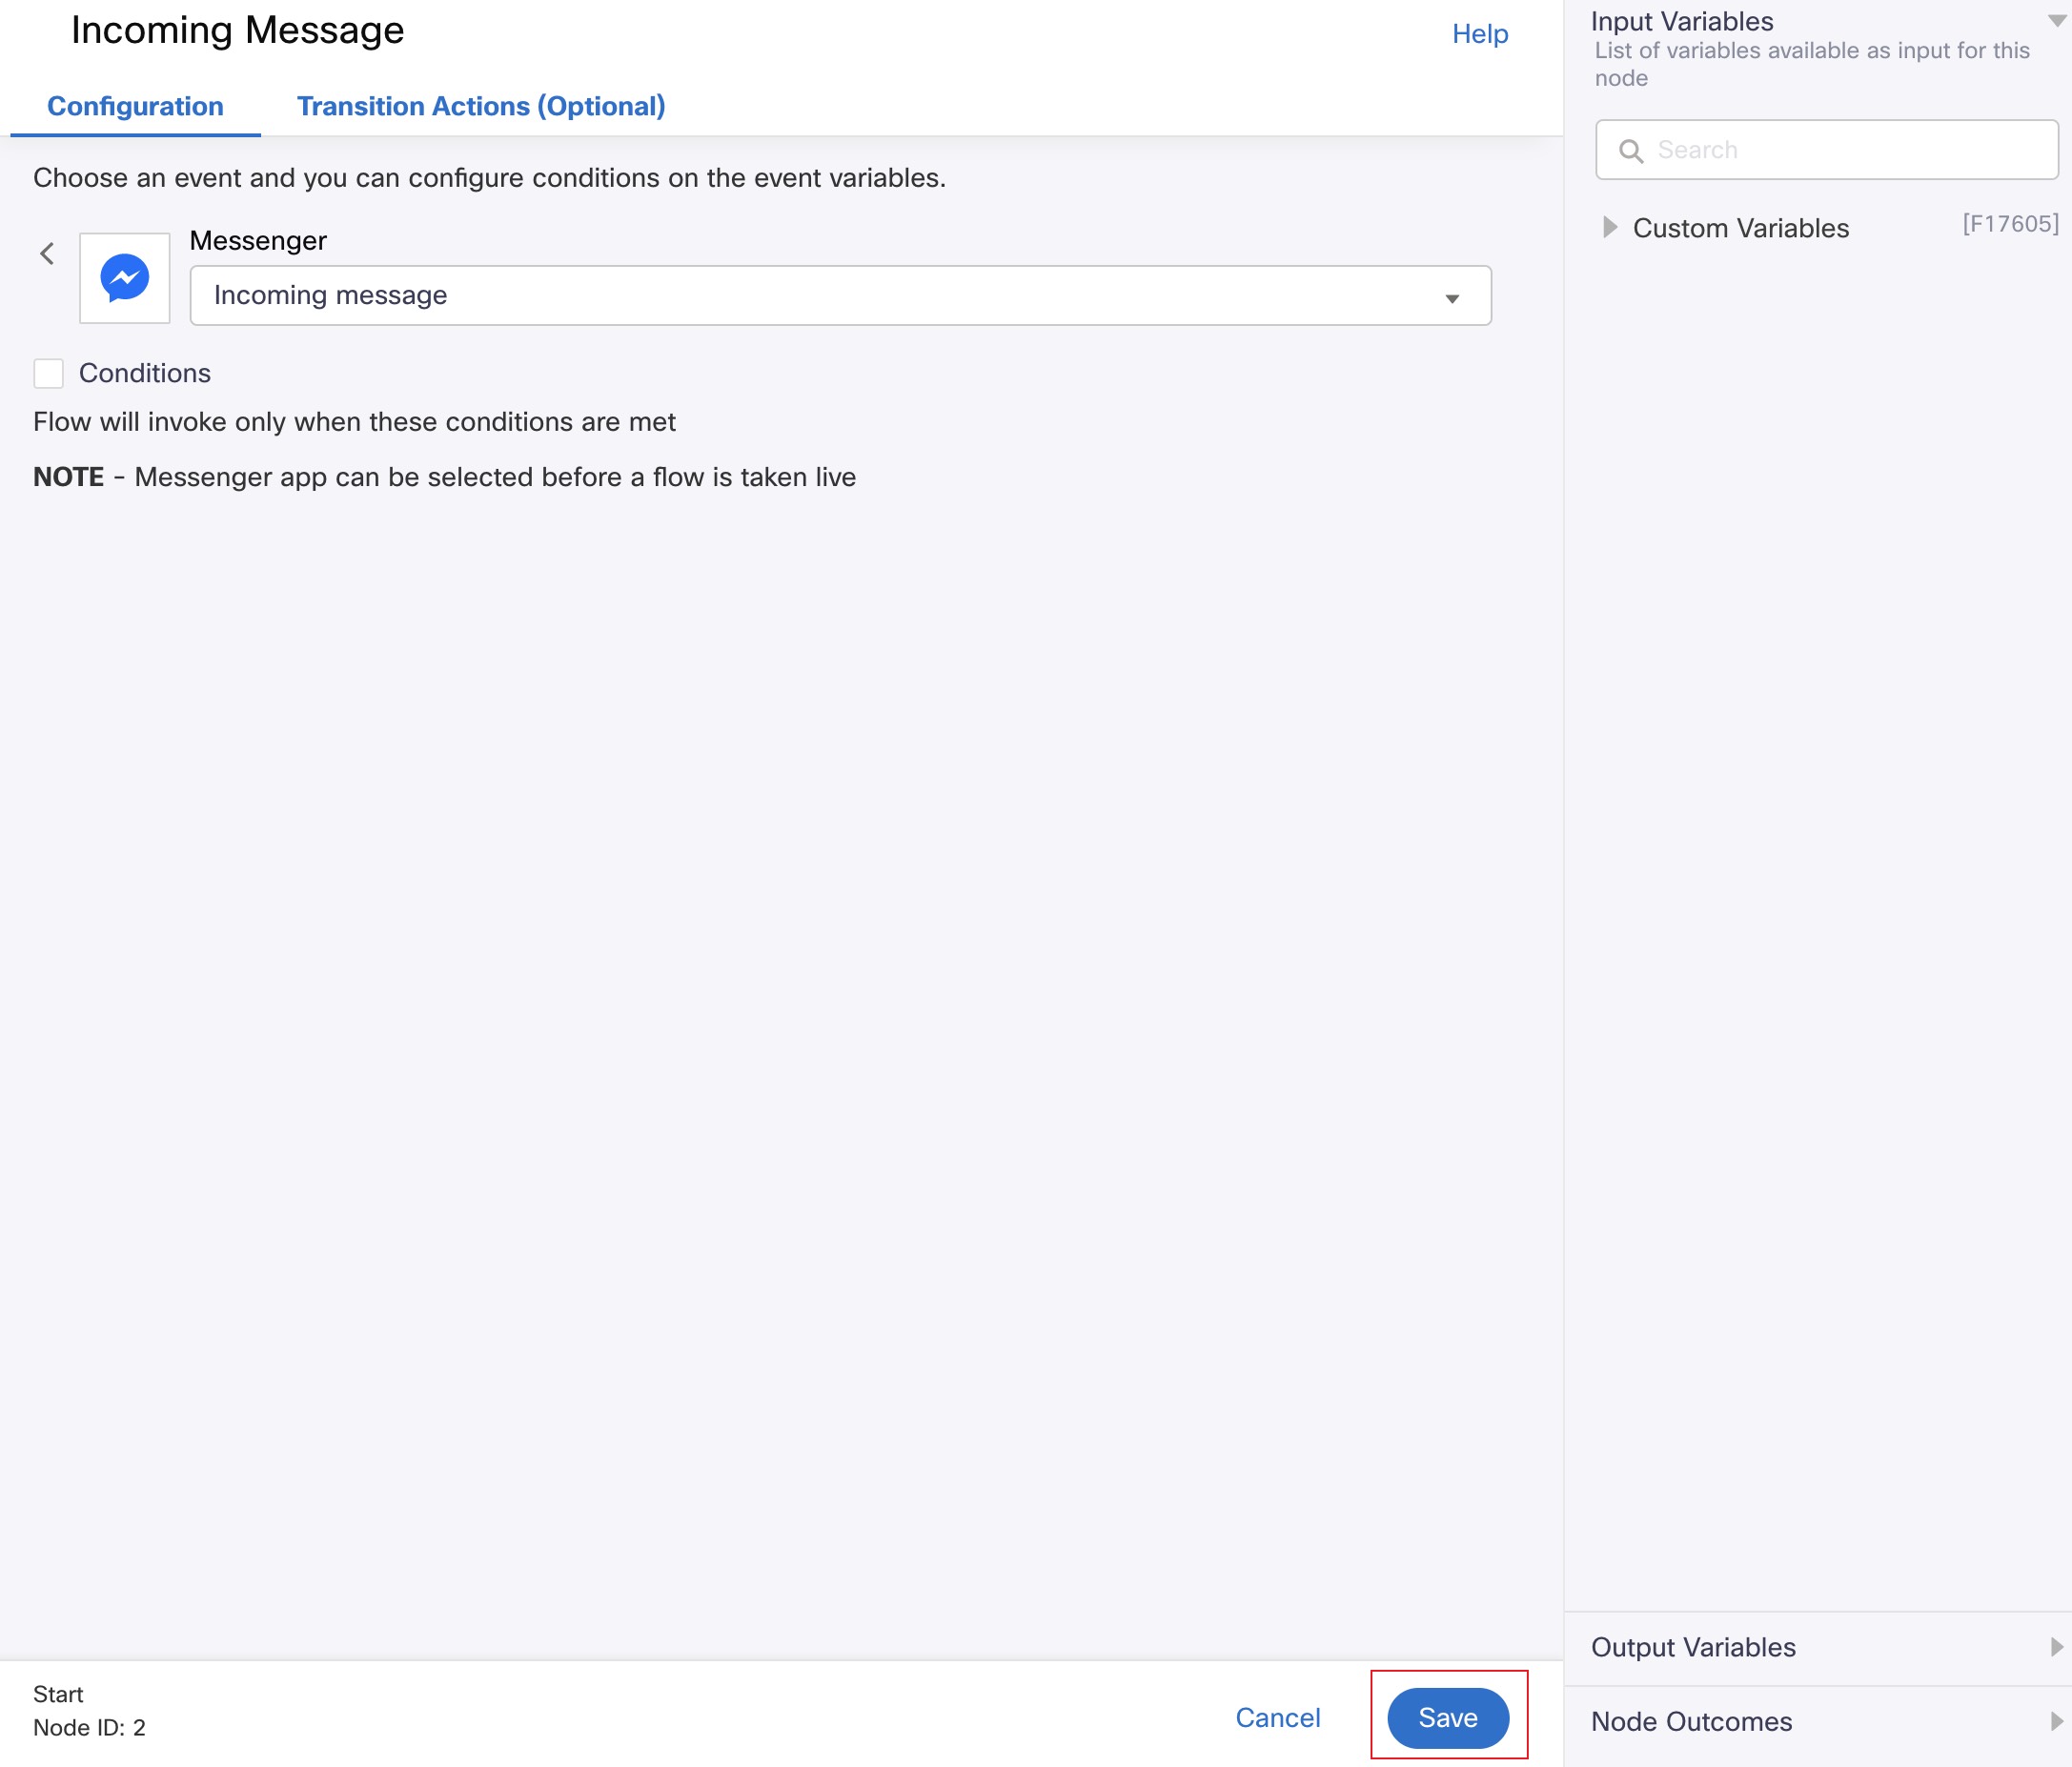
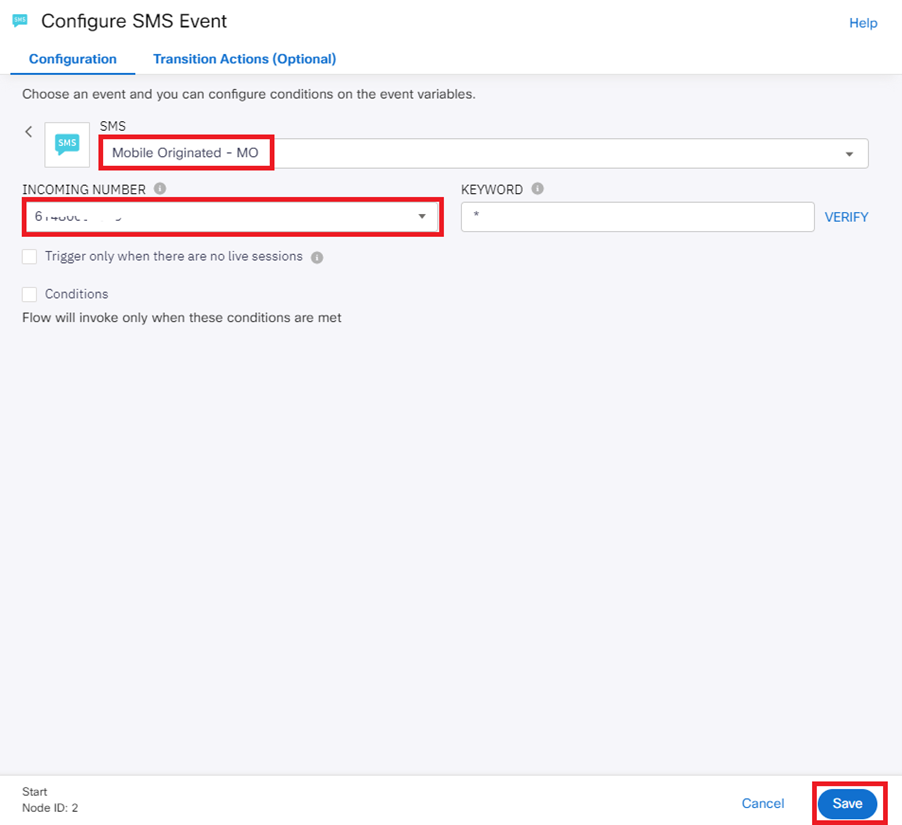
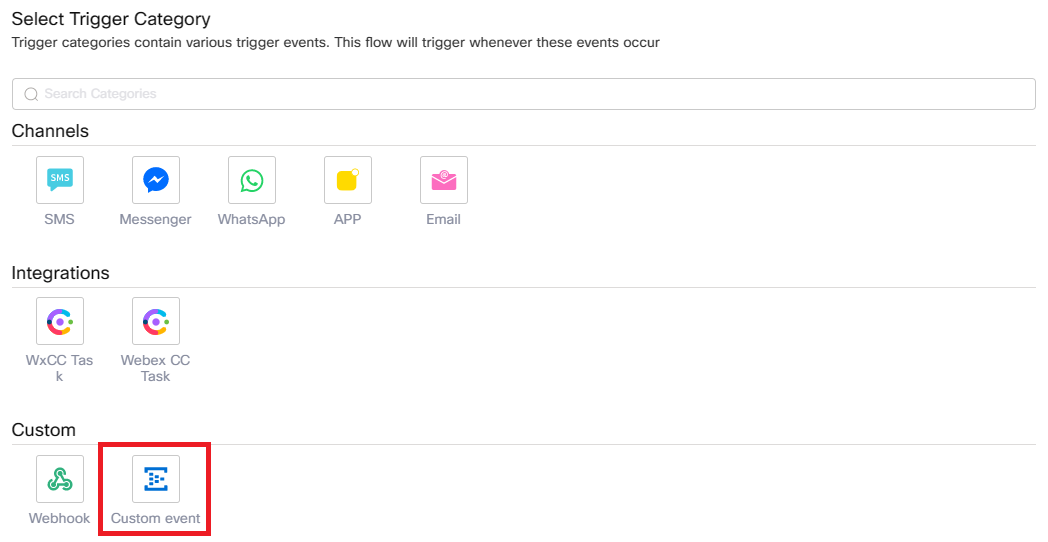
Configure APP Event node → Save (default settings)
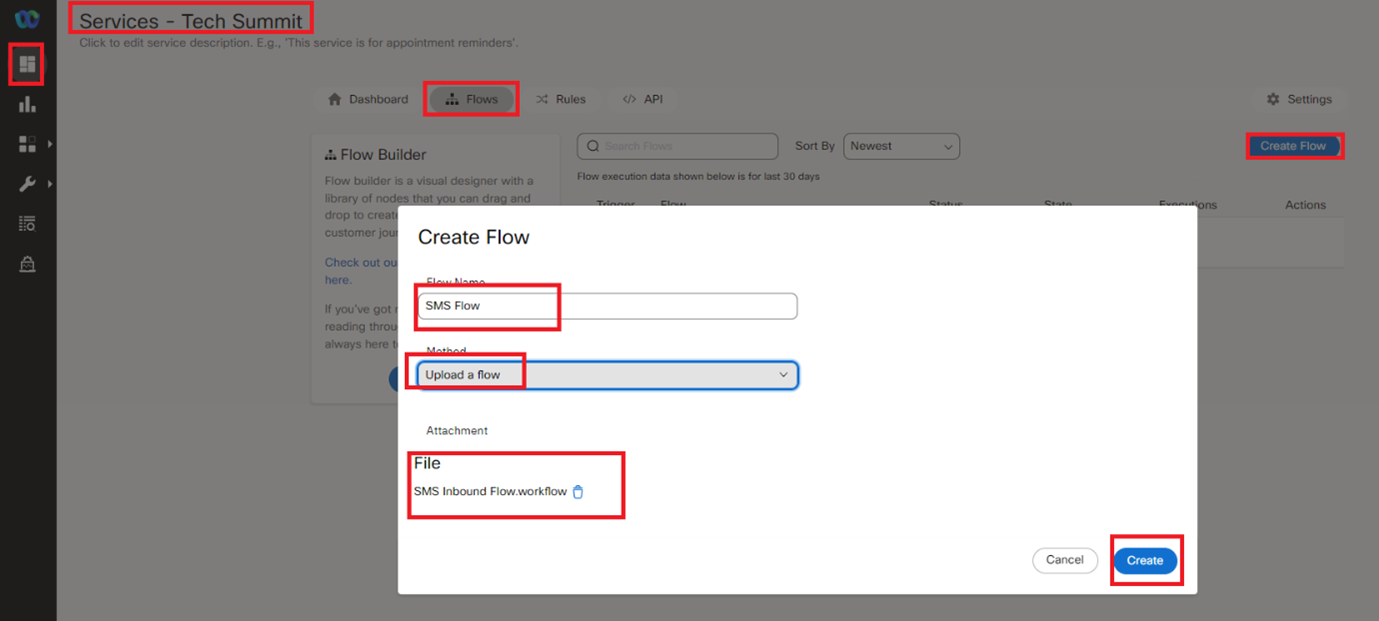
Flow Name SMS Inbound Flow, Type Work Flow, Method Upload a flow → drag file → CREATE
Select Incoming number from dropdown → Save
4. Modifying the Flow
Resolve Conversation node → Flow Id from URL → Save
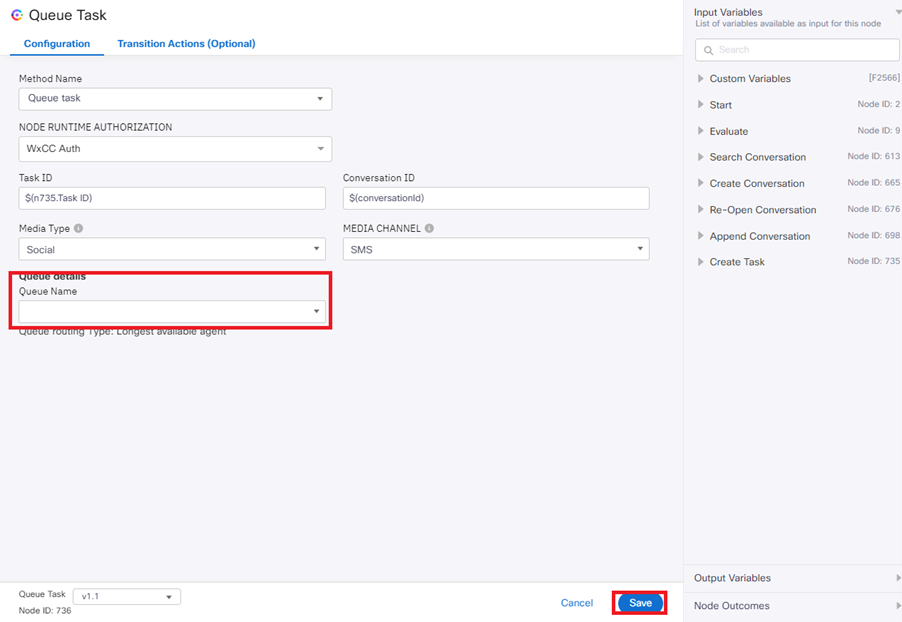
Queue Task → select your queue → Save
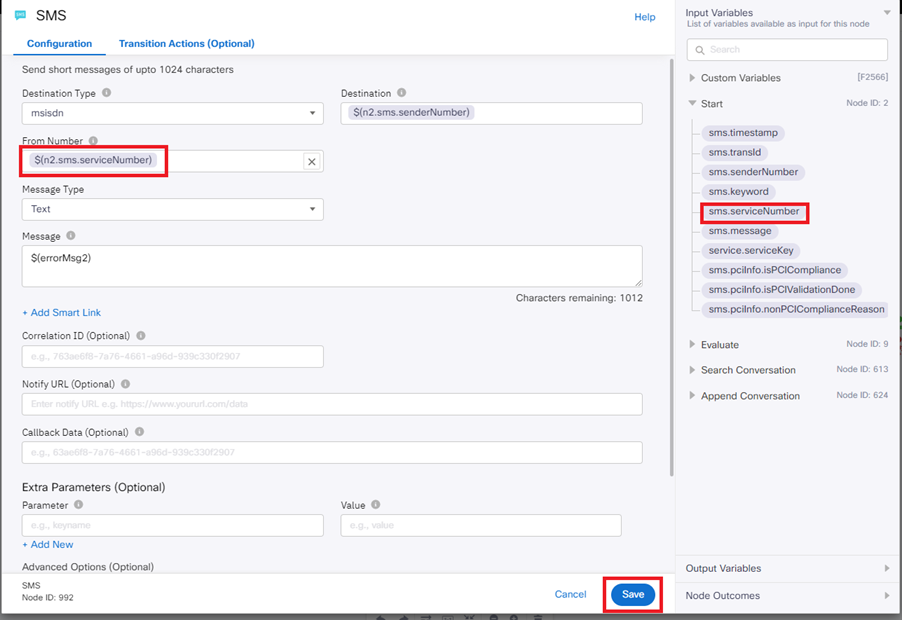
Each SMS node → enter from Number variable from right pane → Save (repeat for all SMS nodes)
Save flow → Make Live
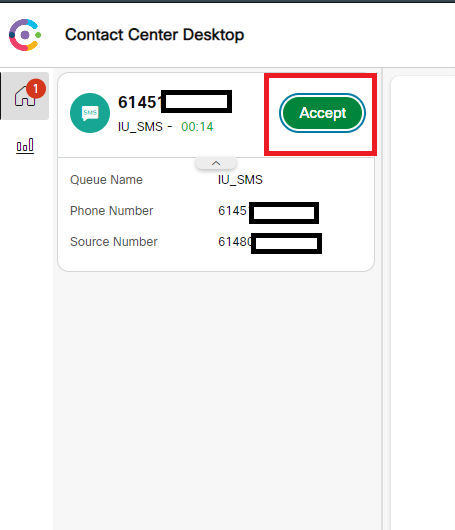
Agent Desktop login → initiate SMS to configured number → Accept
Test conversation → end → wrap up
Lab 12.11 — WhatsApp Channel Configuration
Pre-requisite: WhatsApp Numbers cannot be procured directly from the WxCC integrated Webex Connect tenant — work with your PSM.
1. Verify WhatsApp Number Assignment
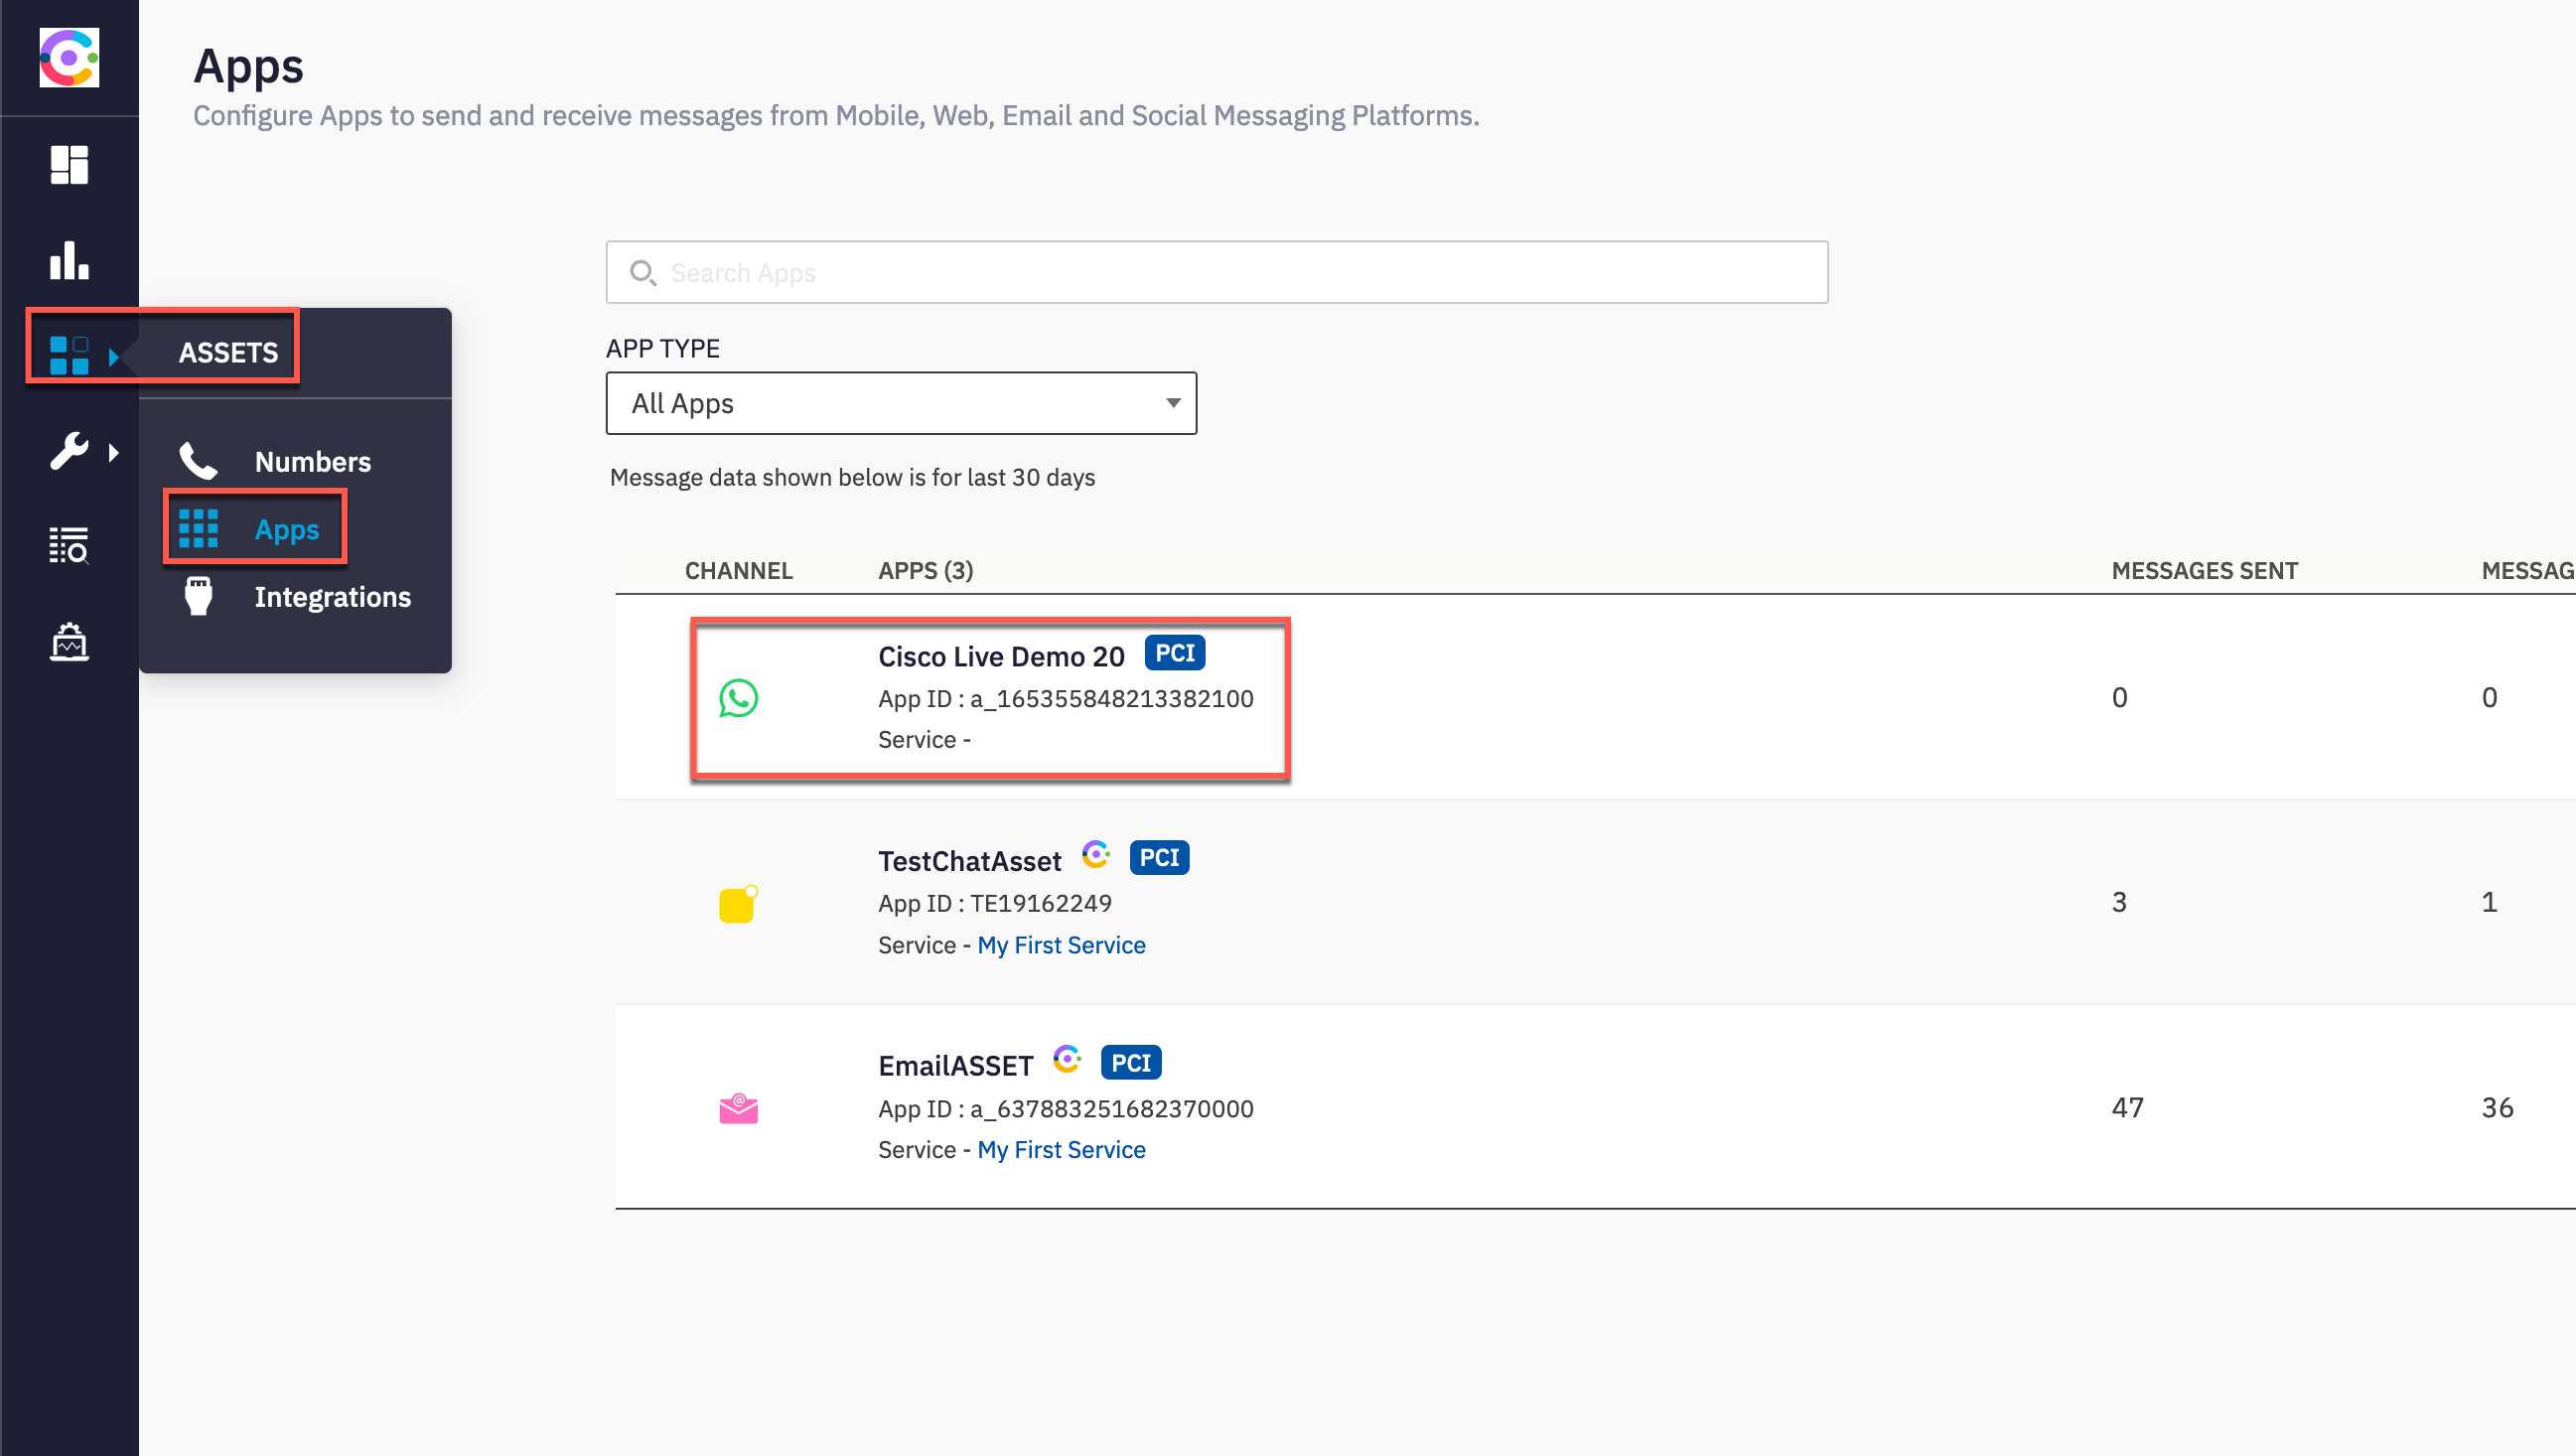
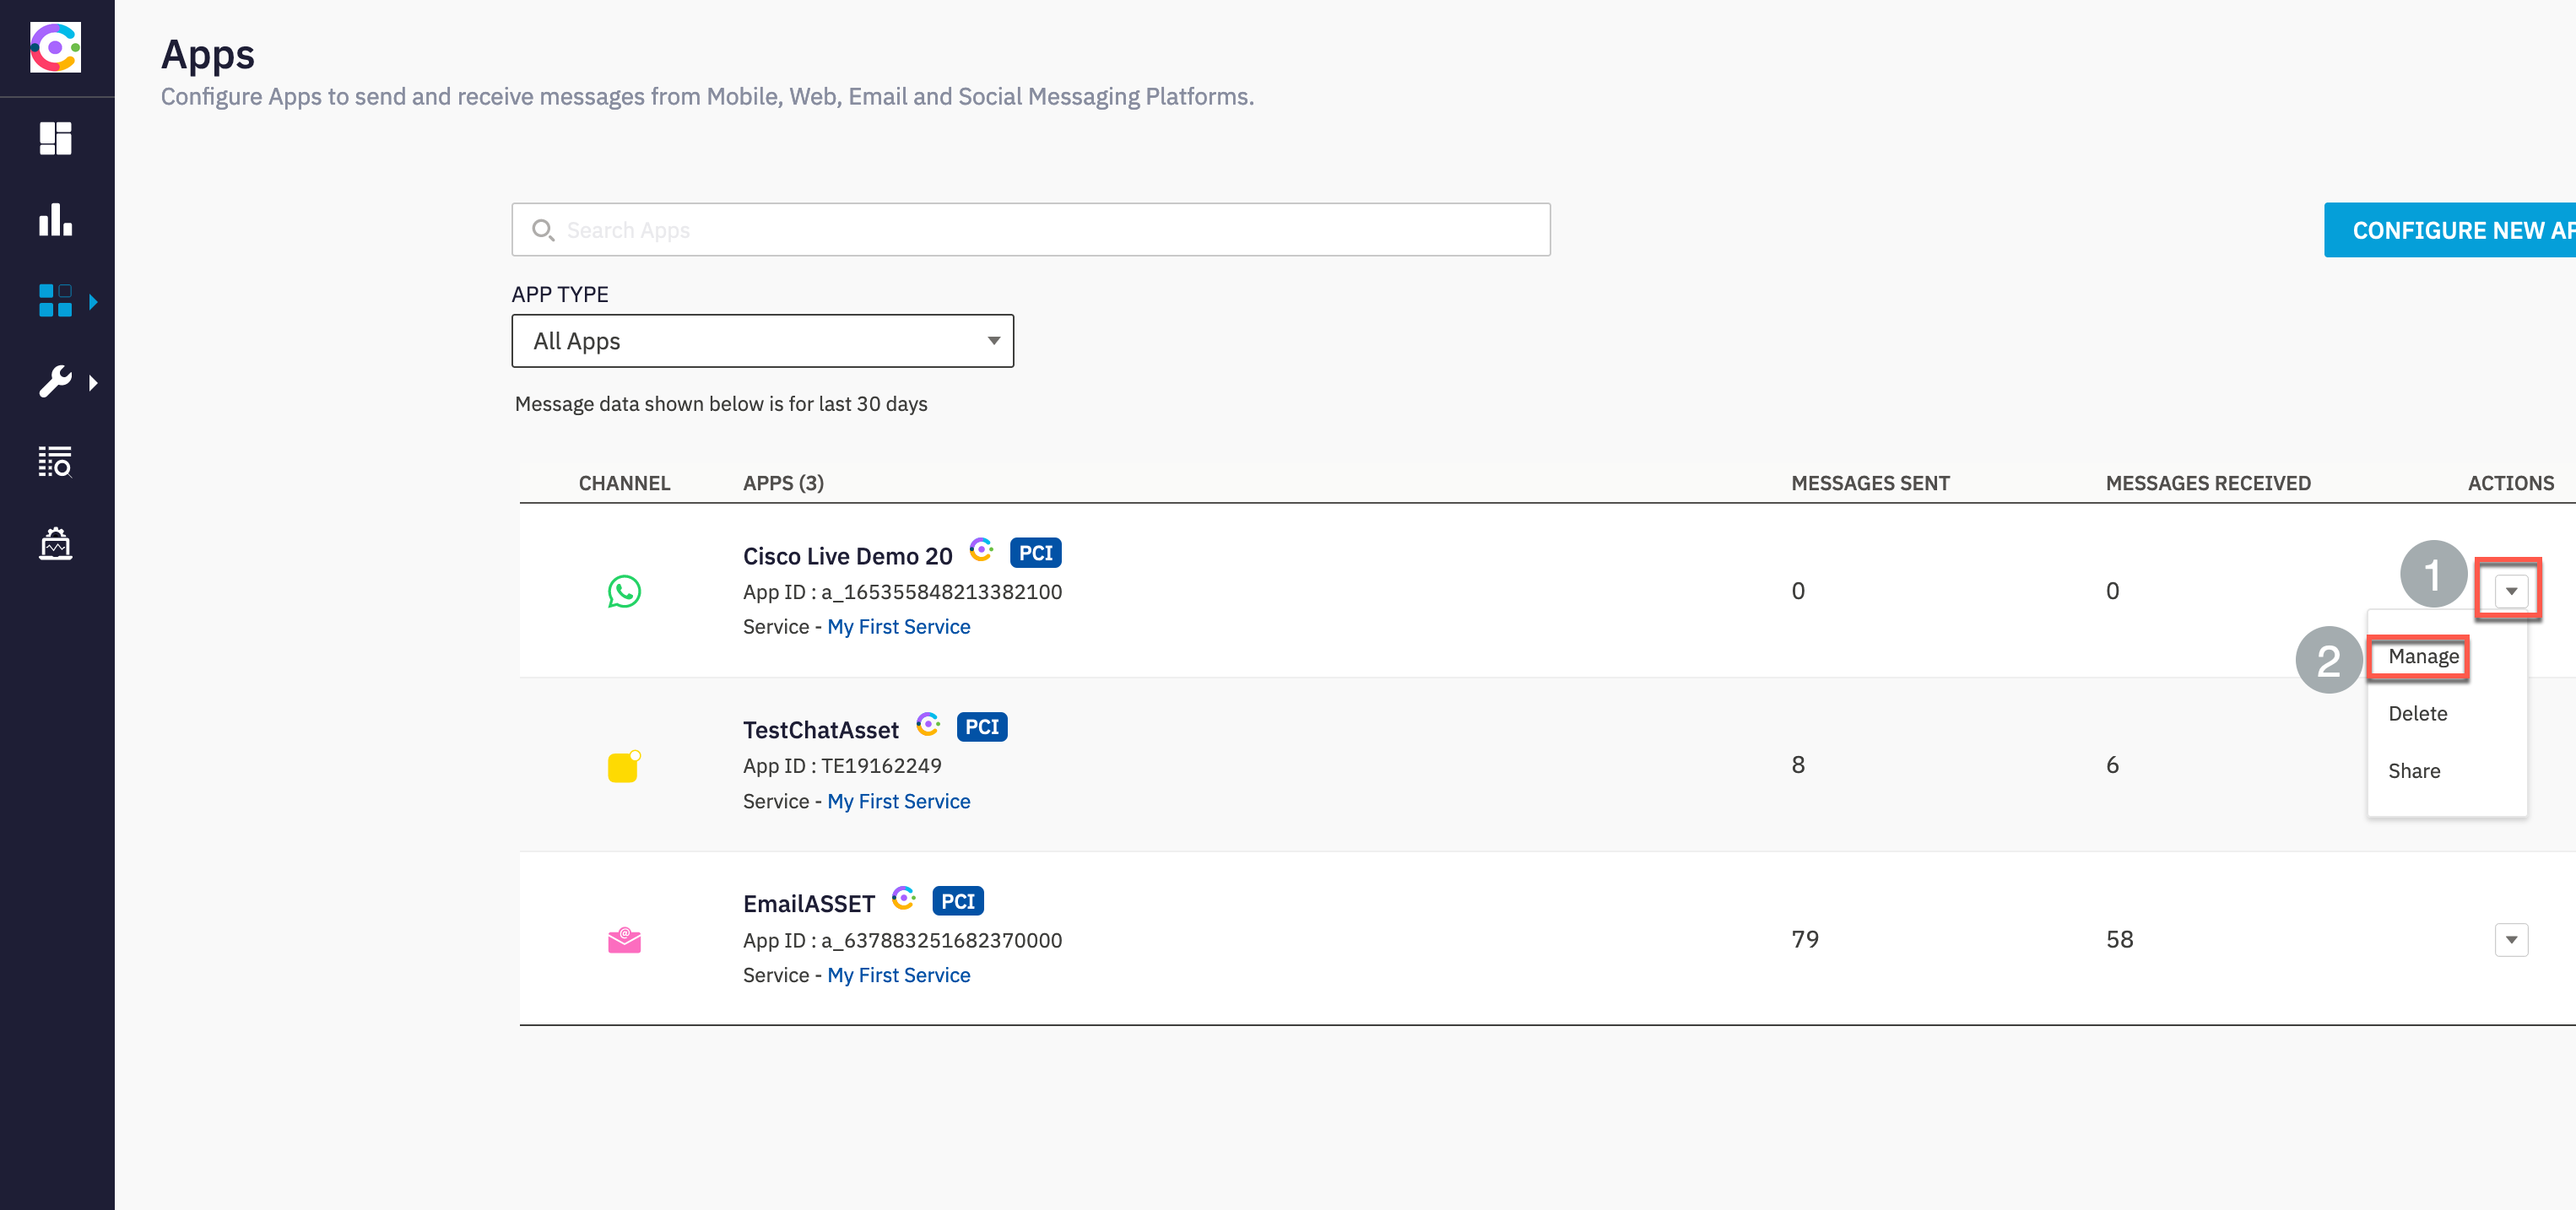
Connect UI → Assets → Apps
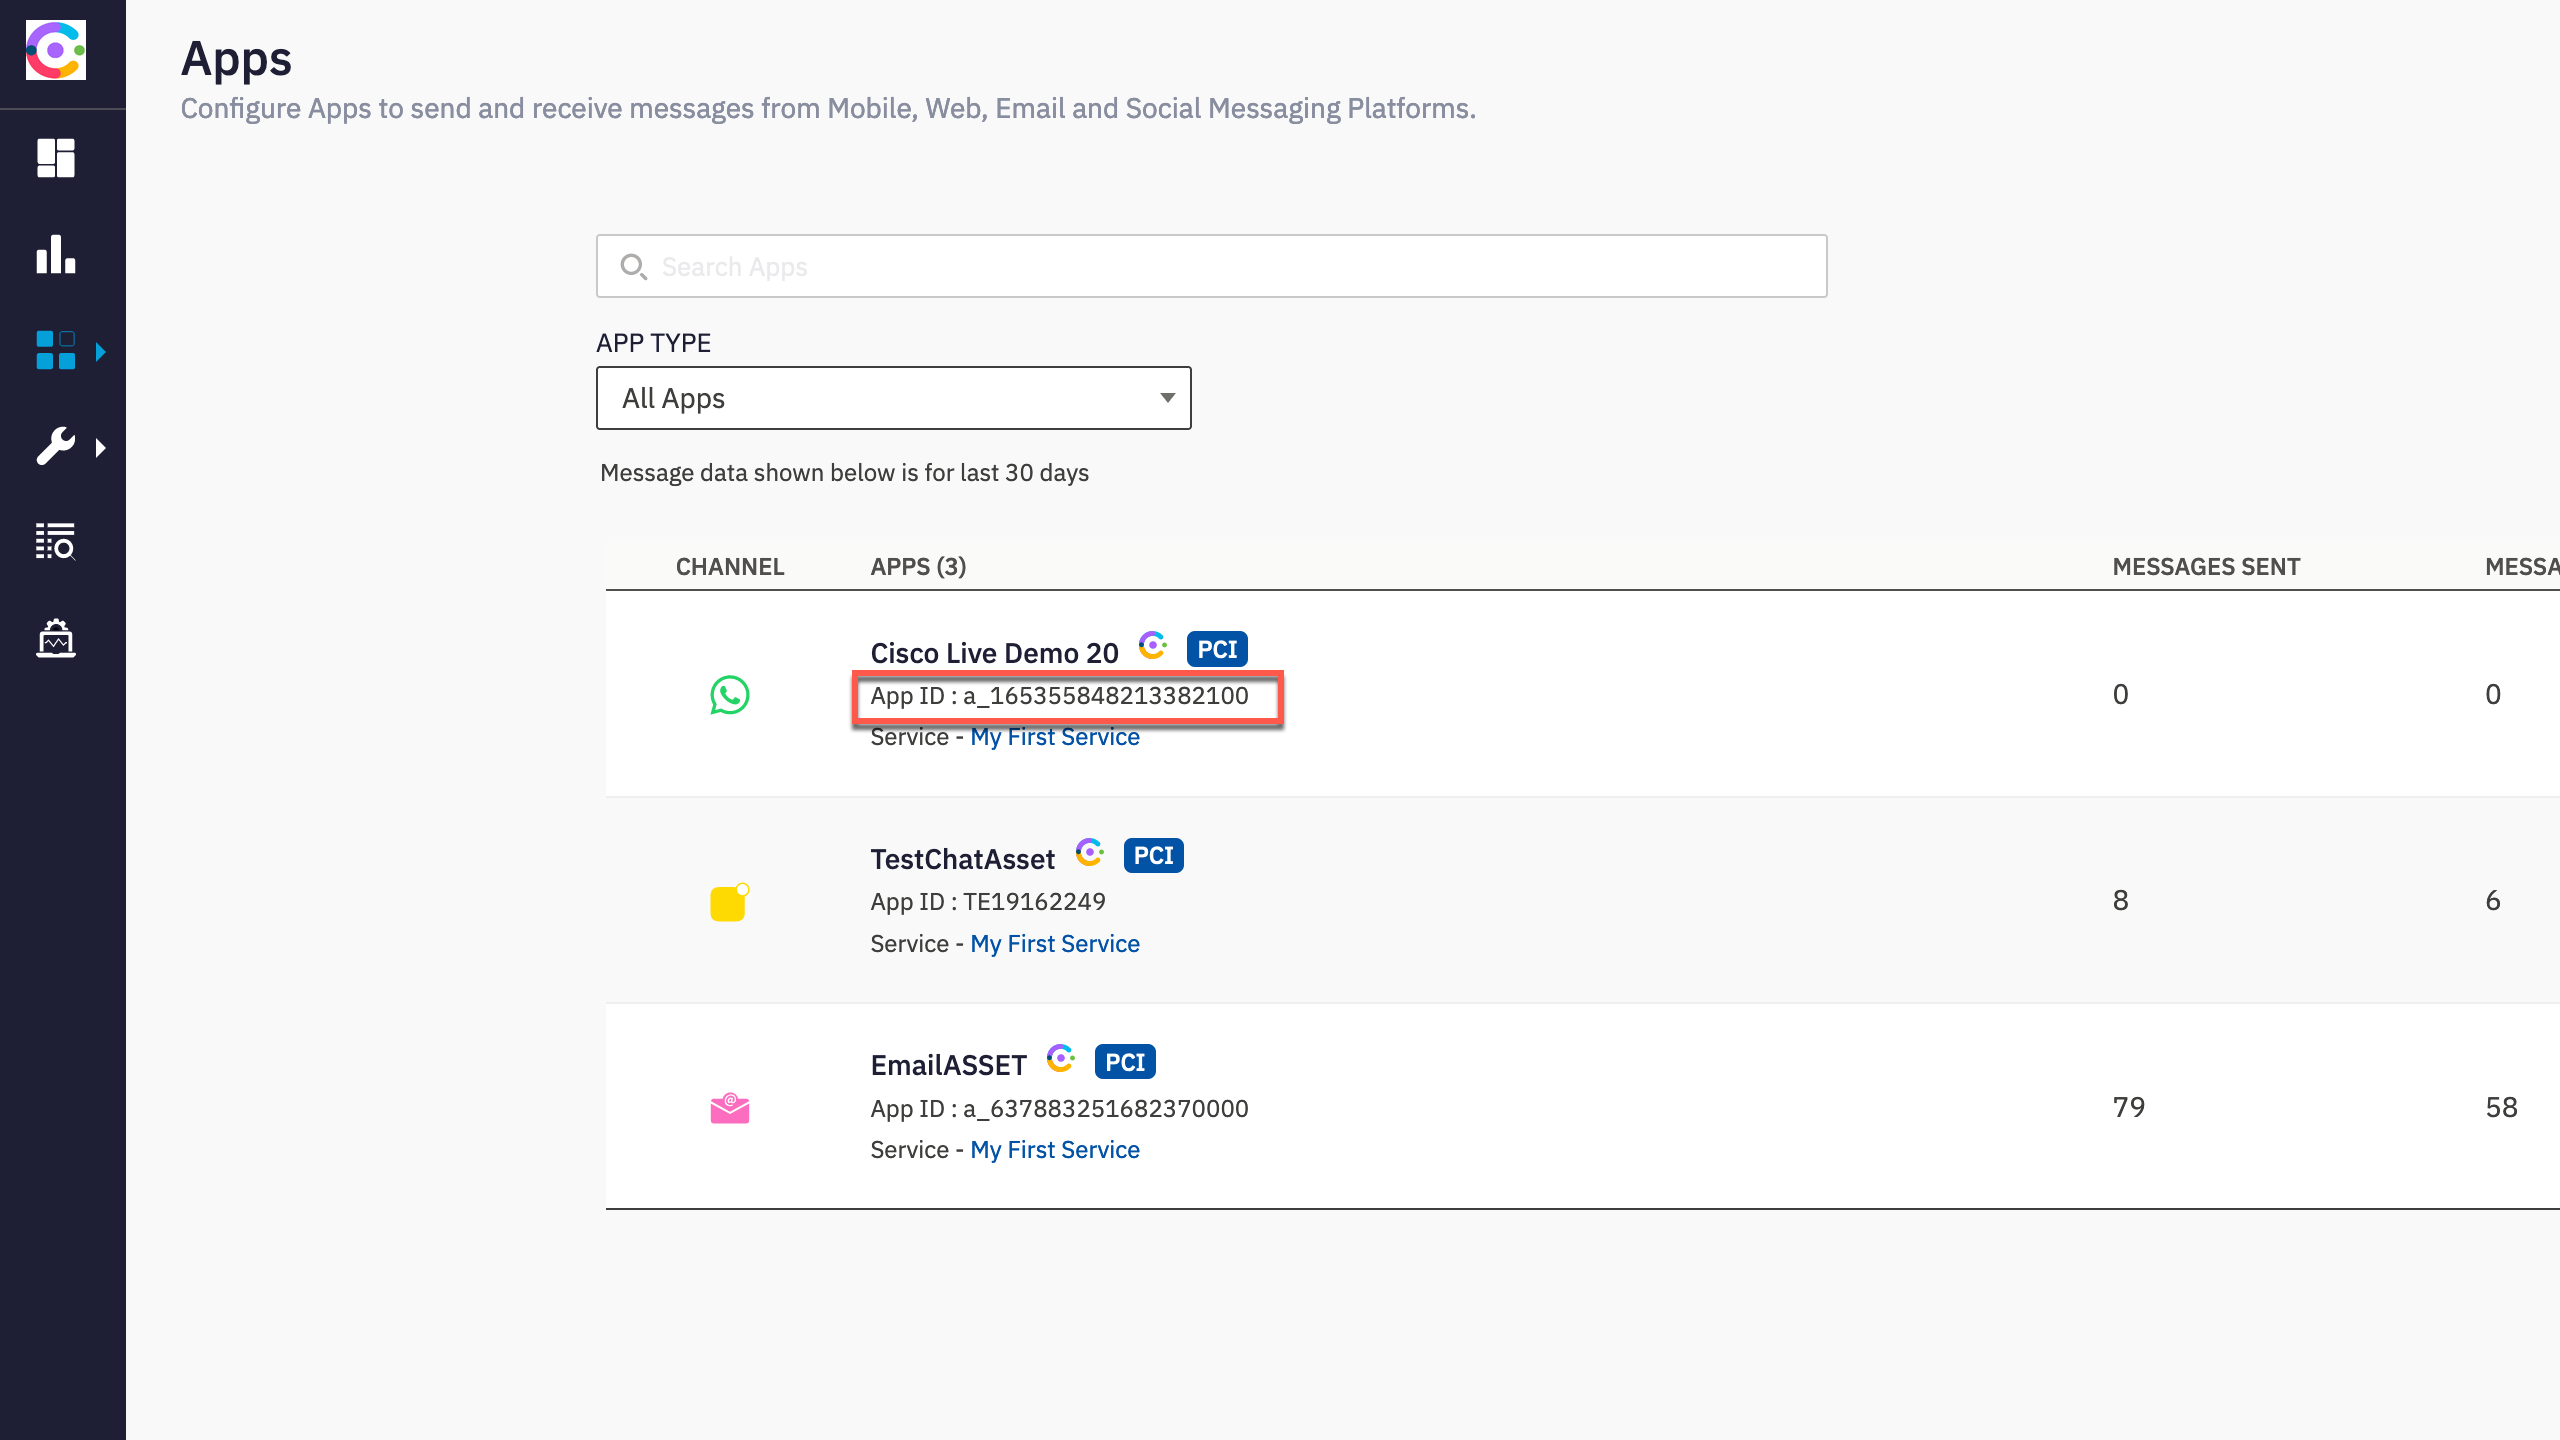
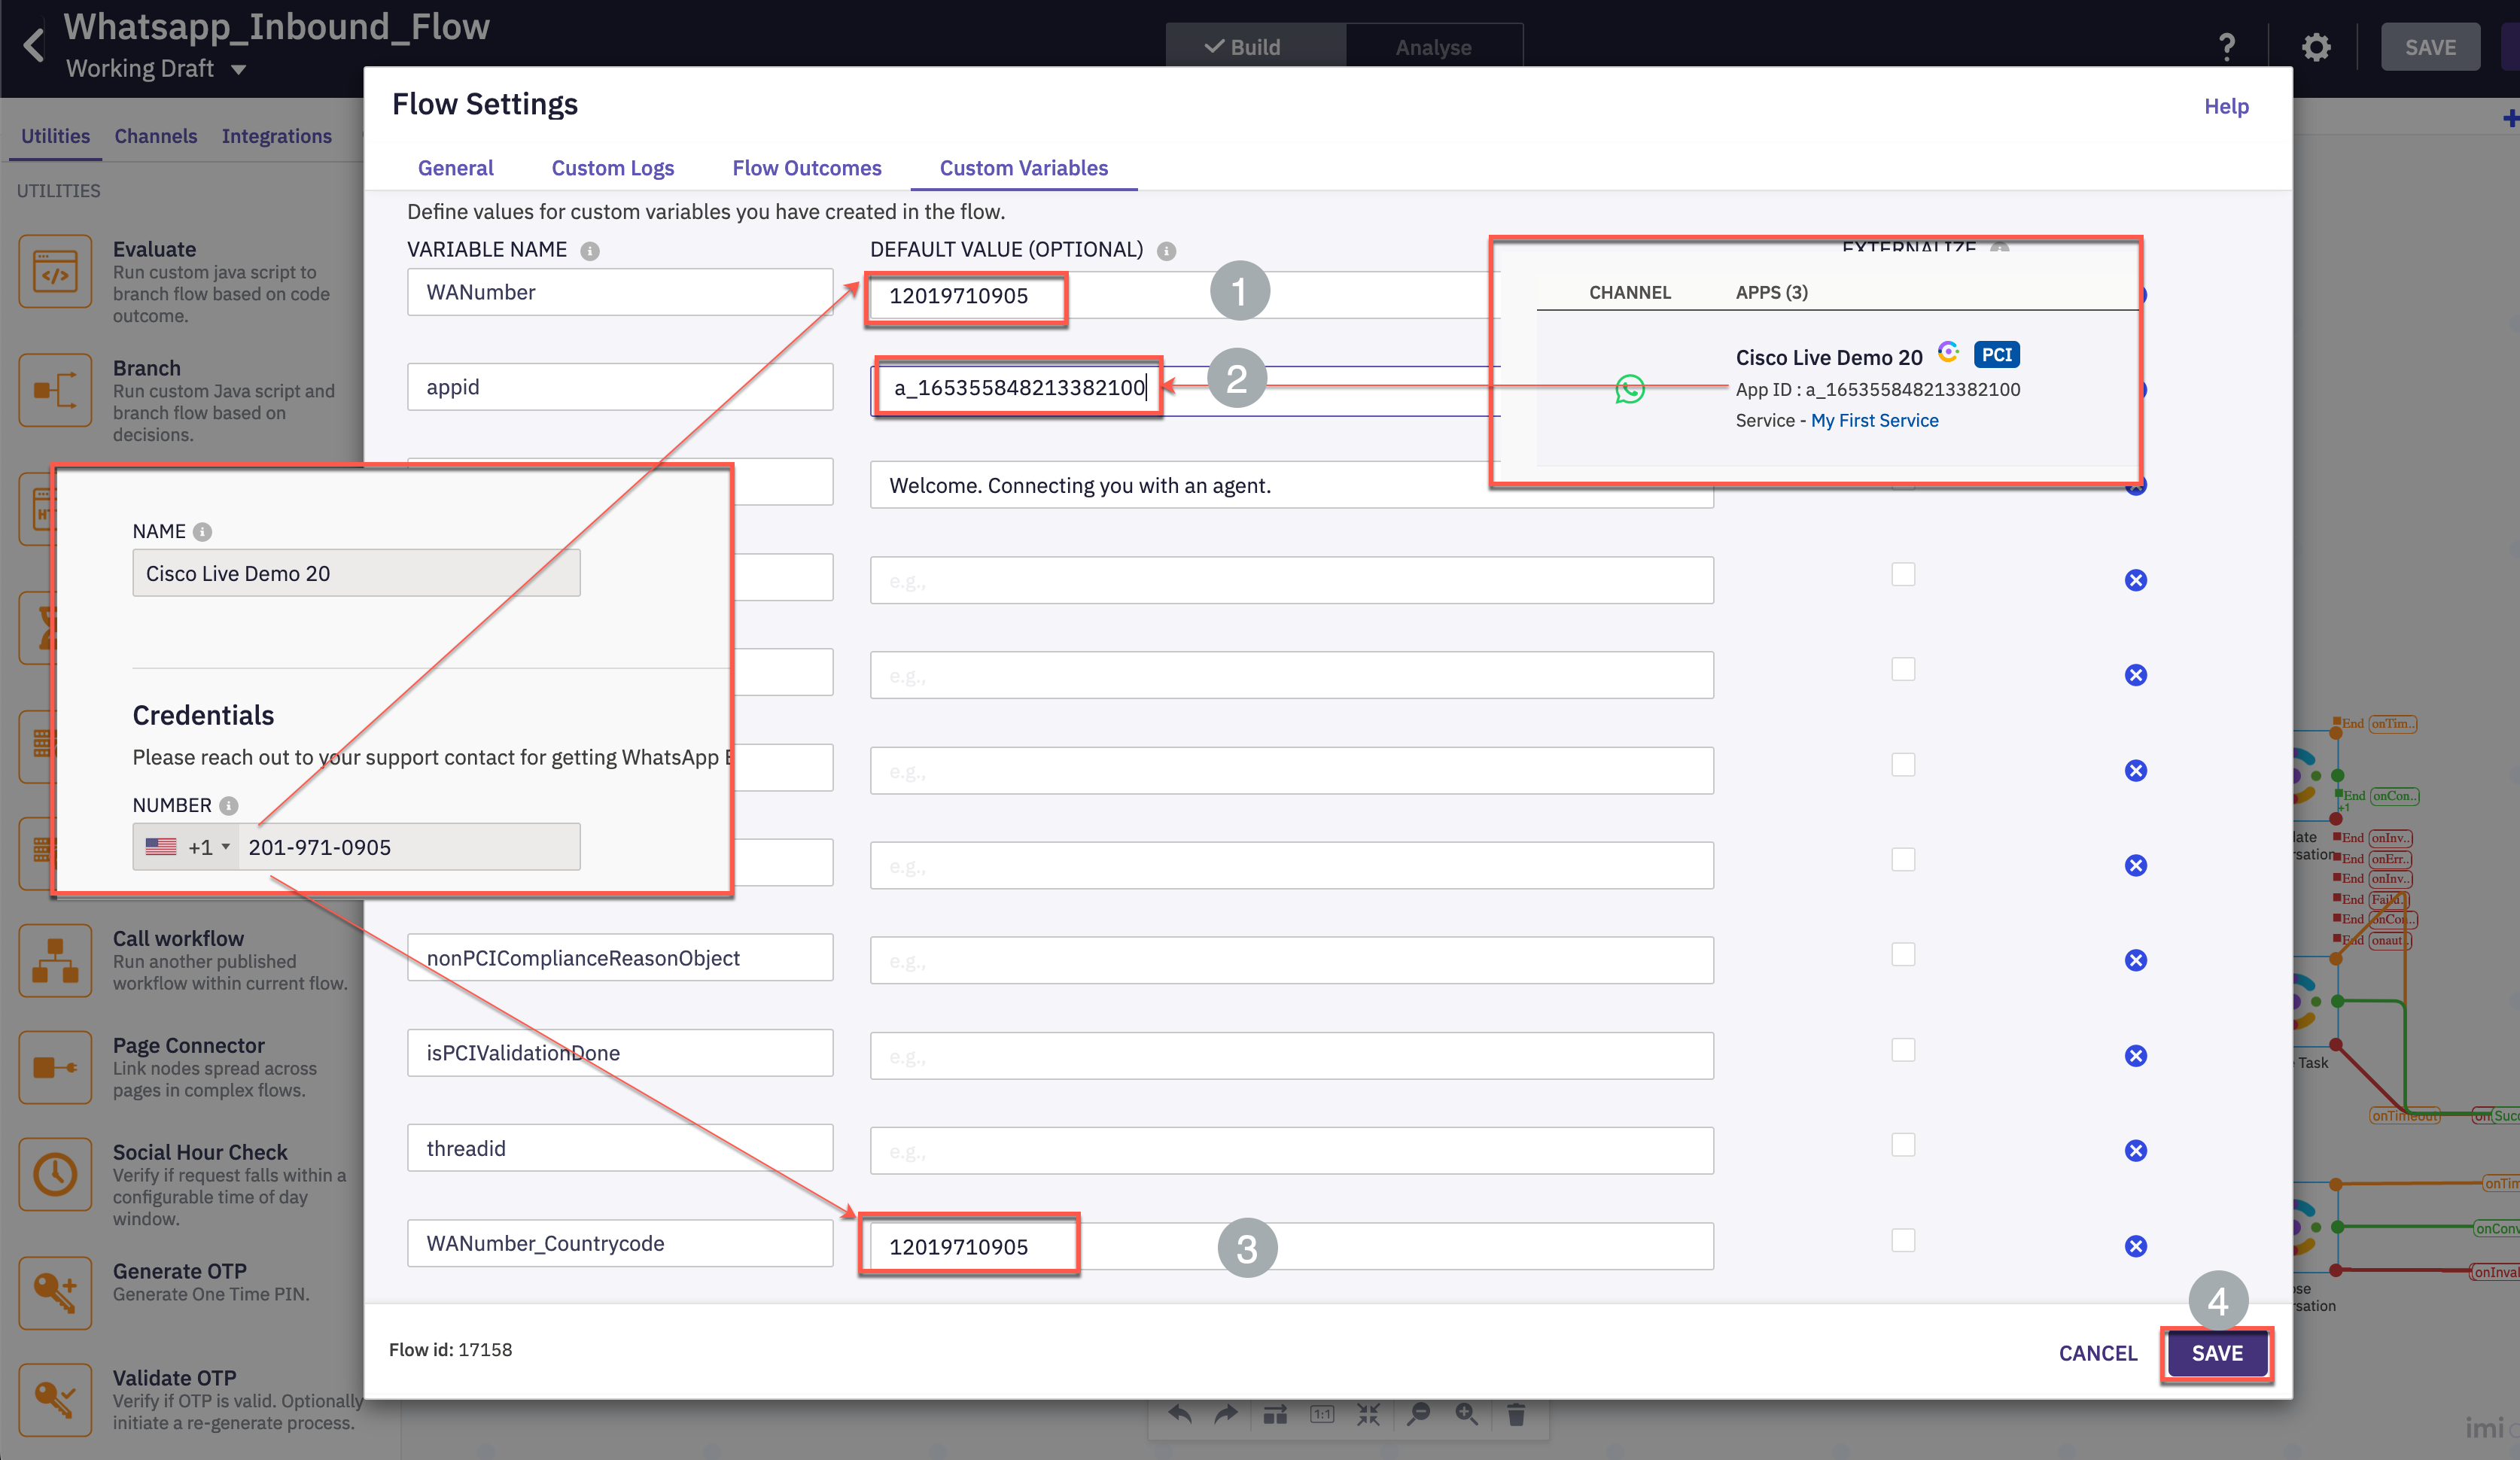
Note the APP ID (used in flow configuration)
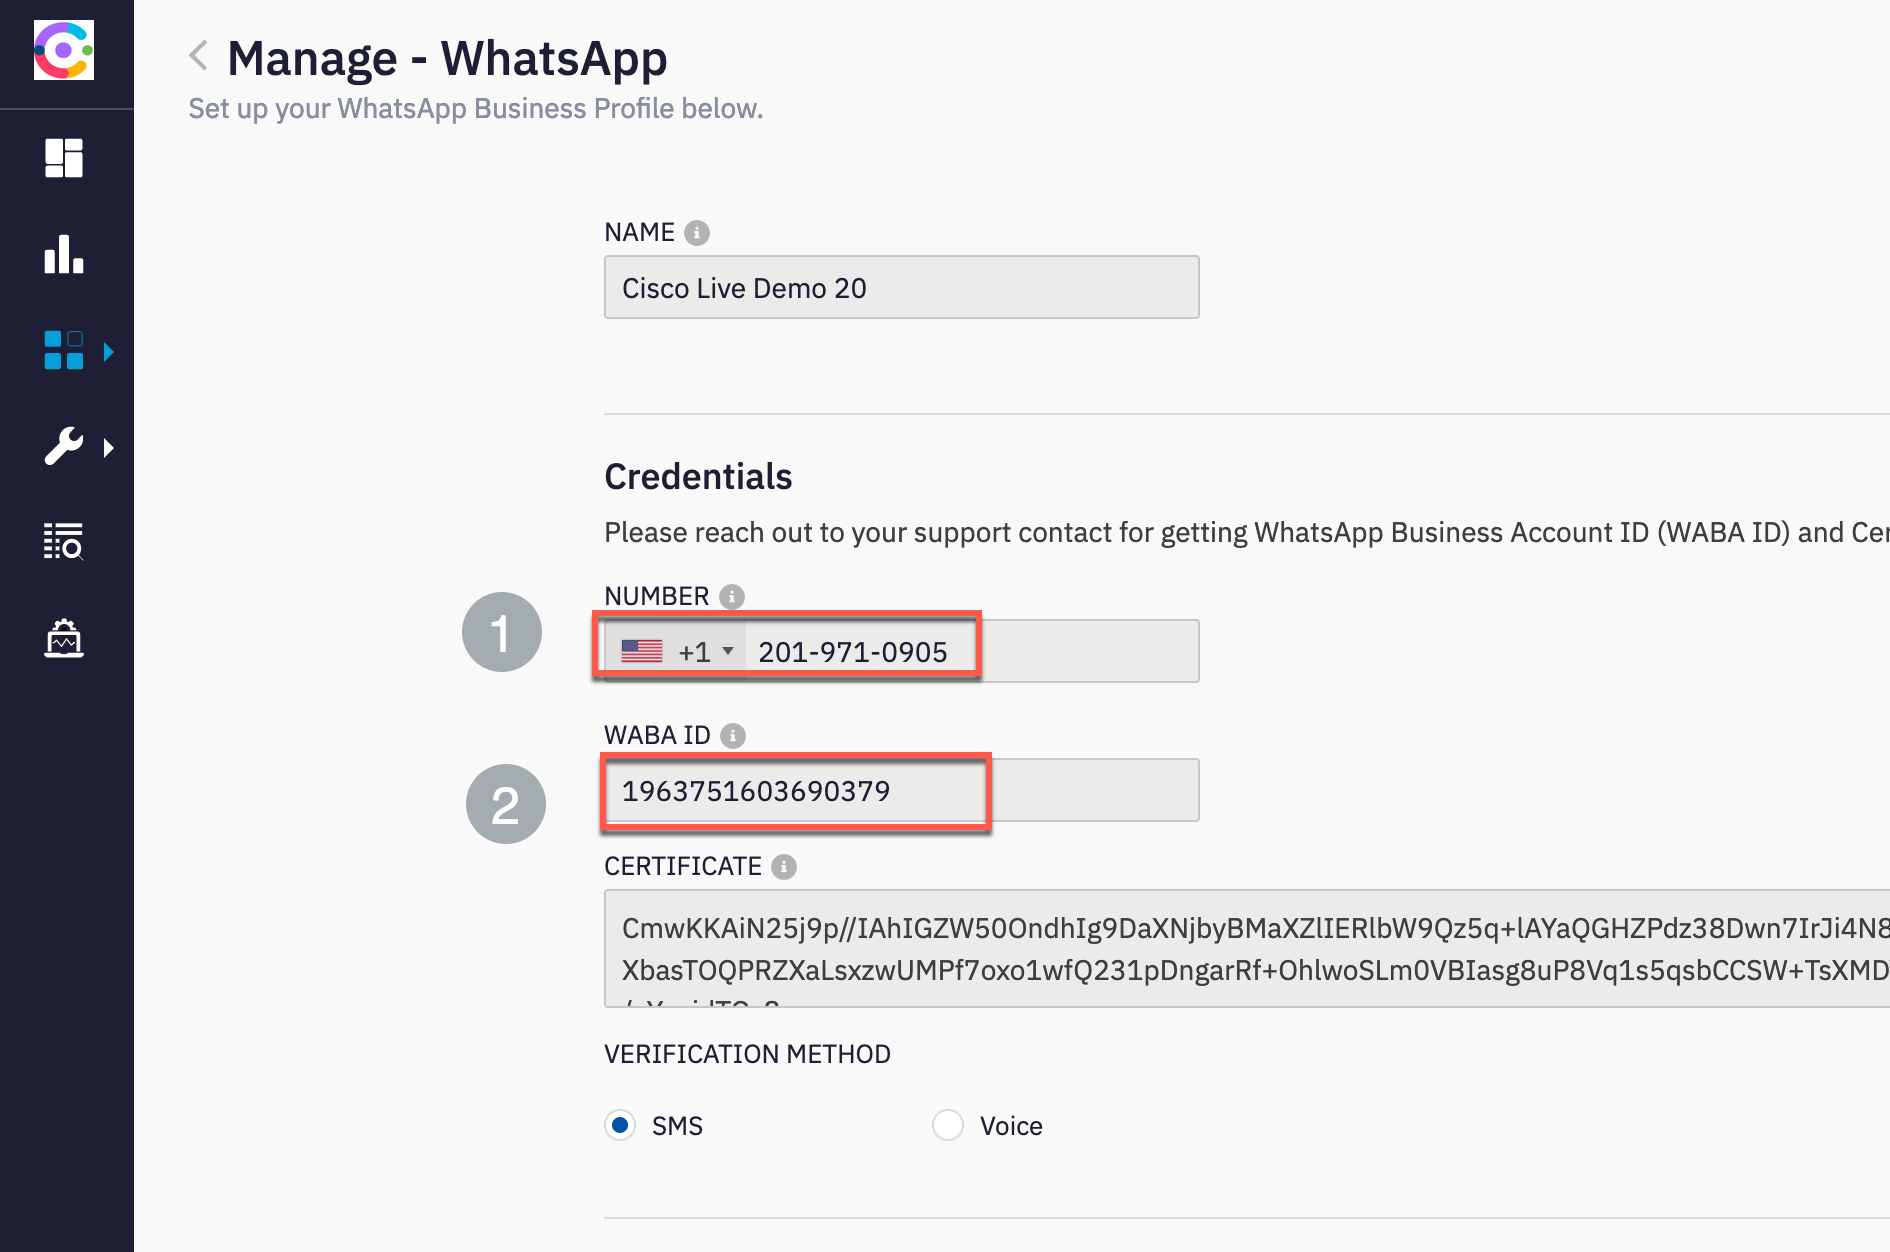
Actions → Manage
Note the Number and WABA ID
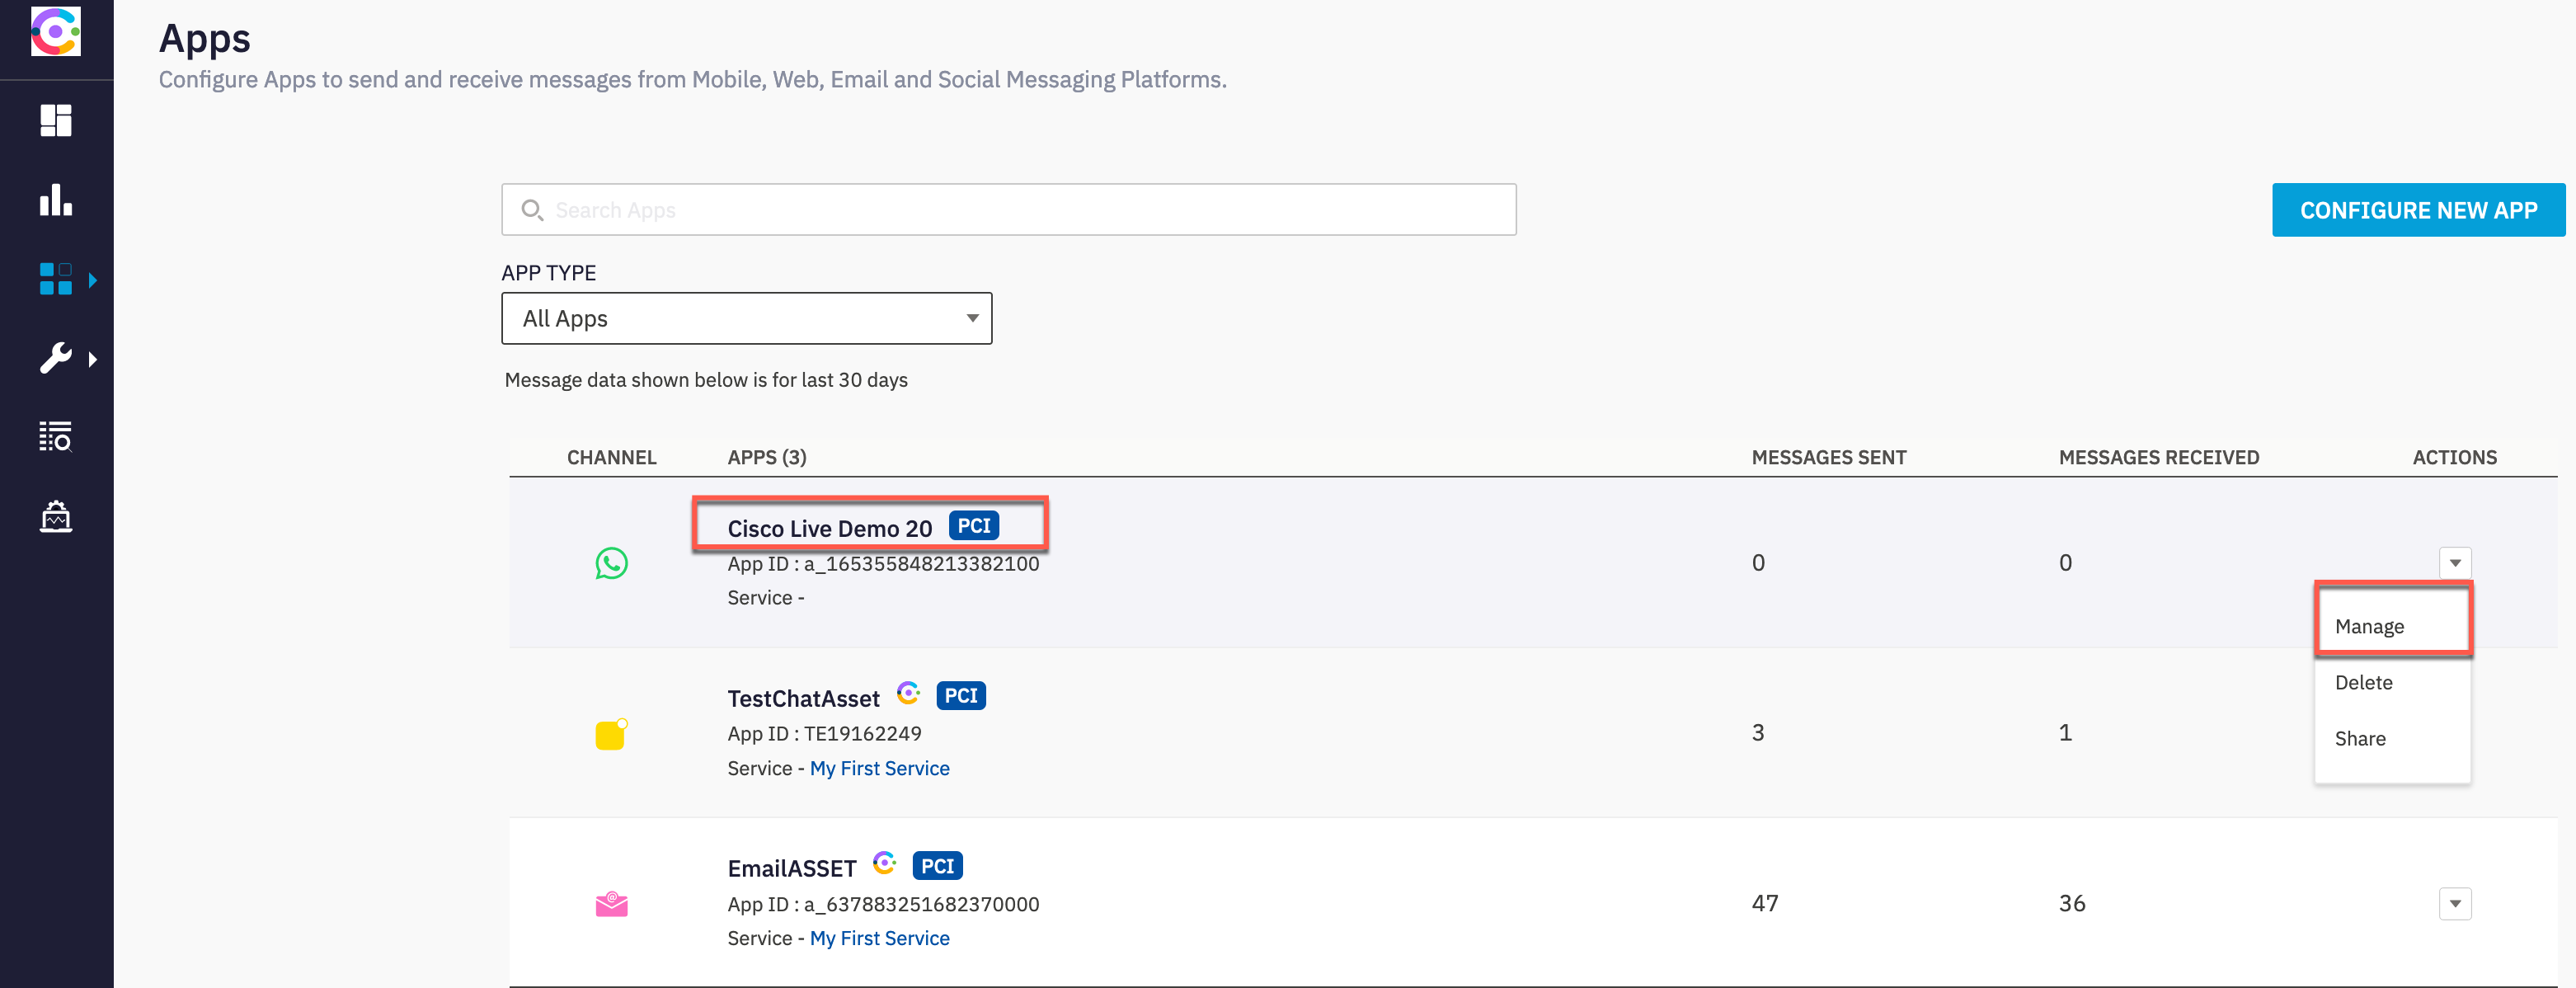
2. WhatsApp Asset registration to WebexCC
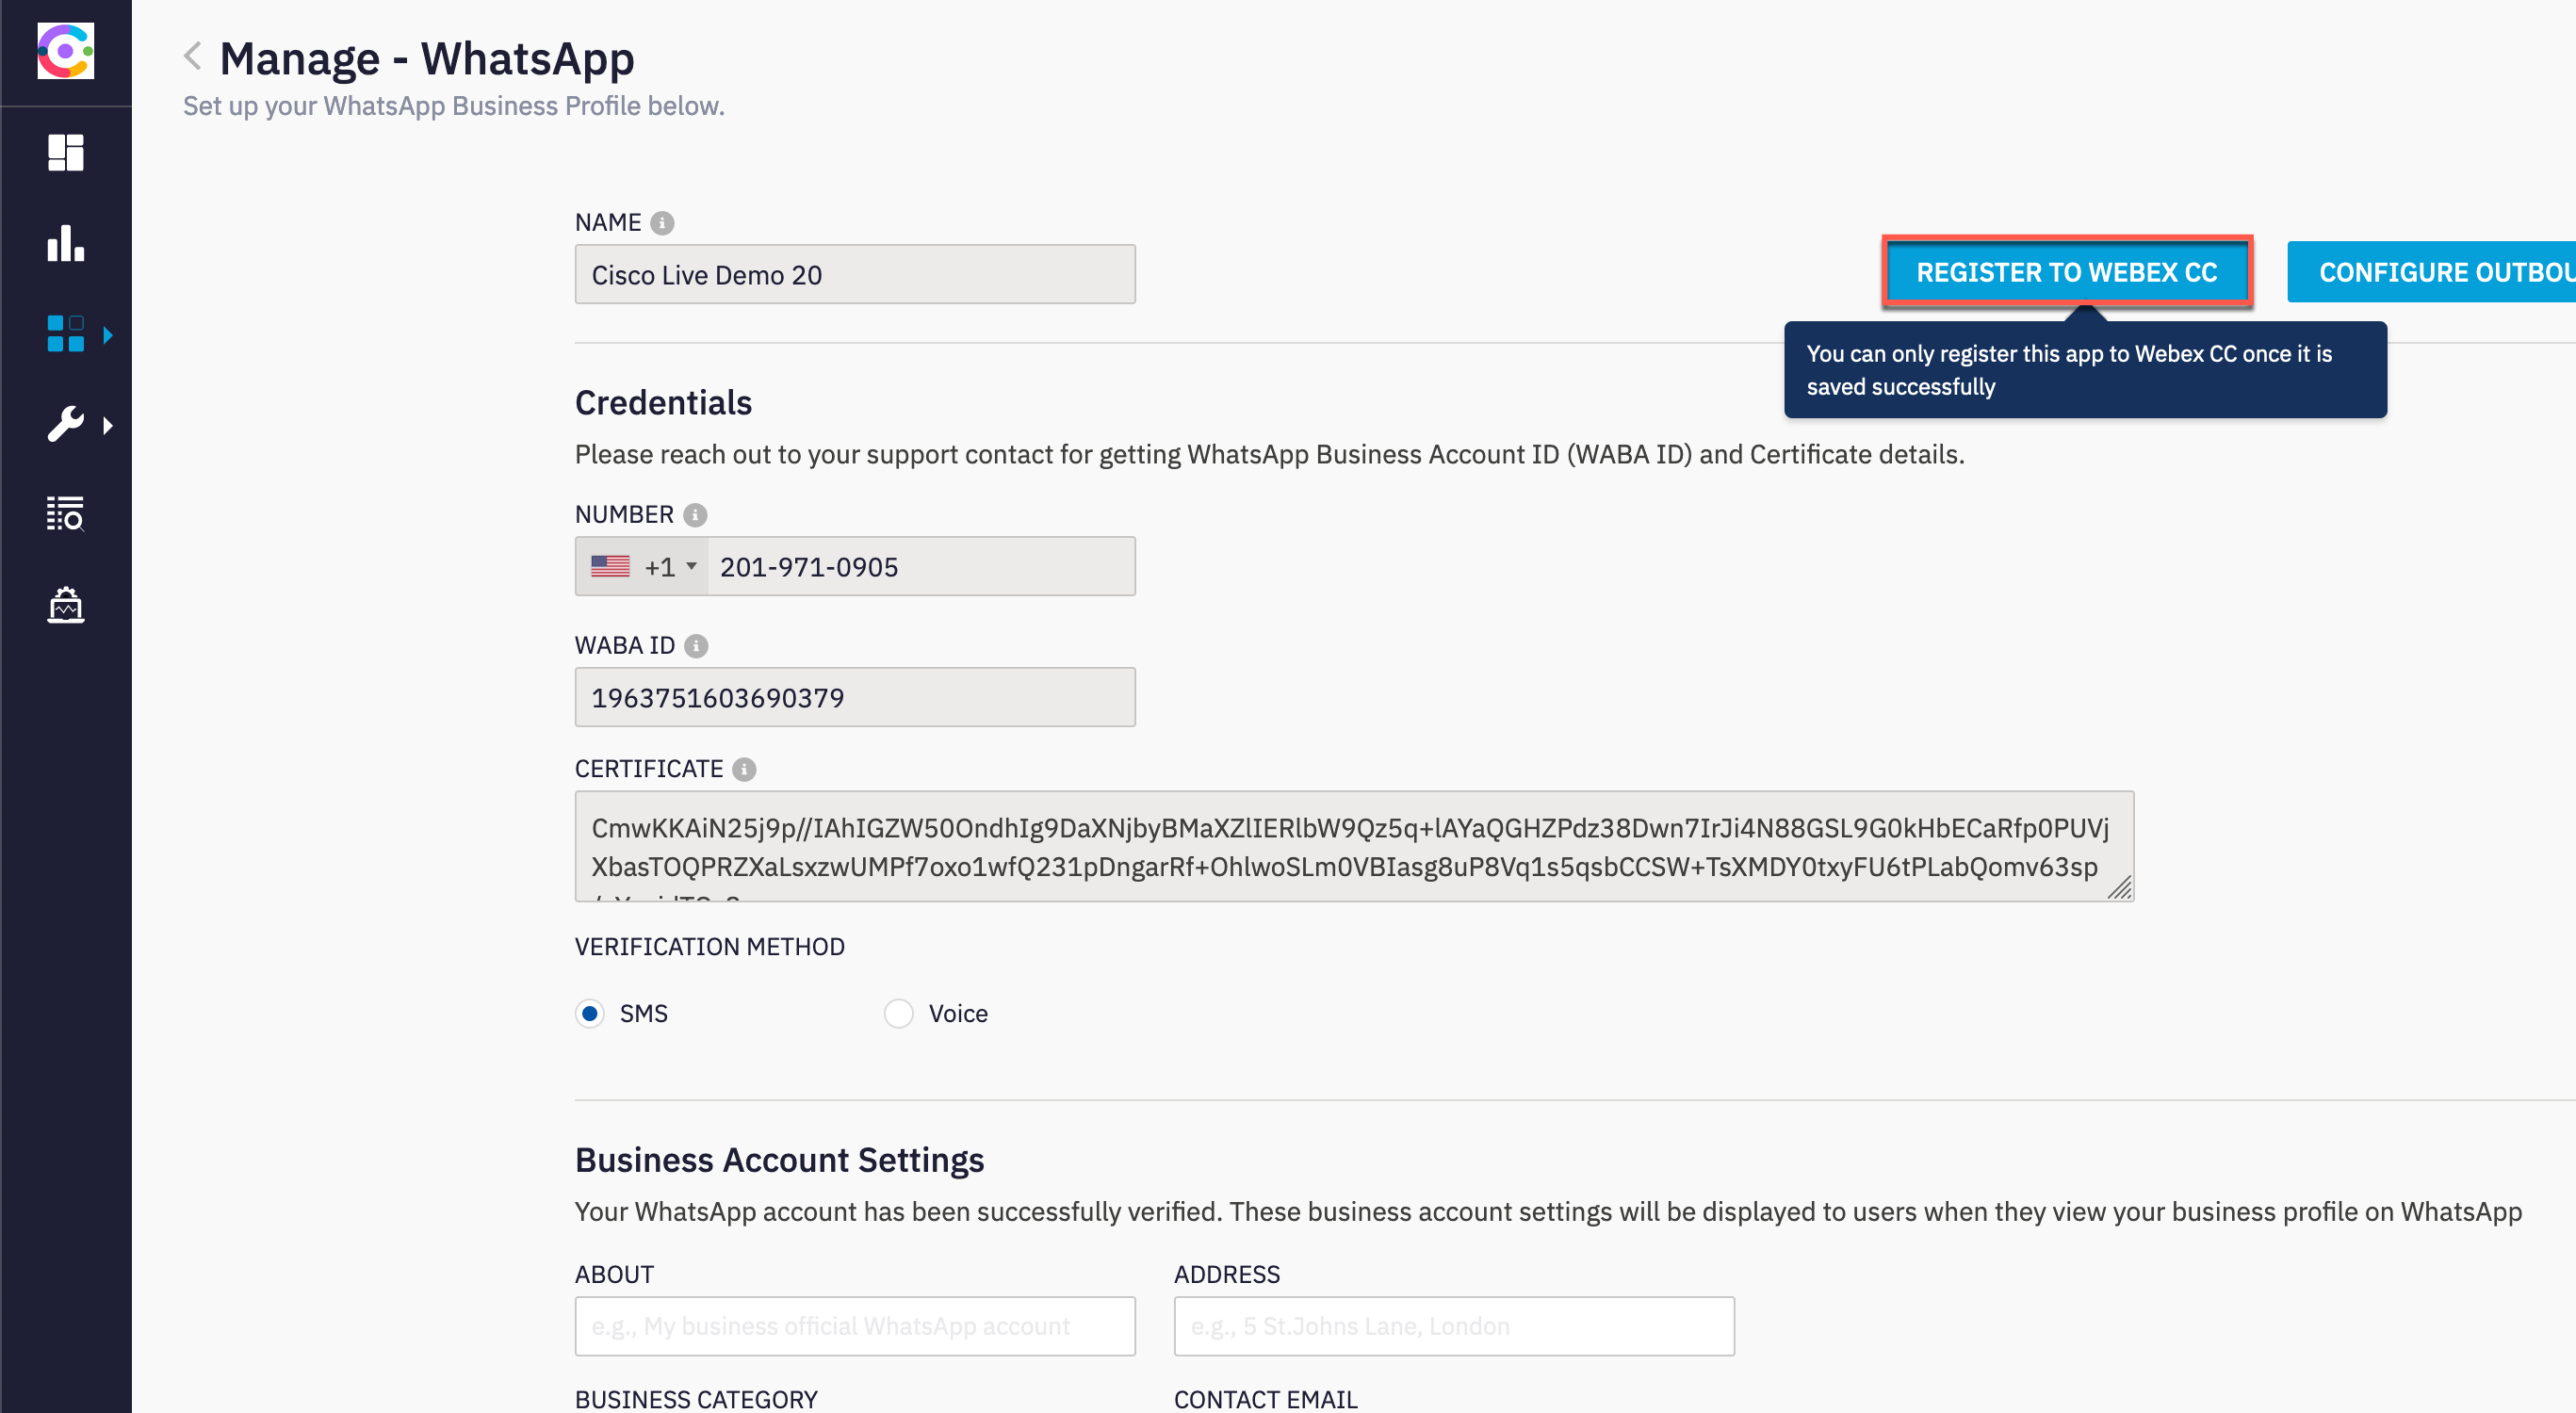
Actions → Manage
Register to WebexCC
Select service
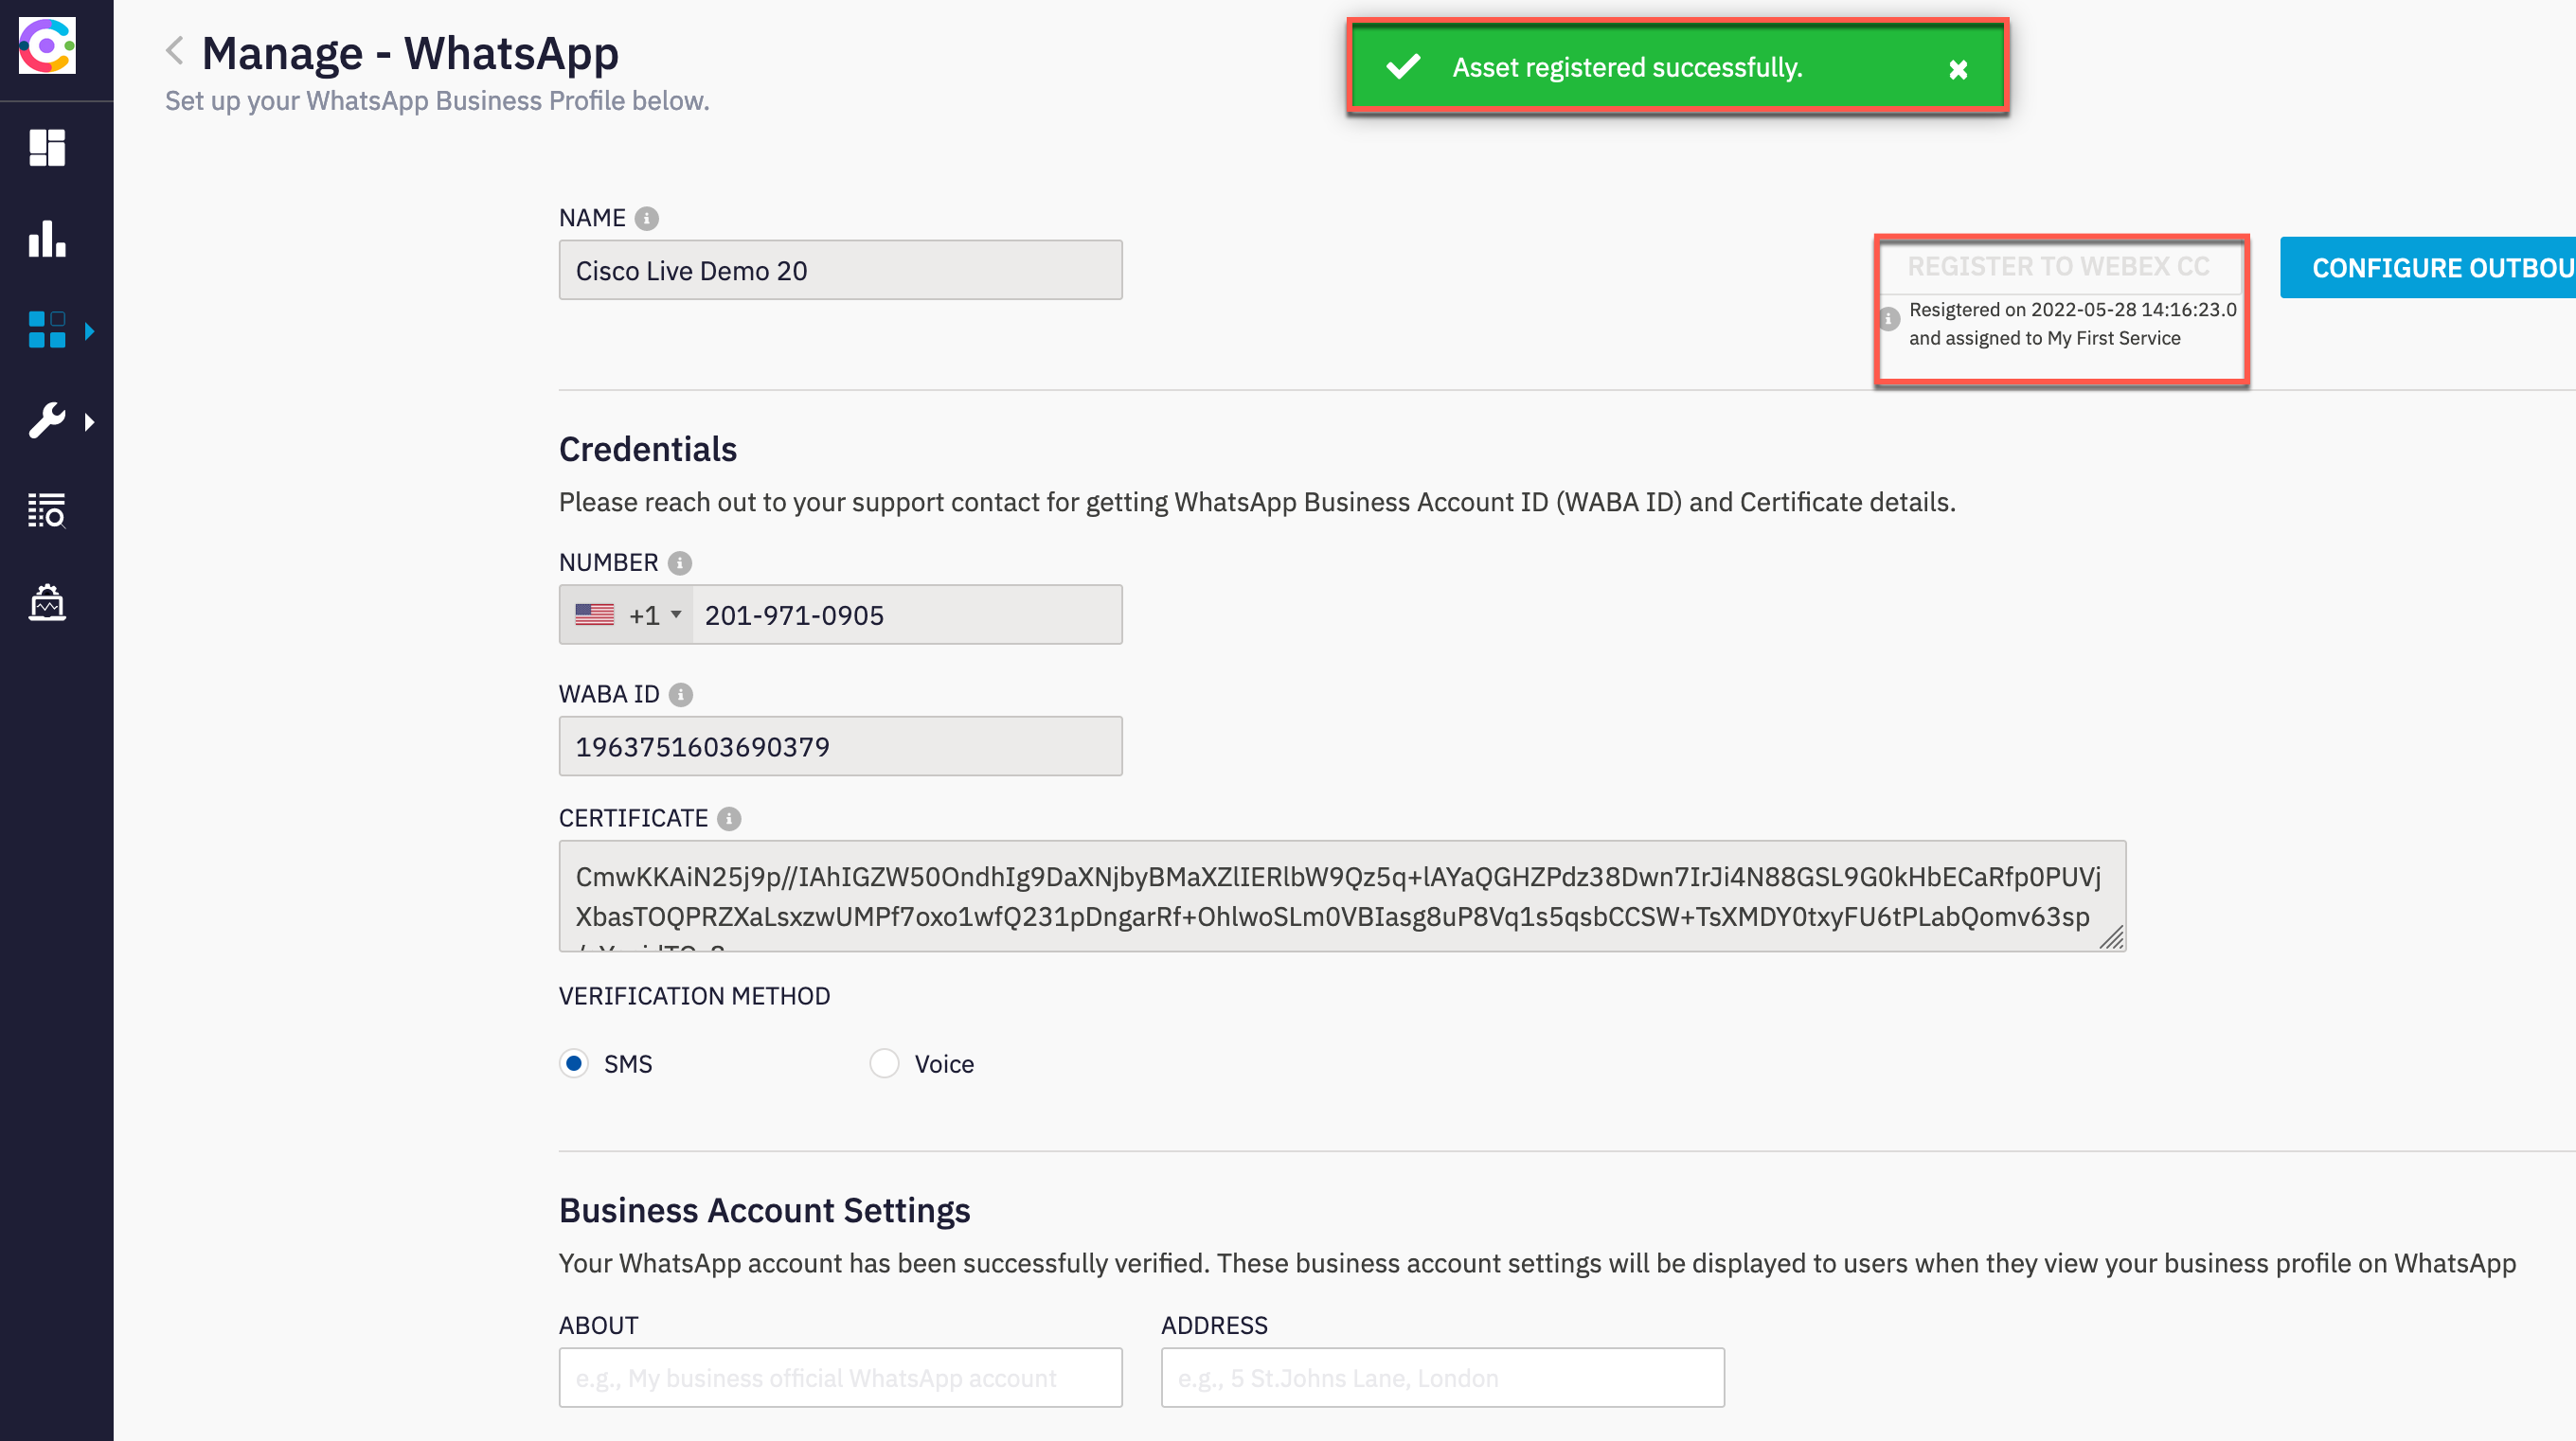
Verify registered (button disabled)
3. WhatsApp Entry Point and Queue creation
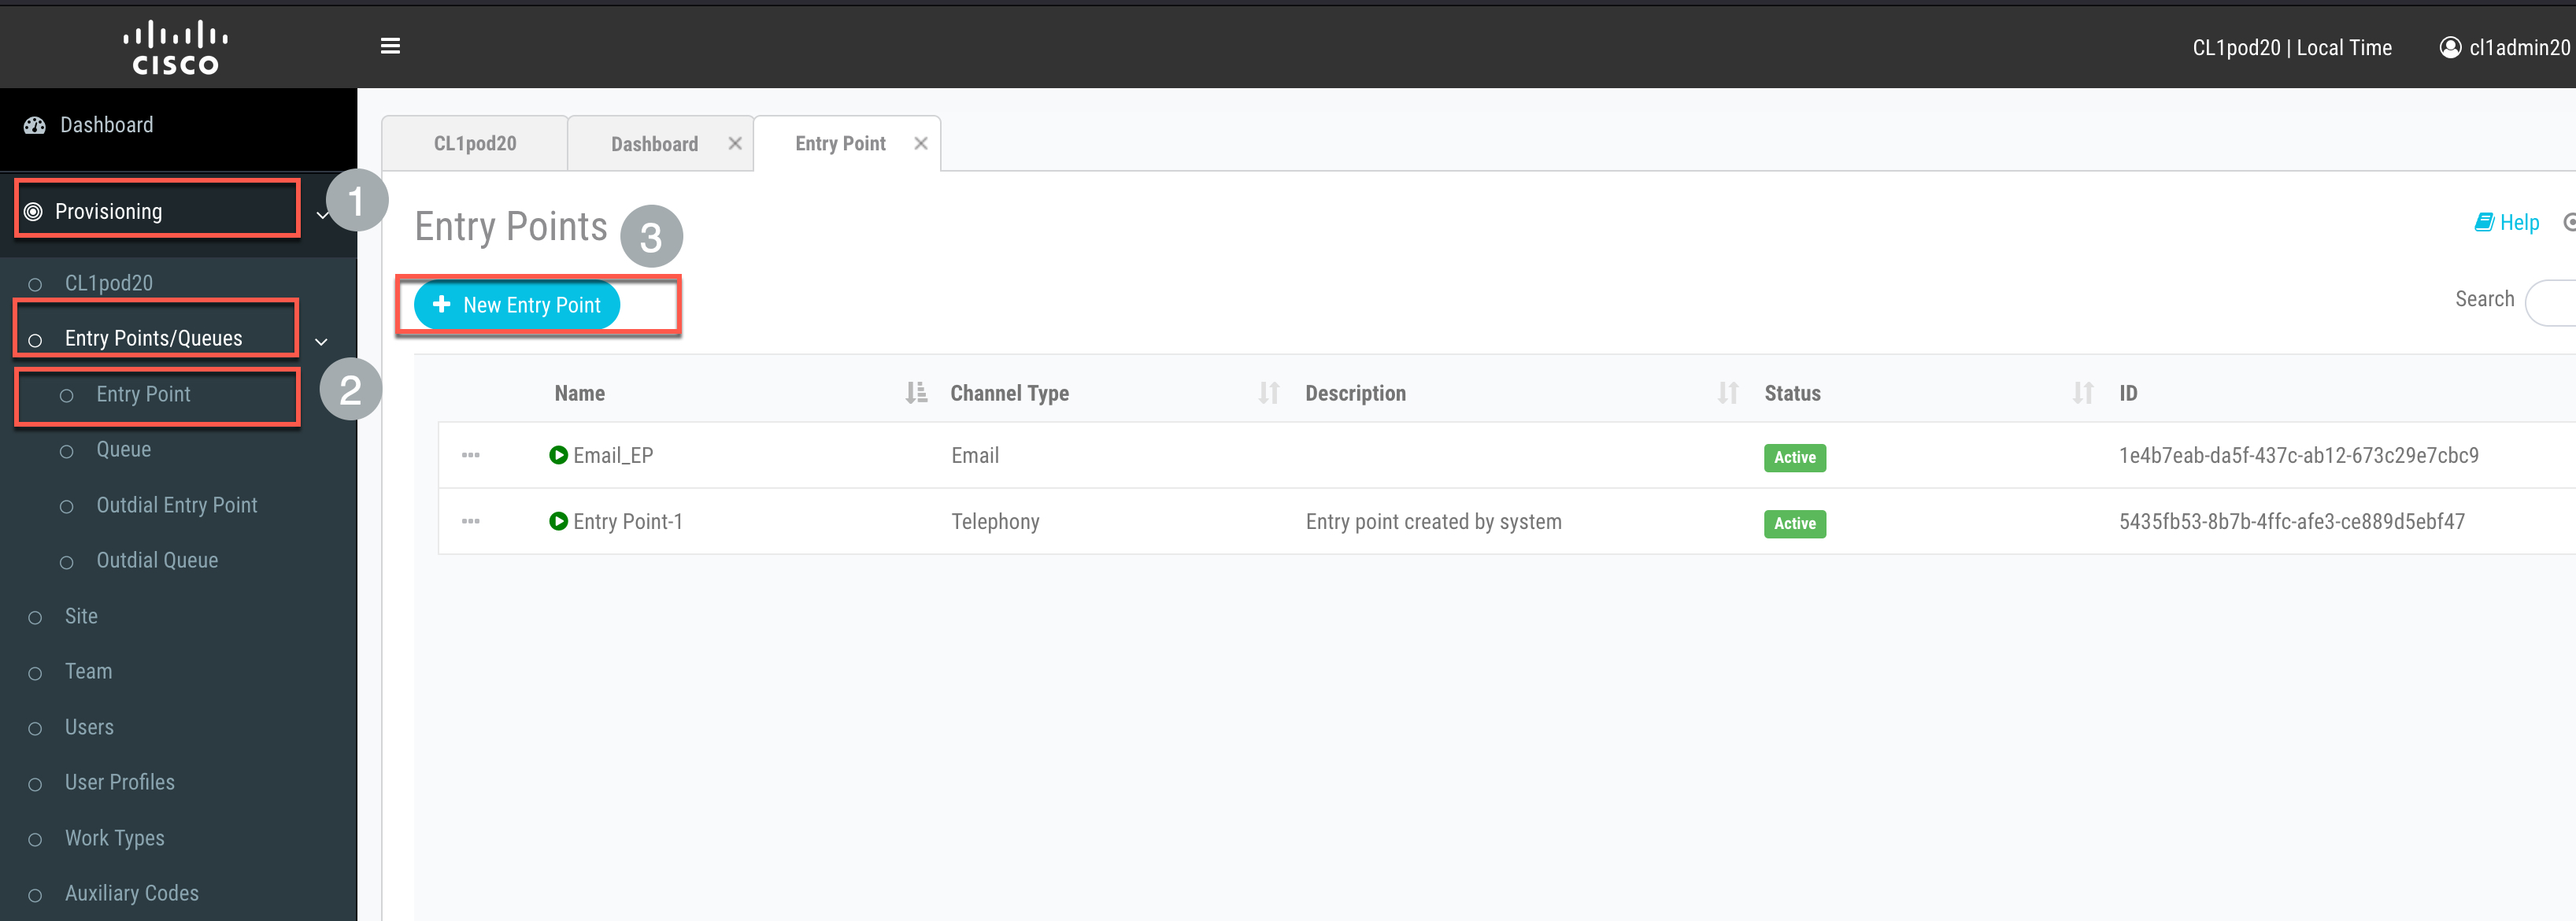
Management Portal → Provisioning → Entry Points/Queues → Entry Point → New Entry Point
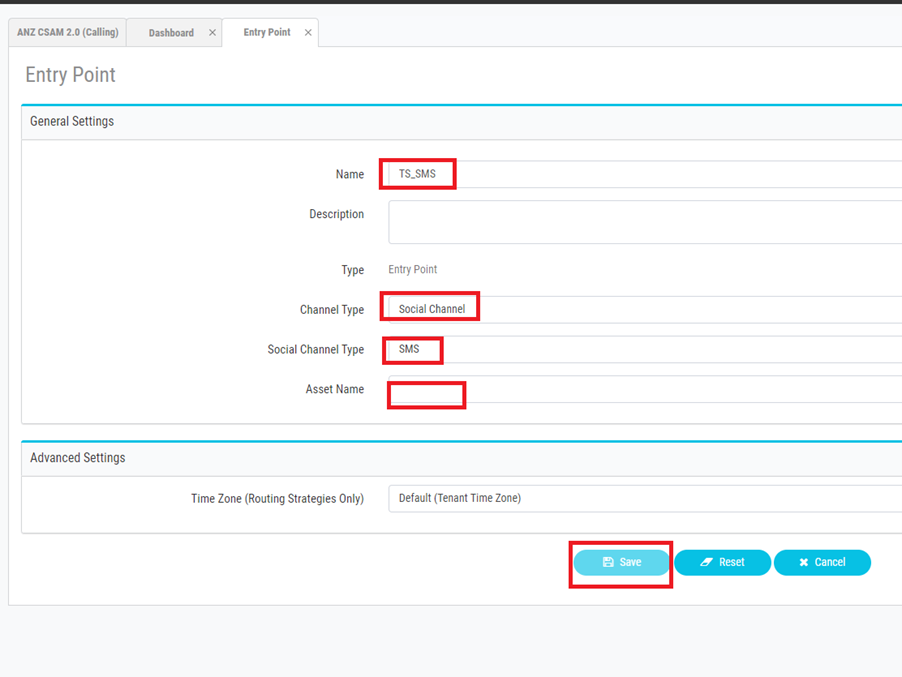
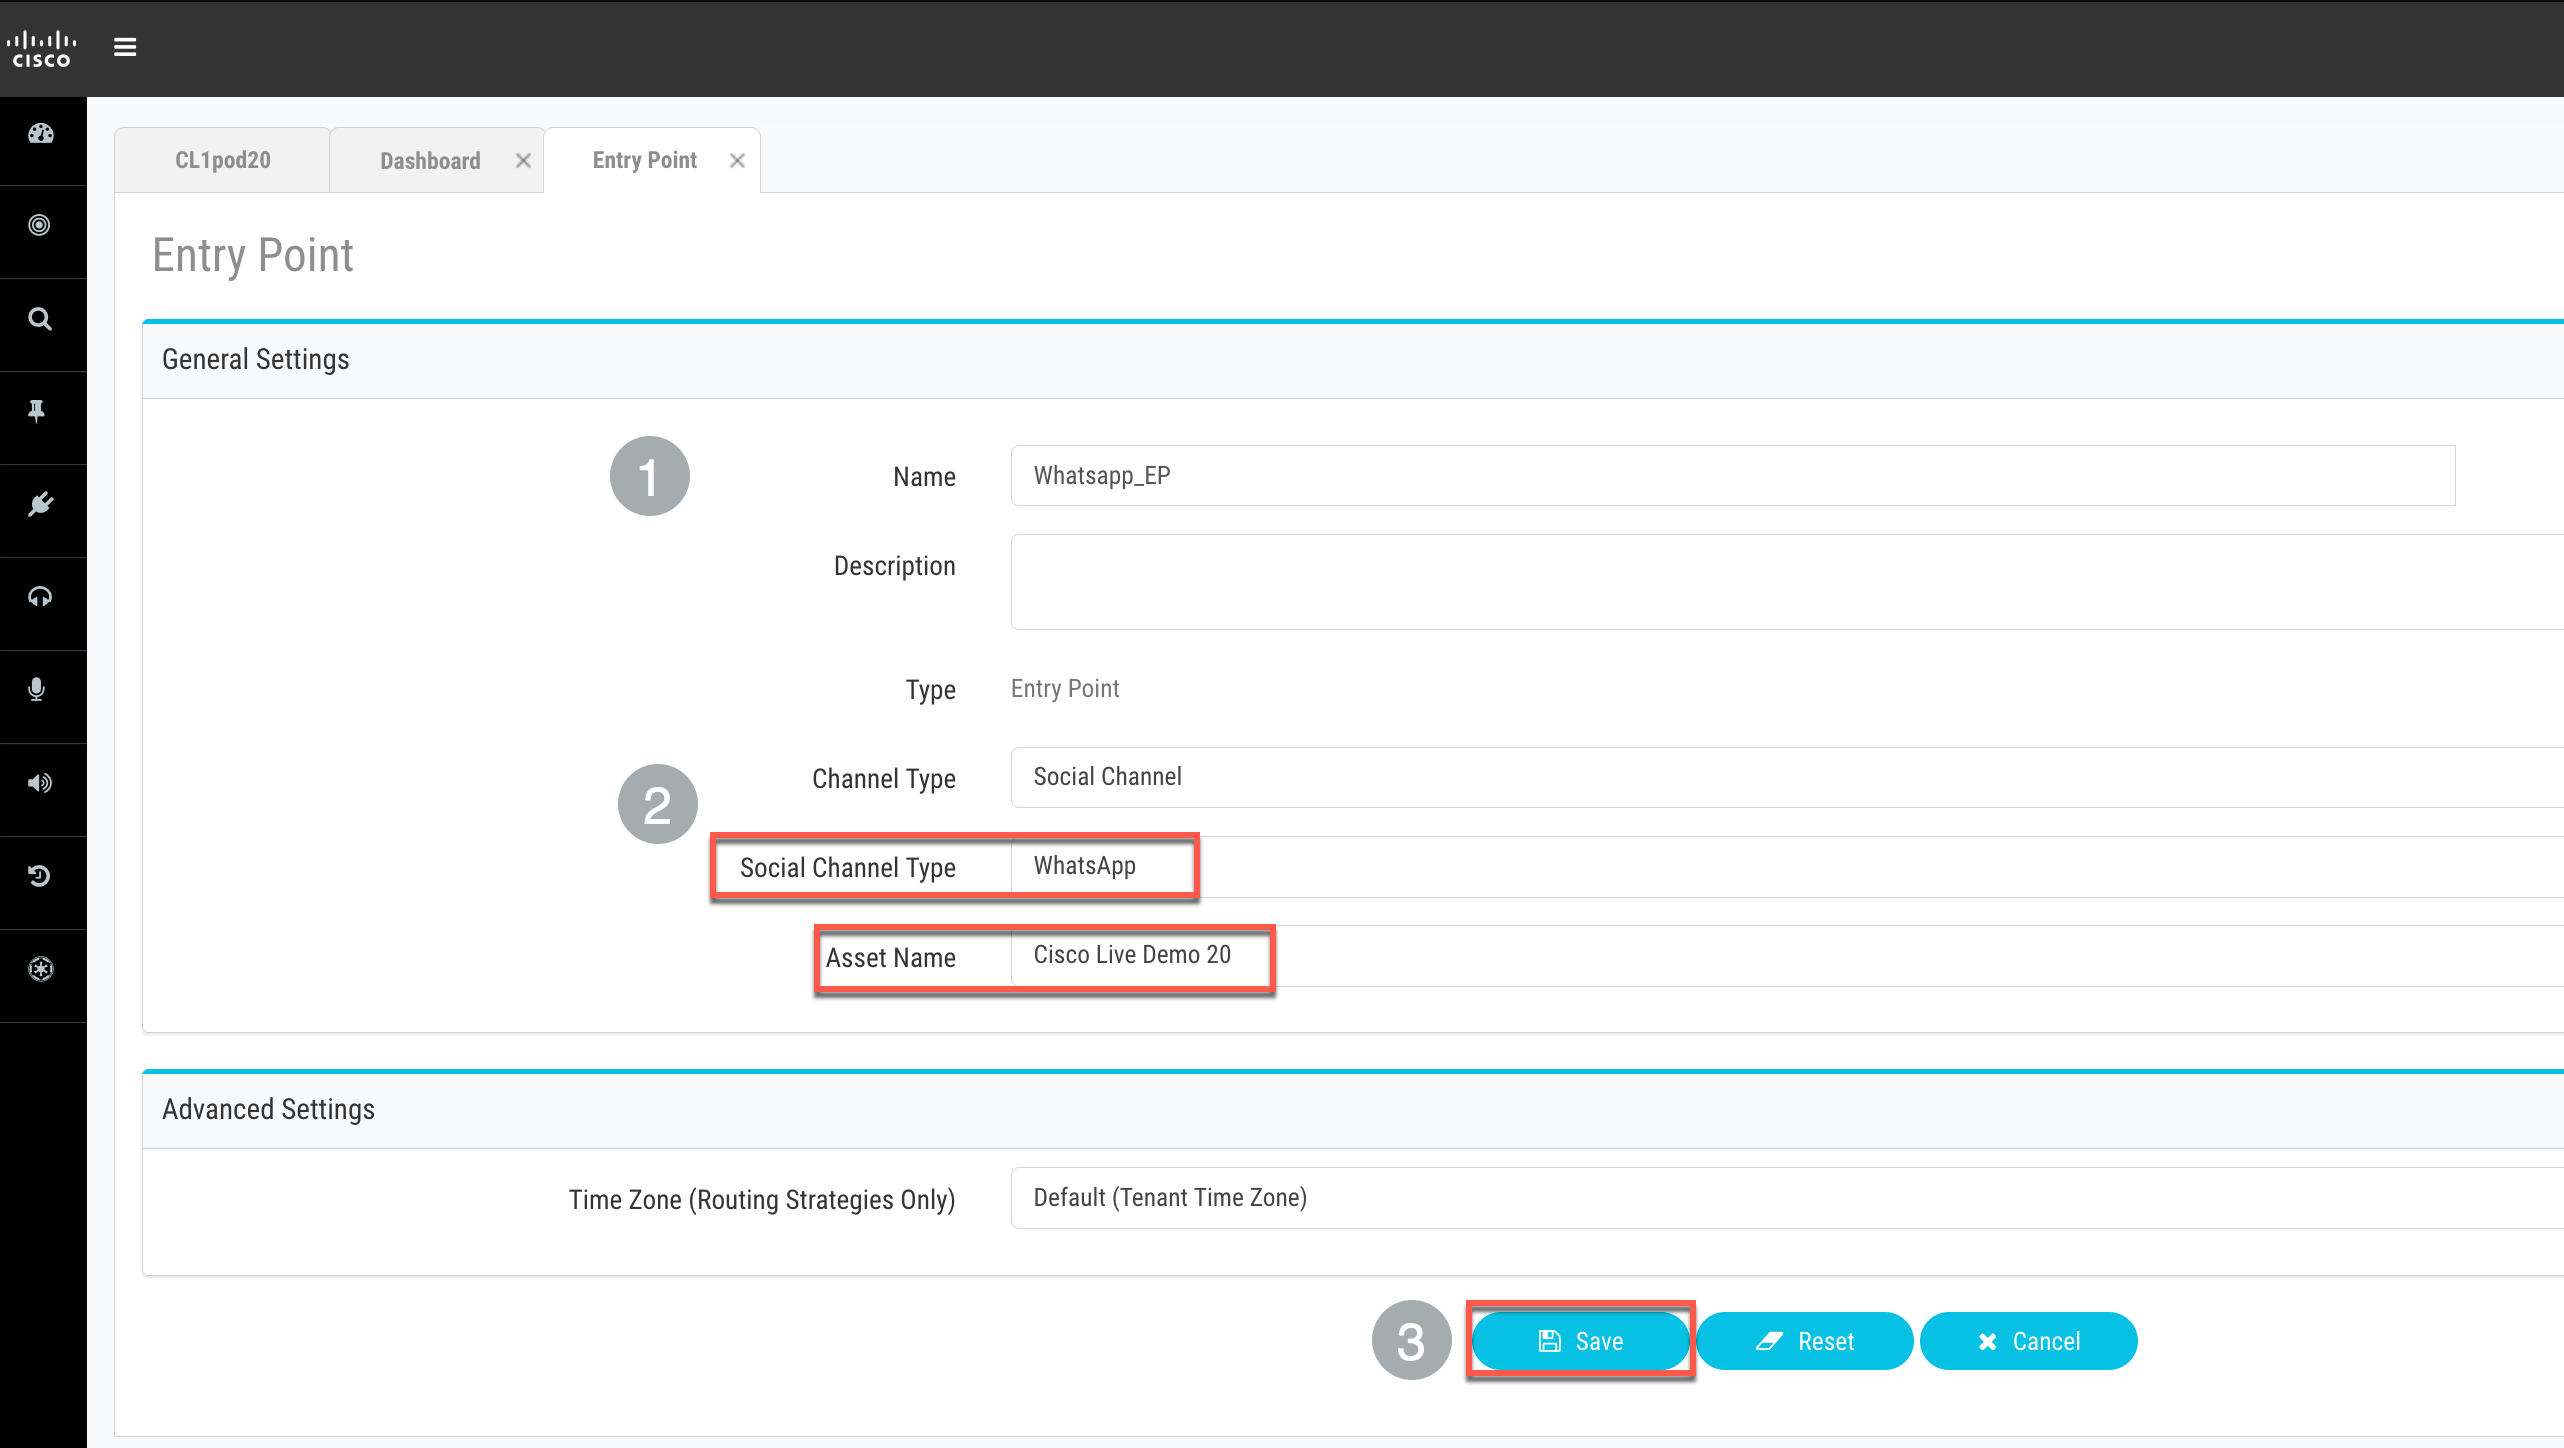
Name WhatsApp_EP, Channel Type Social Channel, Social Channel Type WhatsApp, Asset Name (your WhatsApp asset) → Save
Queues → New Queue
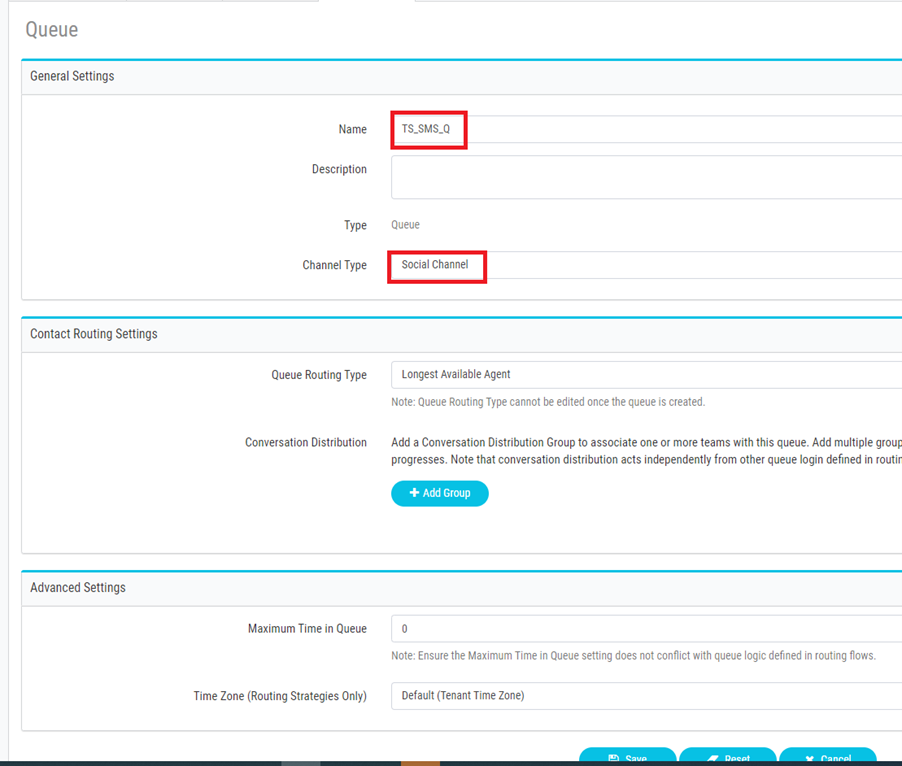
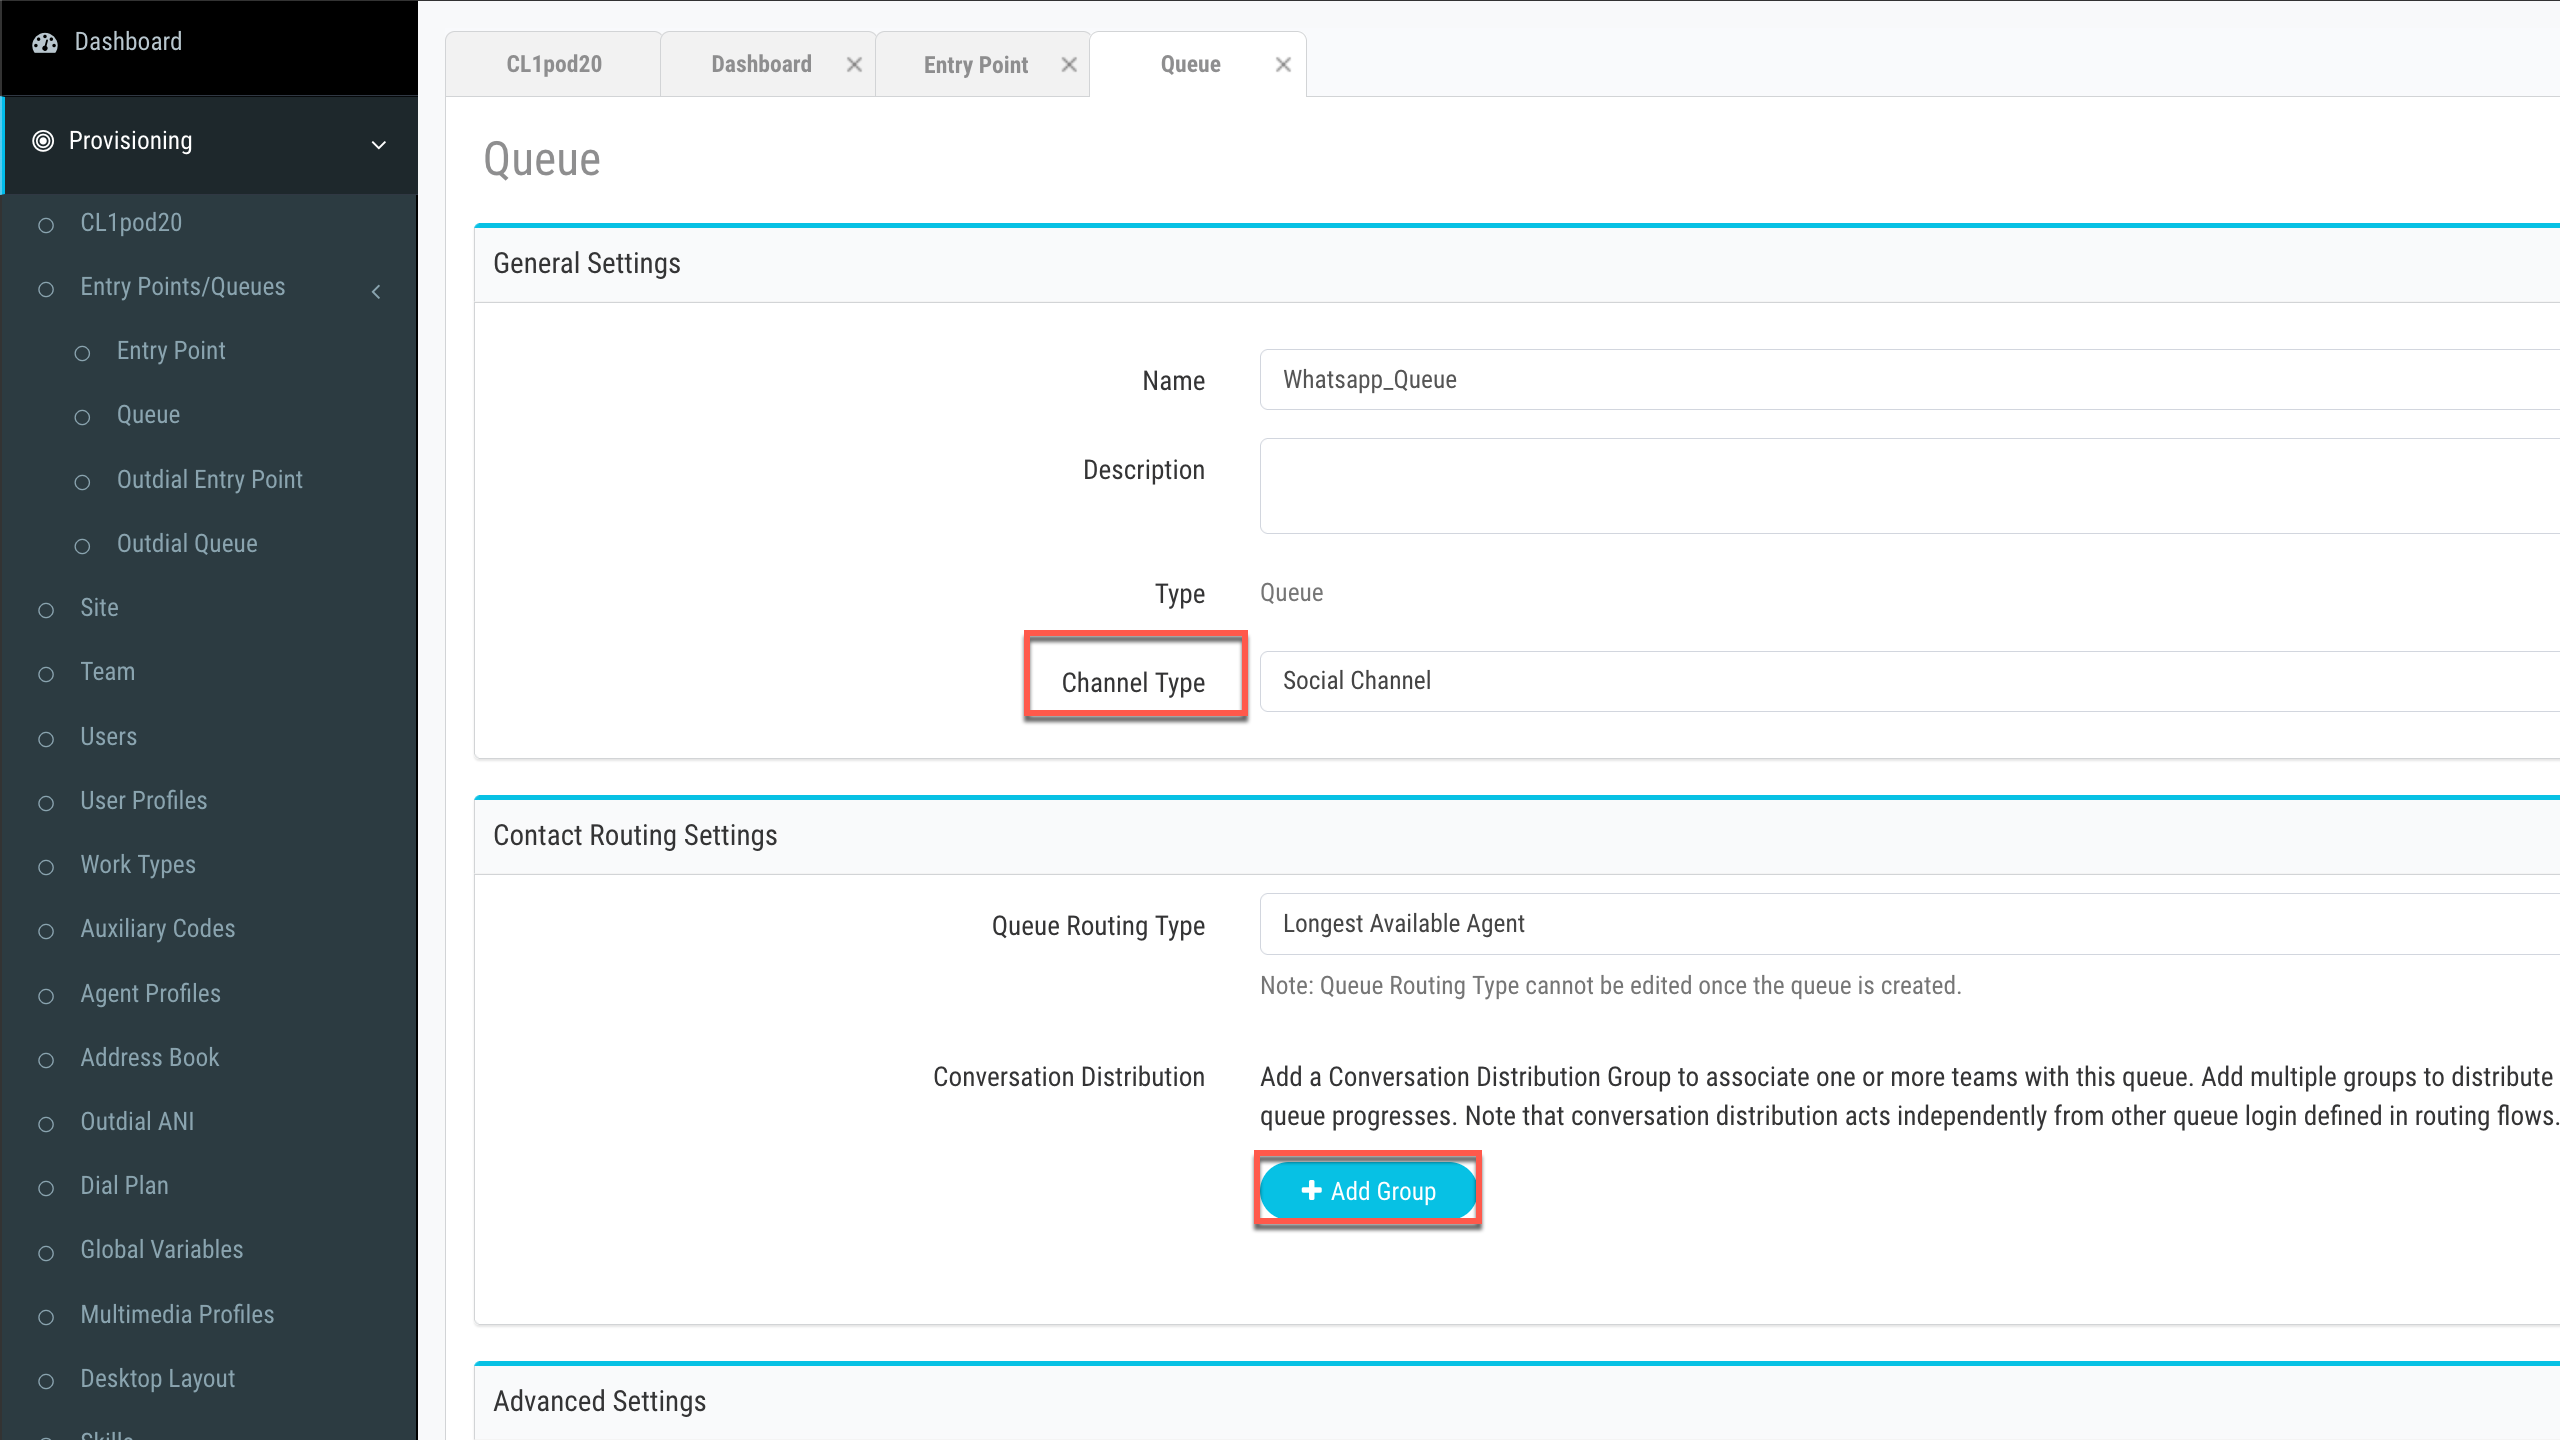
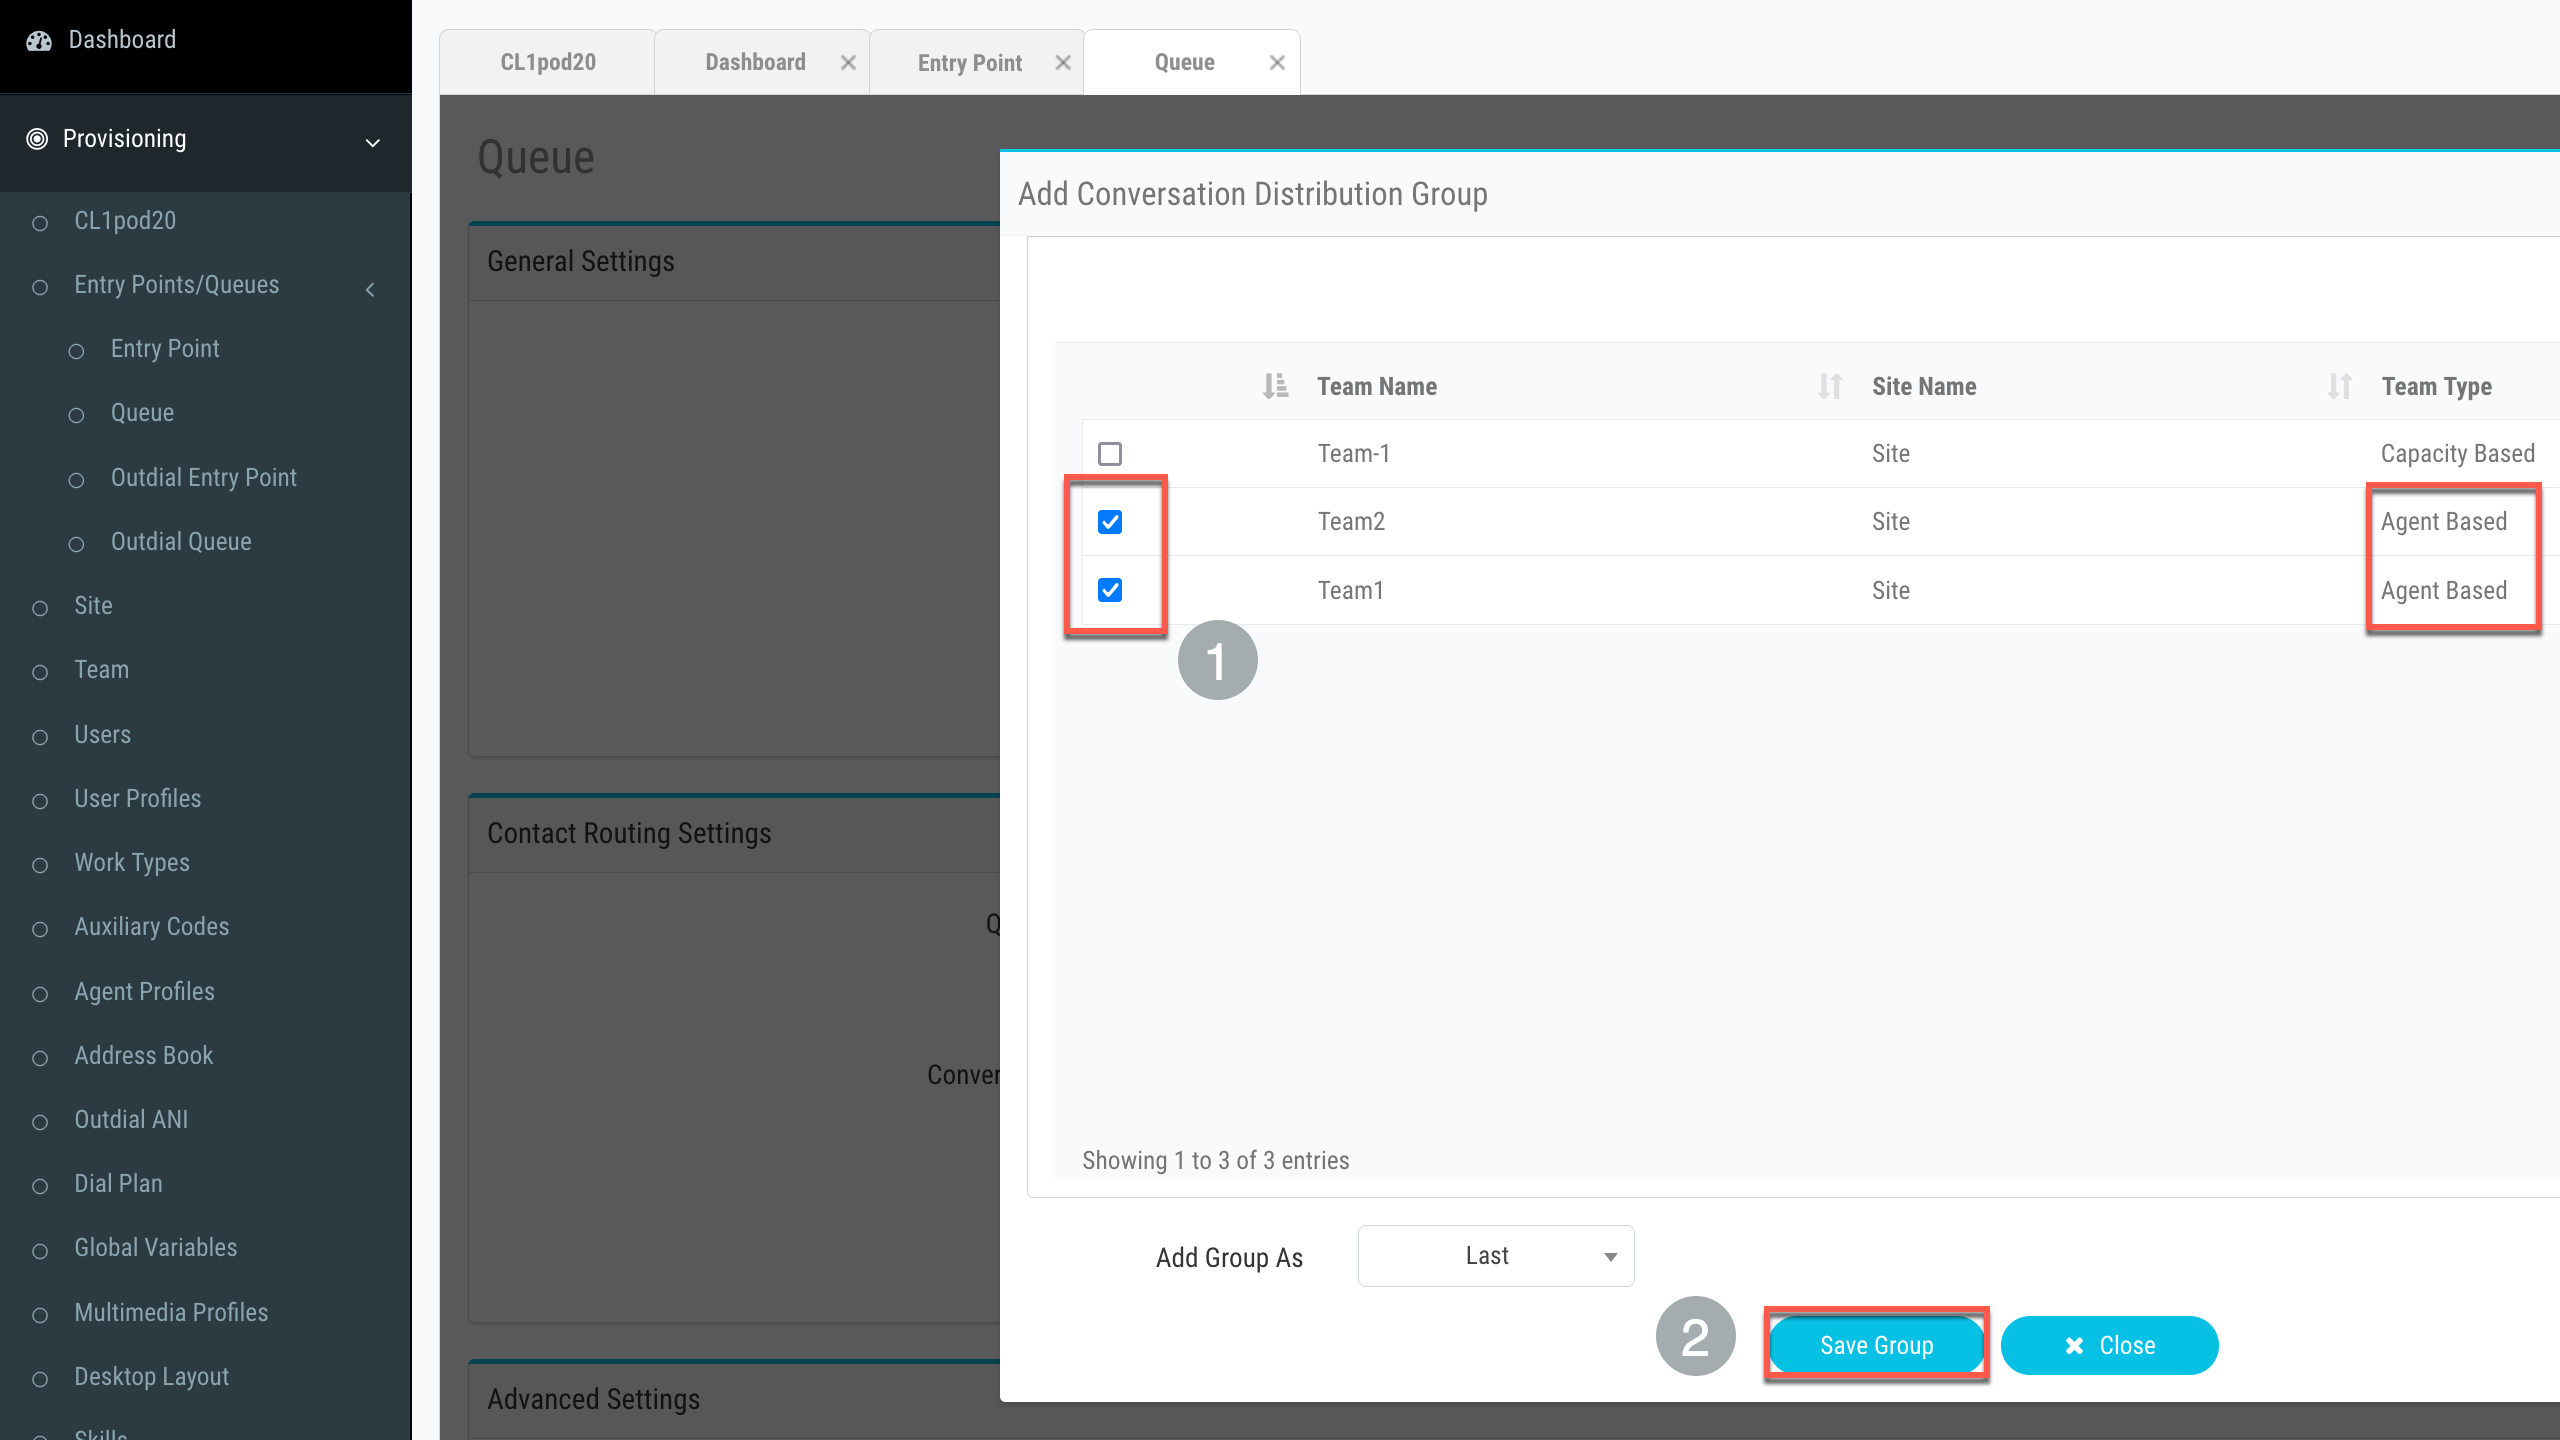
Name WhatsApp_Queue, Channel Type Social Channel, Add Group → agent teams
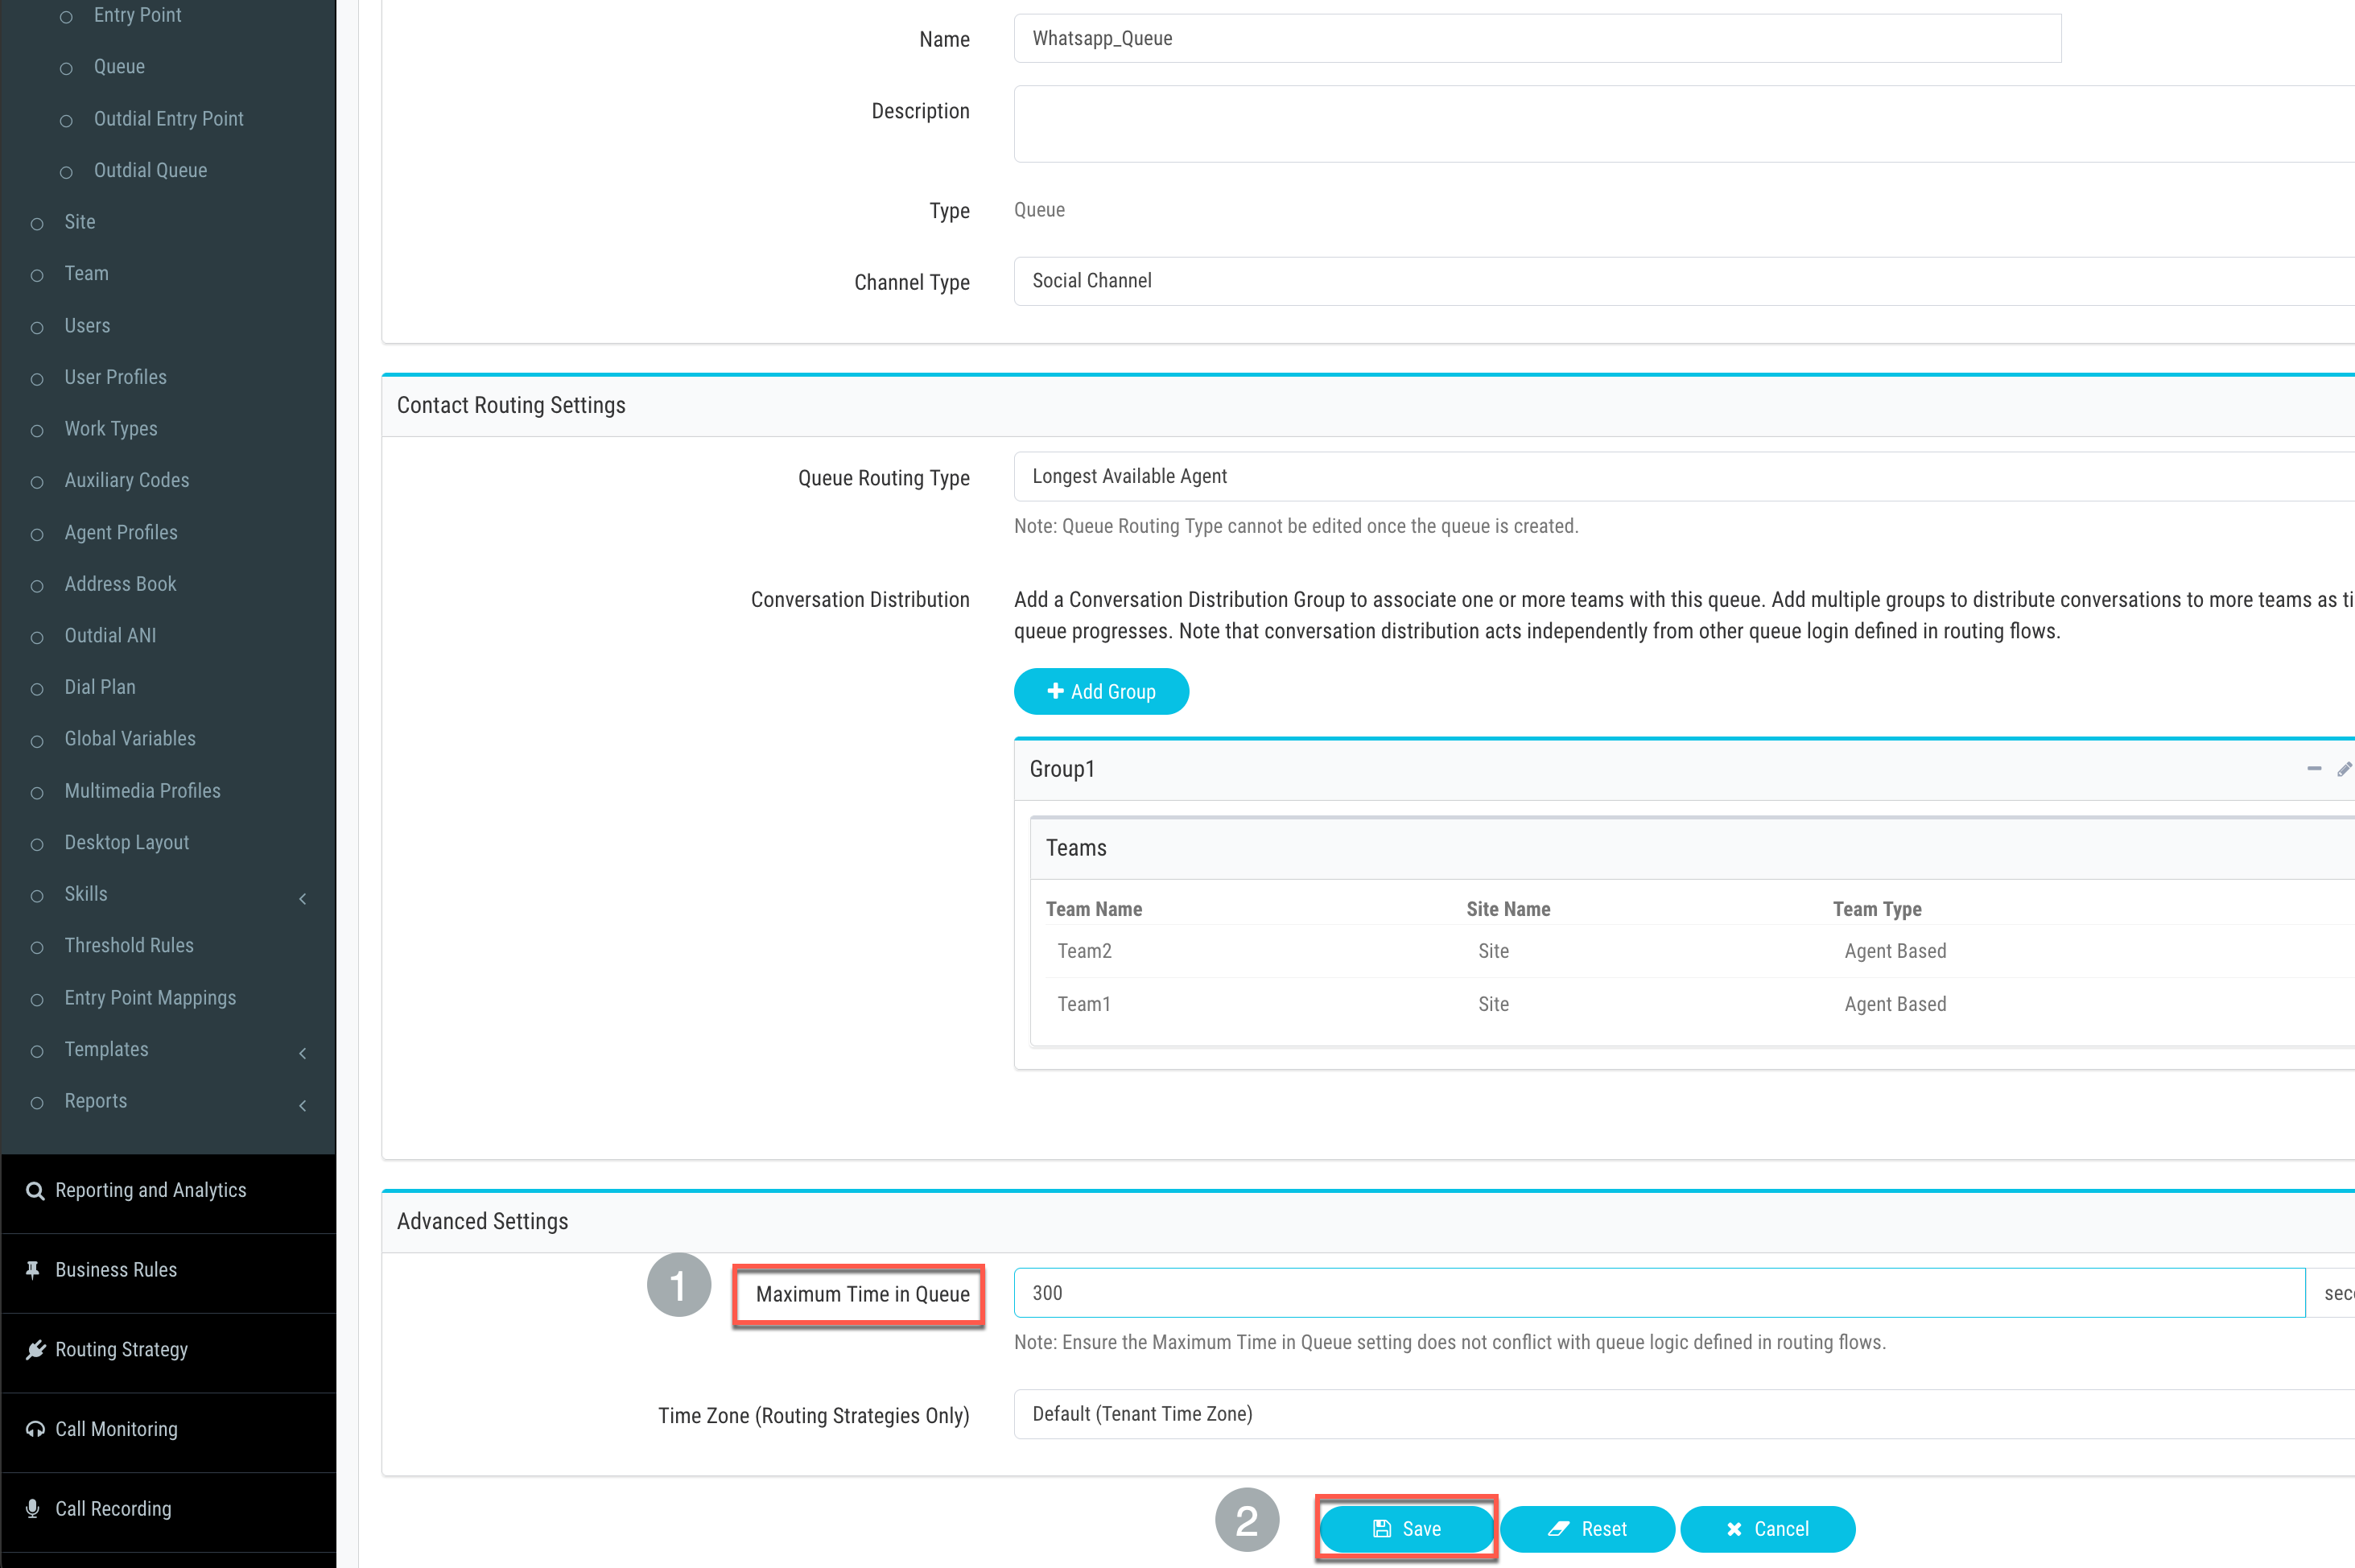
Max Time 300 → Save
4. Create/Upload WhatsApp flow
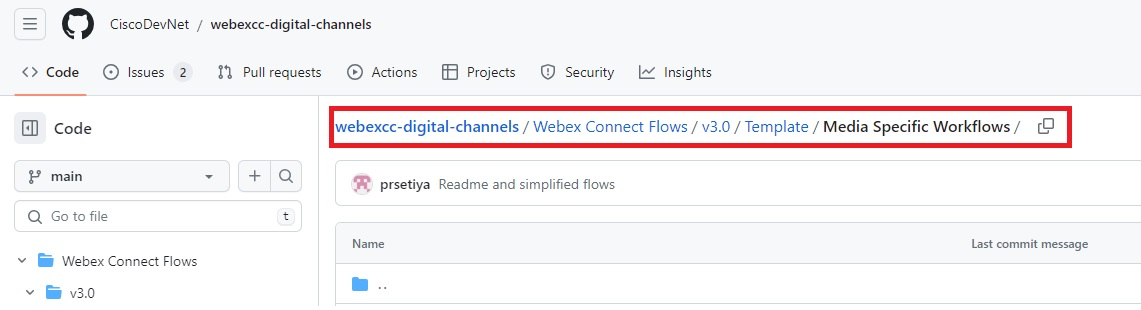
Download Whatsapp Inbound Flow.workflow.zip from GitHub → unzip
Connect → My First Service → FLOWS → CREATE FLOW
Flow Name WhatsApp Inbound Flow, Method Upload a flow → drag file → CREATE
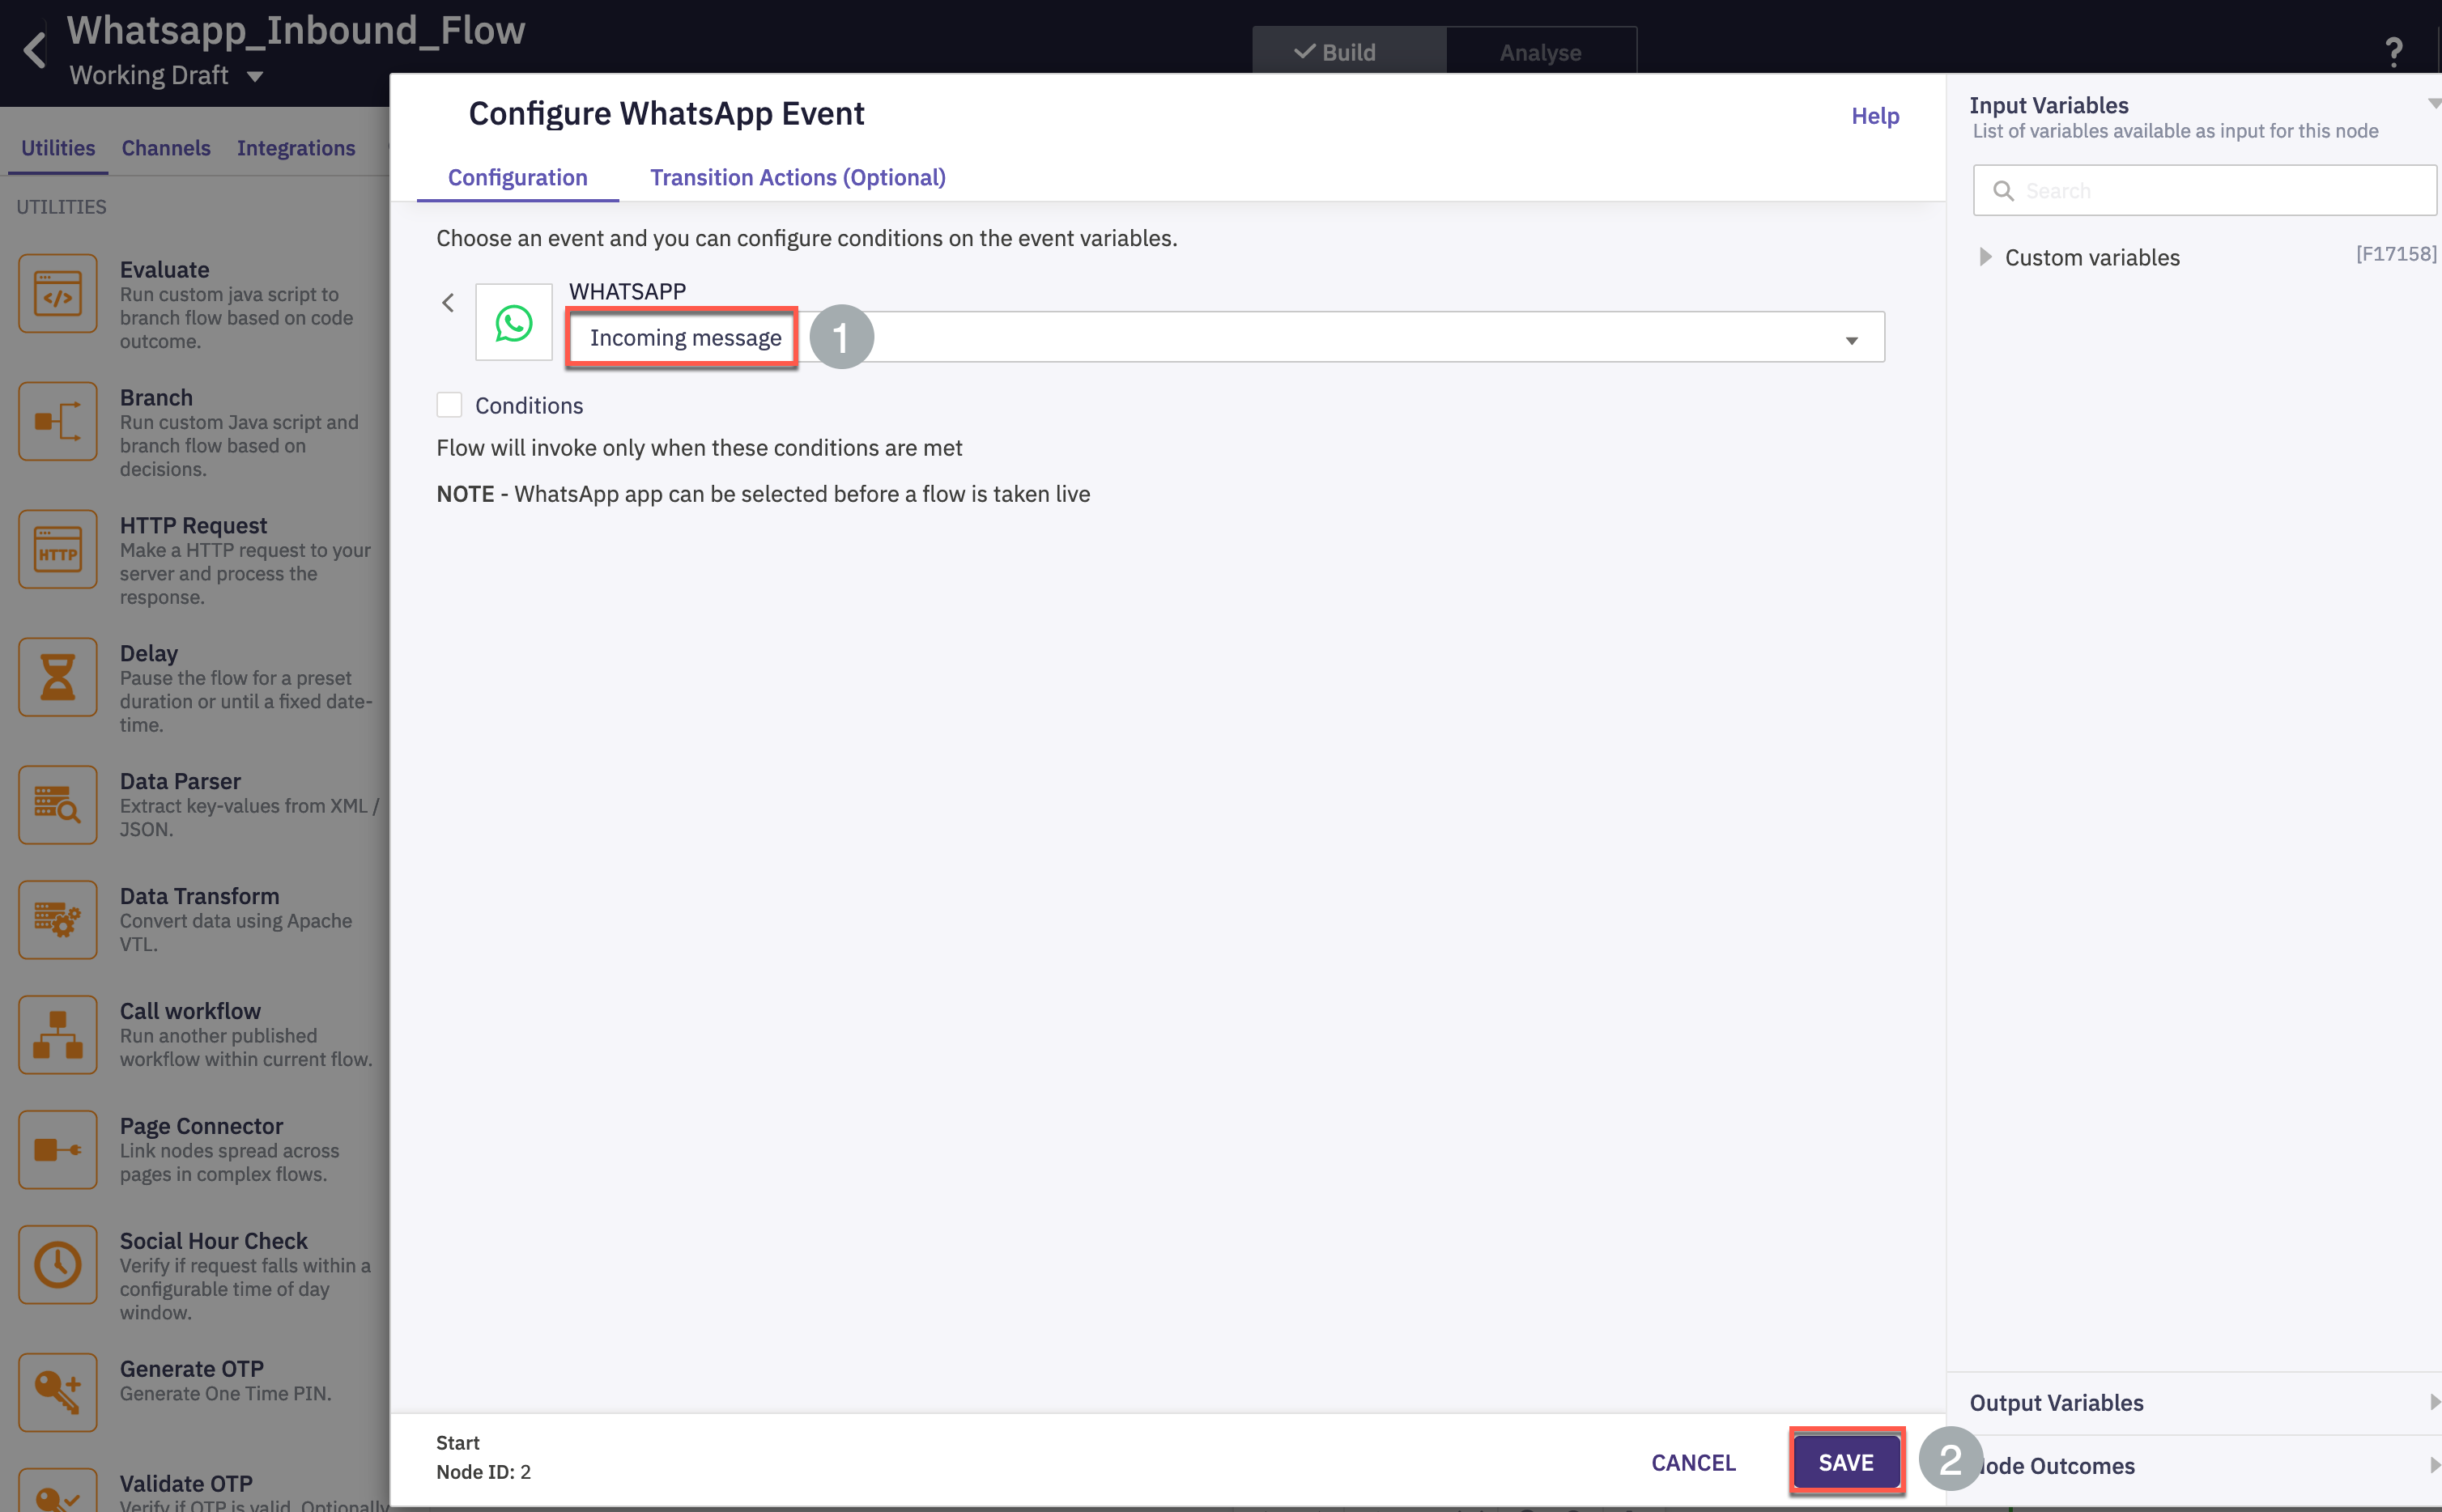
Configure WhatsApp Event → select incoming message as trigger → Save
Custom variables → WANumber and appid from Step 1 → SAVE
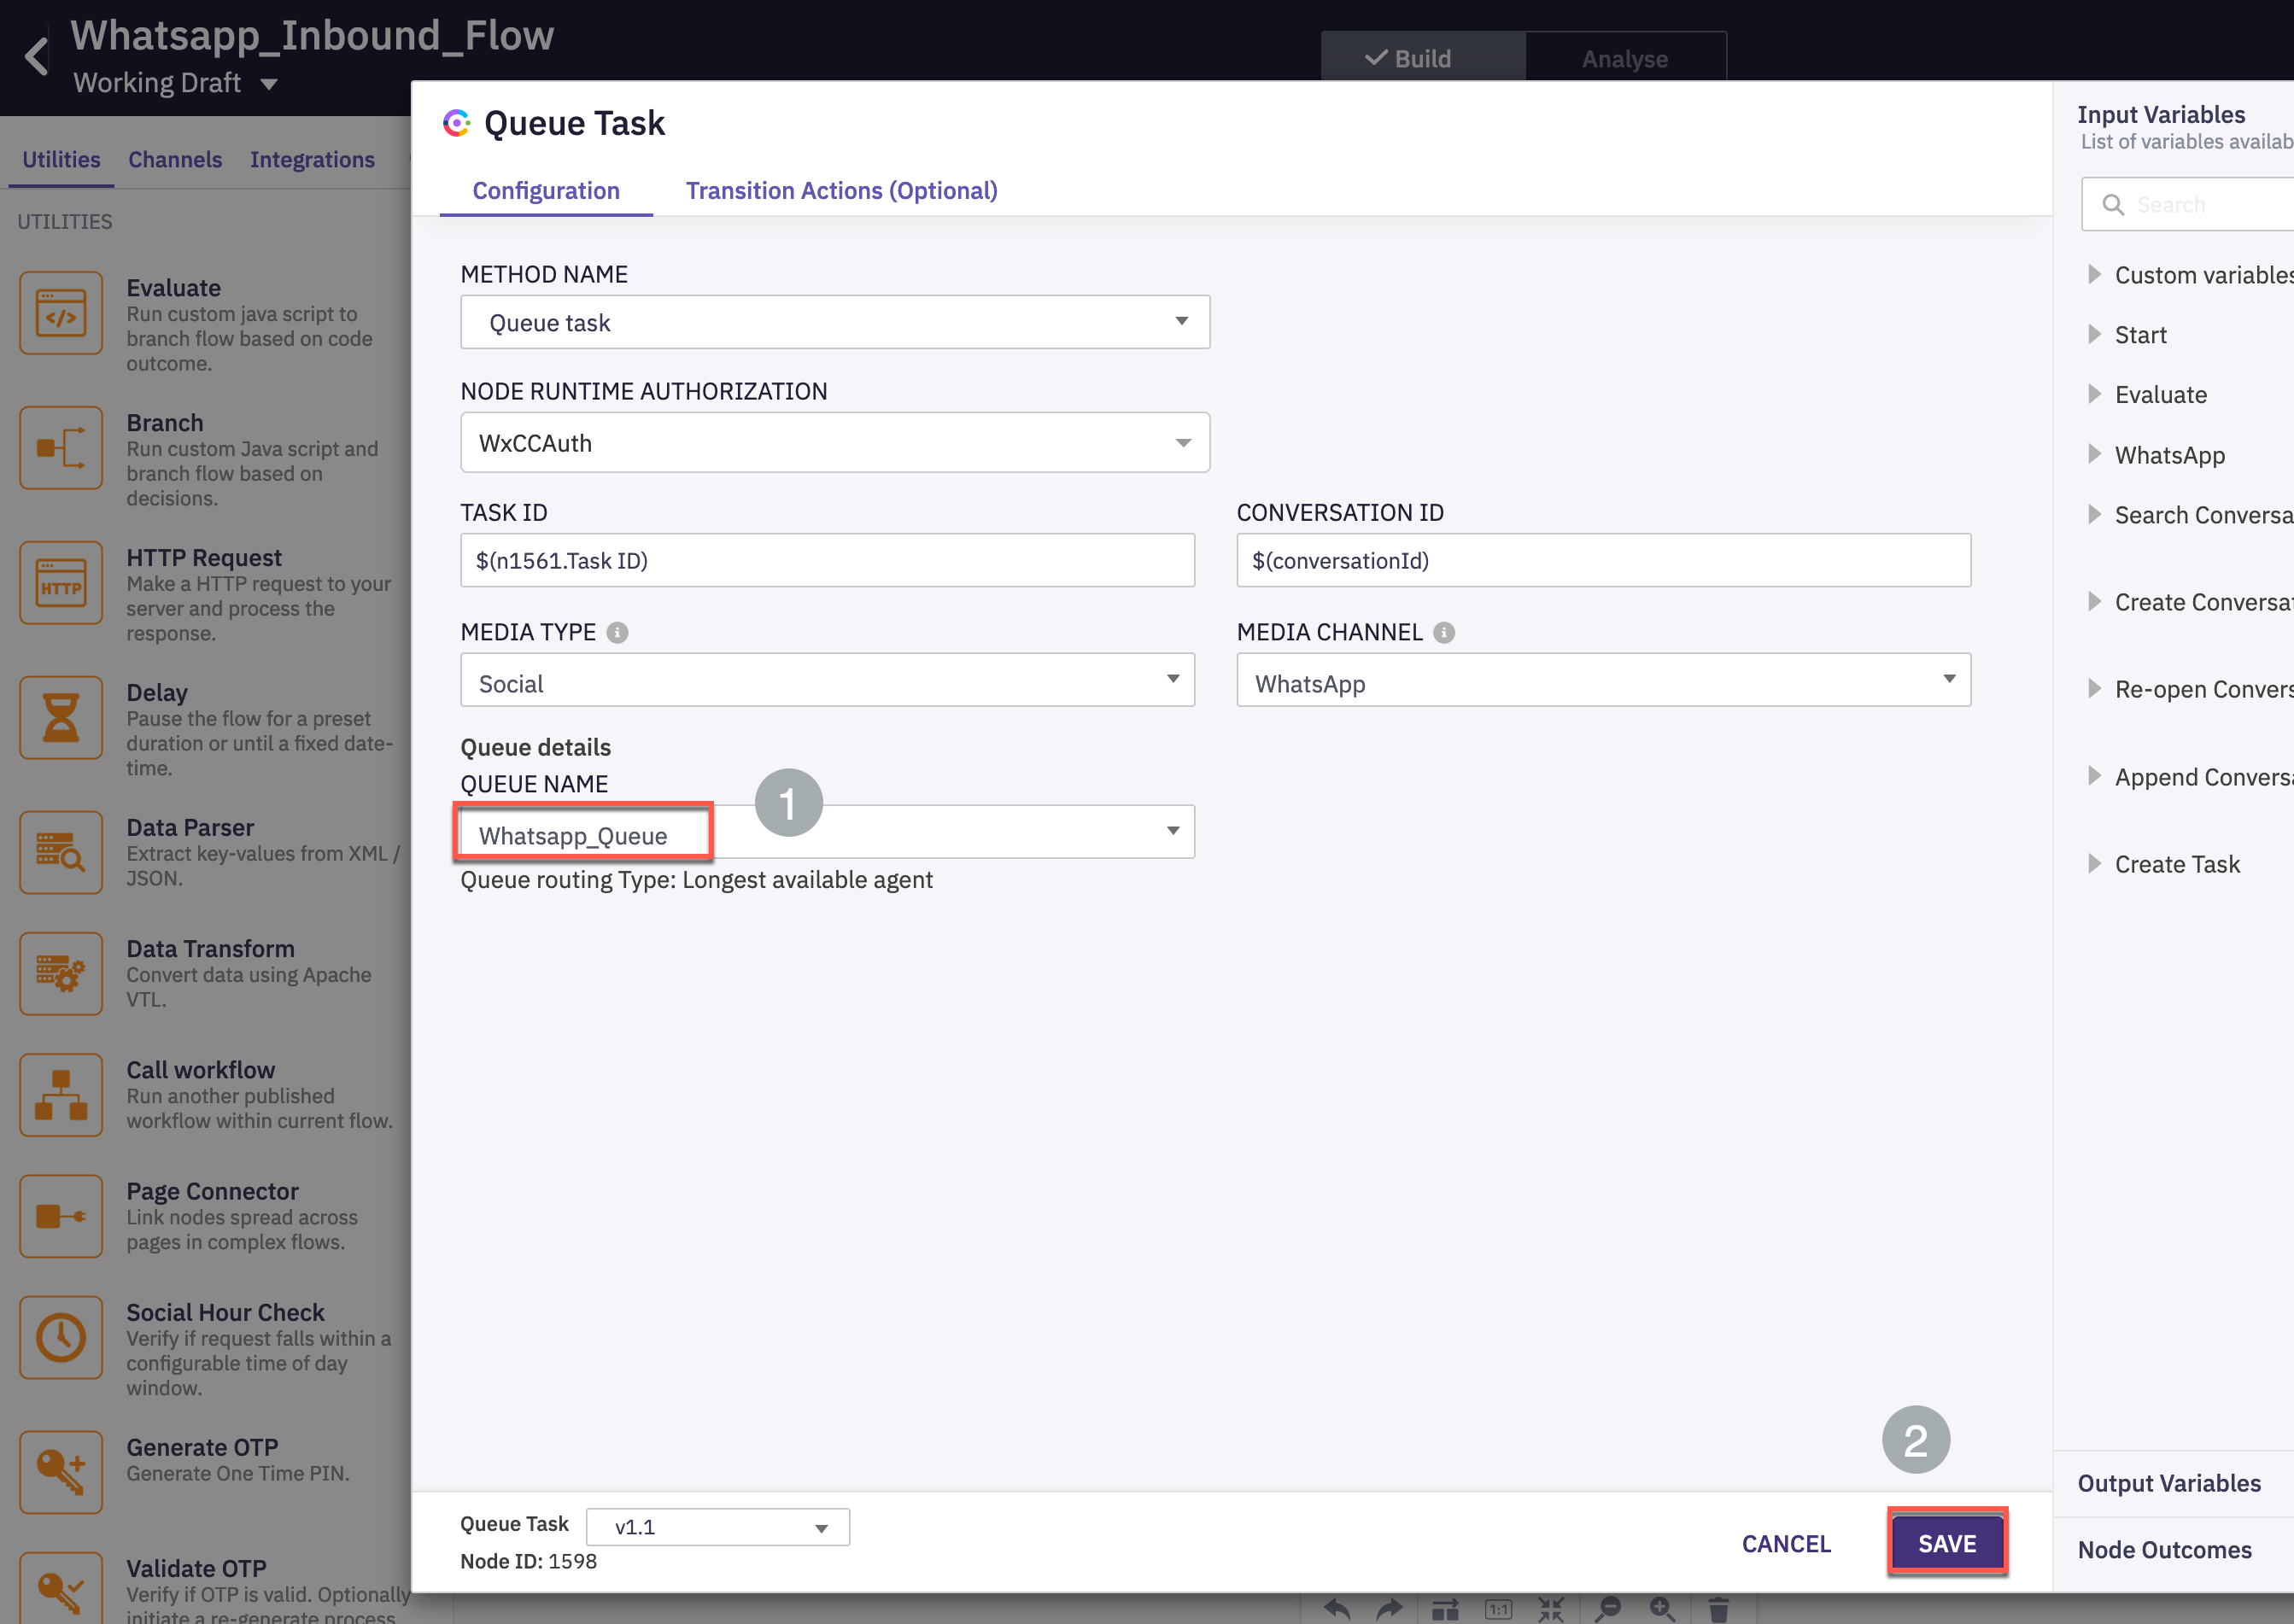
Queue Task → Queue Name WhatsApp_Queue → SAVE
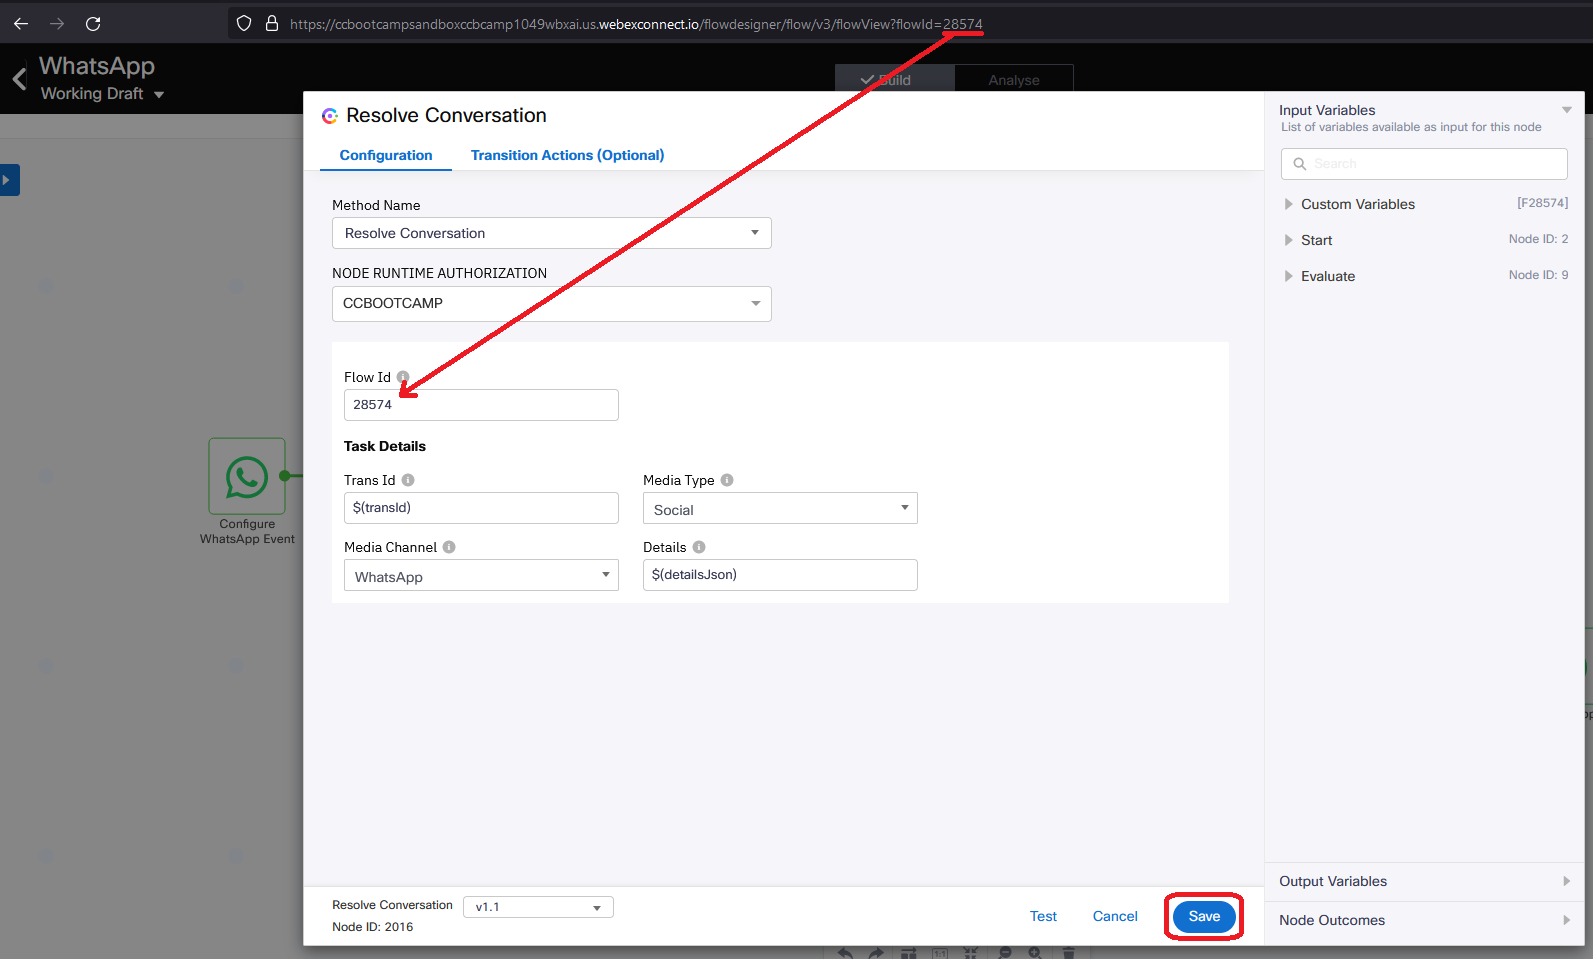
Resolve Conversation → Flow Id from URL → Save
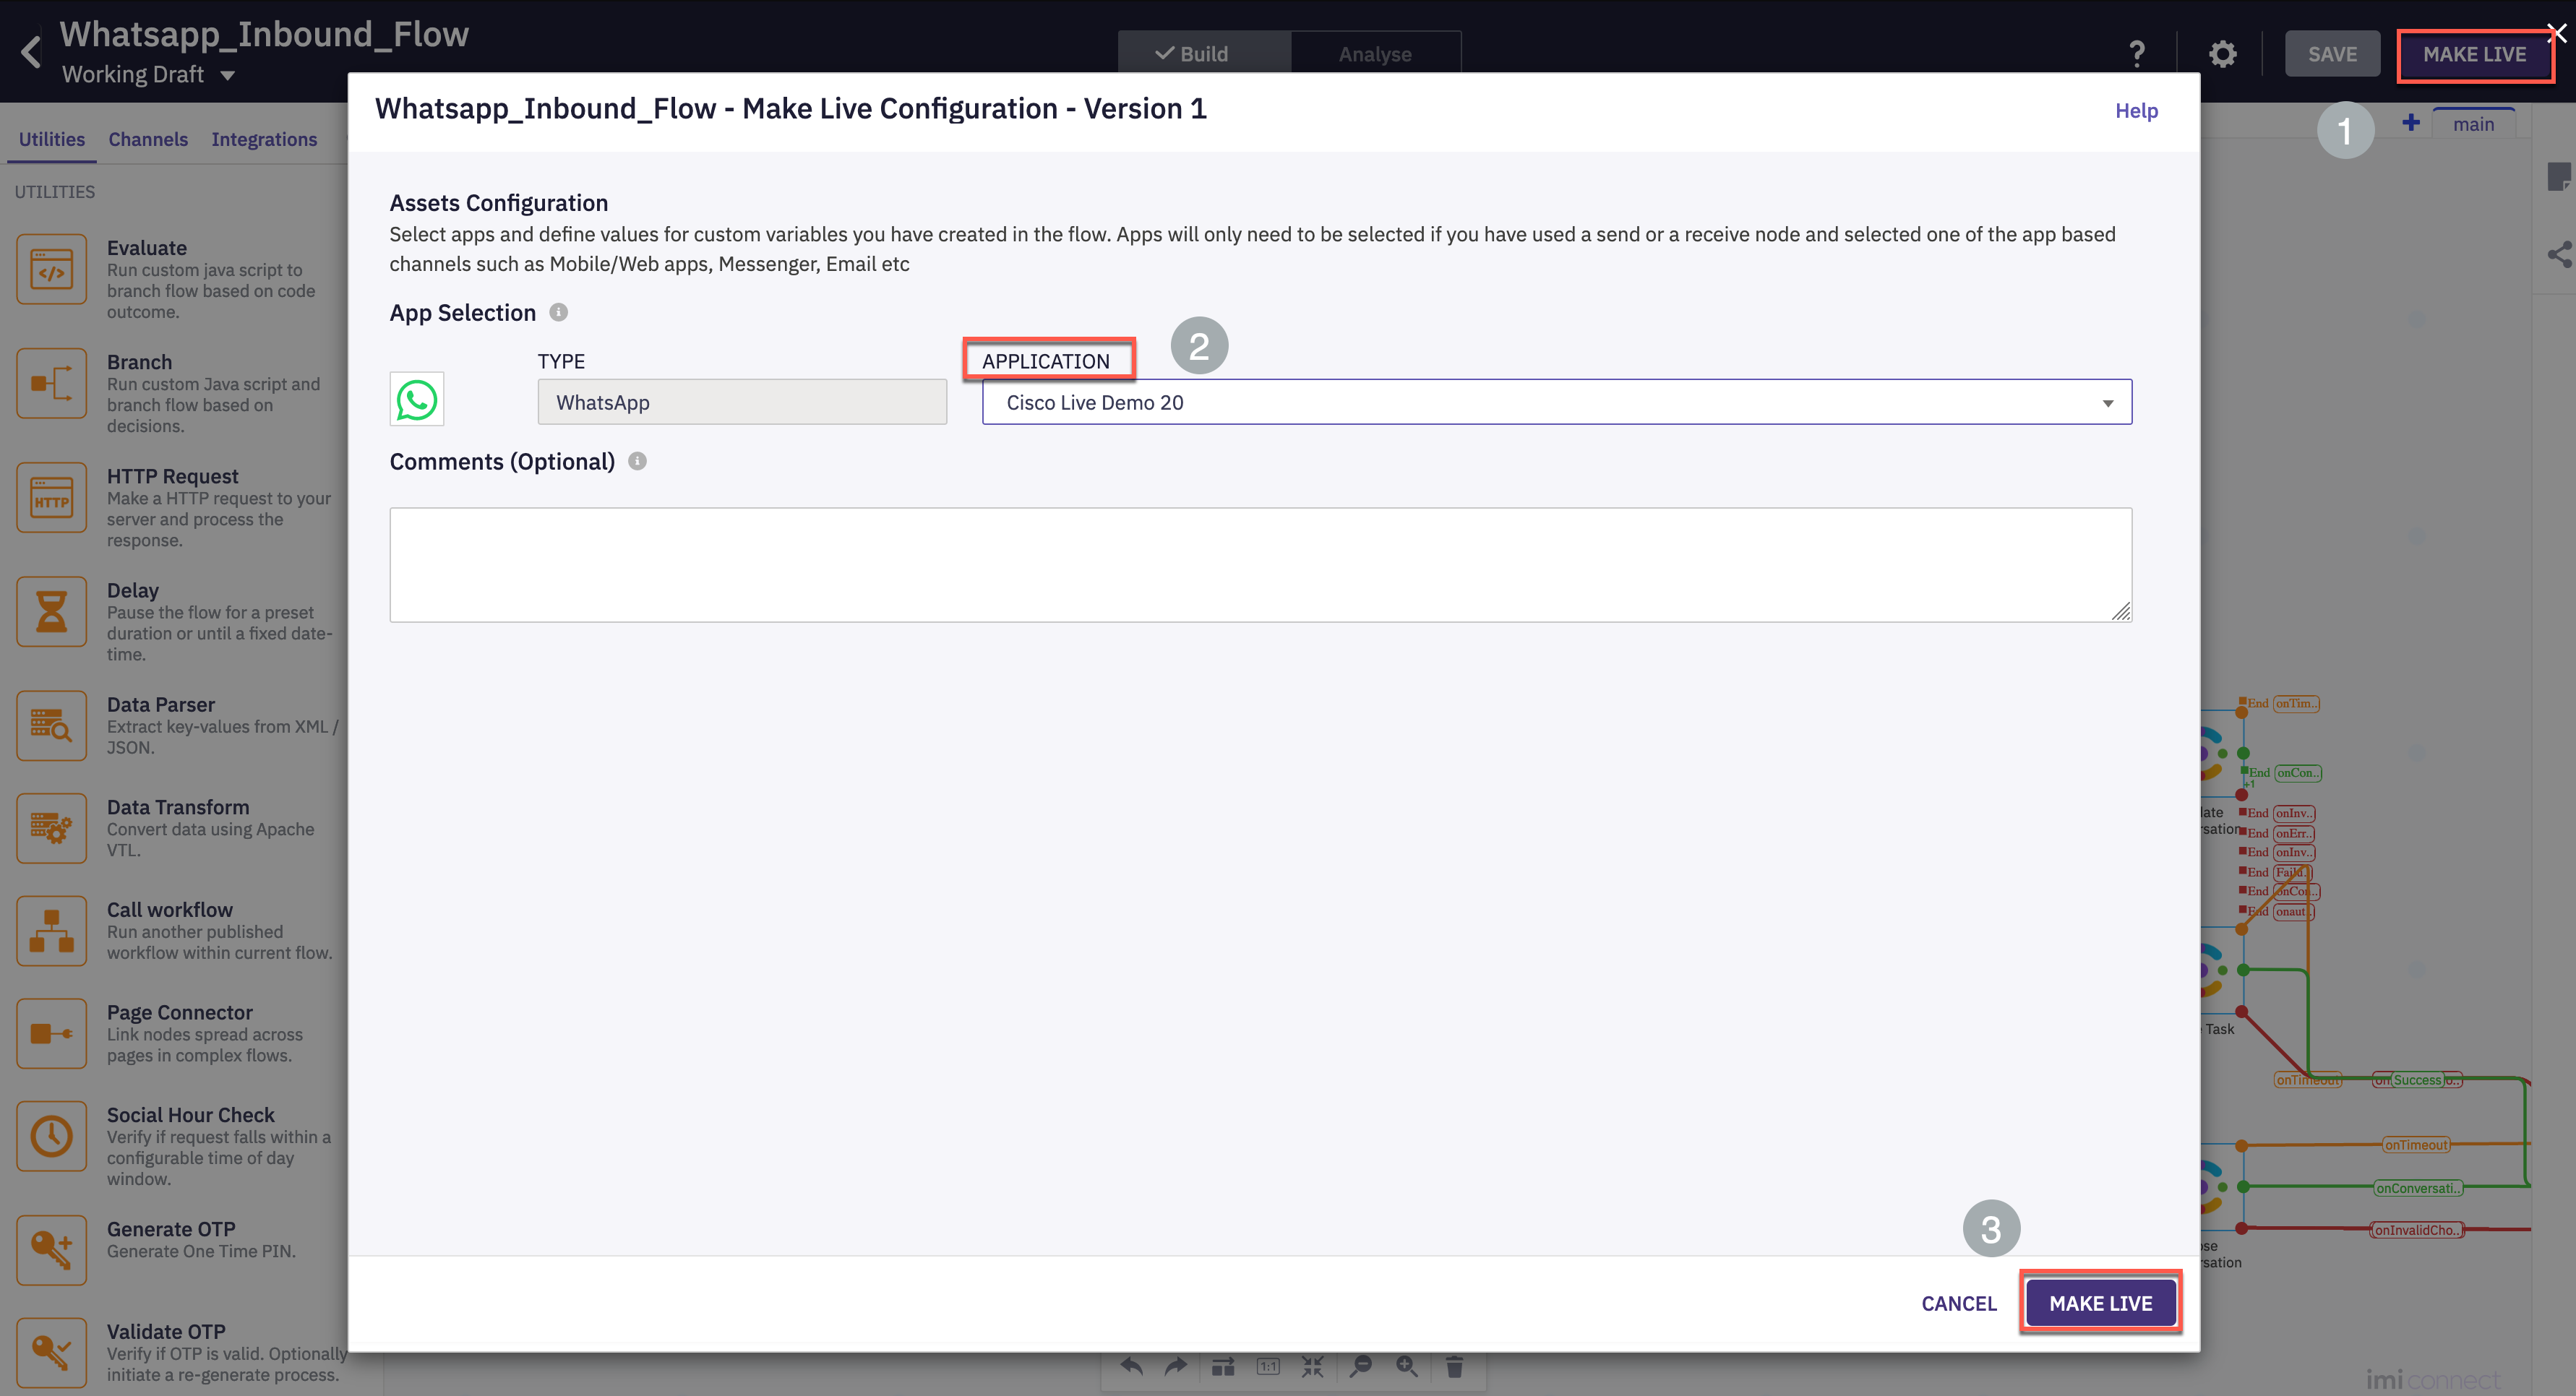
Make Live
Wait ~2 min
5. Verification - send WhatsApp message and accept the request
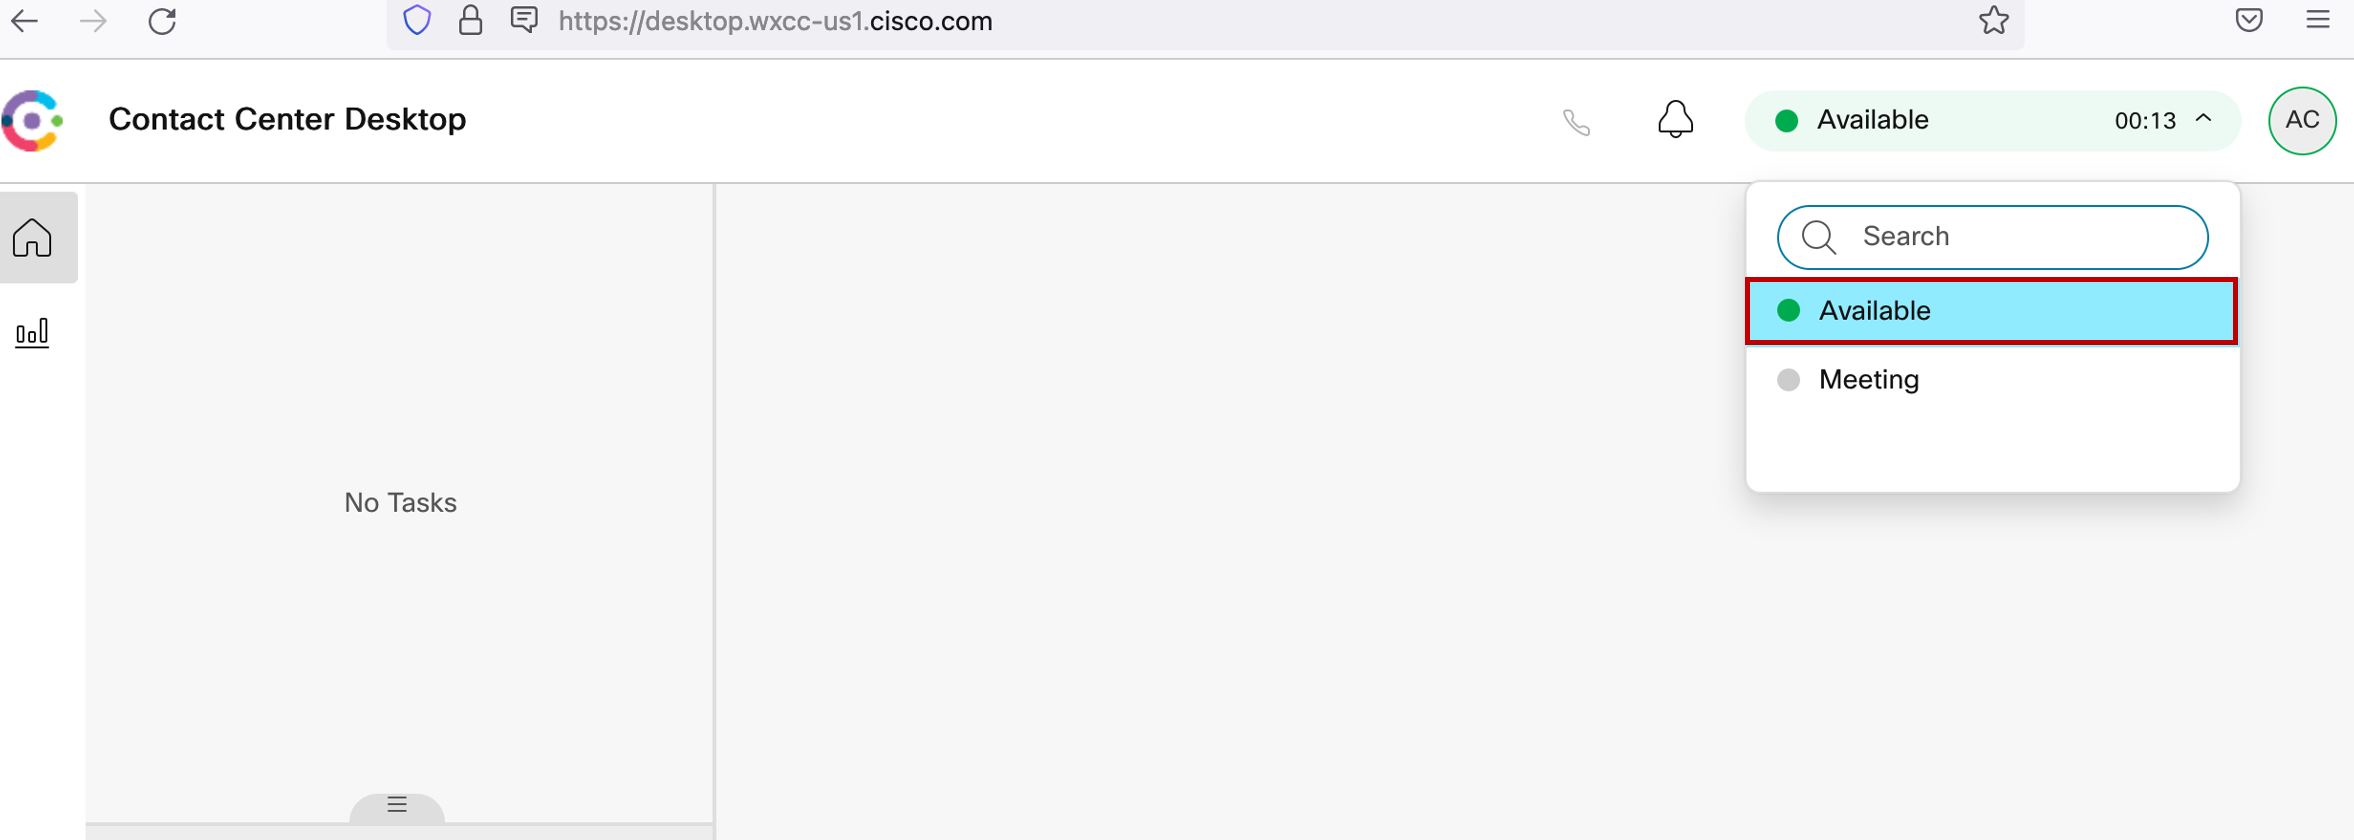
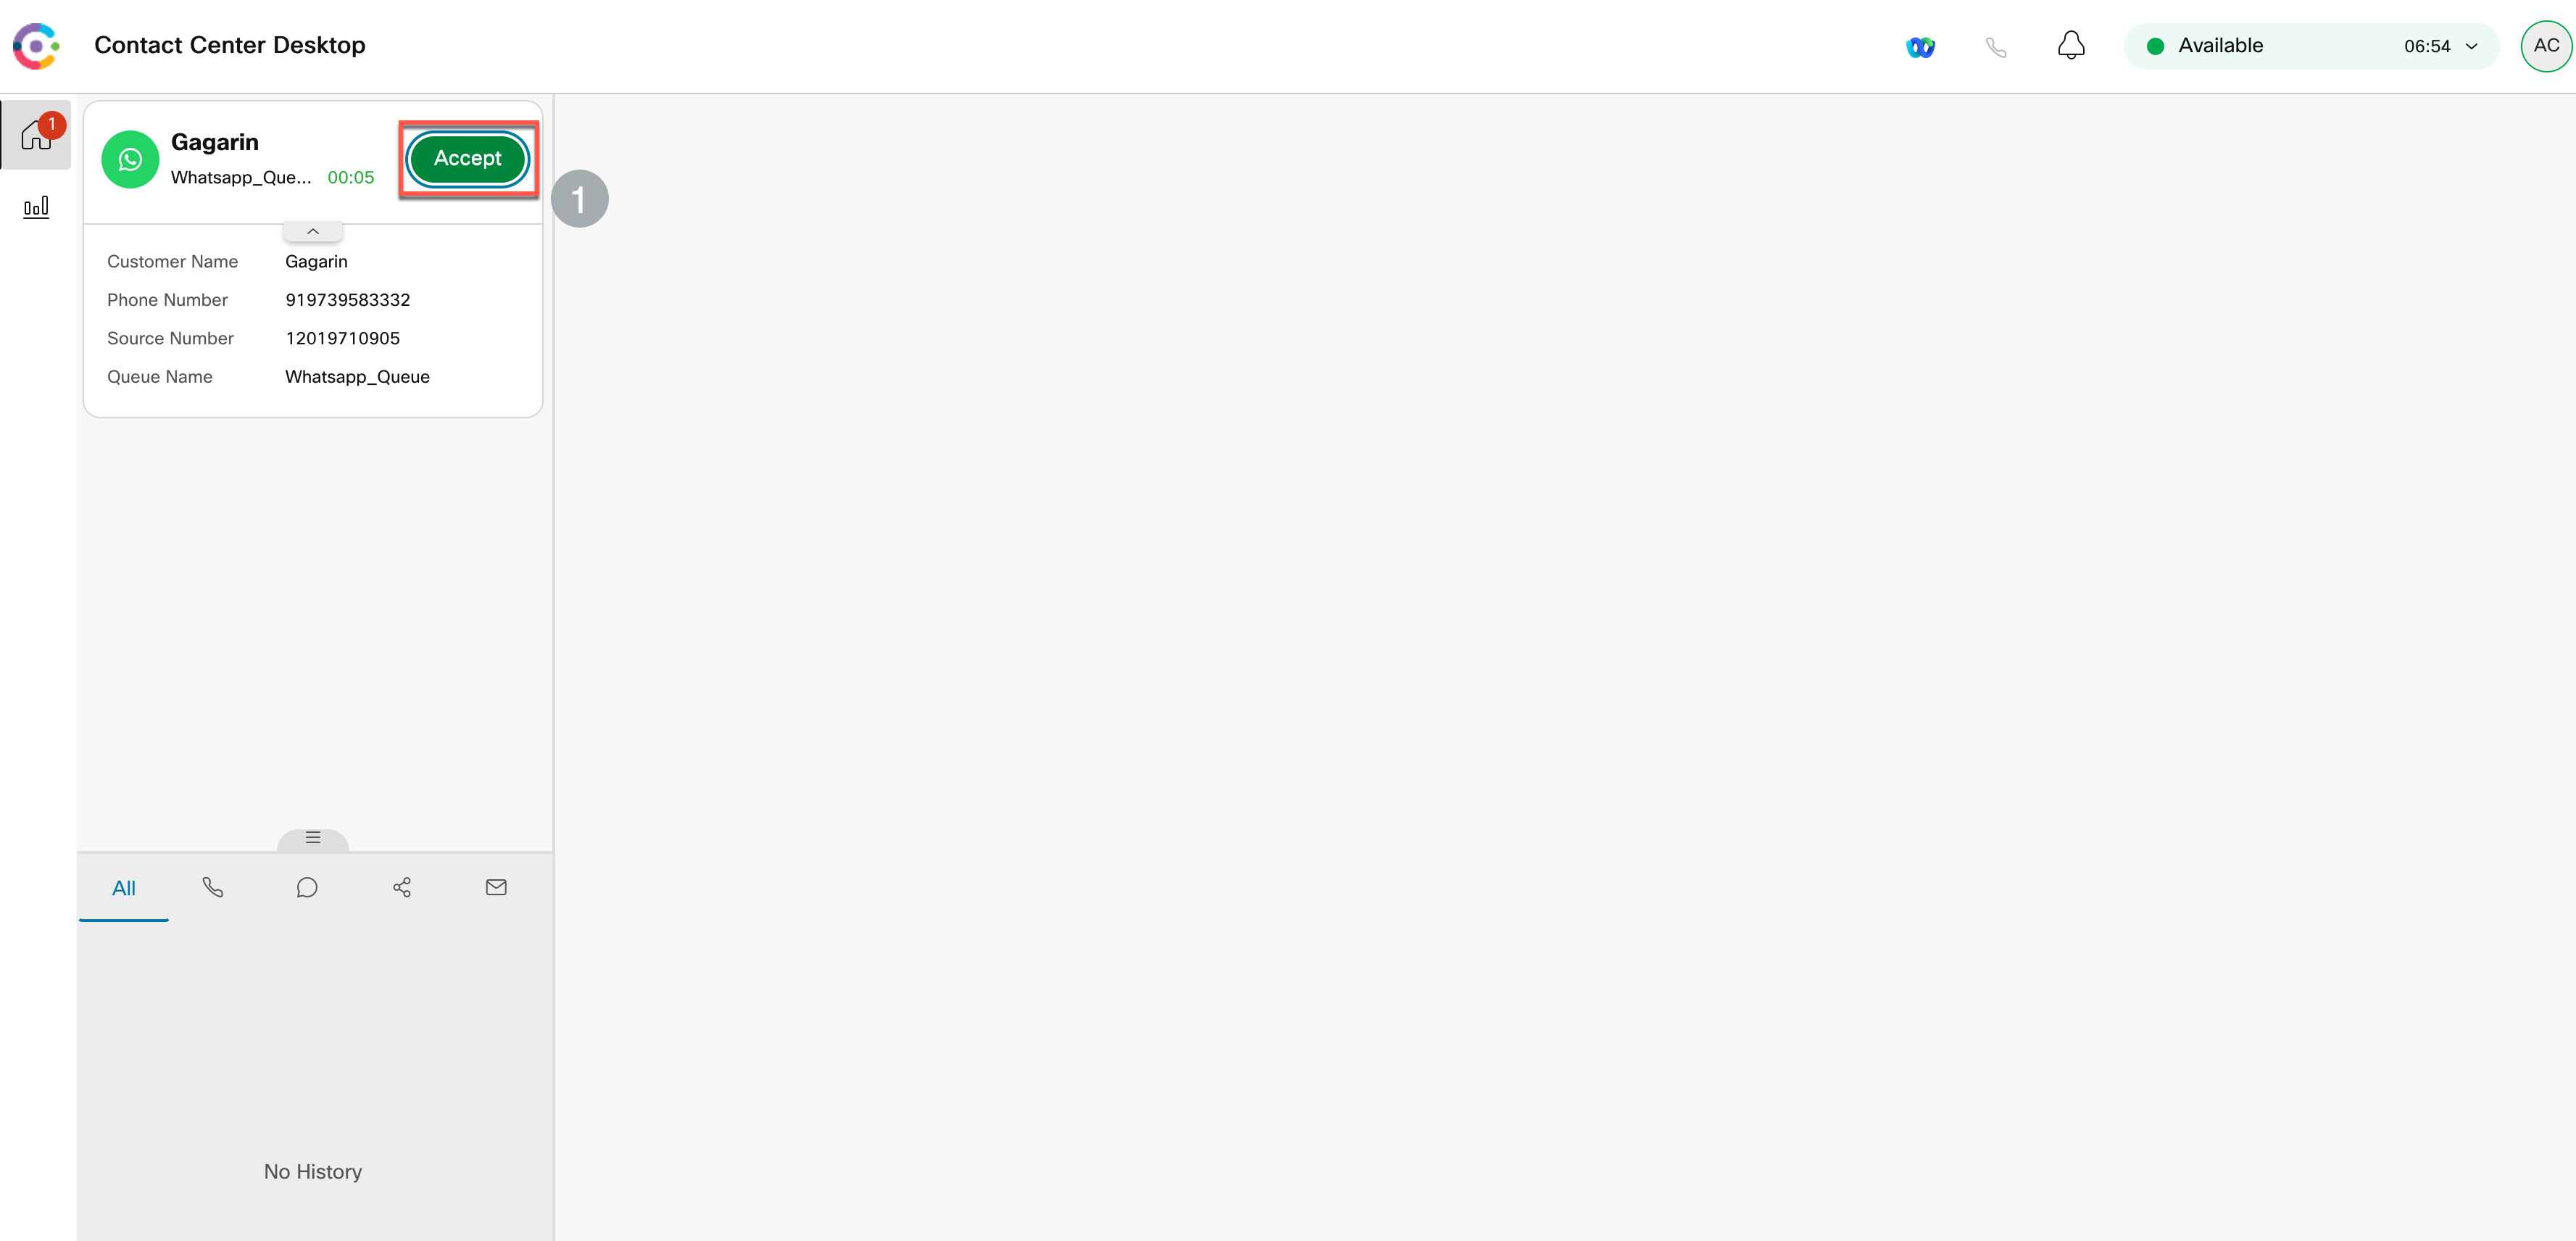
Agent Desktop → Available
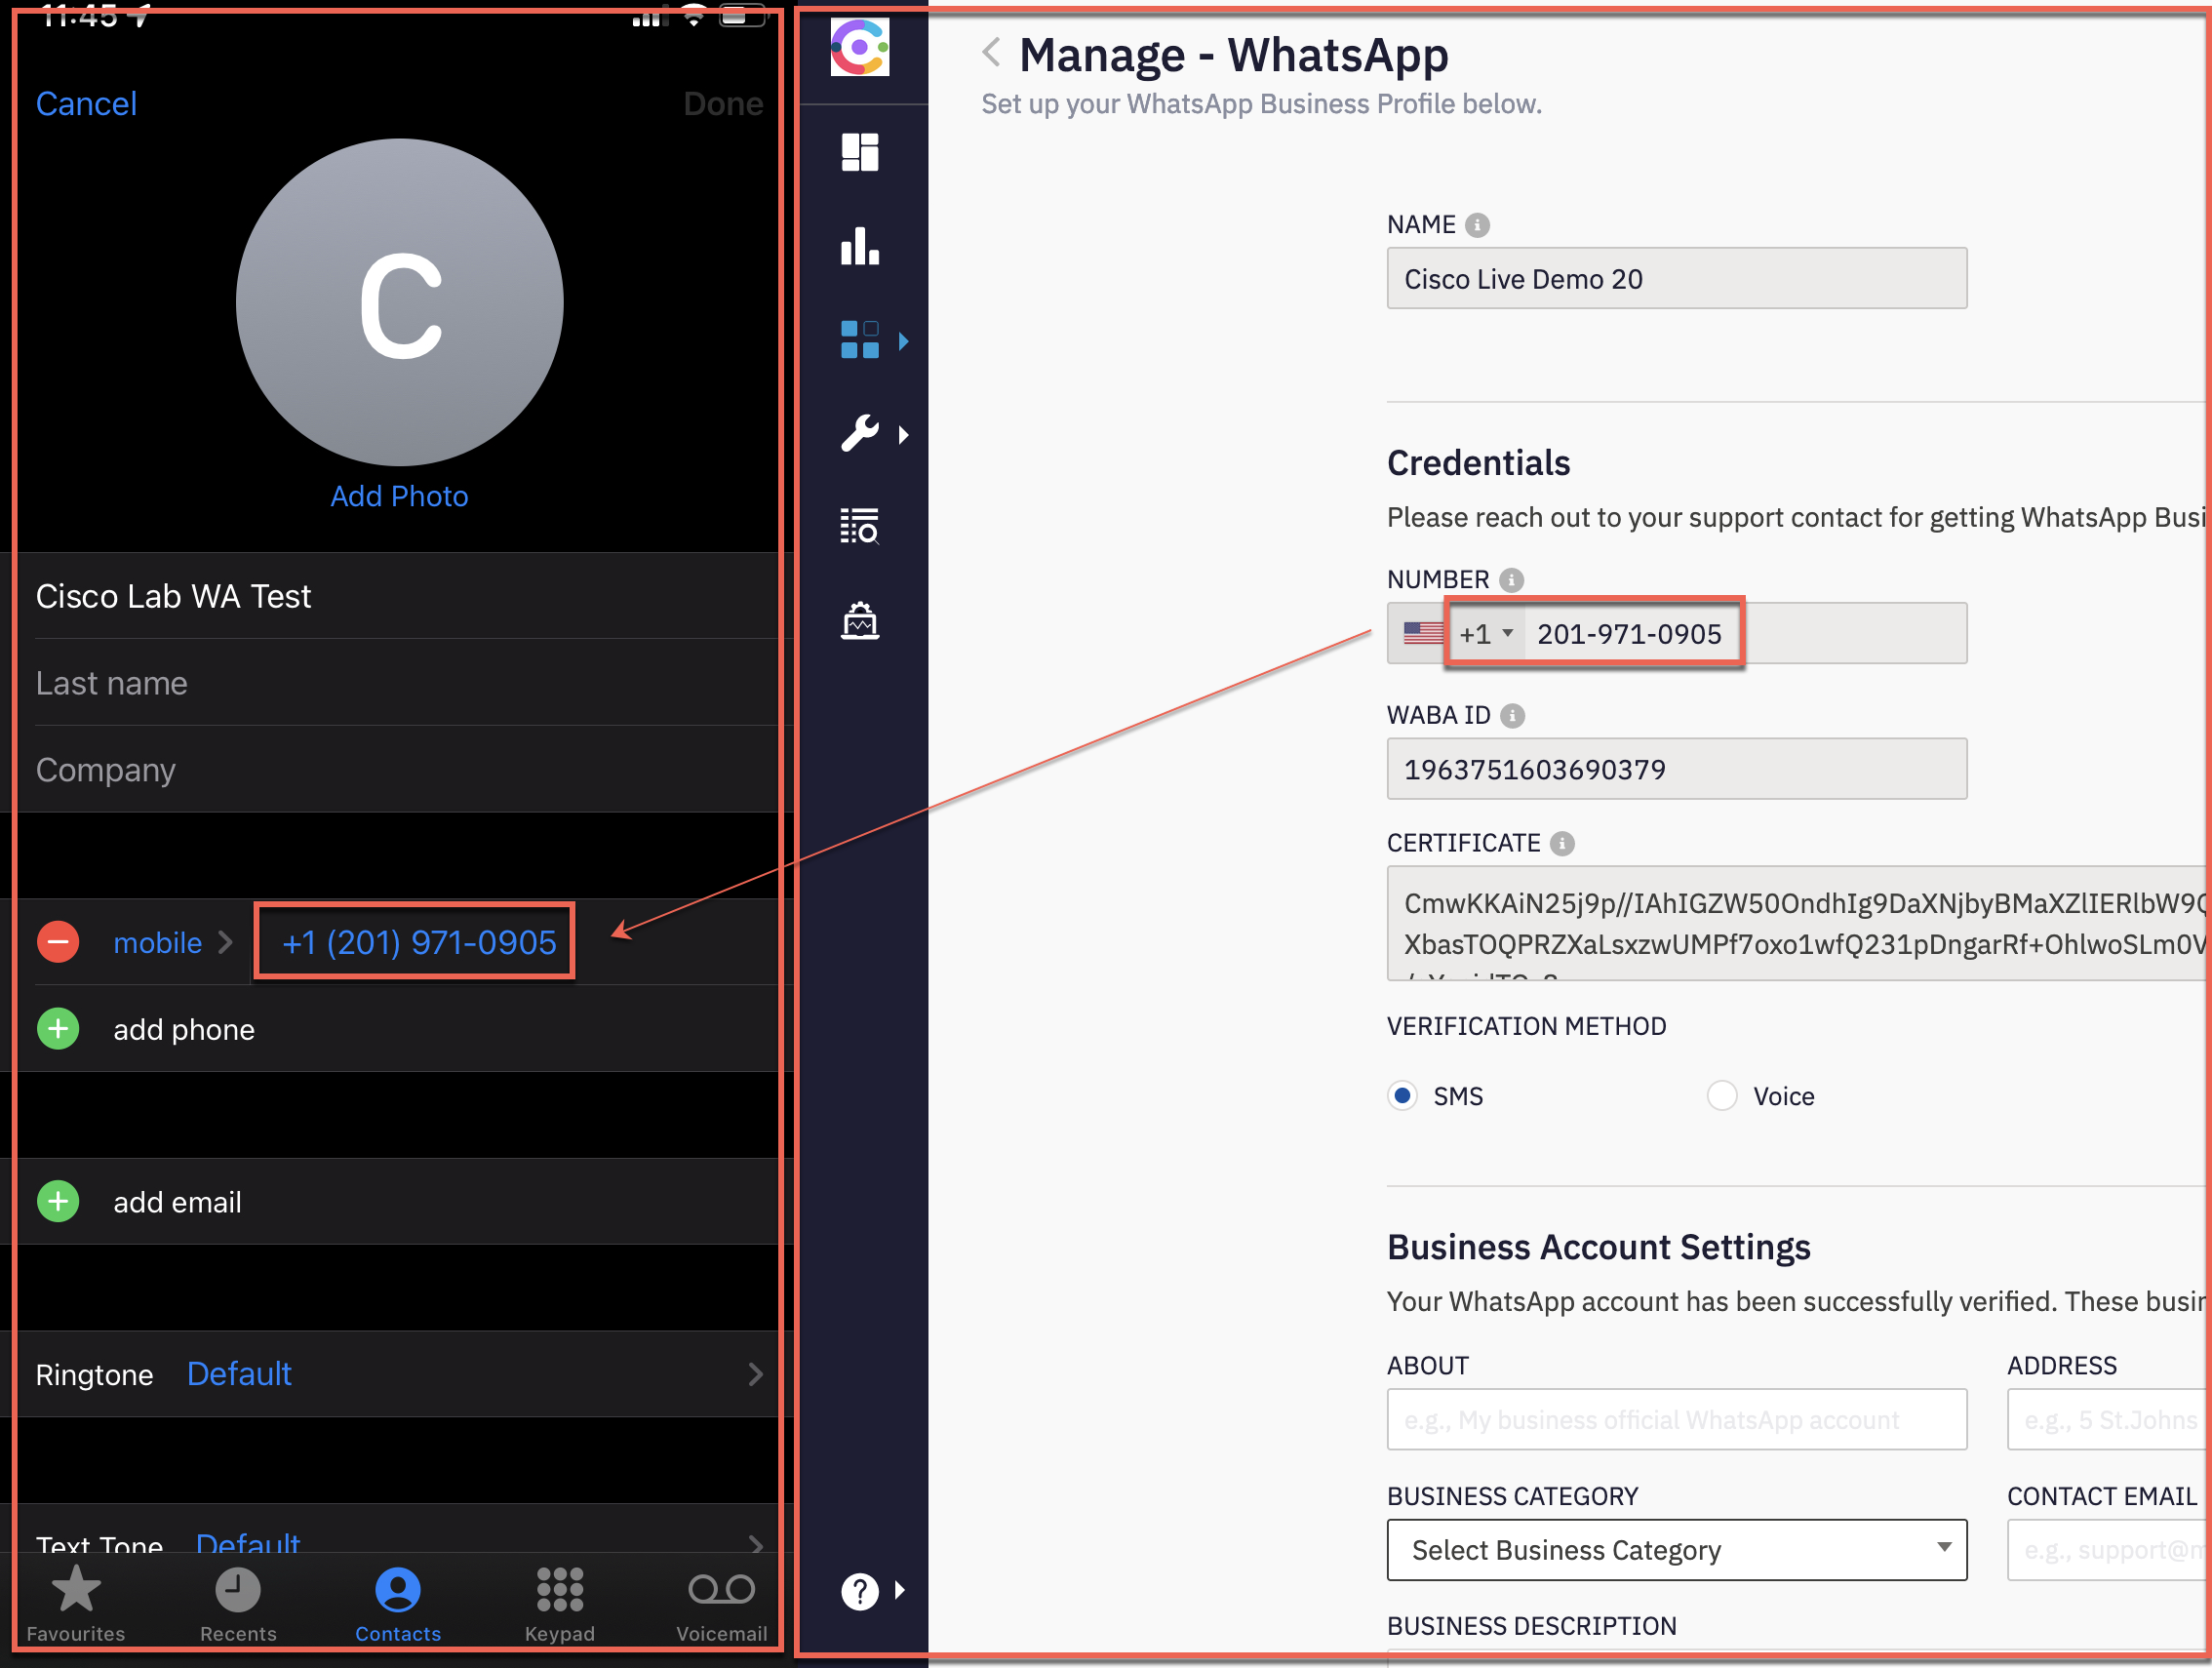
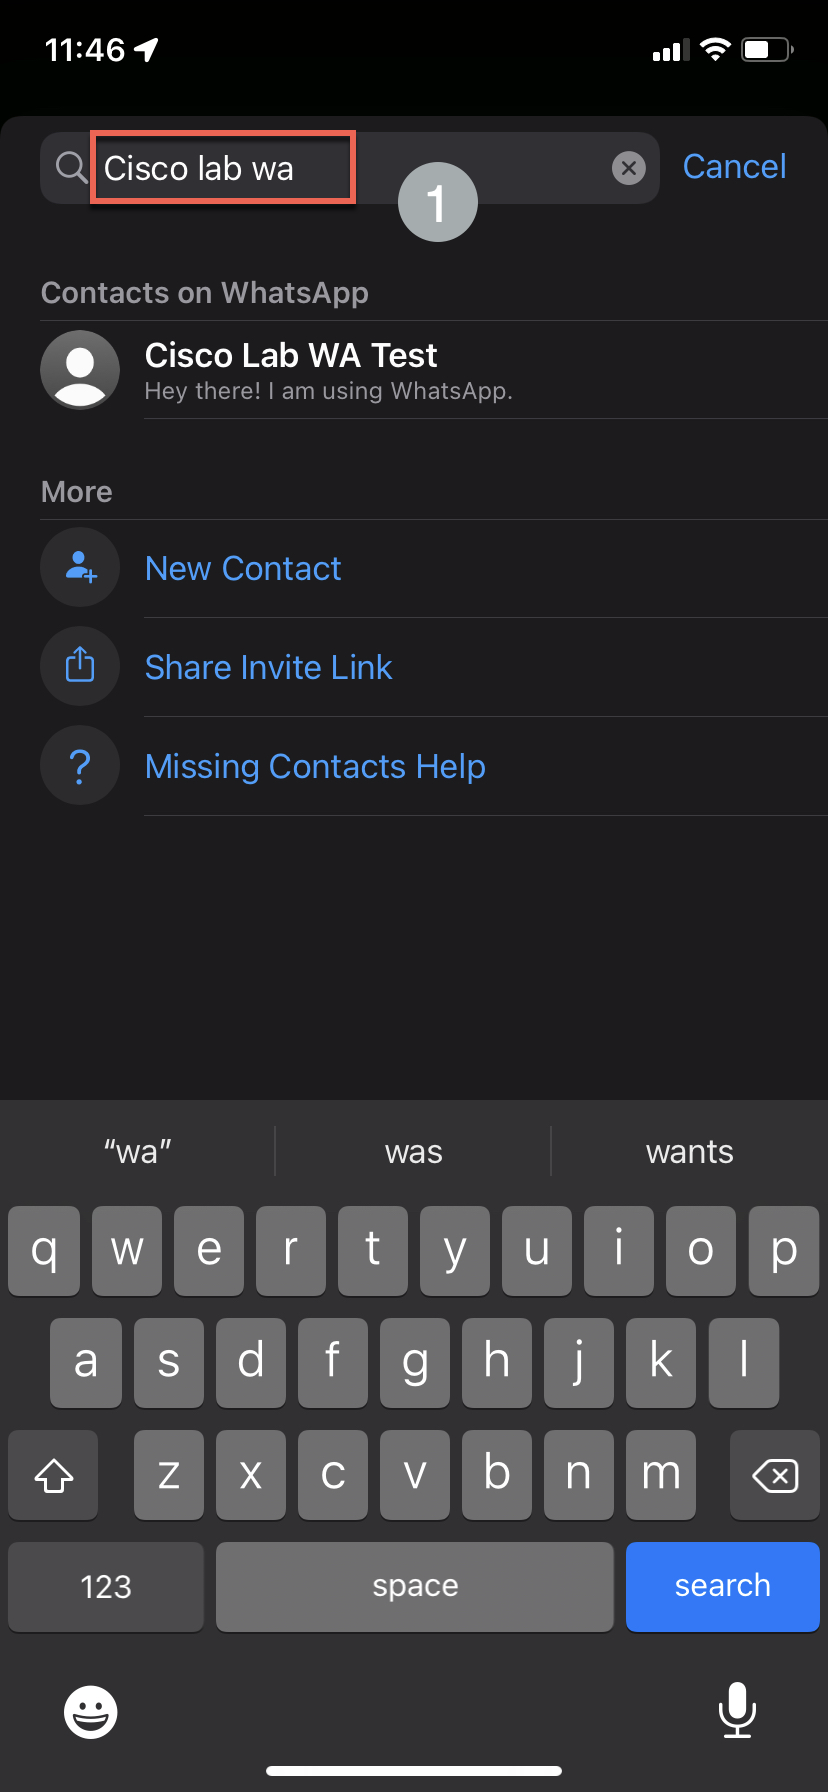
On personal mobile, add the WhatsApp number as new contact
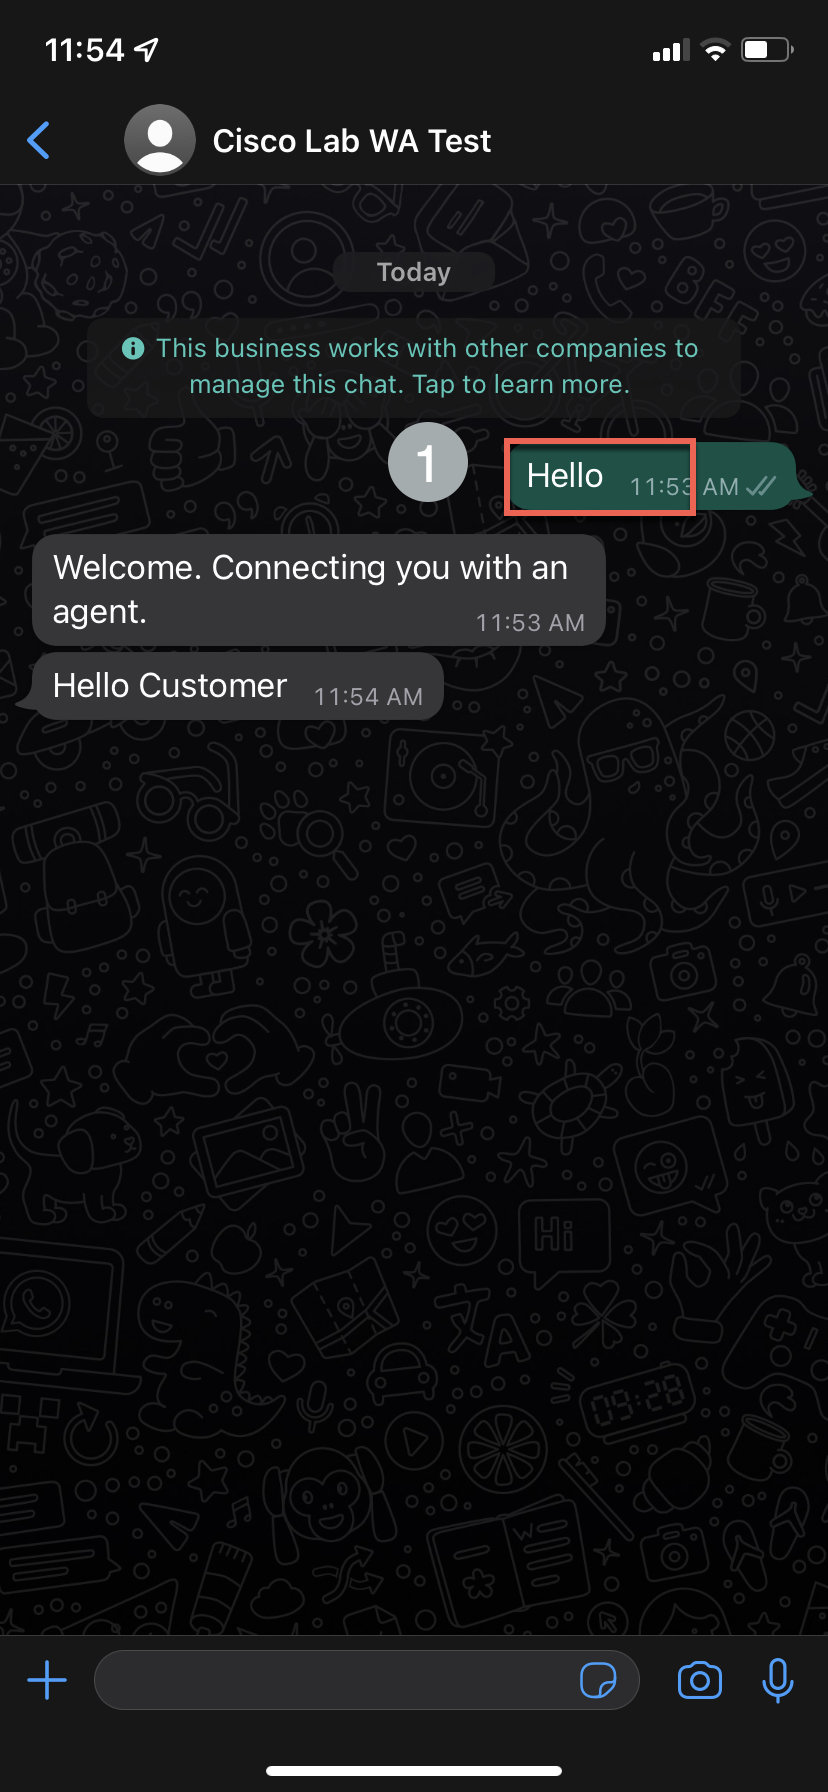
Open WhatsApp → contact
Send message
Agent Accept
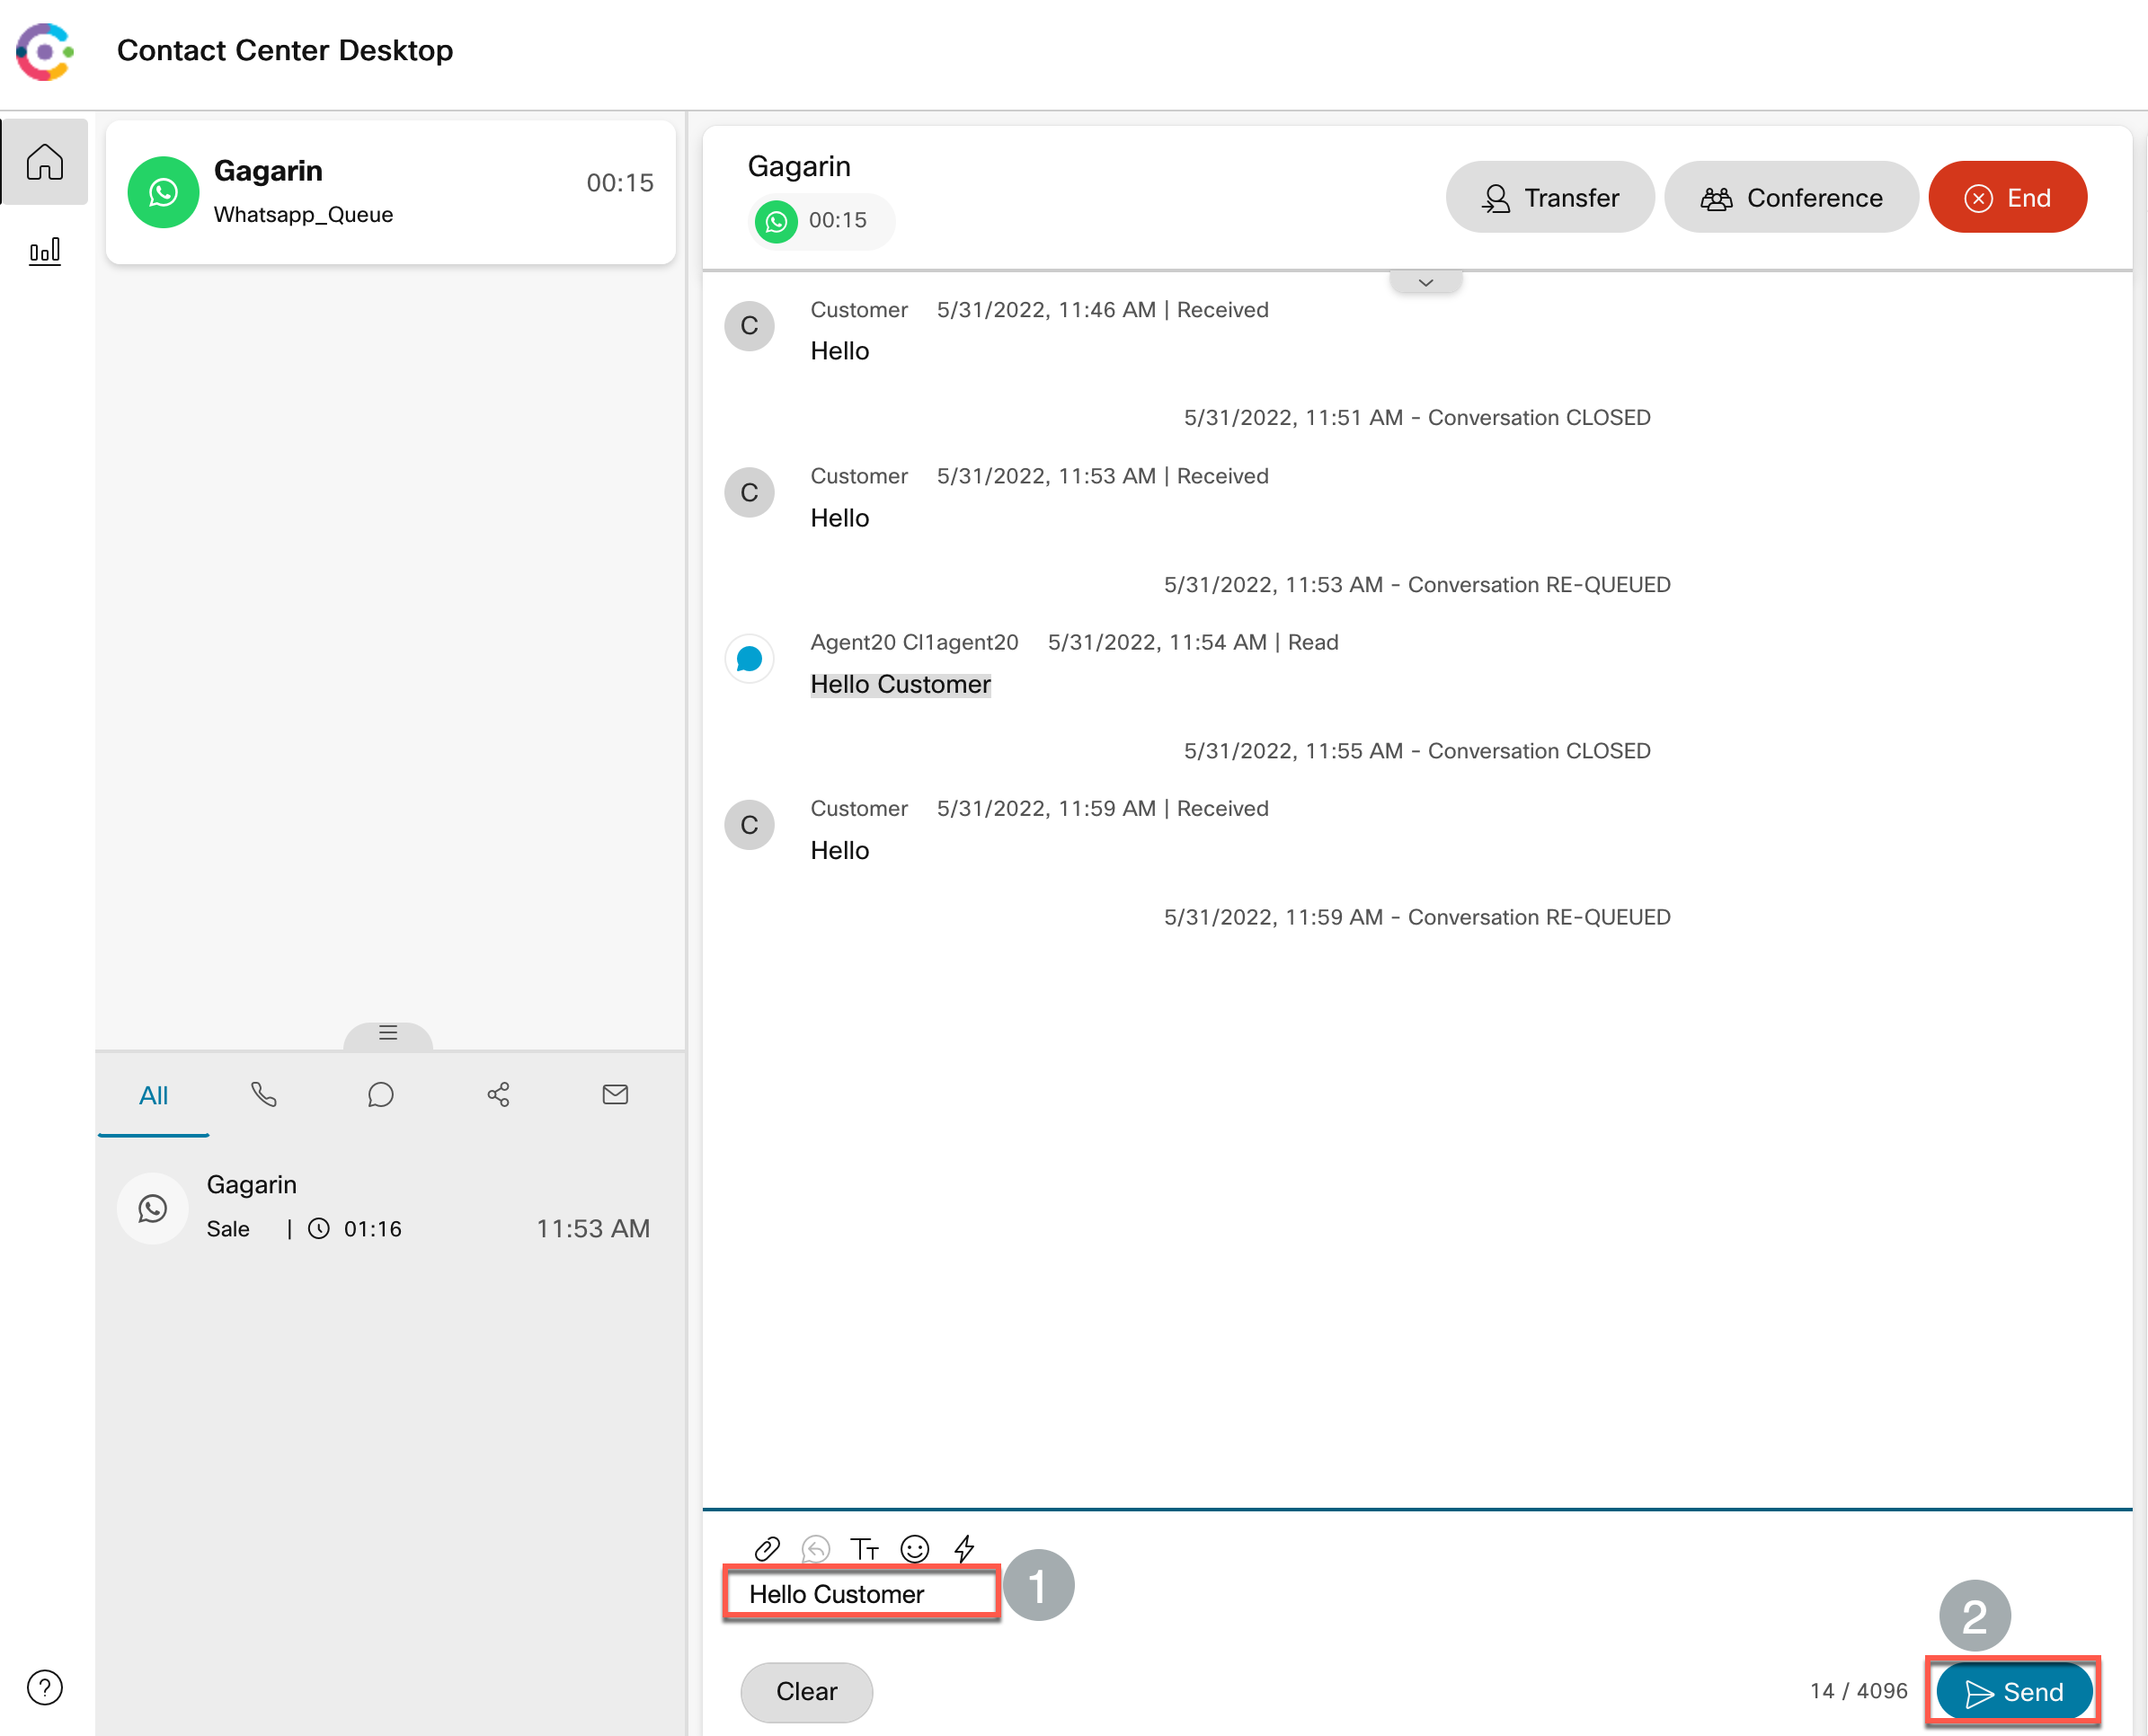
Reply → Send
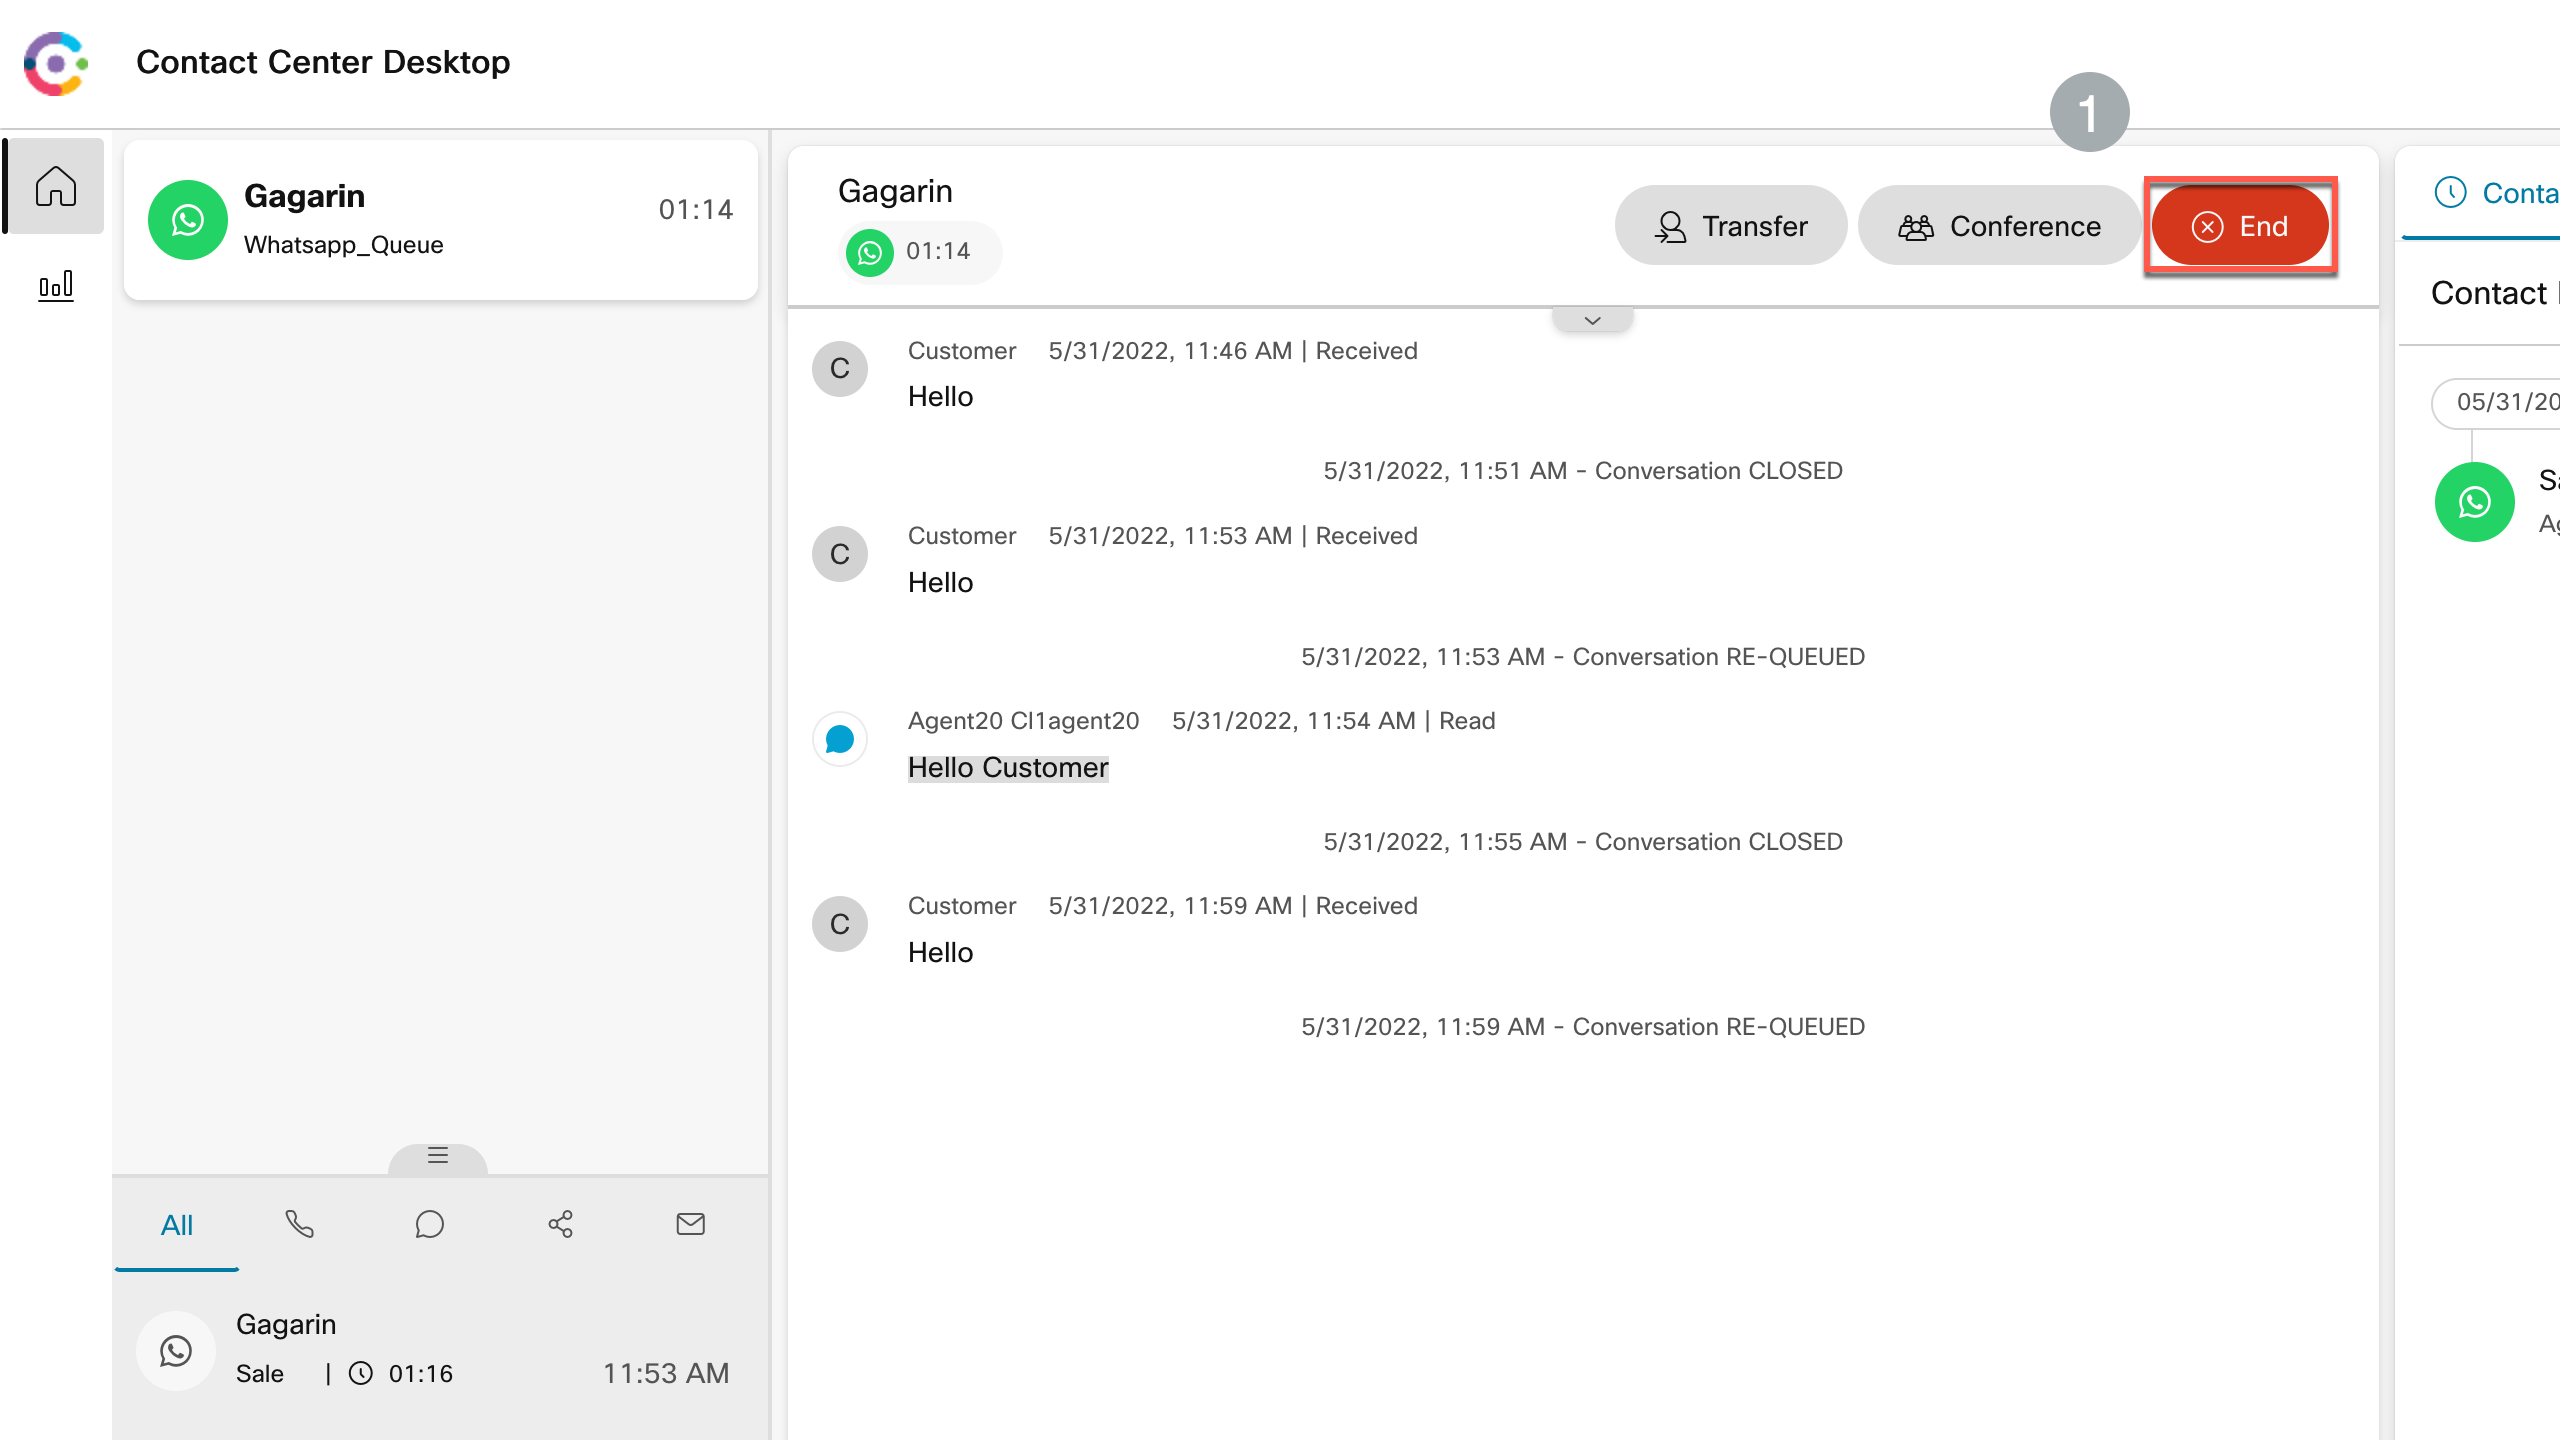
End contact
Lab 12.12 — Connect Templates
1. Understanding Connect Templates
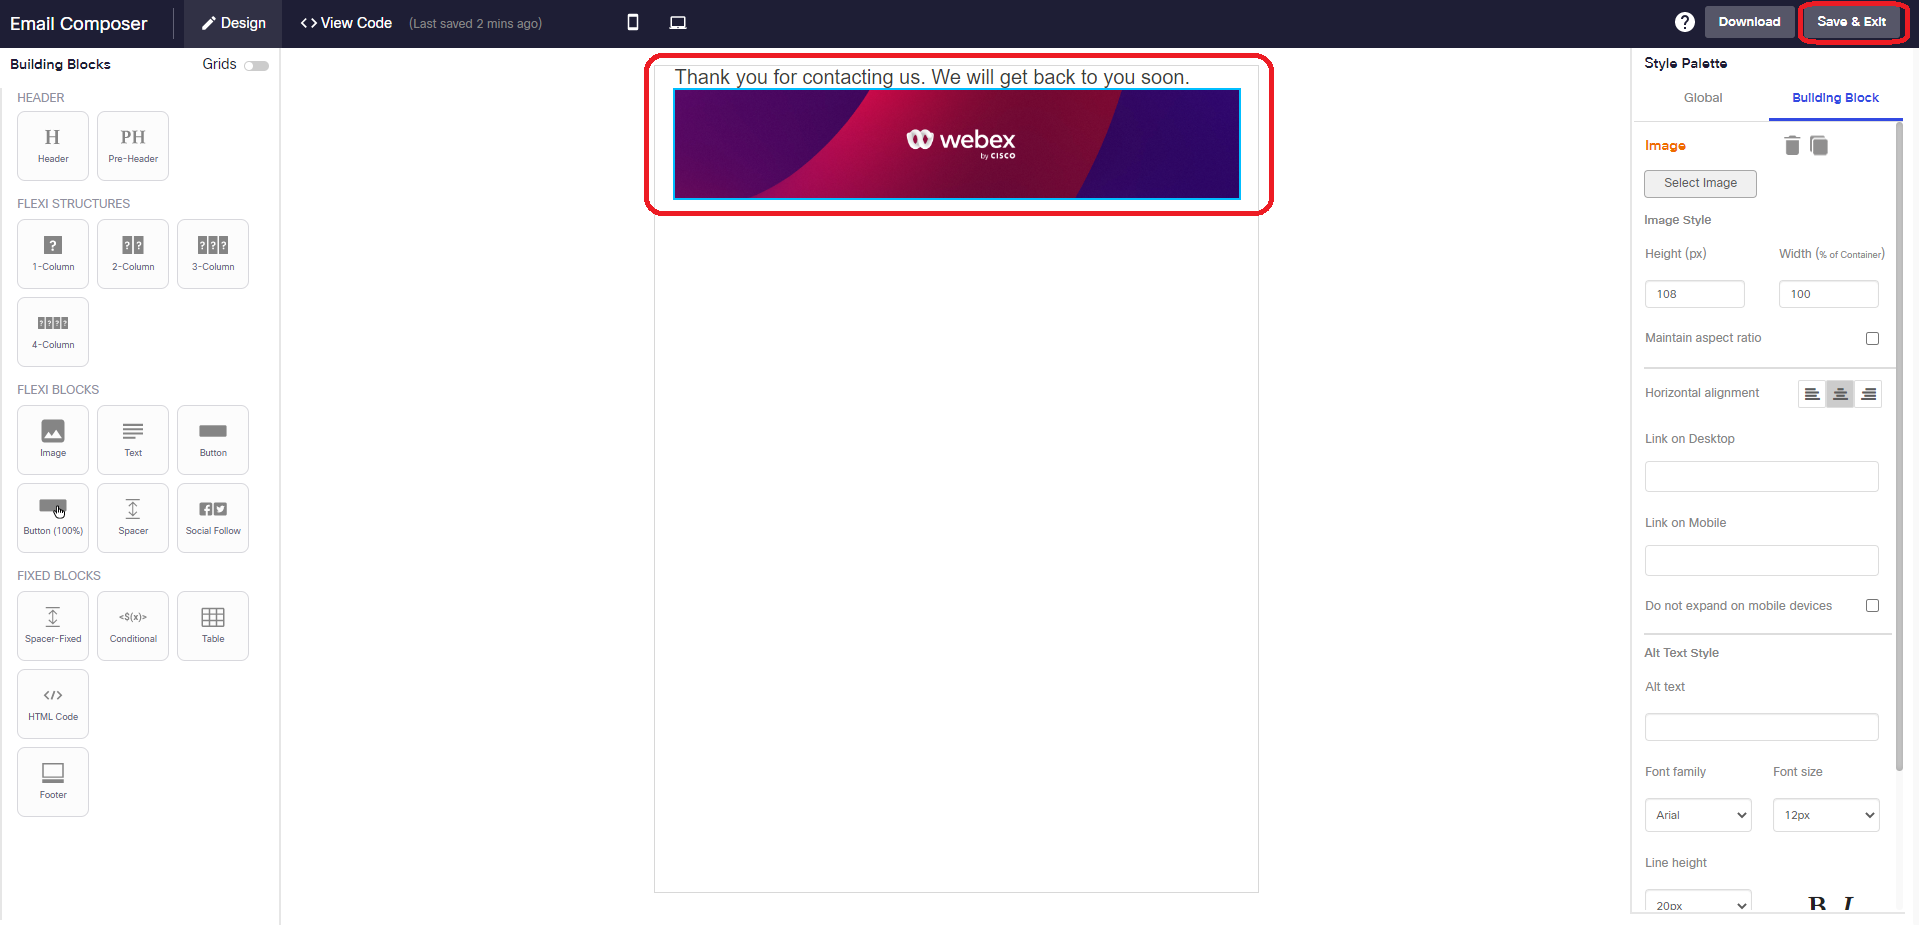
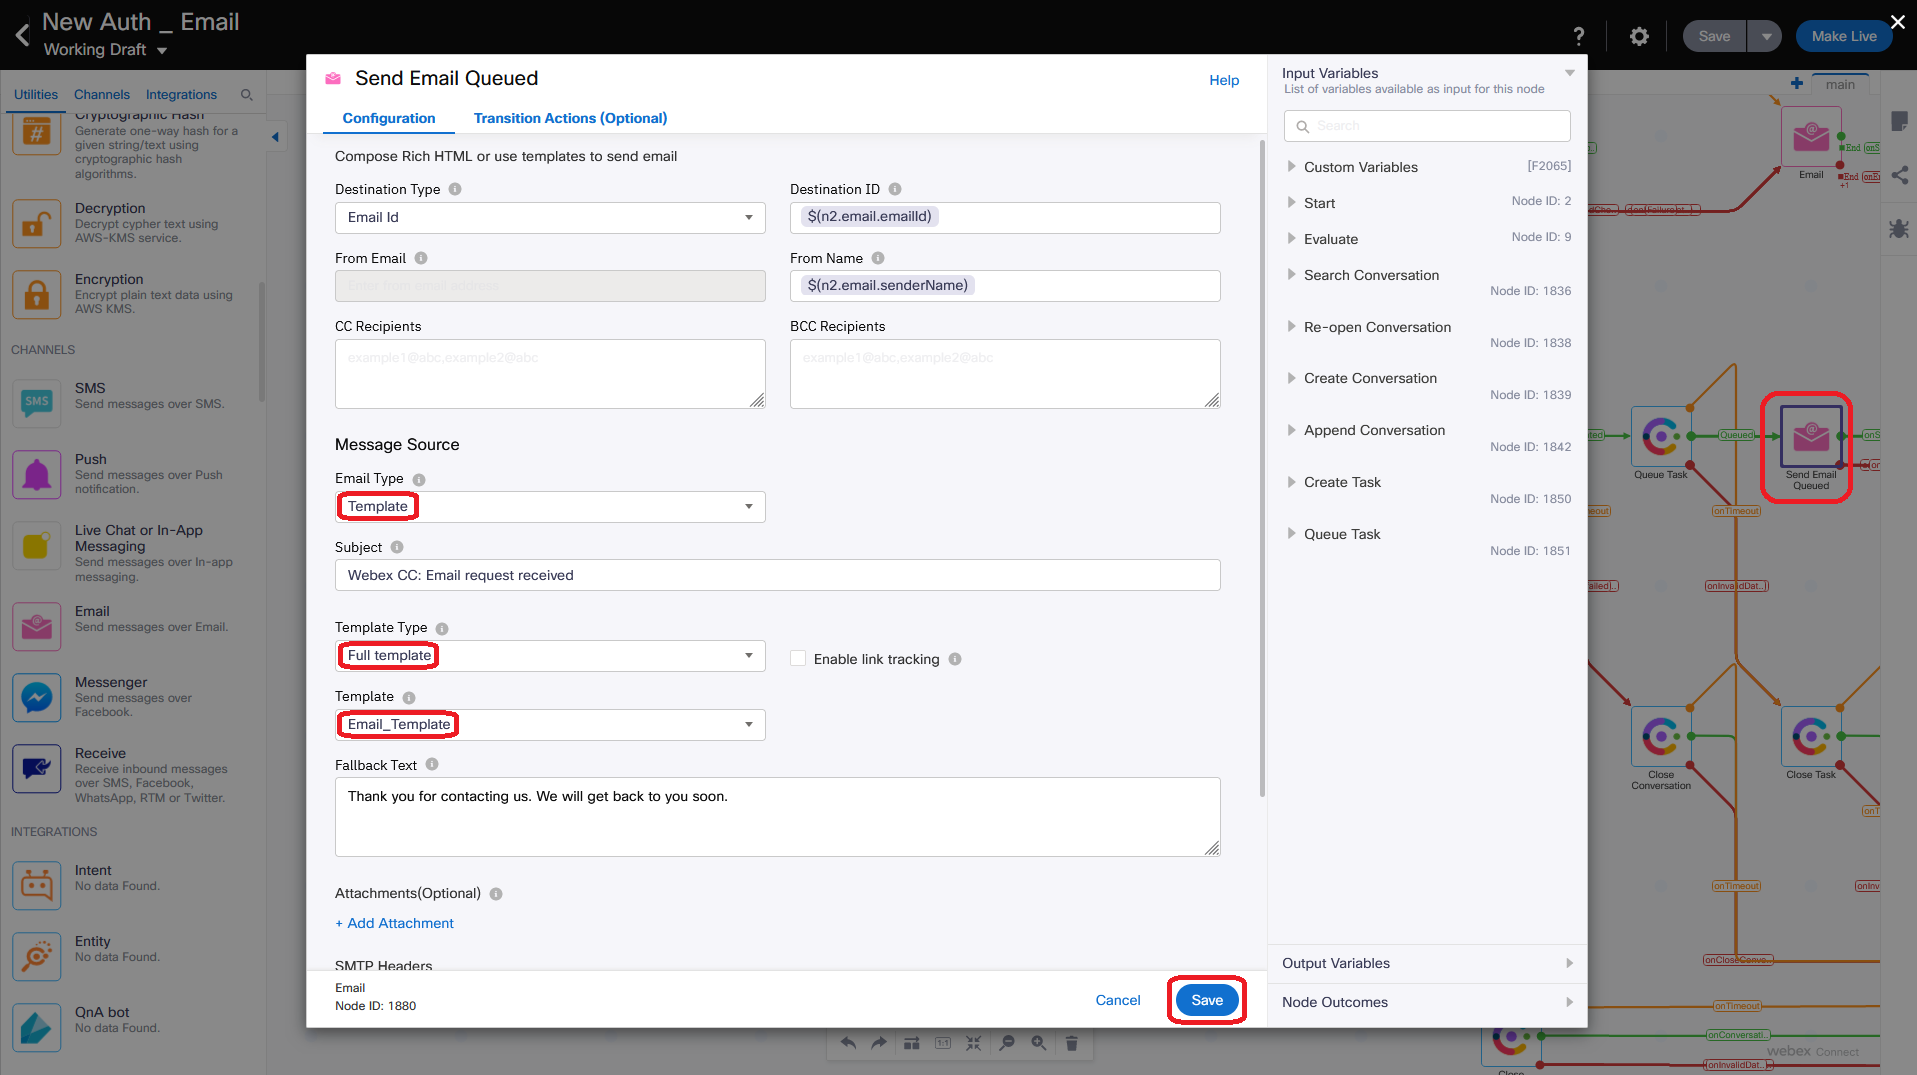
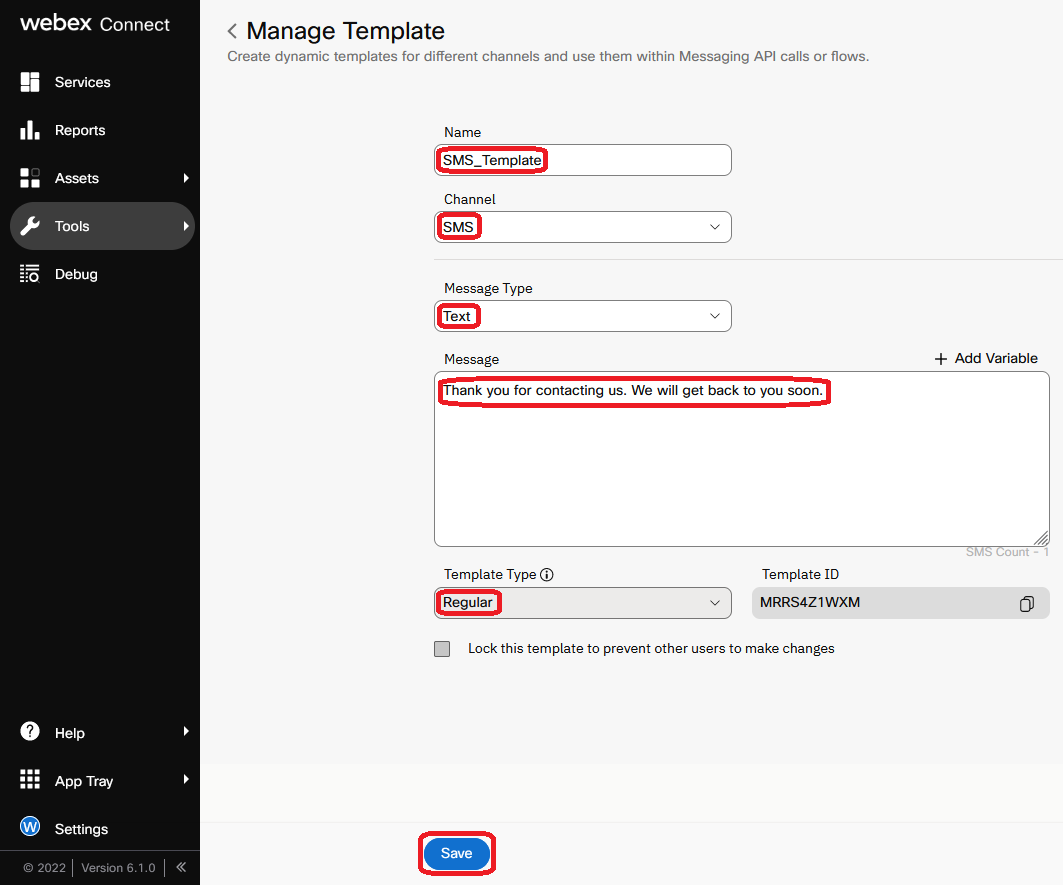
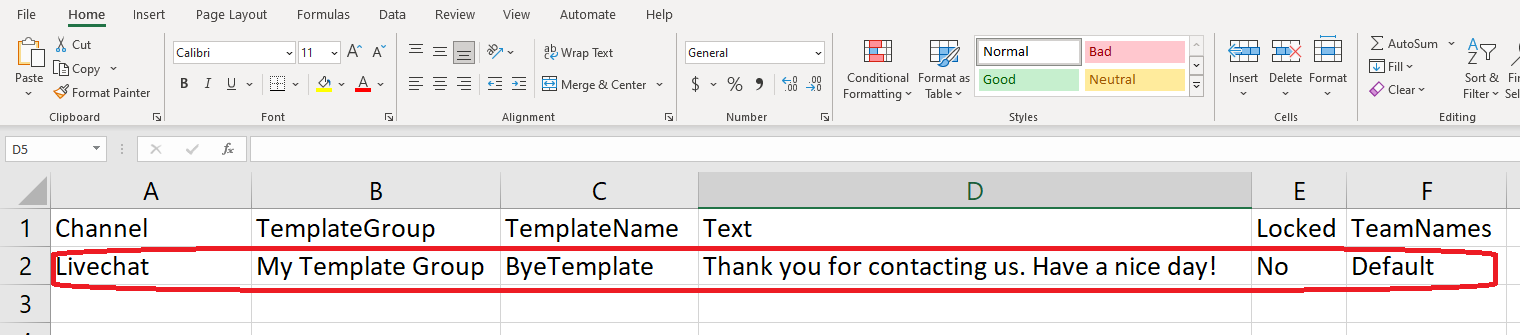
Connect templates can be referenced in flows to send notifications to end users through various digital channels. Template text can include simple text, URLs or forms.
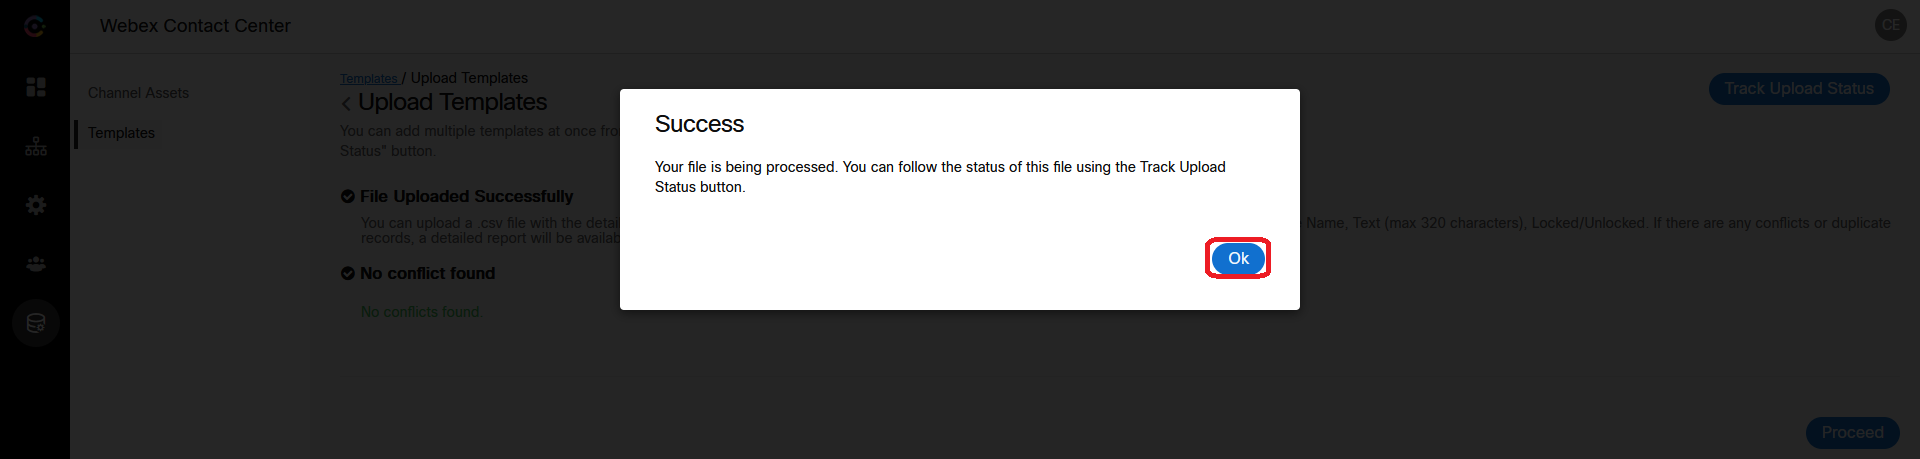
To create a template: Connect Portal → Tools → Templates → Add new Template
2. Create Chat Templates in Connect
Channel Live Chat / In-App Messaging, Message Type Form, Title → Add Field for required form fields → Save
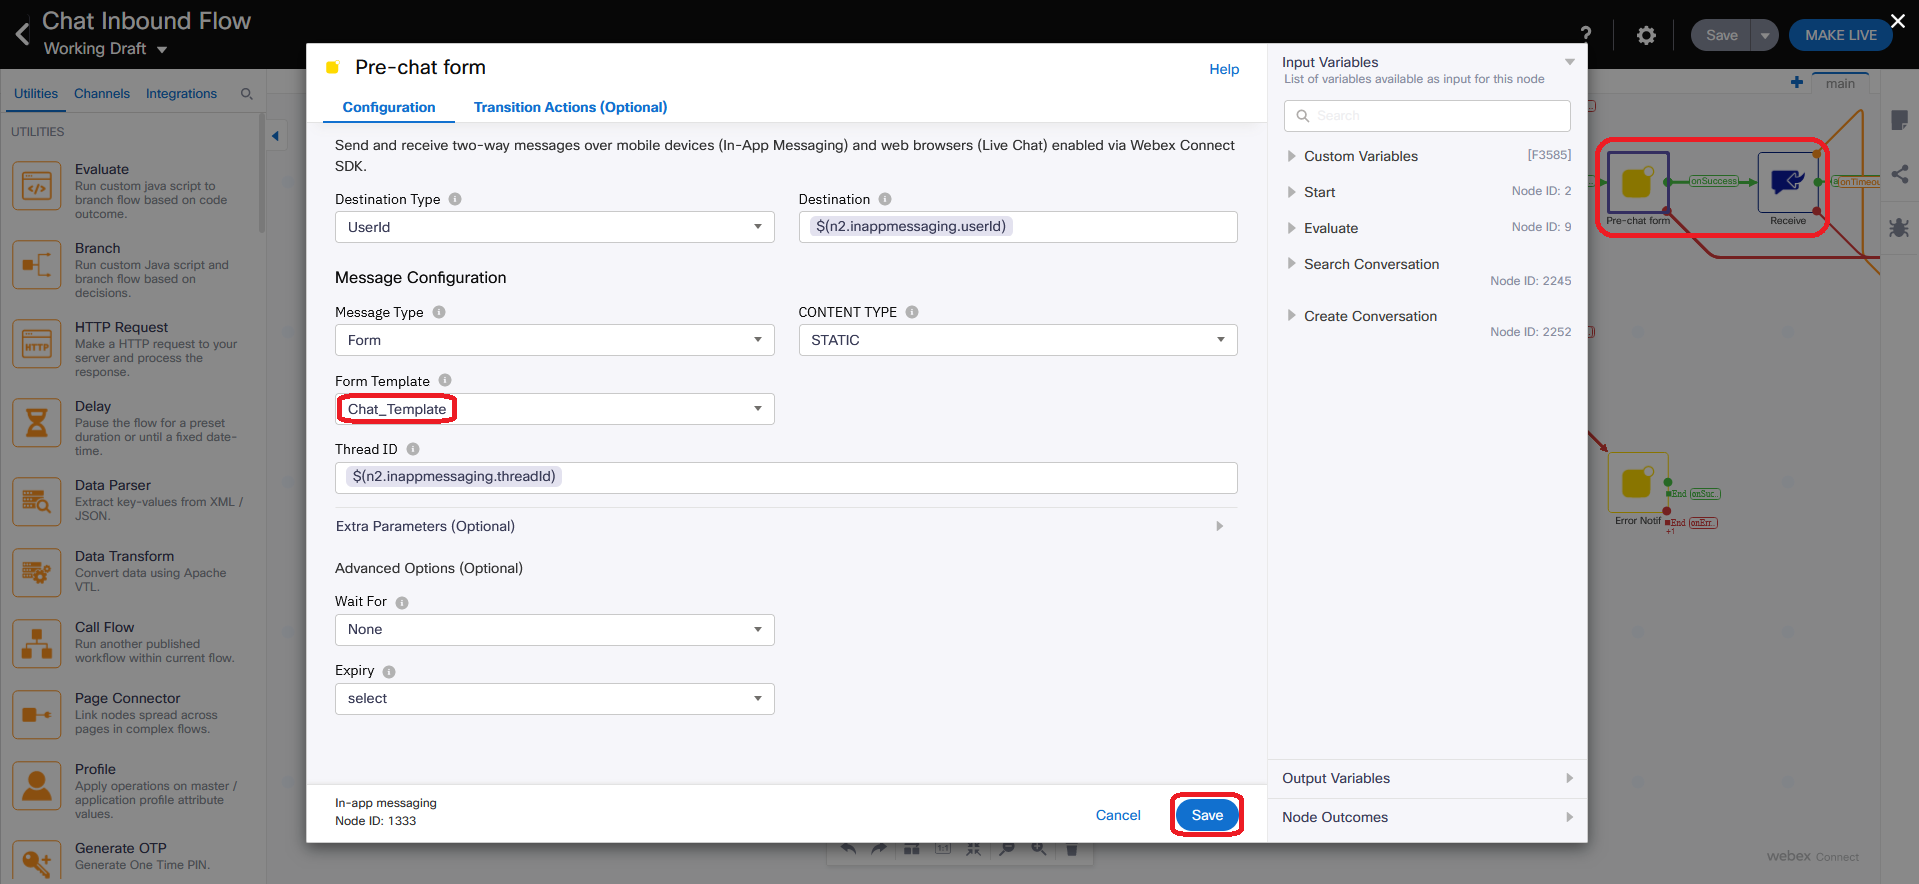
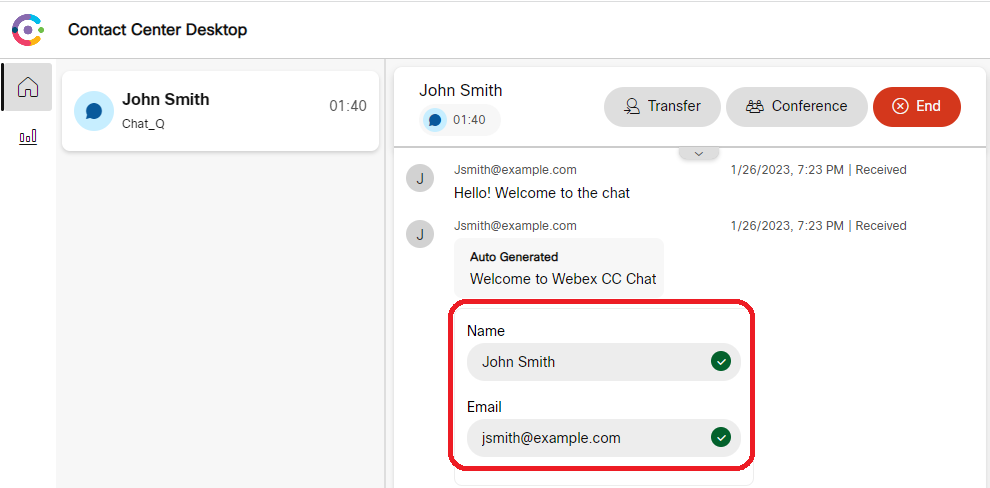
Use in Pre-chat form and Receive nodes of chat flow
Training → Entities → + Create entity → Name and Entity Type → Save
Repeat for desired entities
Training → Intents → + Create Intent
Insert descriptive Intent Name
Insert utterances containing words from Entities
Entities highlighted automatically and appear in Slot section
Mark Entities as mandatory; set Retries
Add at least 3 alternative Utterances containing Entities
Select Response prompted as final message when Entities collected (or + Create New)
${entity.YOURENTITYNAME} syntax to use entity values in responses
Save → back arrow → Train → comment → Continue → Make Live
[Optional] Preview to test
2. Add the Task Bot to your flow
Recommended pattern: loop on Task Bot node receiving and answering customer input. Loop interrupted via Branch node response check or by bot's Agent Handover condition. Task Bot node only after Create/Re-open Conversation ID and Task nodes. Timeout and Failure Outcomes for loop nodes must connect to Close Conversation and Close Task nodes.
VALUE = same text defined in Goodbye Response Template (Bot Builder)
Save
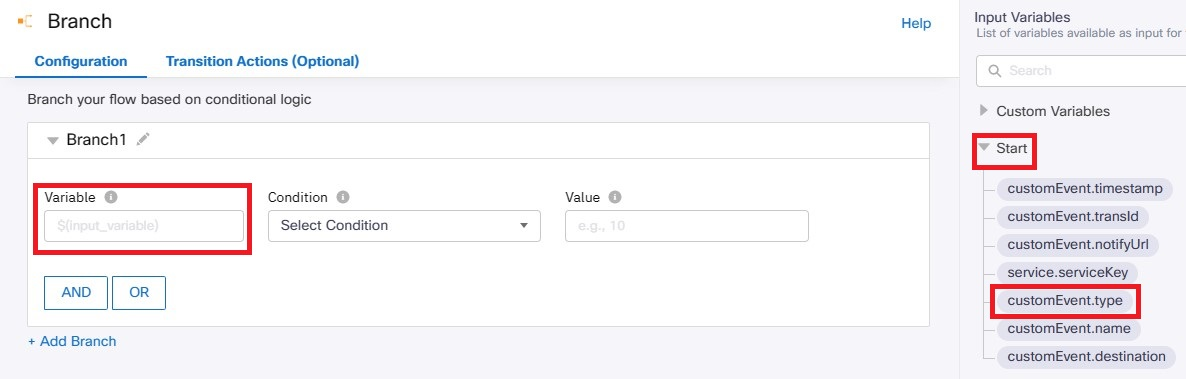
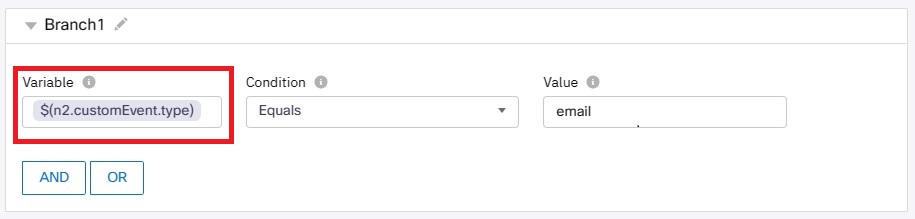
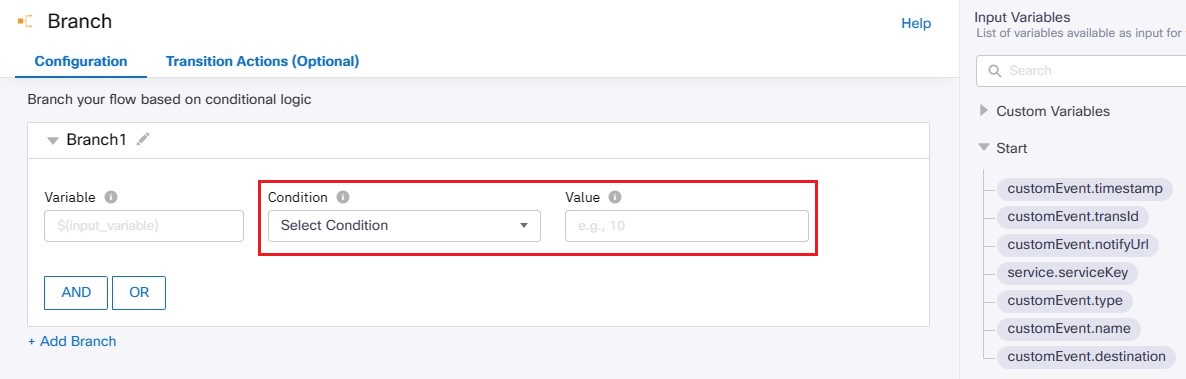
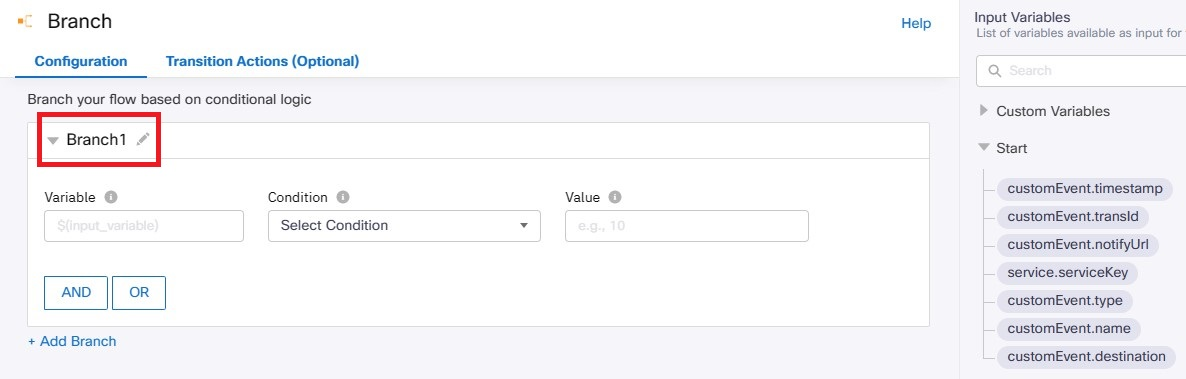
Connect Branch Failure to Close Conversation → Connect Branch Successful to Close Conversation → select Branch 1 → OK
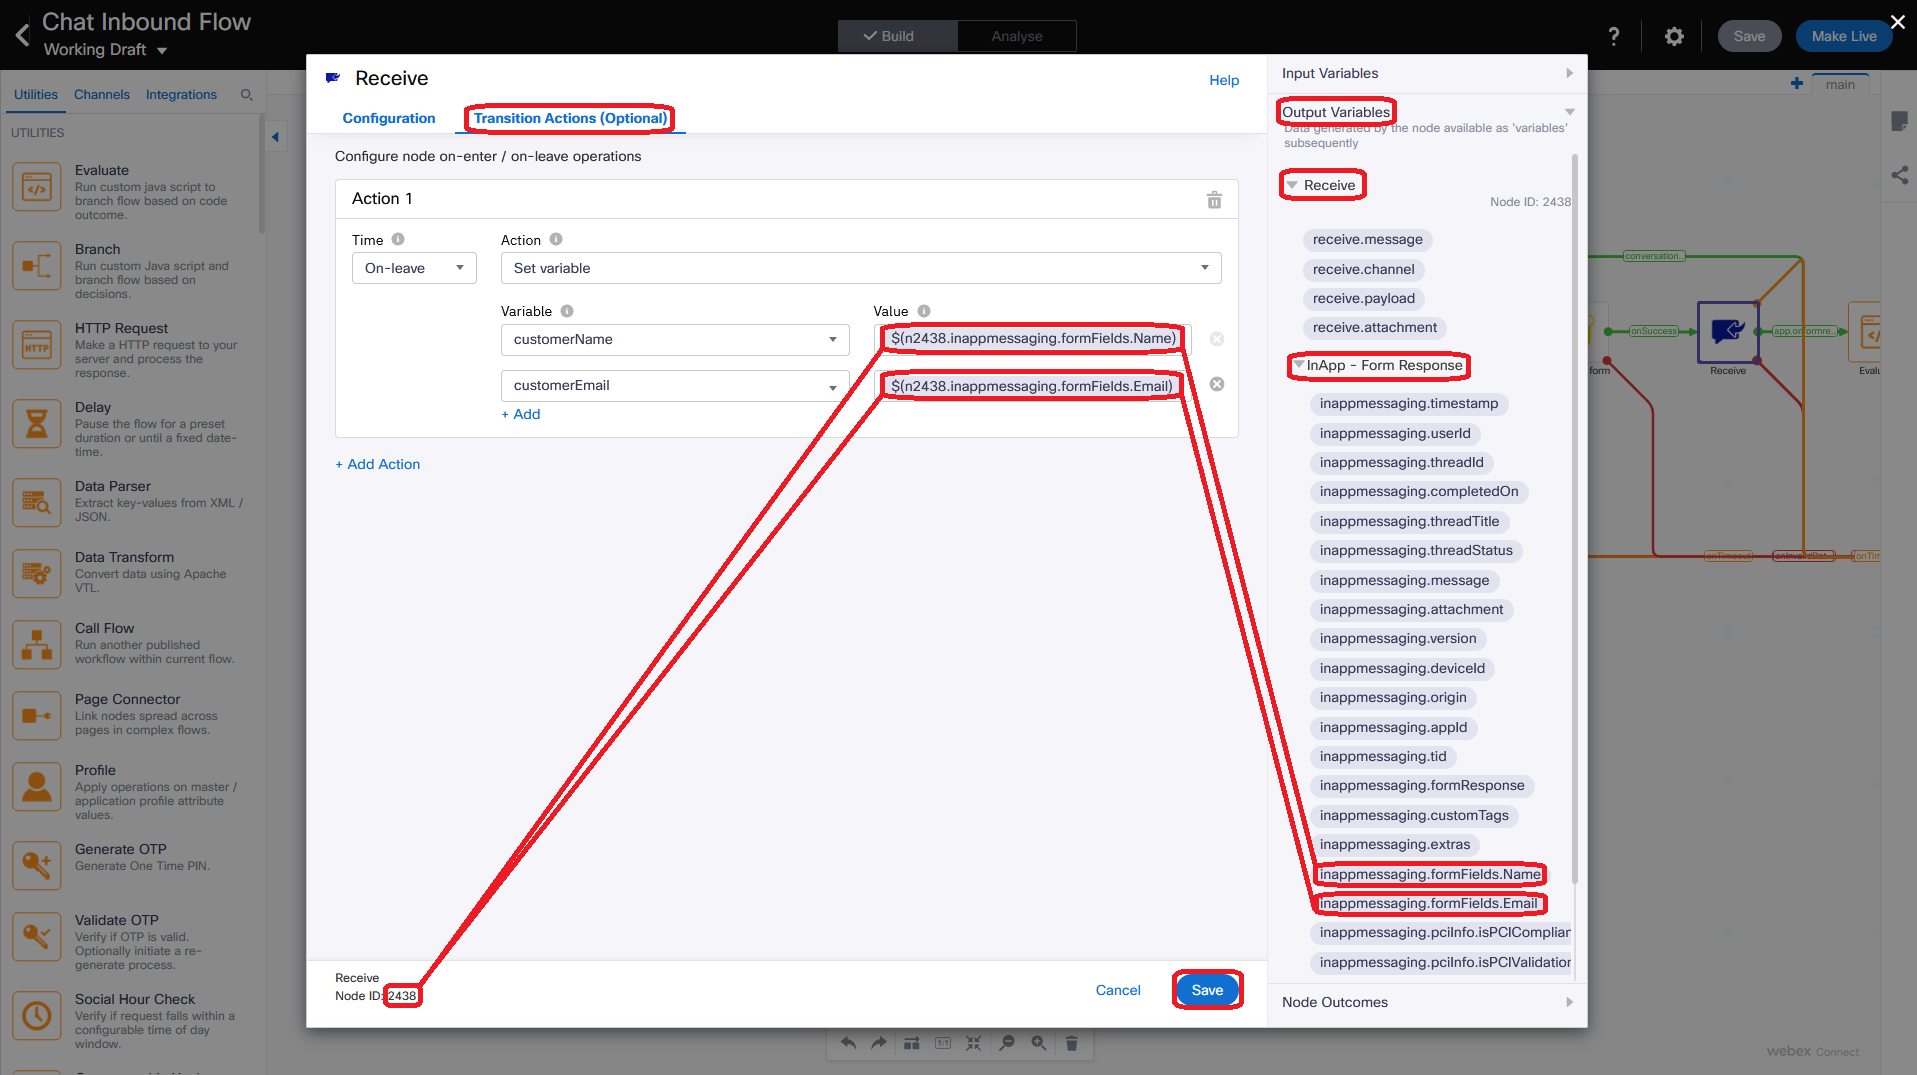
Drag Receive node
Edit Receive node:
SELECT INCOMING MESSAGE/EVENT = your channel option
MAX TIMEOUT = e.g. 120 seconds
Channel ID = your channel ID
EVENT NAME = Incoming Message
Transaction Actions → + Add Action → TIME On-leave → Action Set Variable → Variable BotInputMessage → Value $(nX.receive.message)
Save
Connect Receive Failure to Close Conversation → Connect Receive Successful back to Task Bot node
Drag Channel node → edit:
Copy config from existing
MESSAGE TYPE Text
Message = Sorry we didn't hear back from you, please contact us again later
Save
Connect all Failure/Successful from this Channel to Close Conversation
Drag Channel node → edit:
Copy config from existing
MESSAGE TYPE Text
Message = $(nX.taskbot.text_response)
Save
Connect Failure to Close Conversation → Connect Task Bot Successful (onAgentHandover) to this Channel
Drag Append Conversation node → edit:
METHOD NAME Append
NODE RUNTIME AUTH = your authorization
CHANNEL = in-use channel
CONVERSATION ID = $(conversationId)
DIRECTION Inbound
TEXT = $(nX.taskbot.text_response)
TIMESTAMP = $(n2.messenger.ts)
ATTACHMENTS = $(parseDataAttachment)
Save
Connect Timeout/Failure to Close Conversation → Connect Successful to Create Task
Connect Channel Successful → Append Conversation
Save and Make Live
When conversation escalates to agent, agent receives only the last bot response. Add the Entities' values in the Agent Handover Response template. For full transcript, add Append Conversation nodes after each Channel and Receive node.
3. Testing
Agent Desktop with test agent
Send message via preferred channel
Continue conversation with bot, provide Entities
Trigger escalation to agent
Have agent conversation with customer
Lab 12.17 — Event Scheduler
1. Introduction to Event Scheduler
Event Scheduler allows Webex Connect users to:
Send SMS messages
Schedule execution of Webex Connect rules/live flows
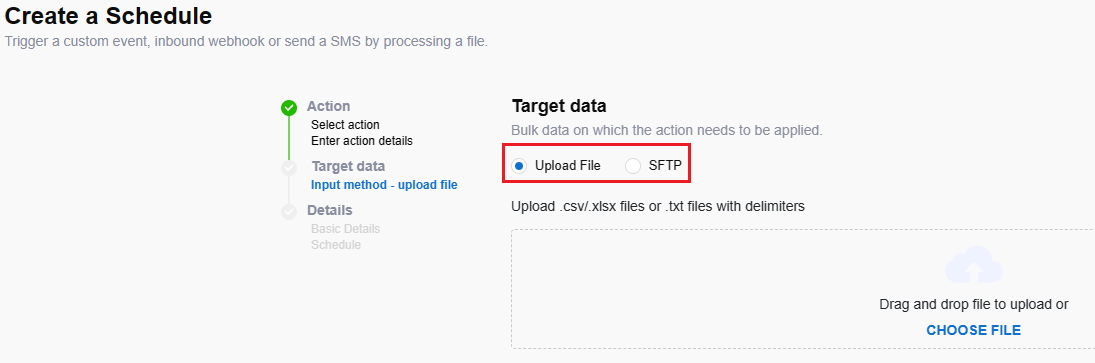
By uploading a file (via UI or SFTP) with required info in the relevant format.
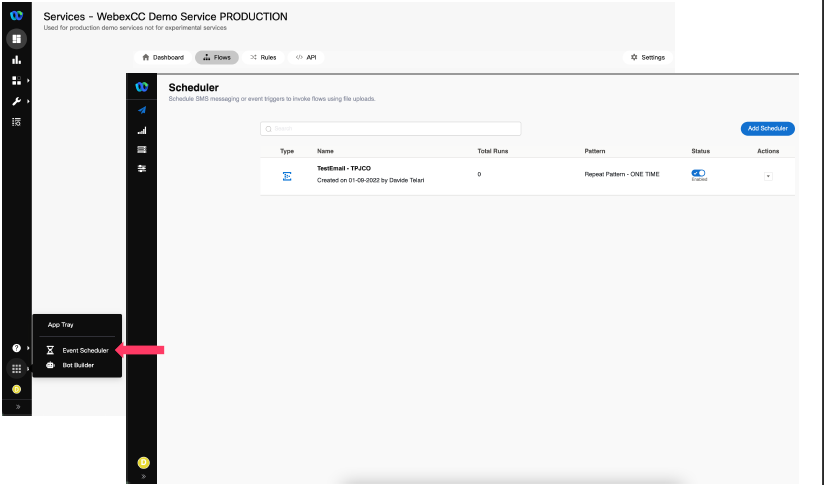
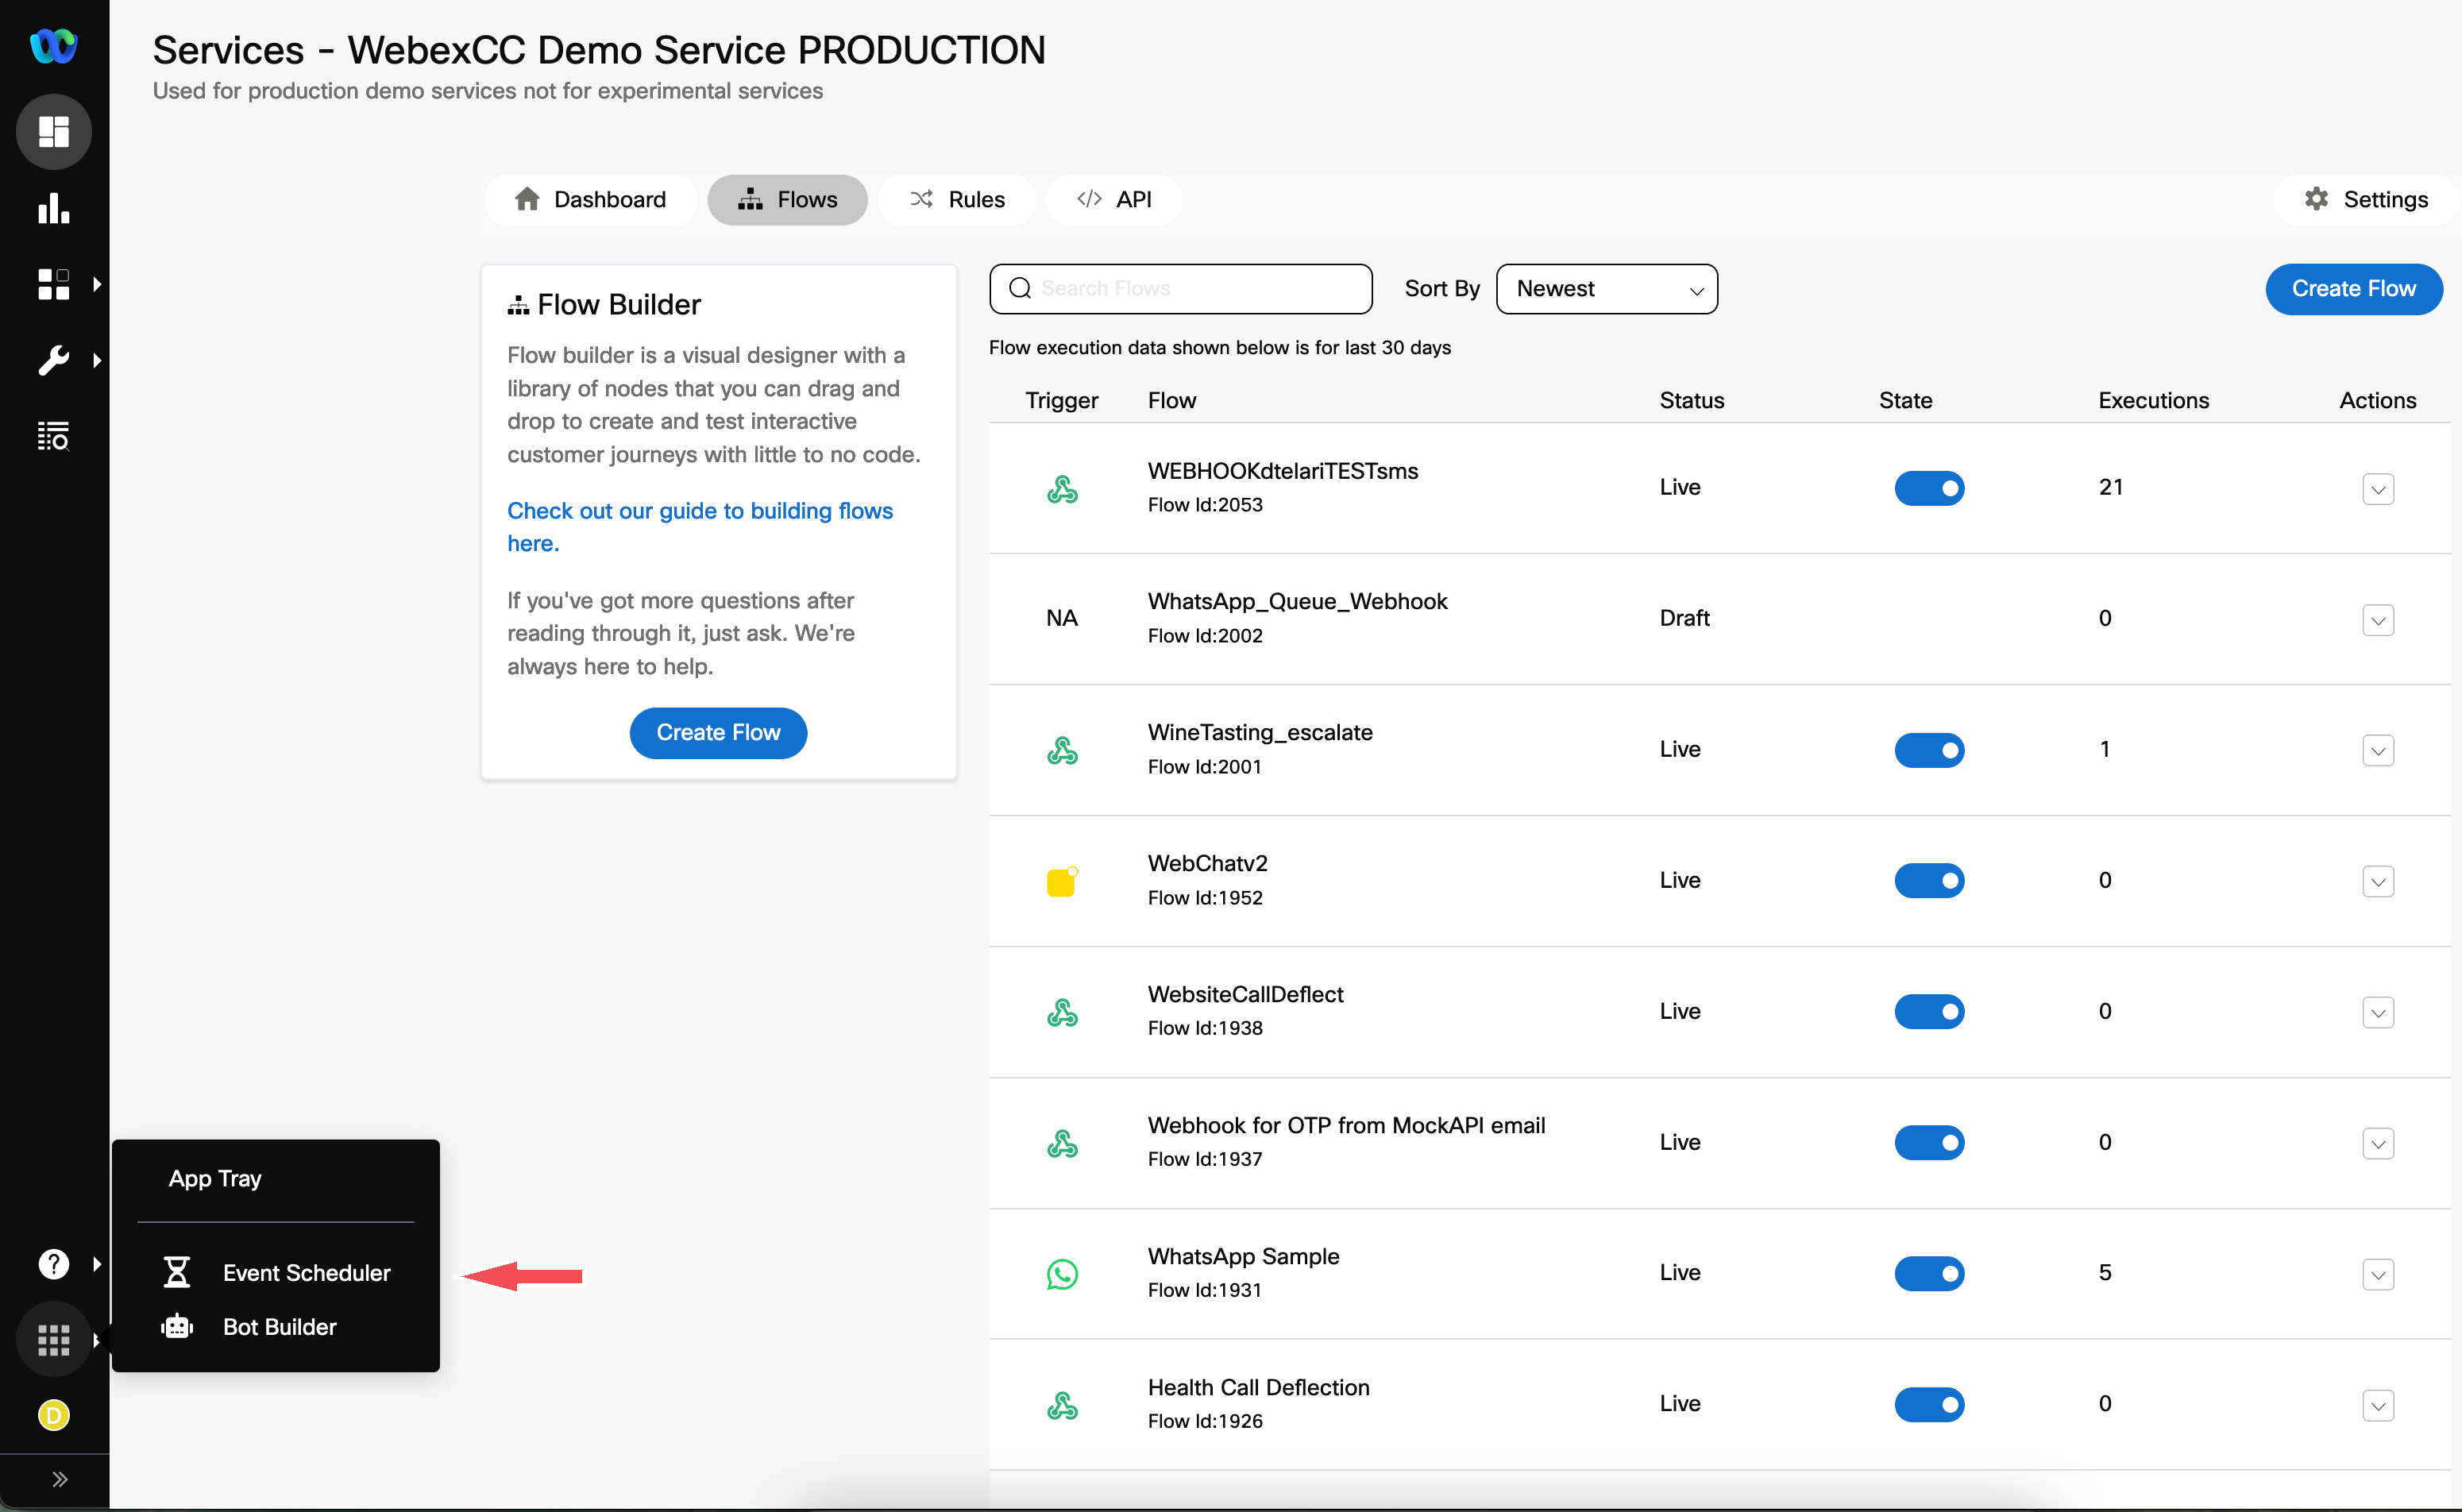
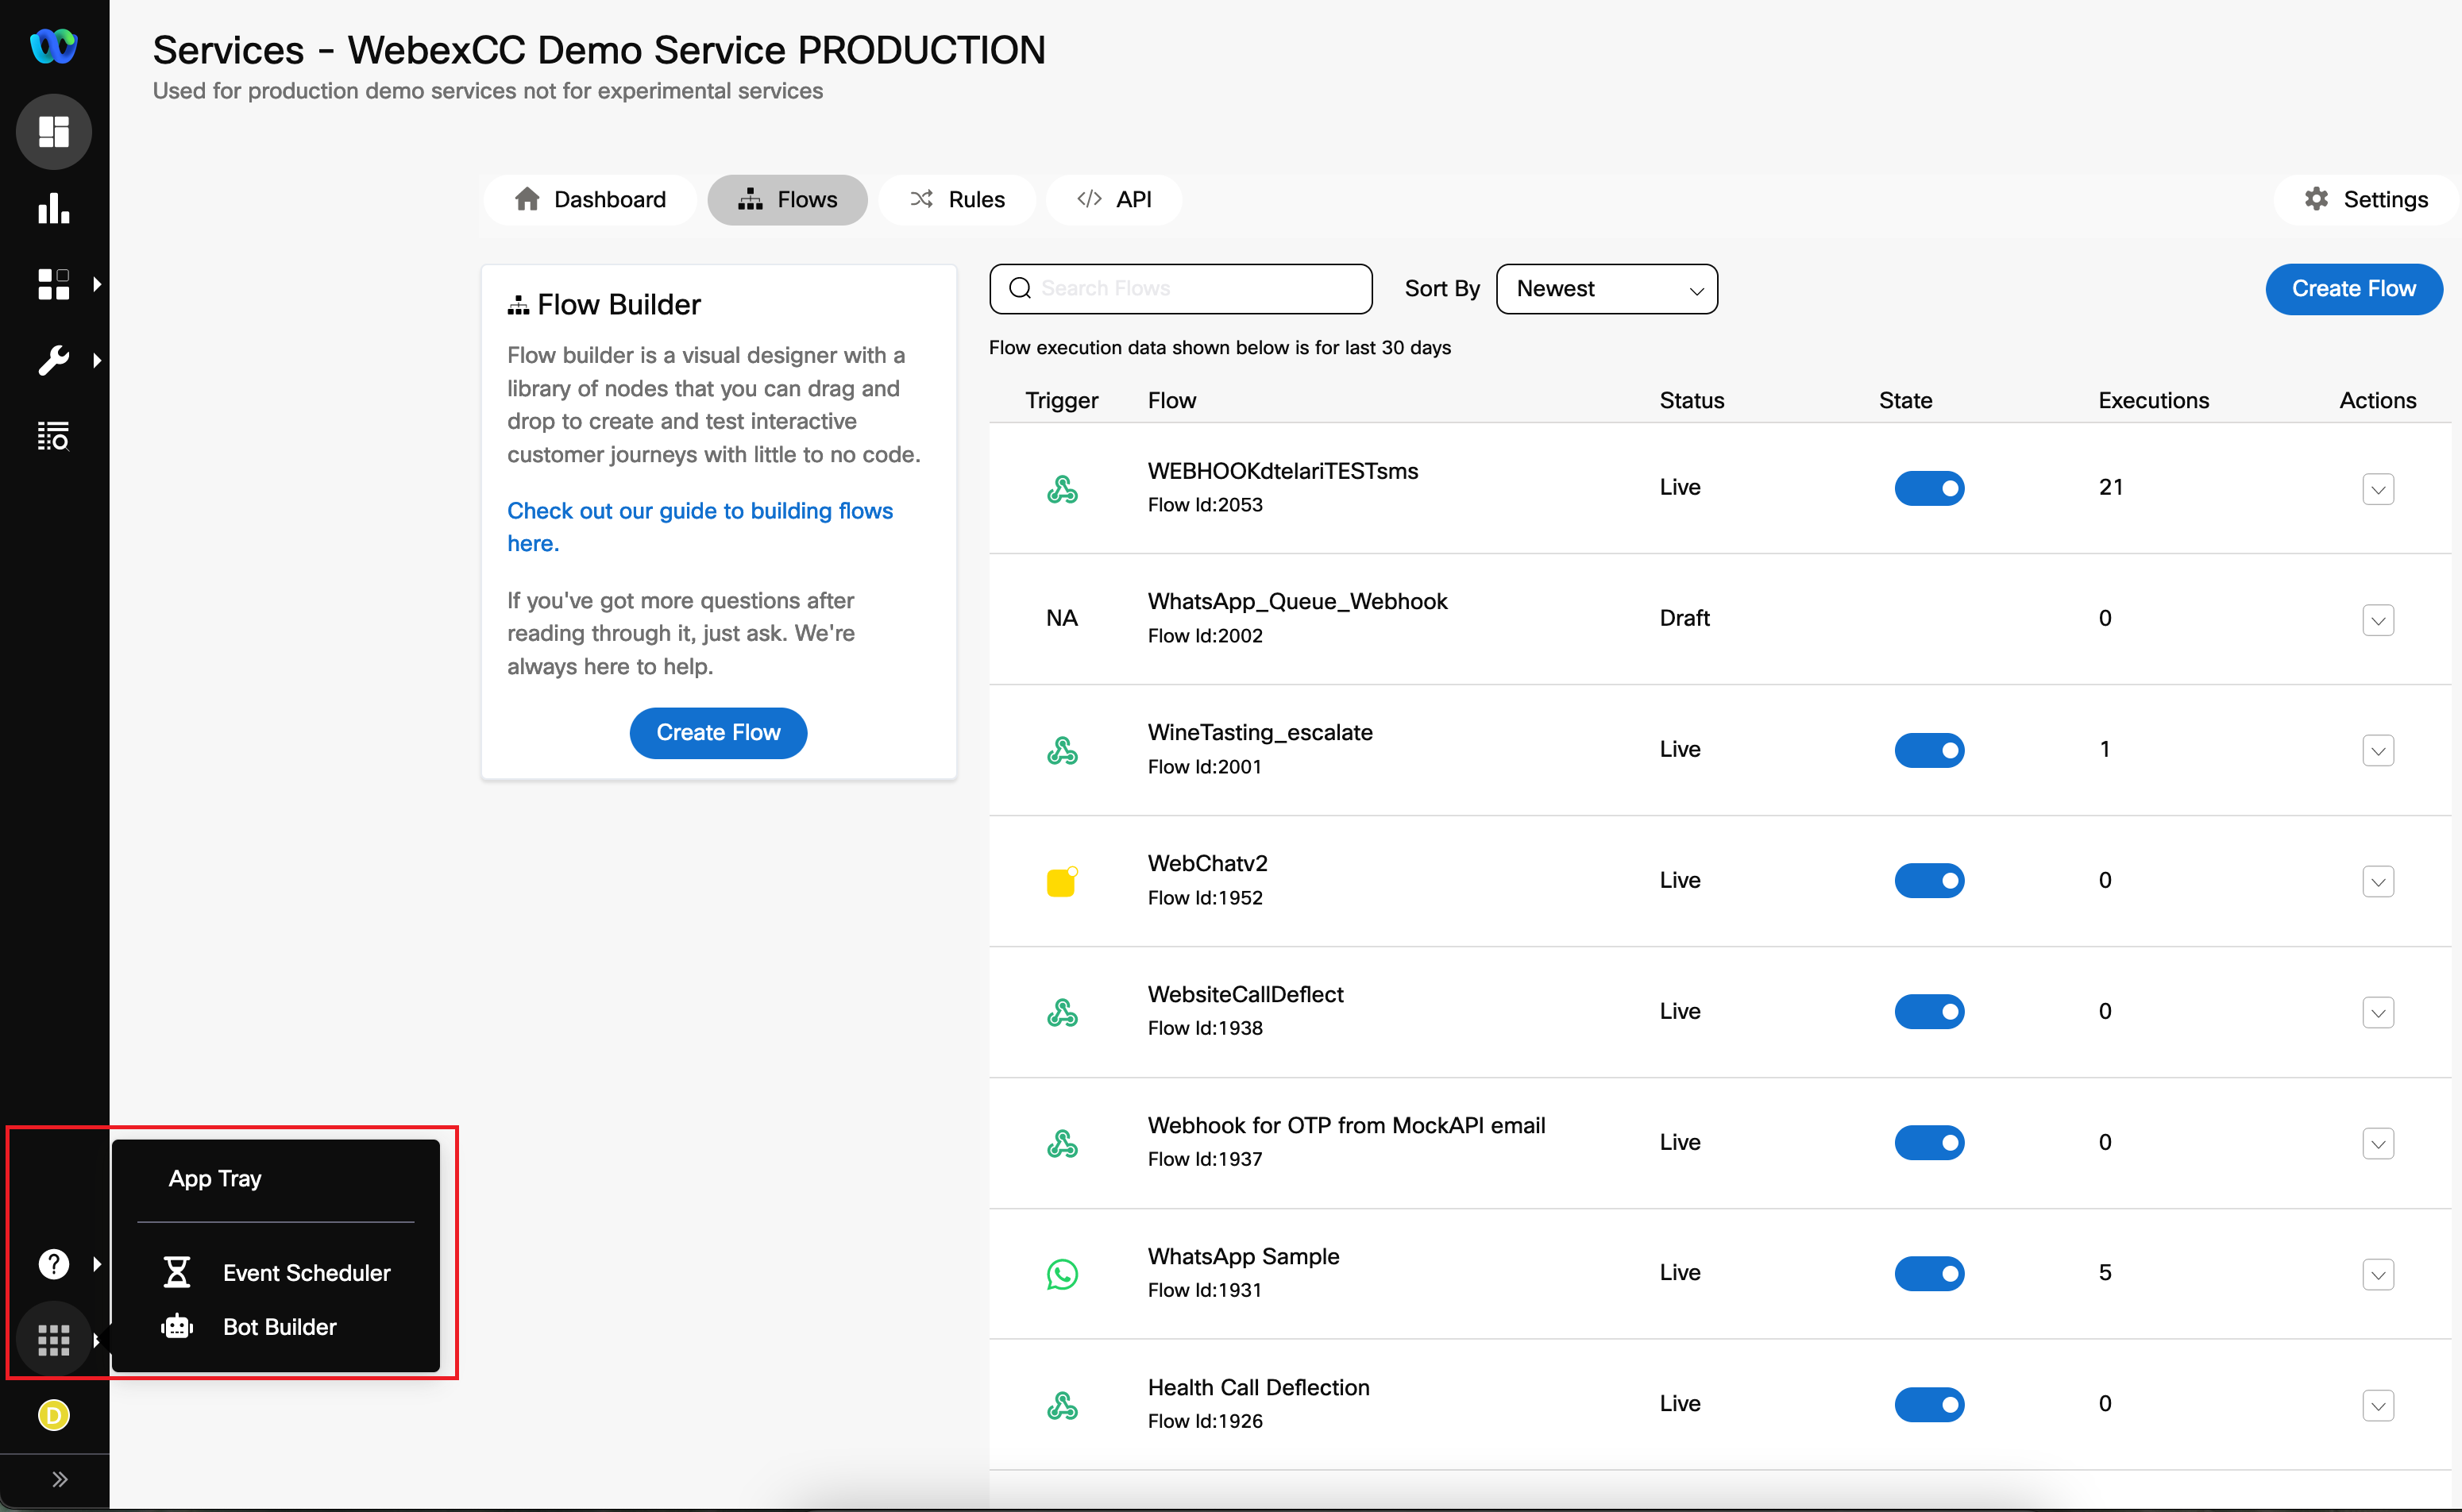
Connect → App Tray → Event Scheduler:
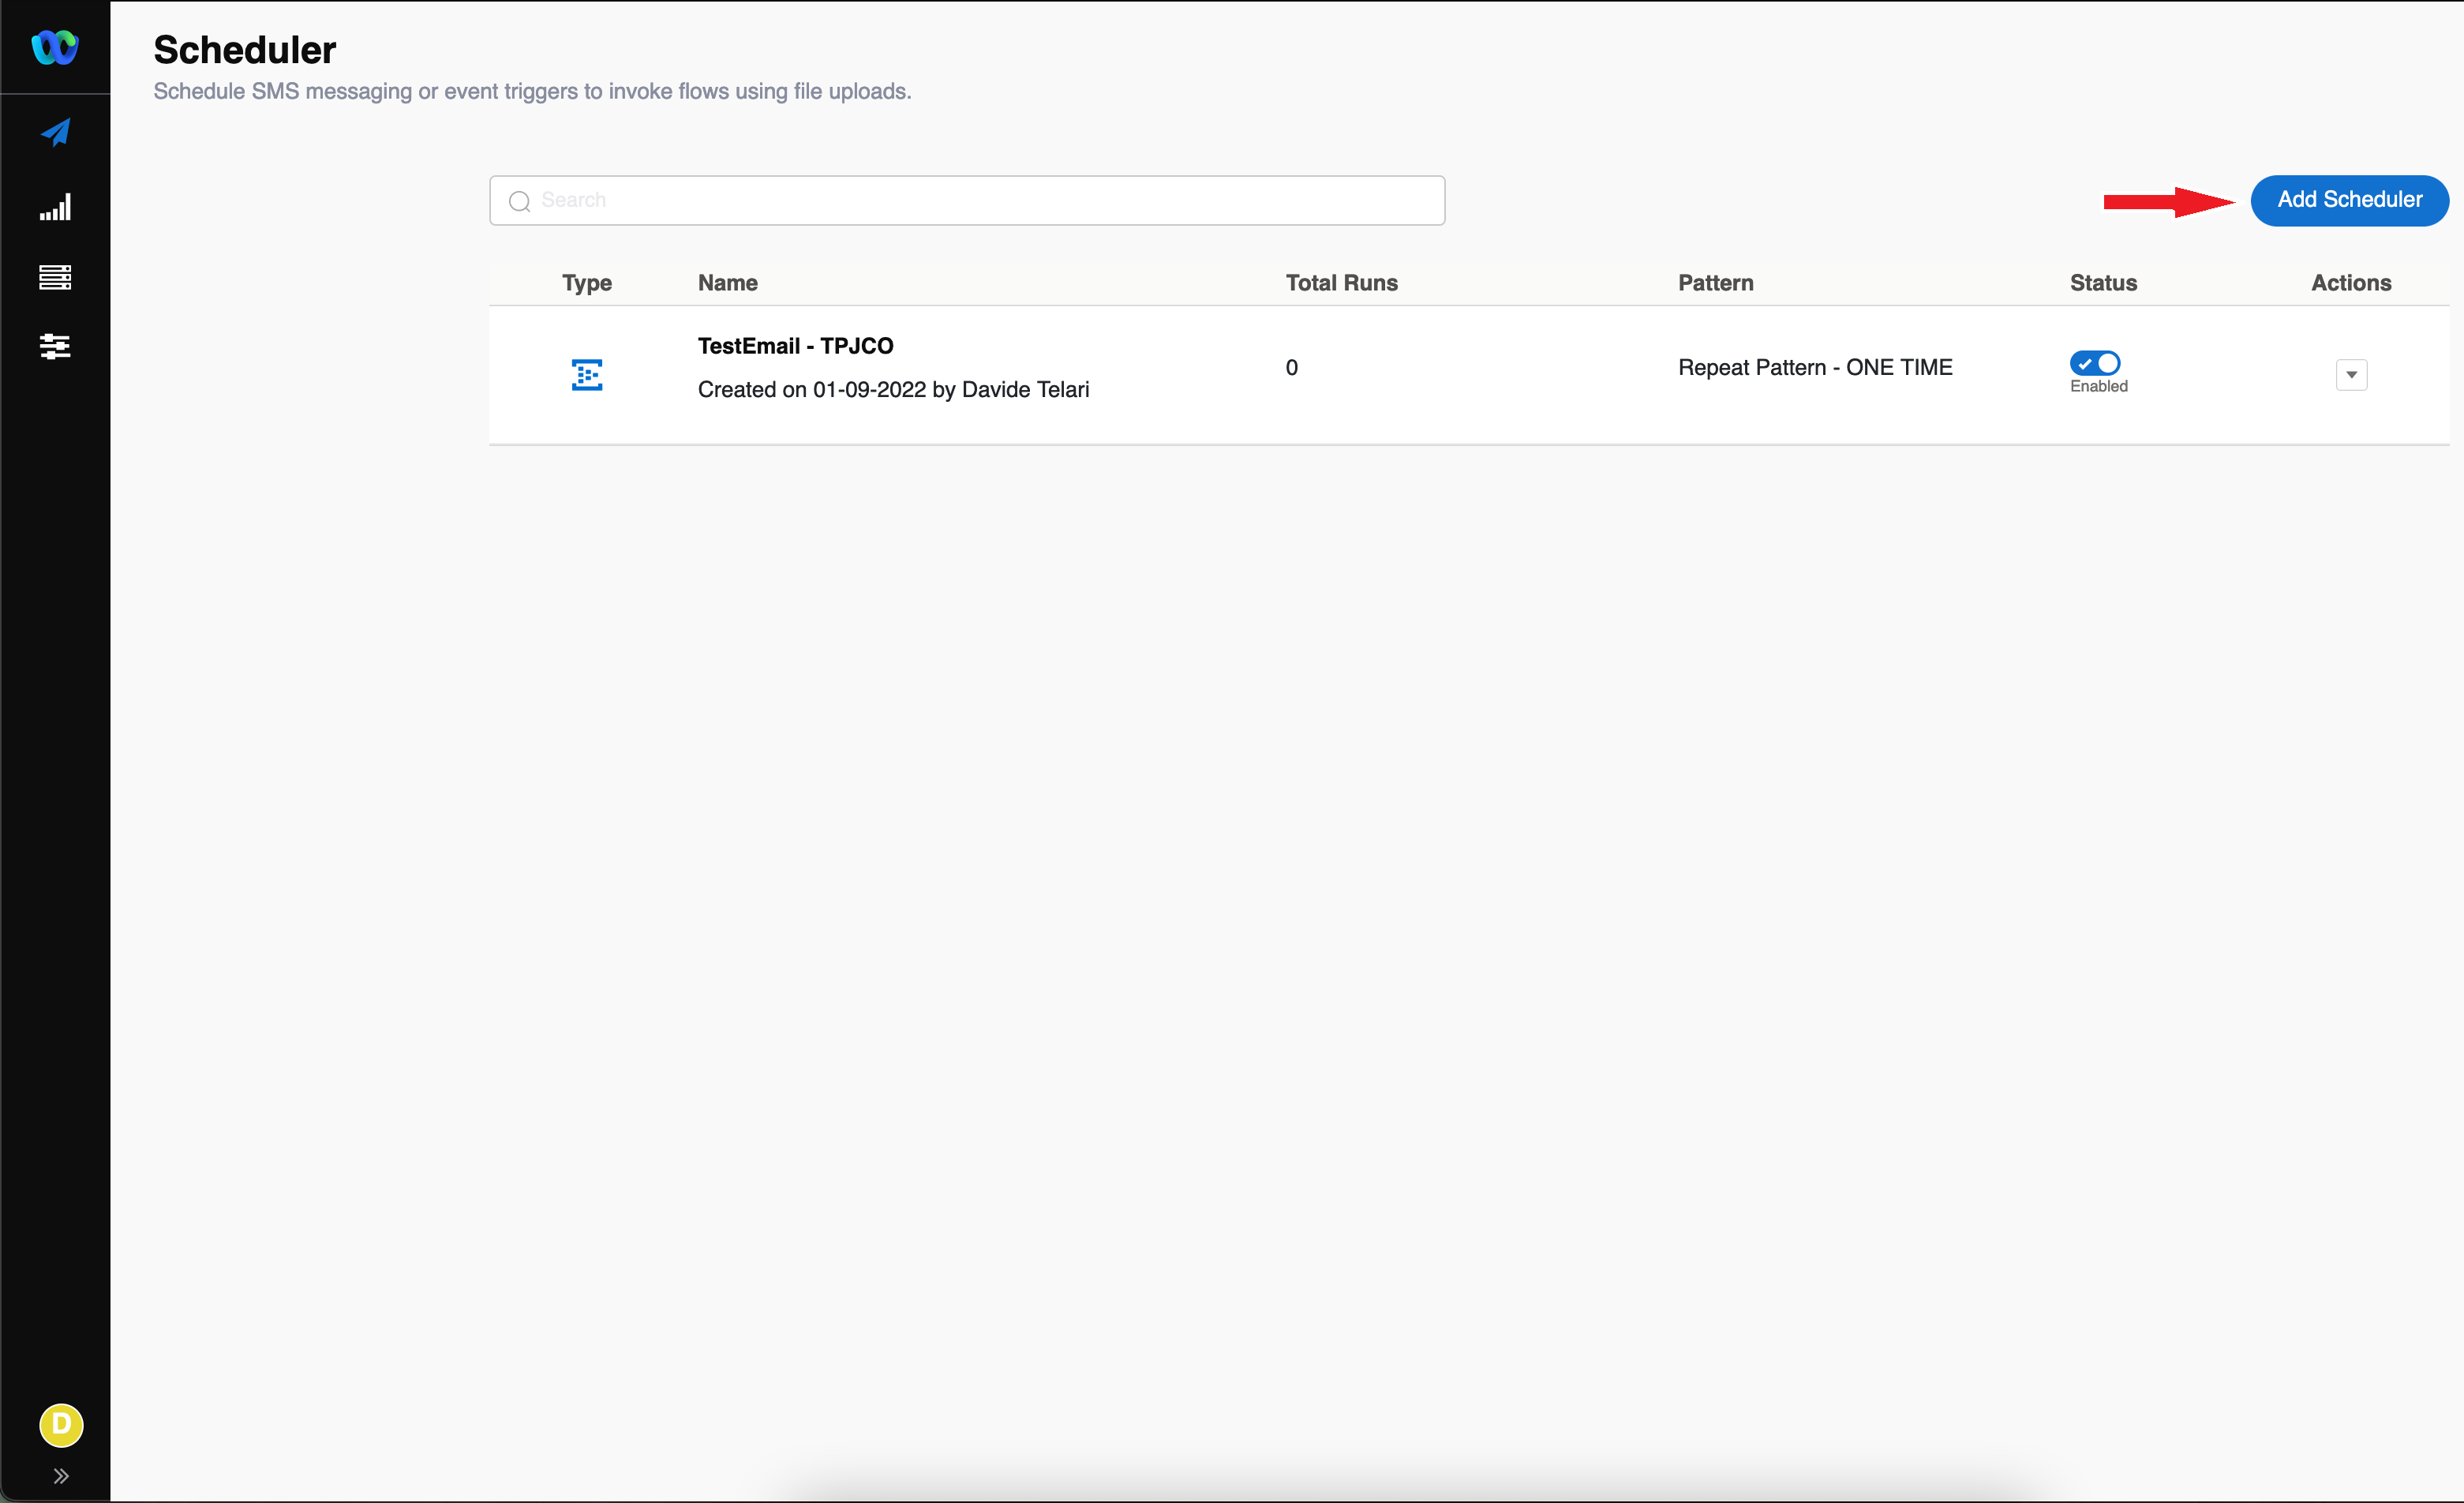
Scheduler — create new or manage existing scheduled tasks
Logs — review all trigger executions in last 6 months
SFTP — manage external data sources
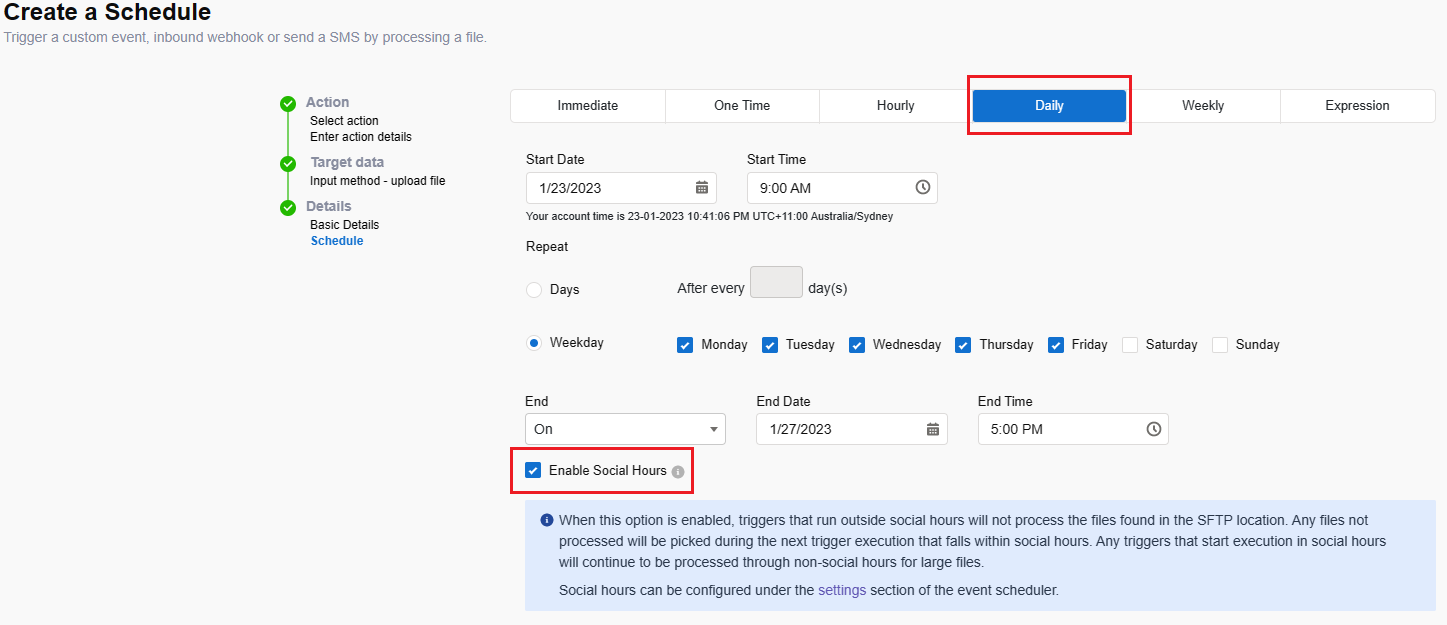
Settings — manage Social Hours (business hours) and holidays
2. Schedule SMS Event
Connect → App Tray → Event Scheduler
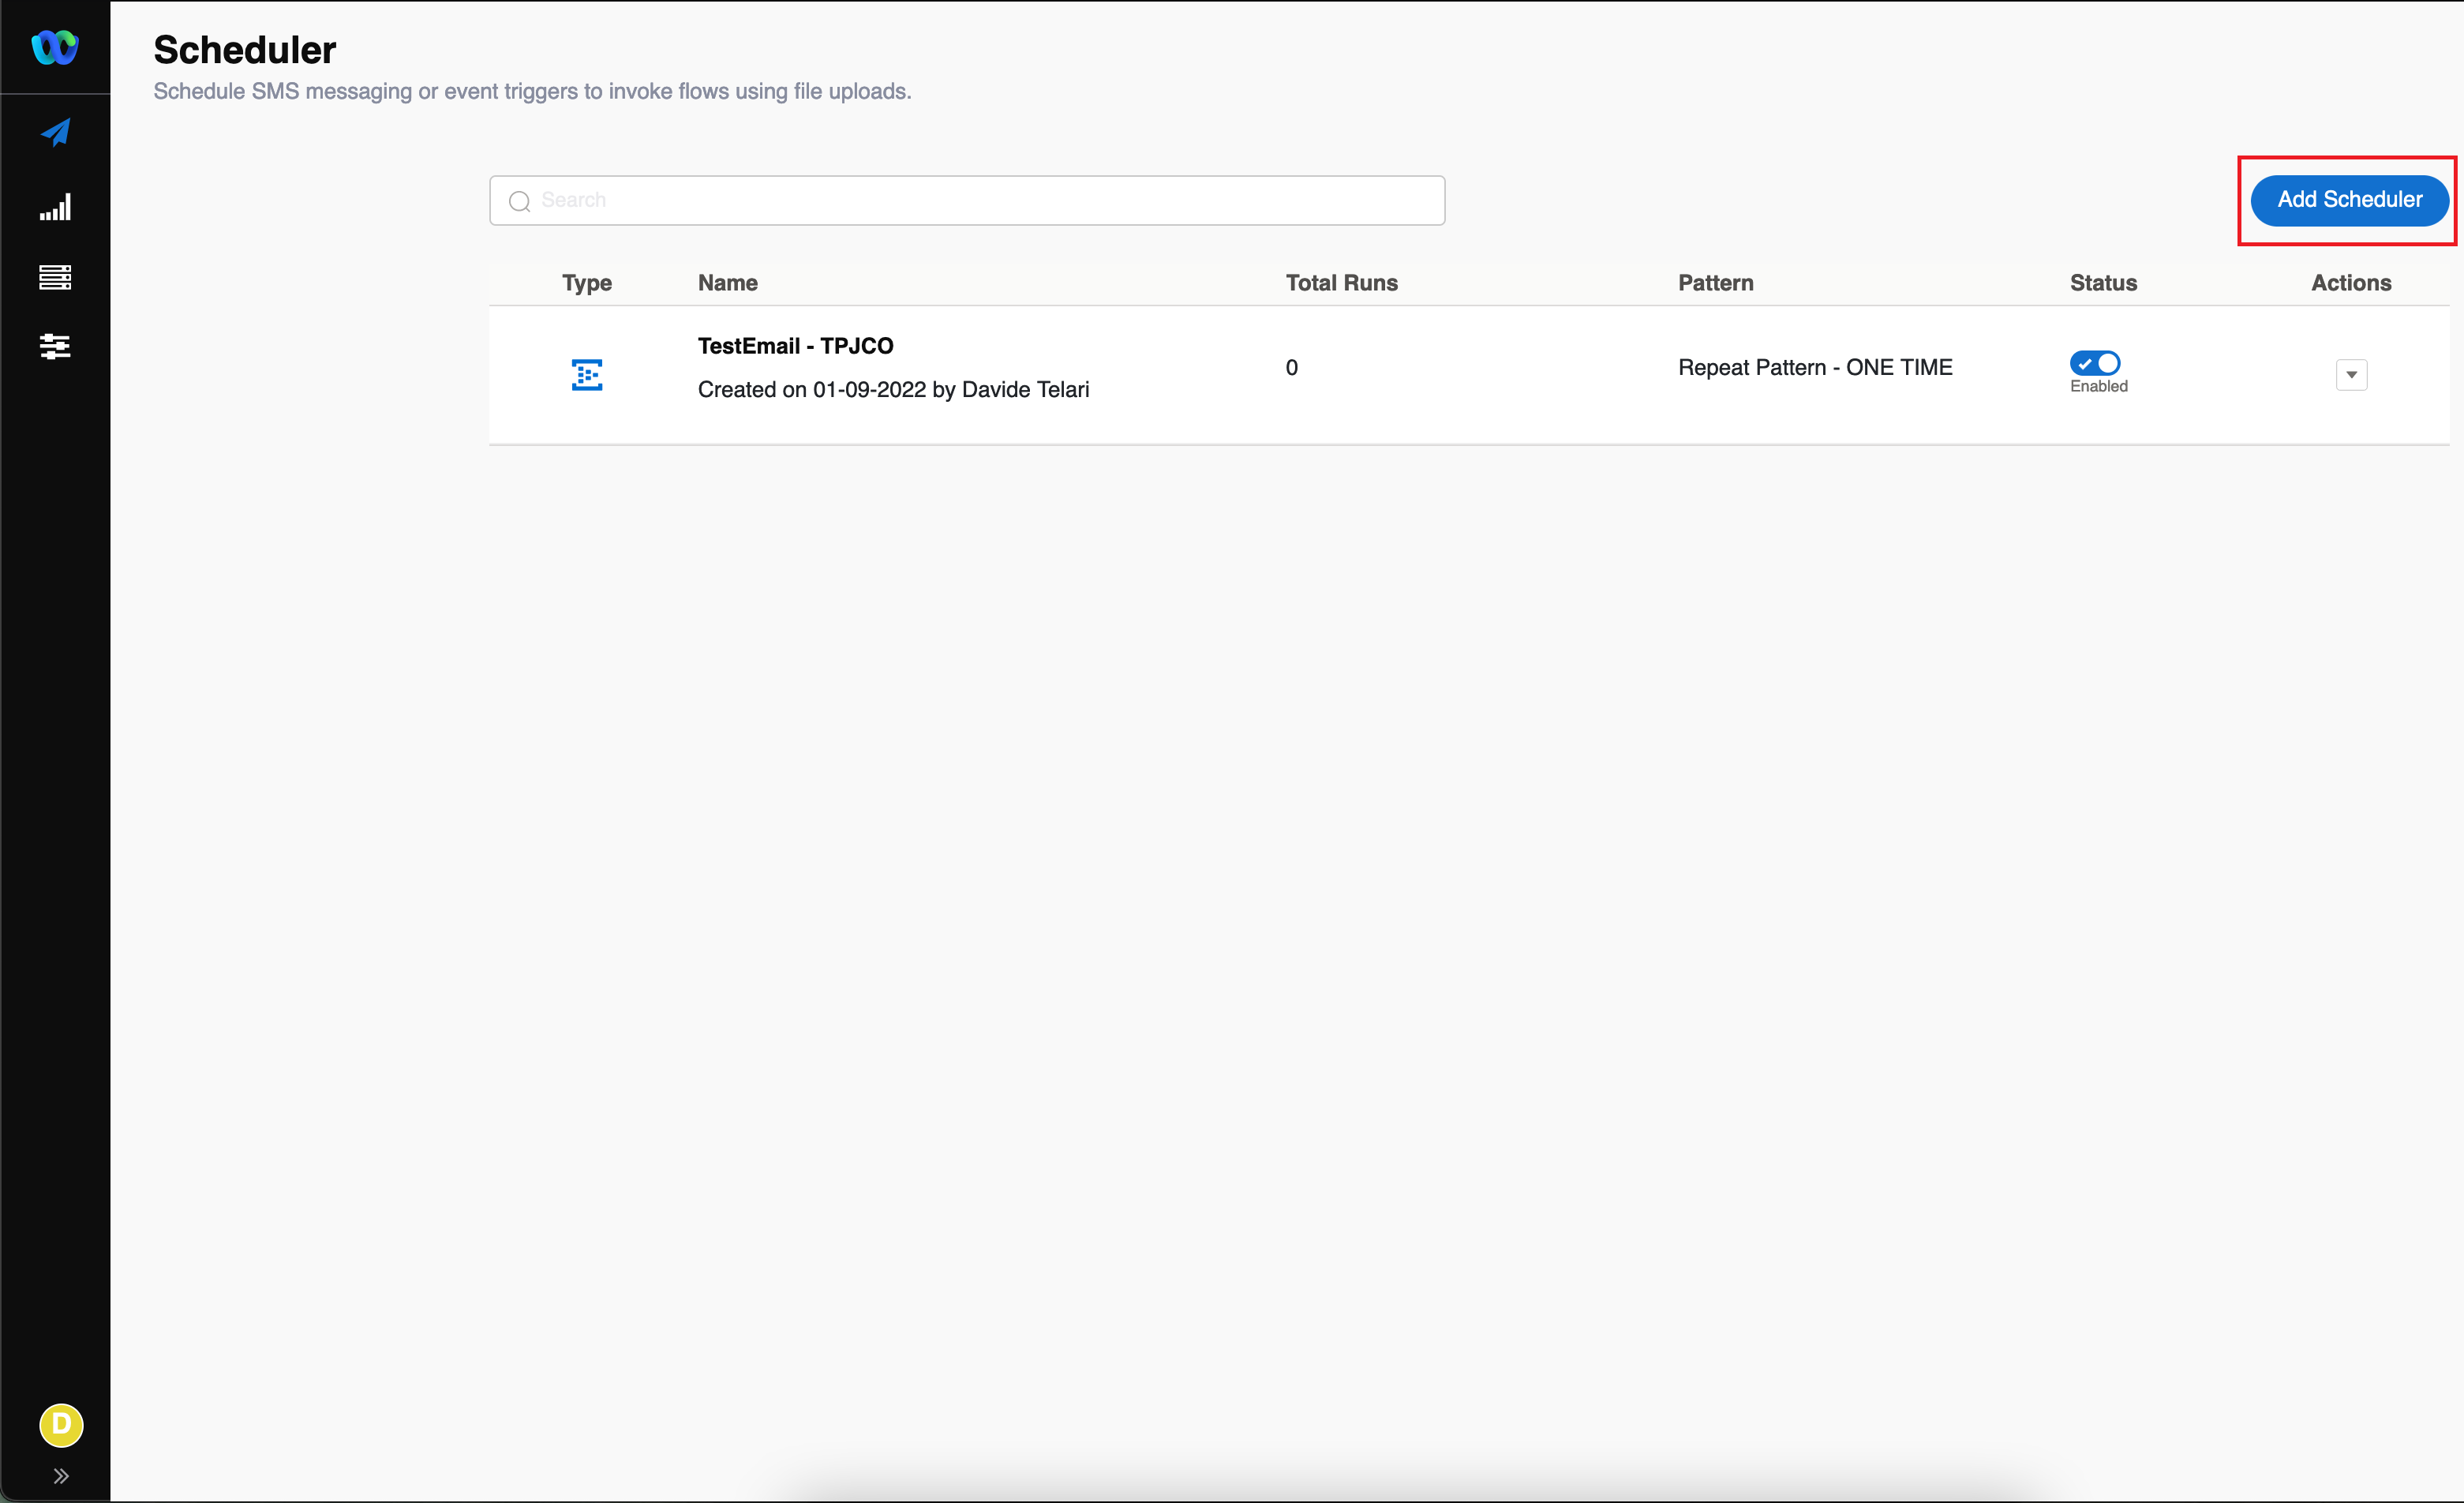
Scheduler → Add Schedule
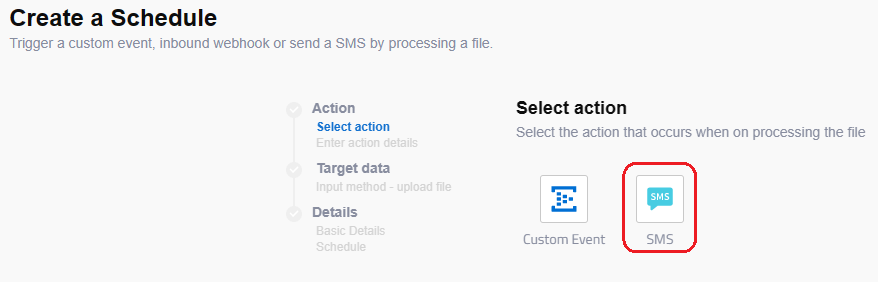
SMS
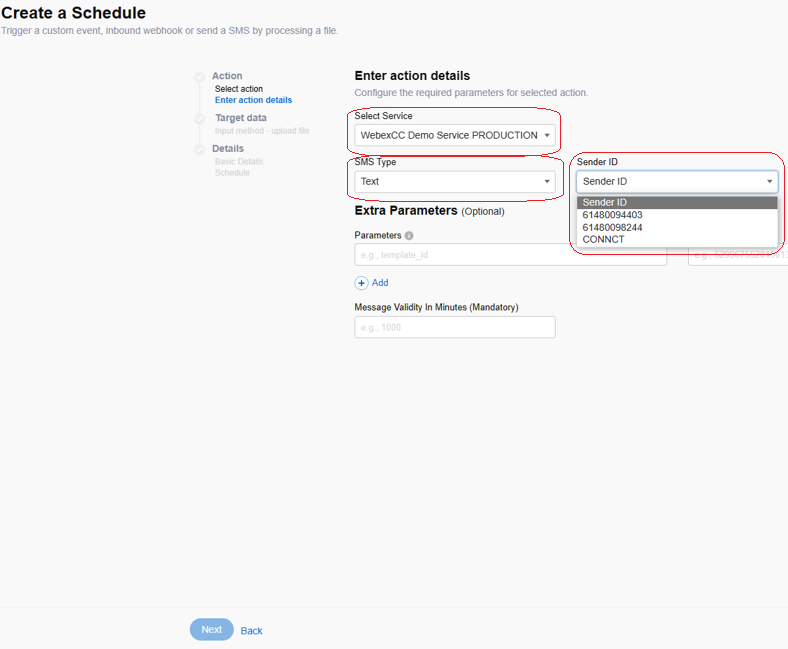
Select Service, SMS Type TEXT, Sender ID, Extra Parameters → Next
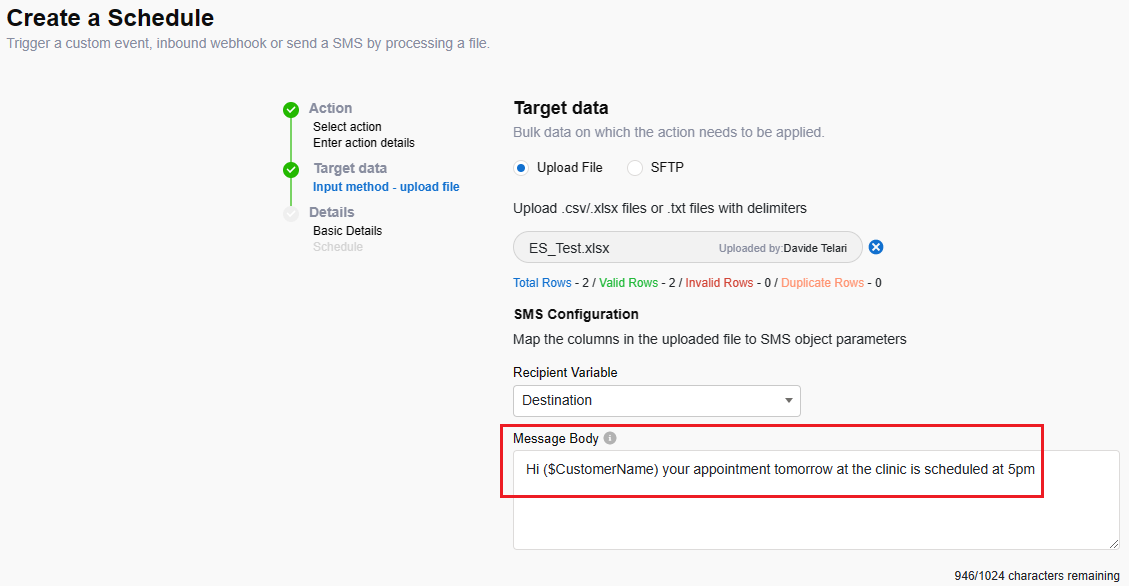
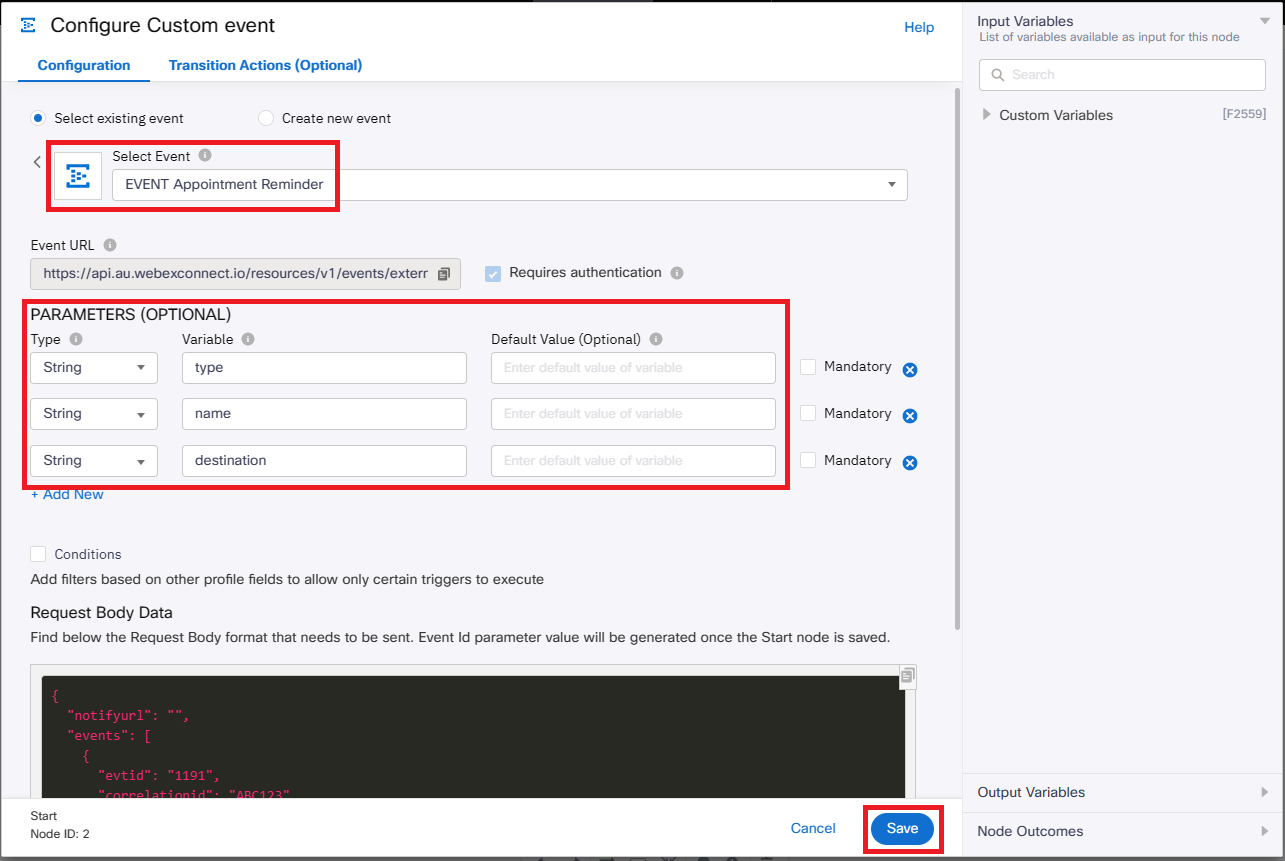
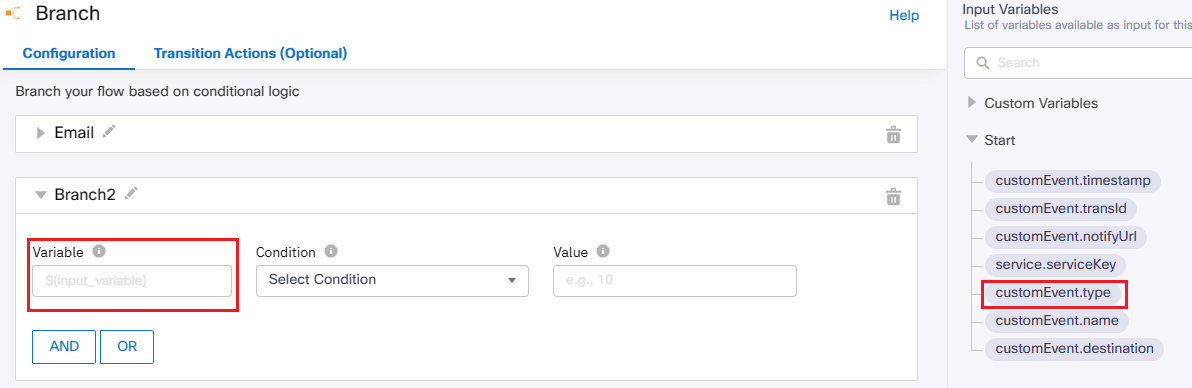
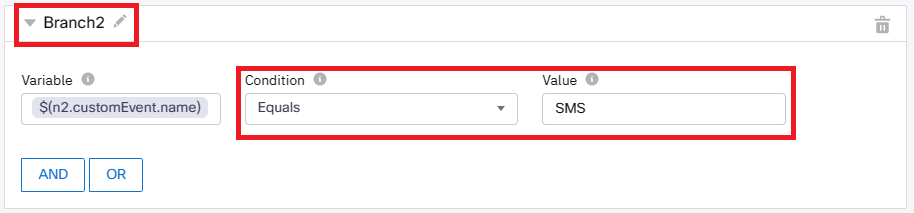
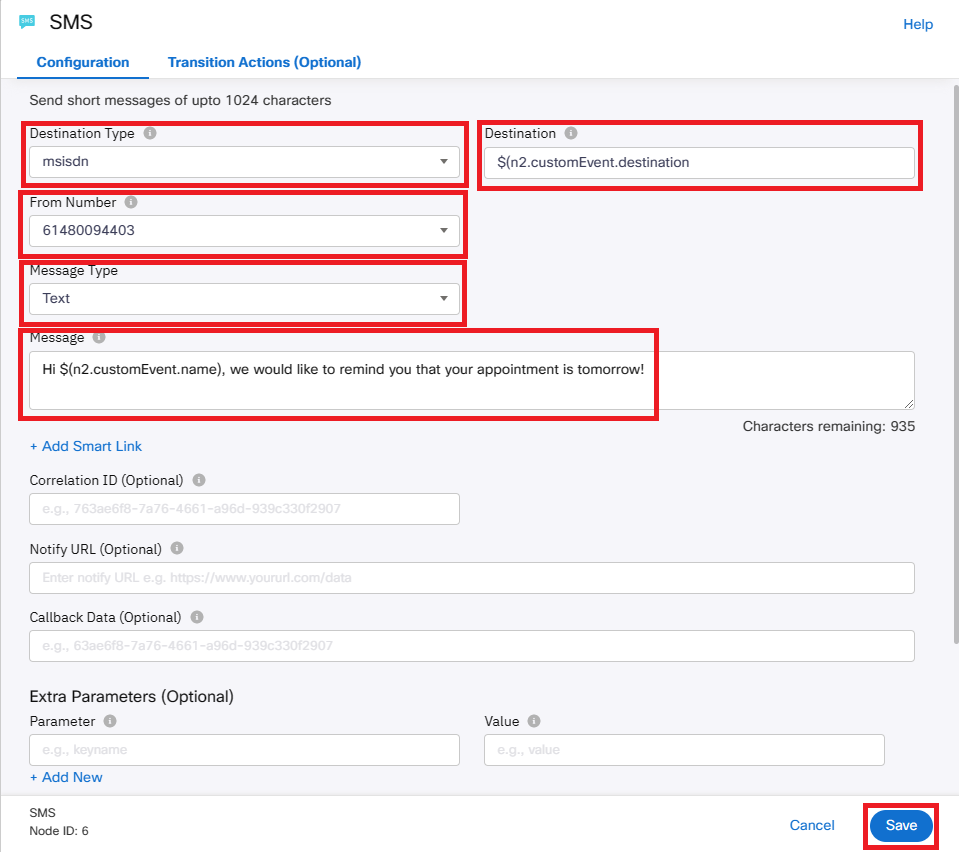
Message: Hi $(n2.customEvent.name), we would like to remind you that your appointment is tomorrow!
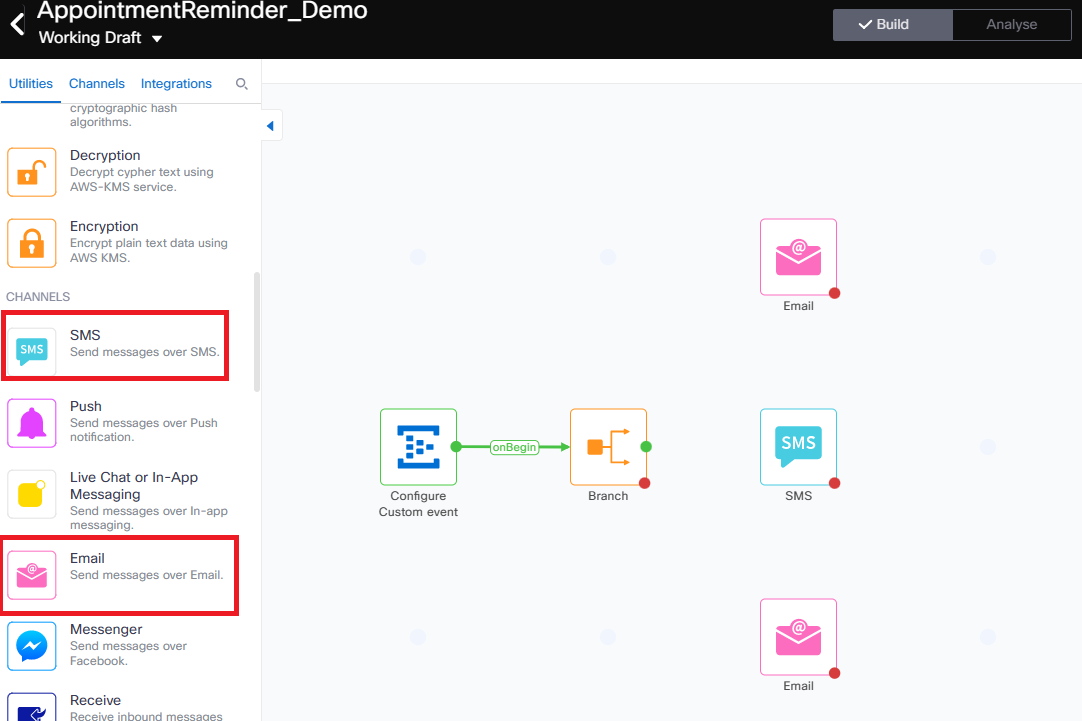
SMS node:
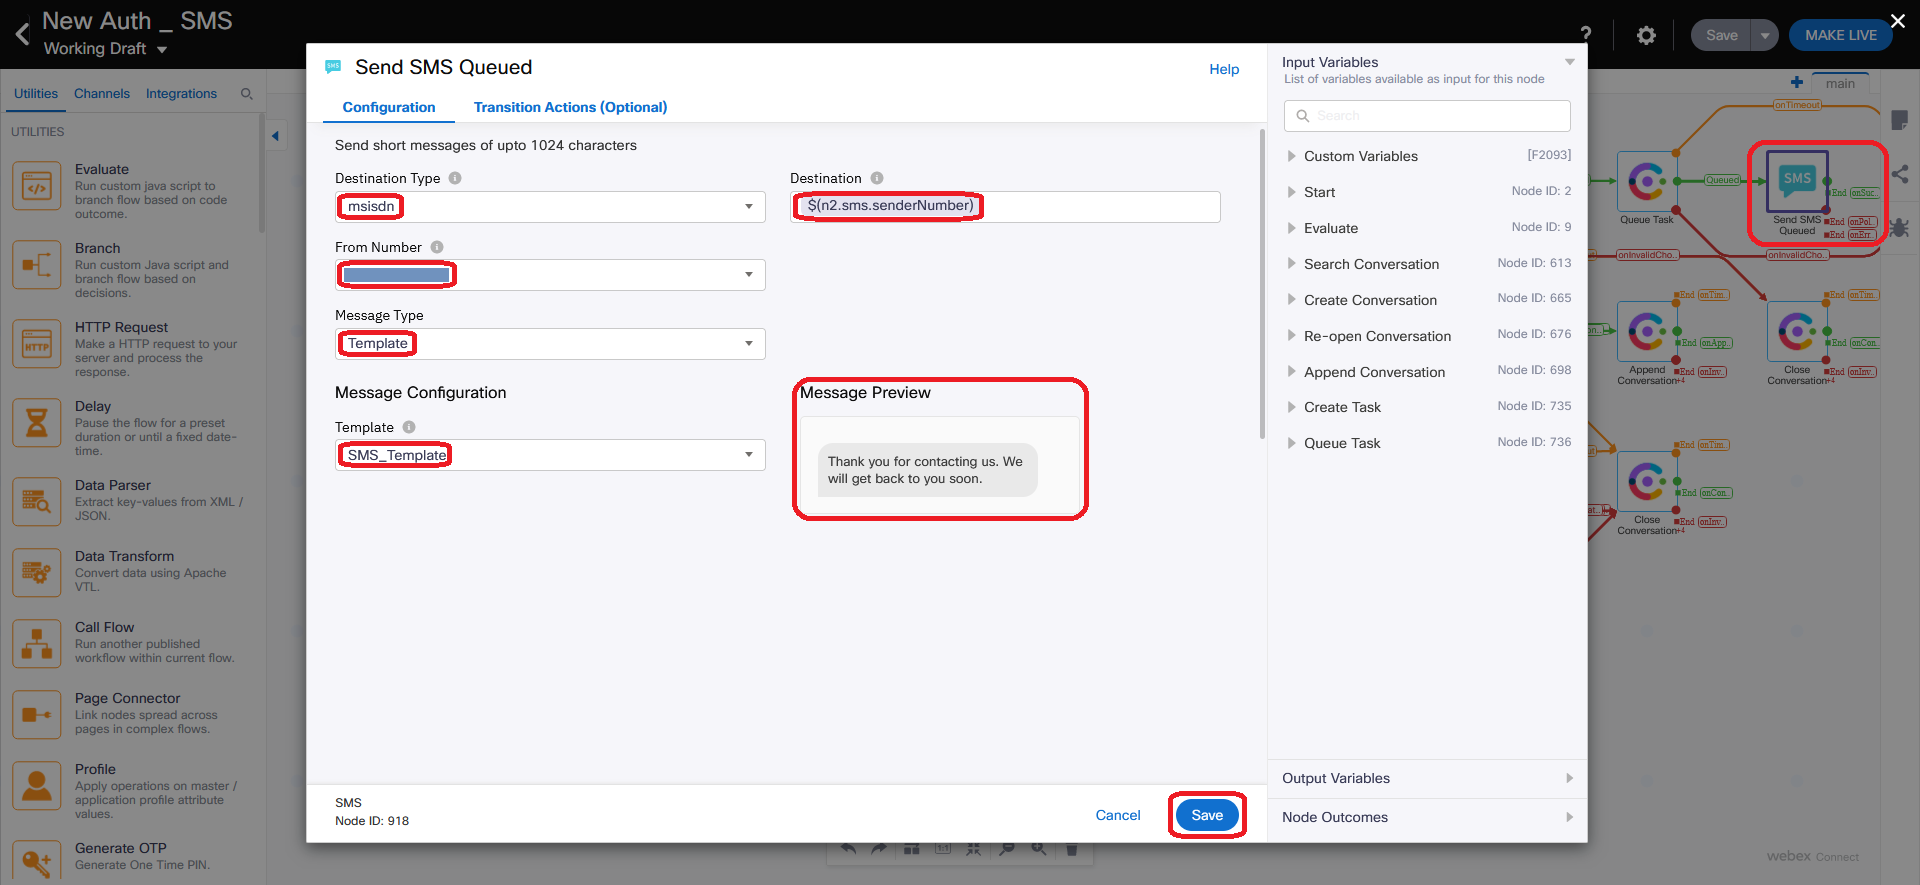
Destination Type: msisdn
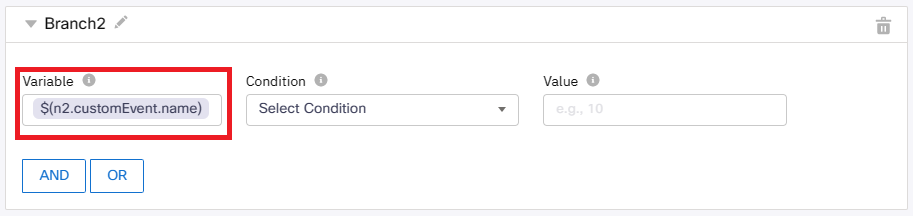
Destination: $(n2.customEvent.destination)
From Number: SMS number
Message Type: Text
Message: Hi $(n2.customEvent.name), we would like to remind you that your appointment is tomorrow!
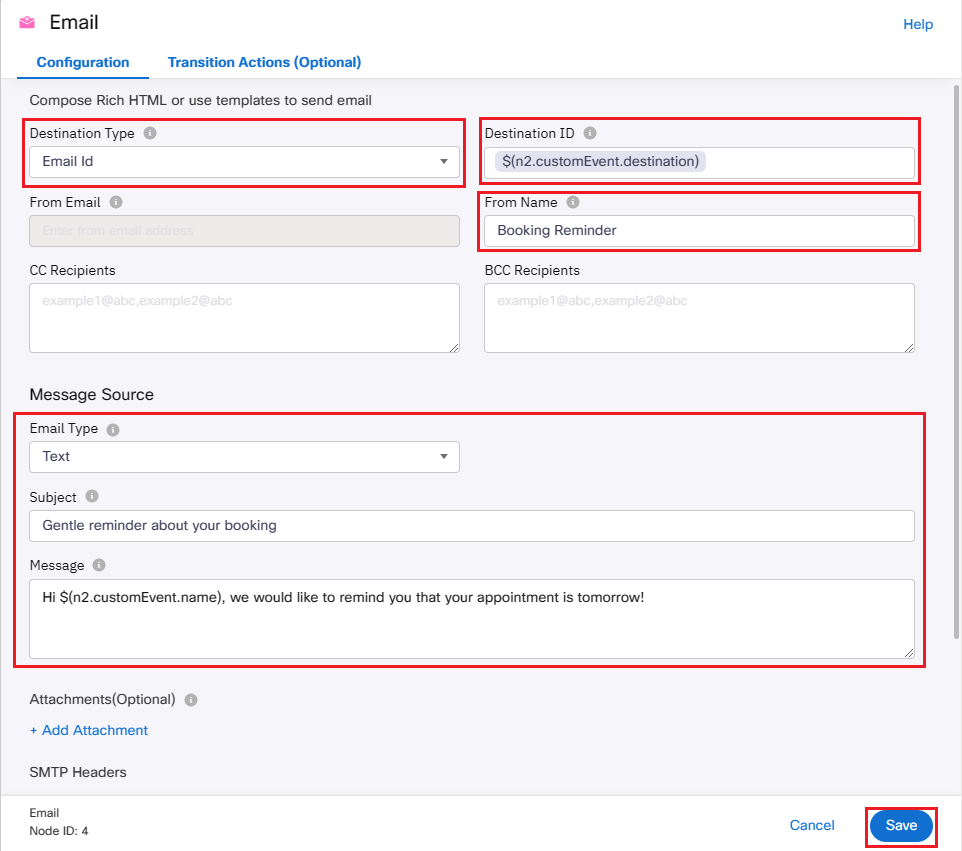
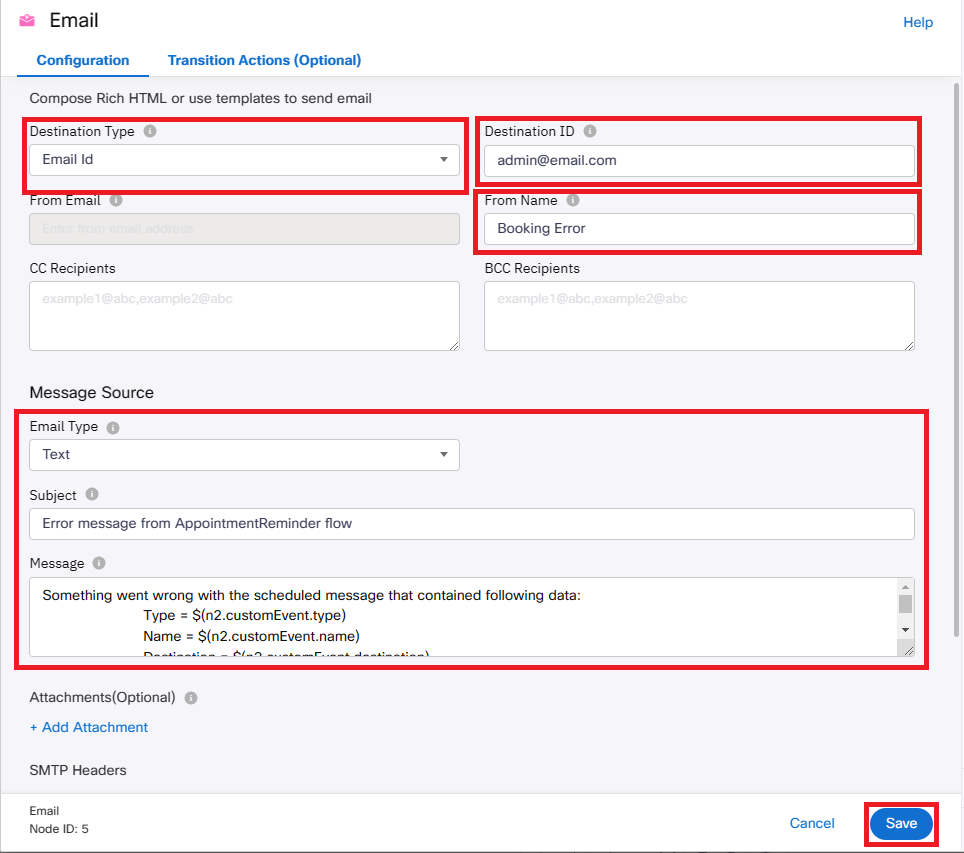
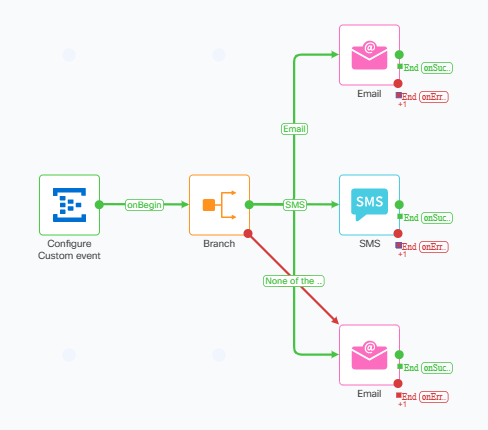
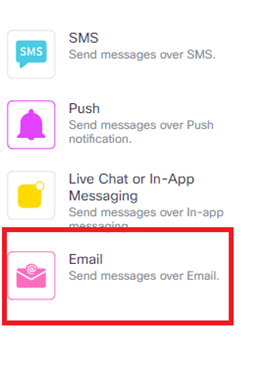
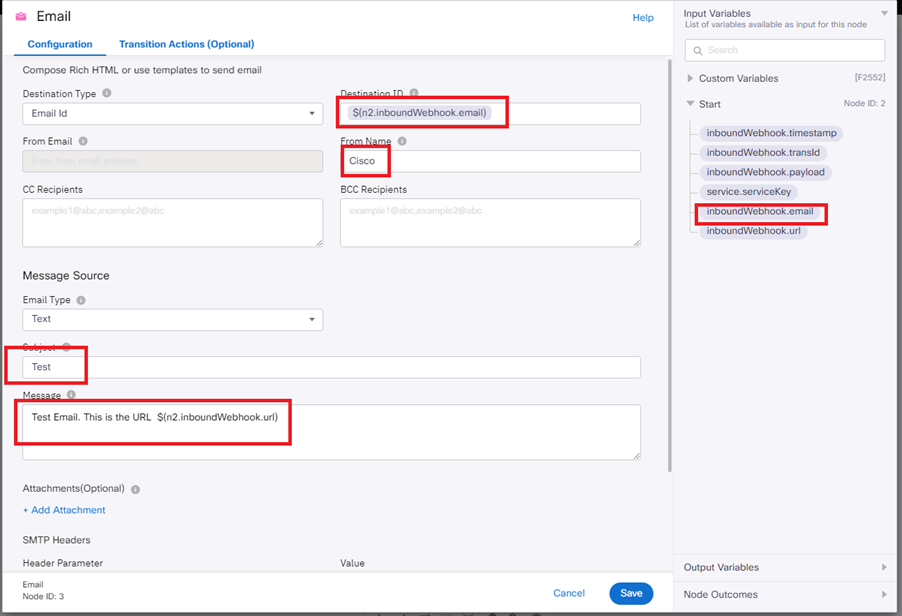
Second Email node (error handler):
Destination Type: Email Id
Destination: administrator email
From Name: Booking Error
Subject: Error message from AppointmentReminder flow
Message:
Something went wrong with the scheduled message that contained following data:
Type = $(n2.customEvent.type)
Name = $(n2.customEvent.name)
Destination = $(n2.customEvent.destination)
The message has not been delivered.
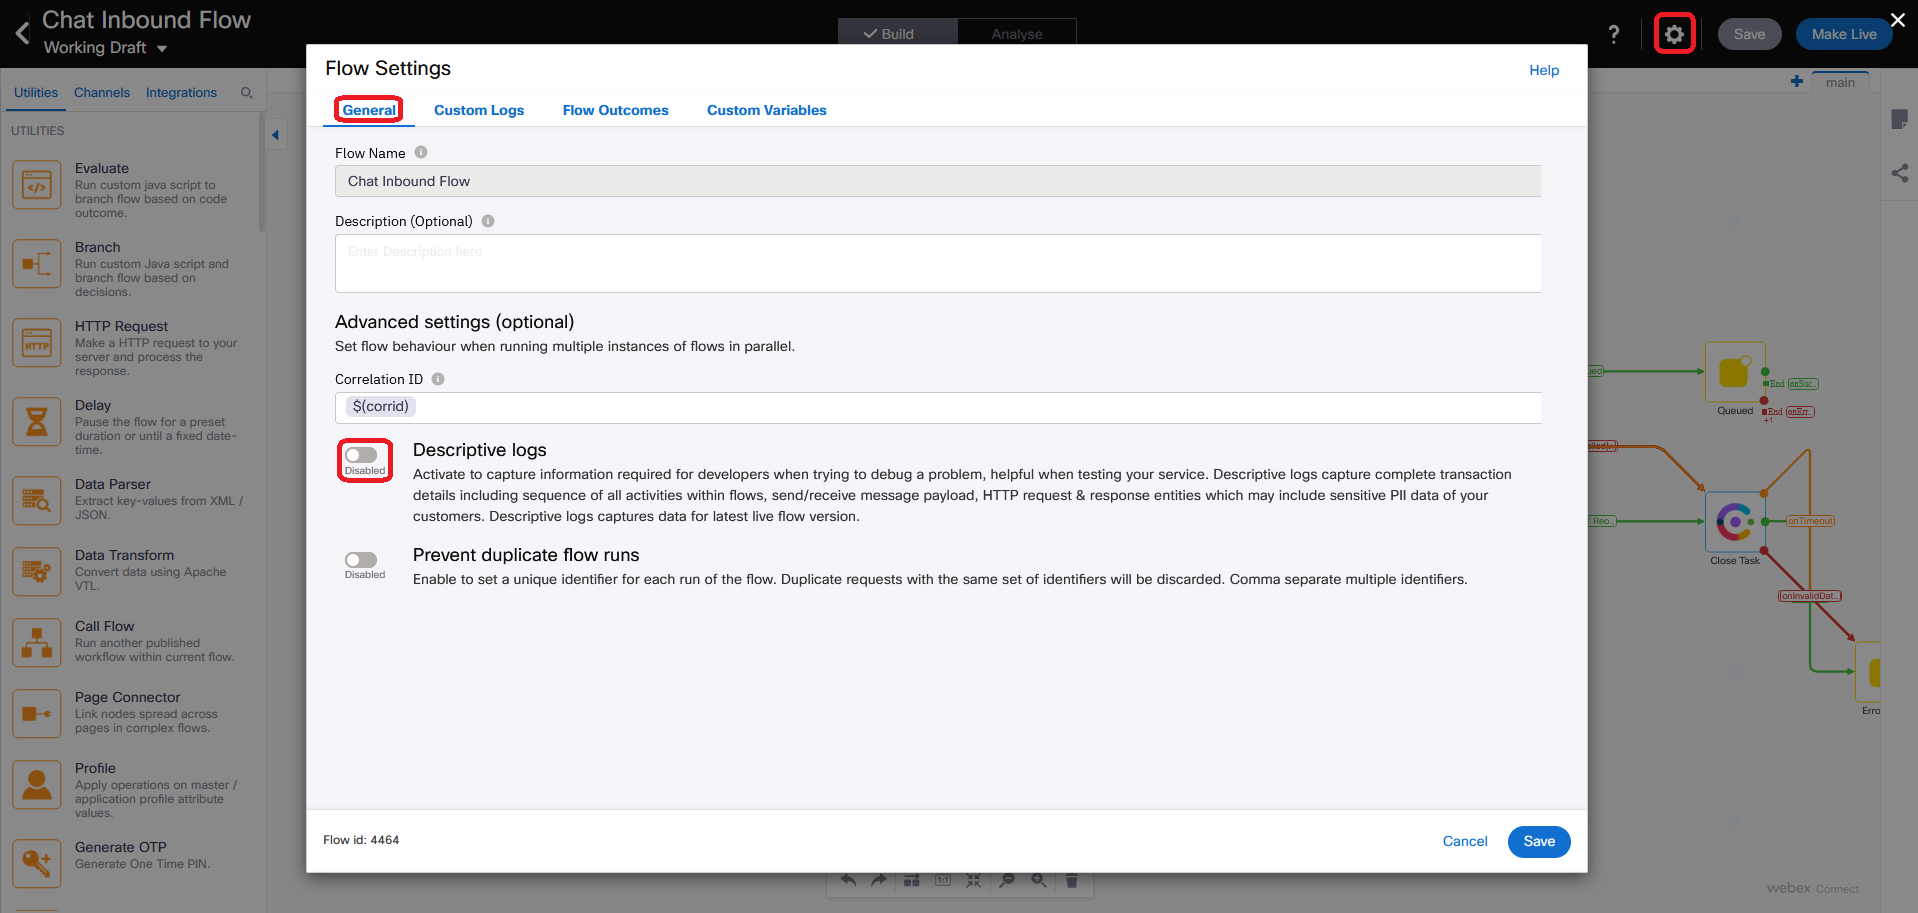
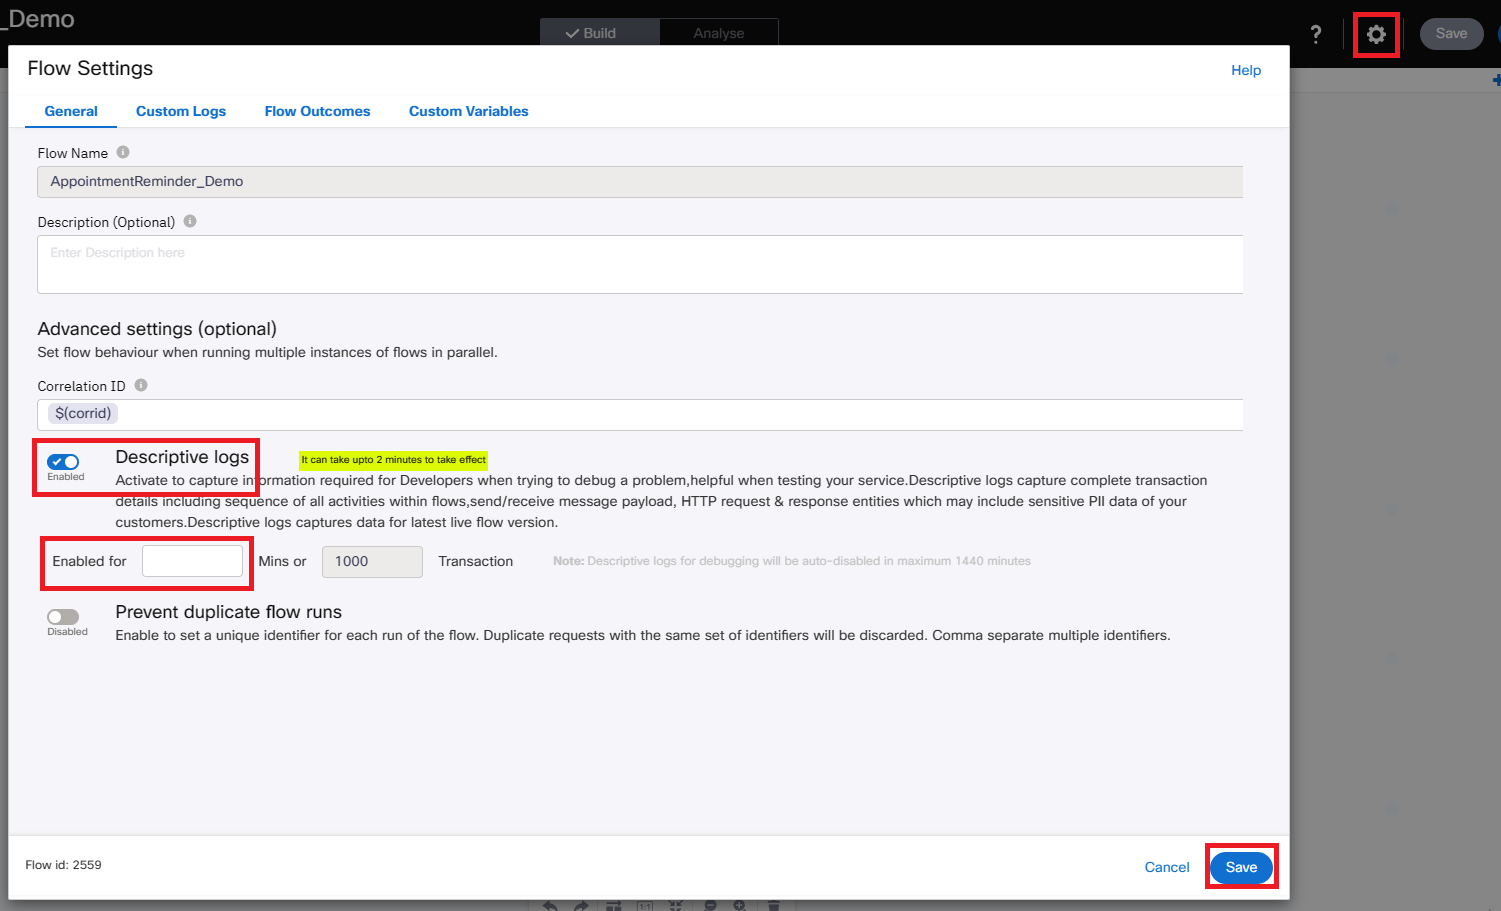
Settings icon → enable Descriptive logs, 60 in "Enabled for" → Save
Save flow
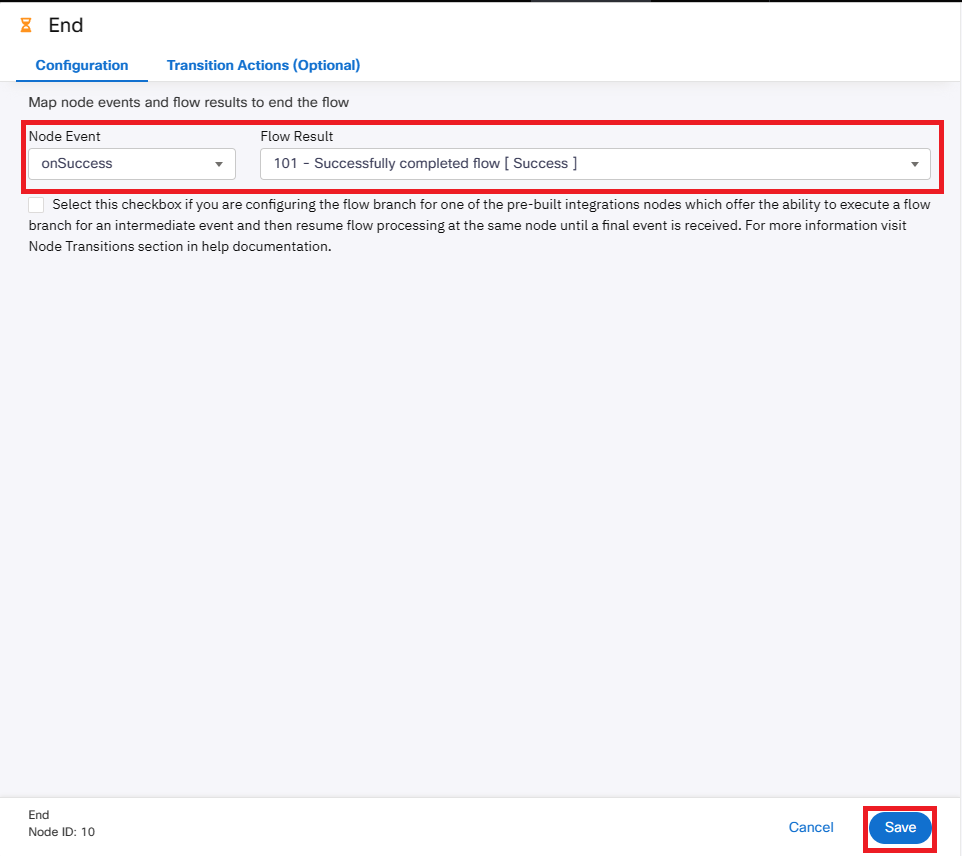
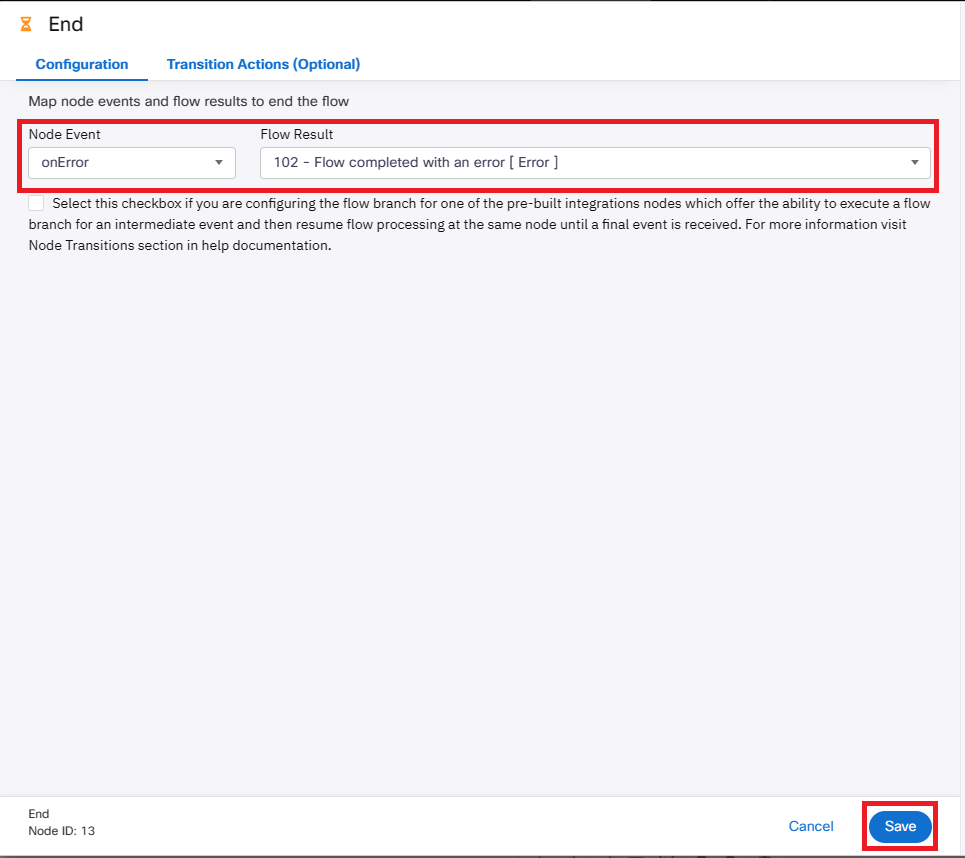
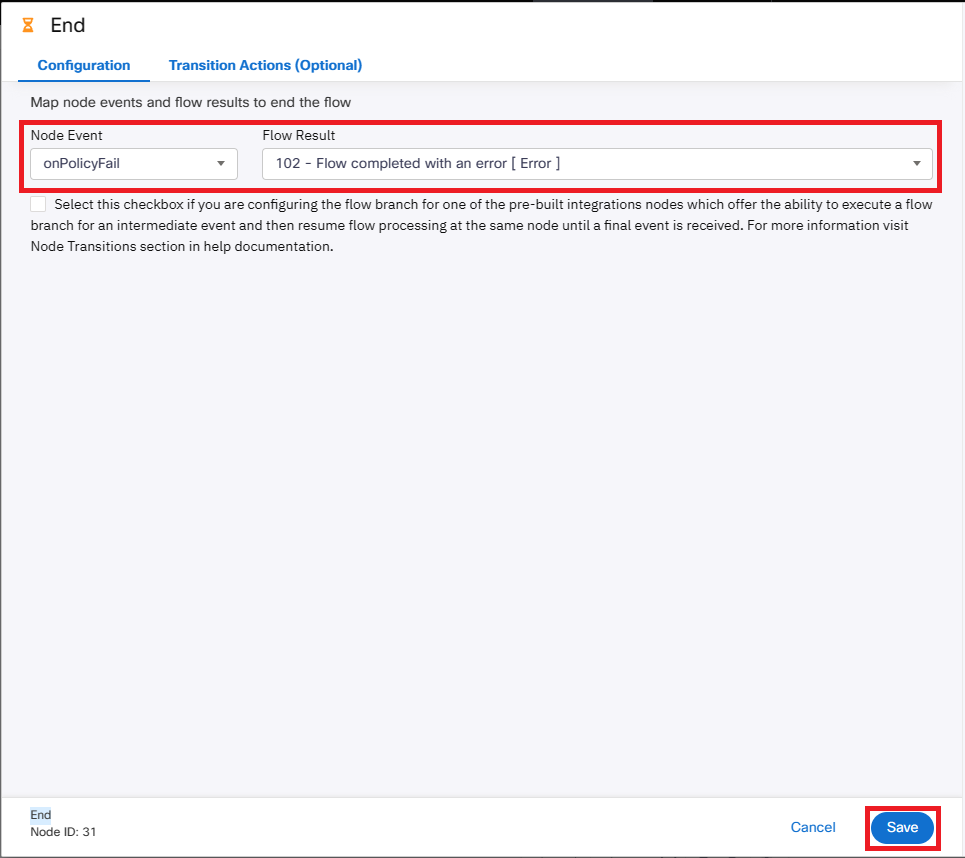
Drag SMS and Email Successful Outcomes to empty canvas → Node Event OnSuccess → Flow Result 101 - Success → Save
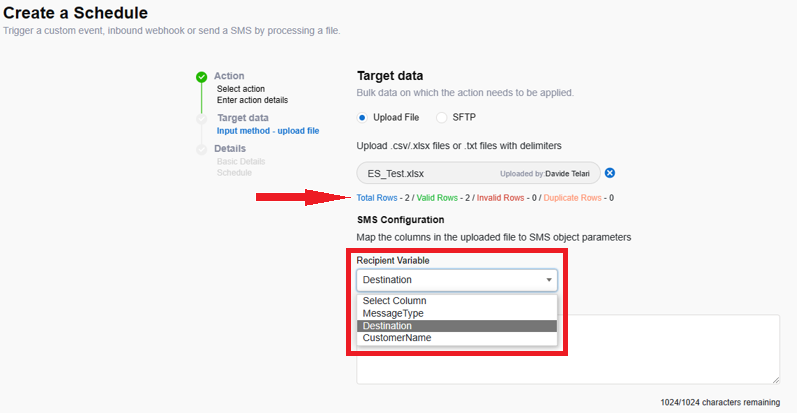
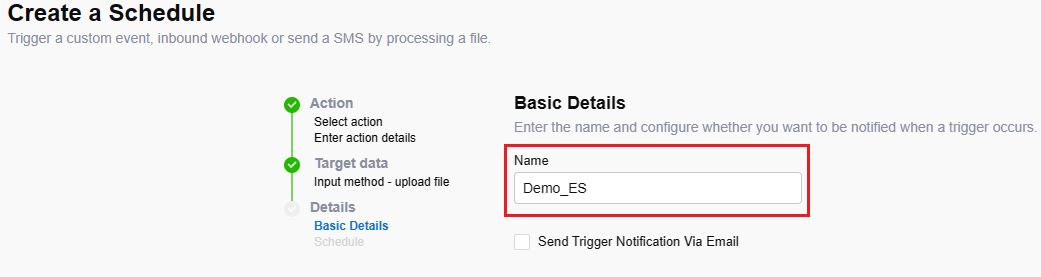
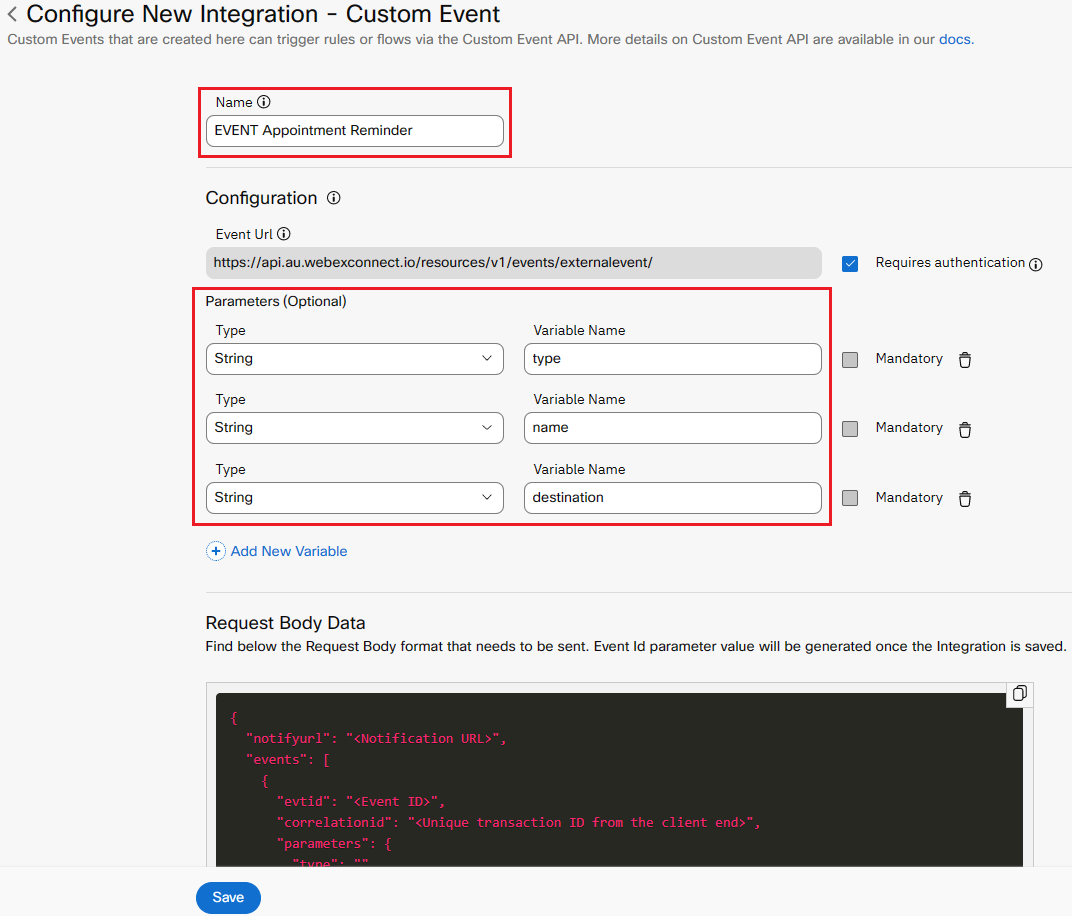
Create CSV with columns MessageType, Destination, CustomerName
3.3 Create a new Schedule
App Tray → Event Scheduler
Add Schedule
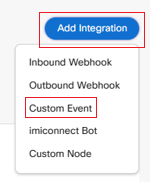
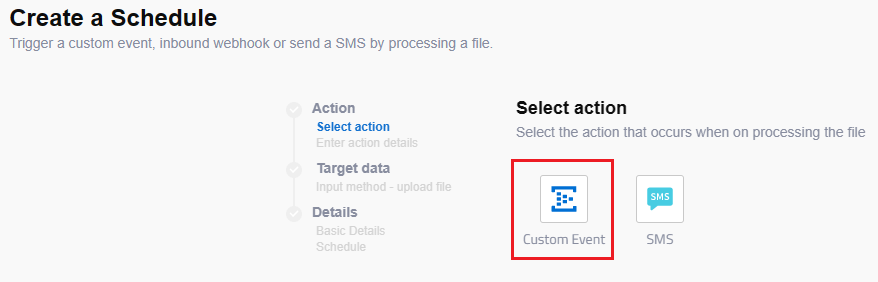
Custom Event
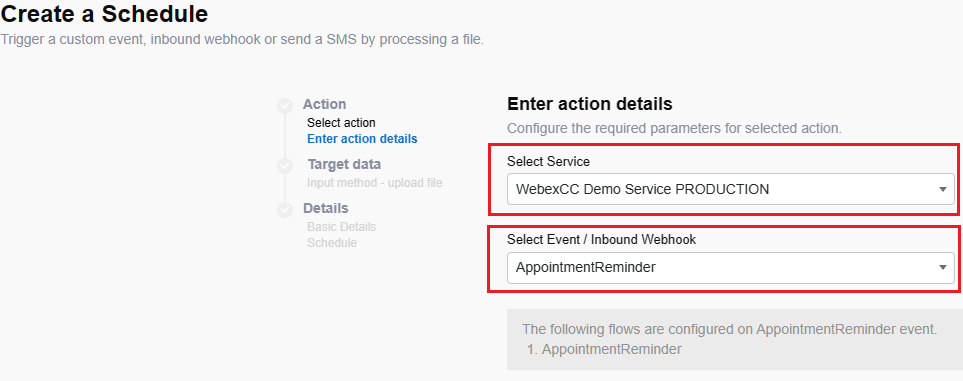
Select Service → Select Event EVENT Appointment Reminder → Next
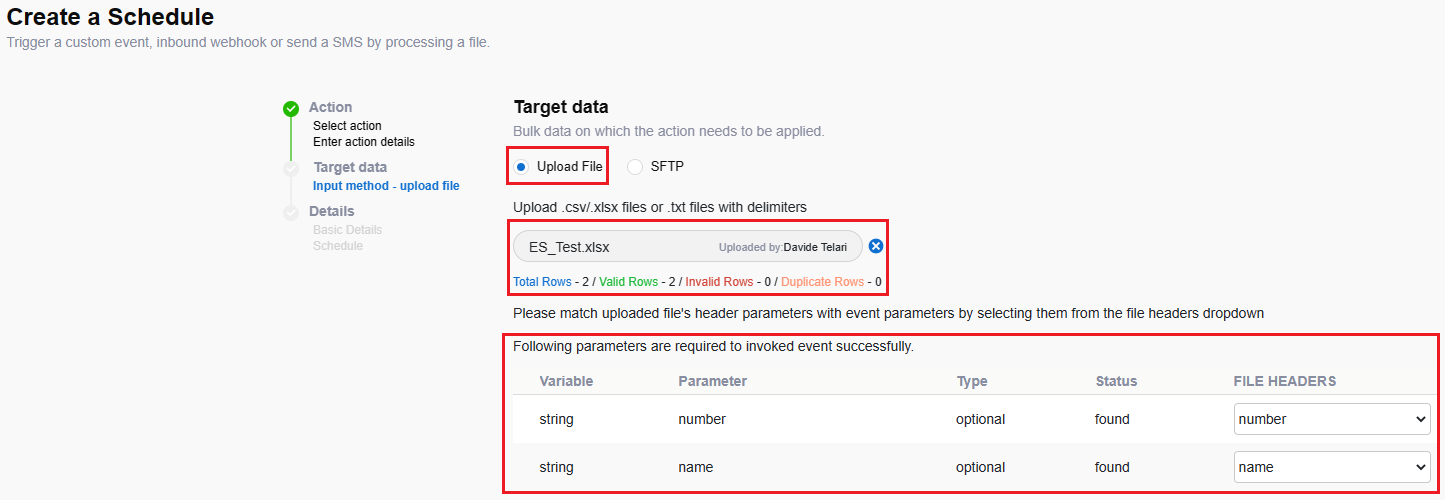
Upload File → drop CSV → map FILE HEADERS → Next
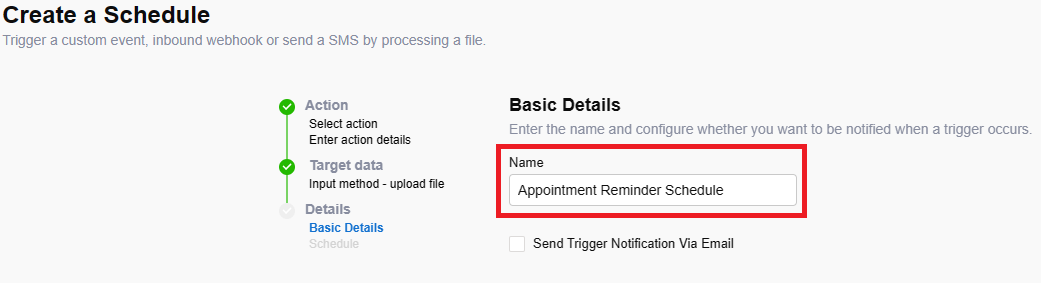
Name Appointment Reminder Schedule → Next
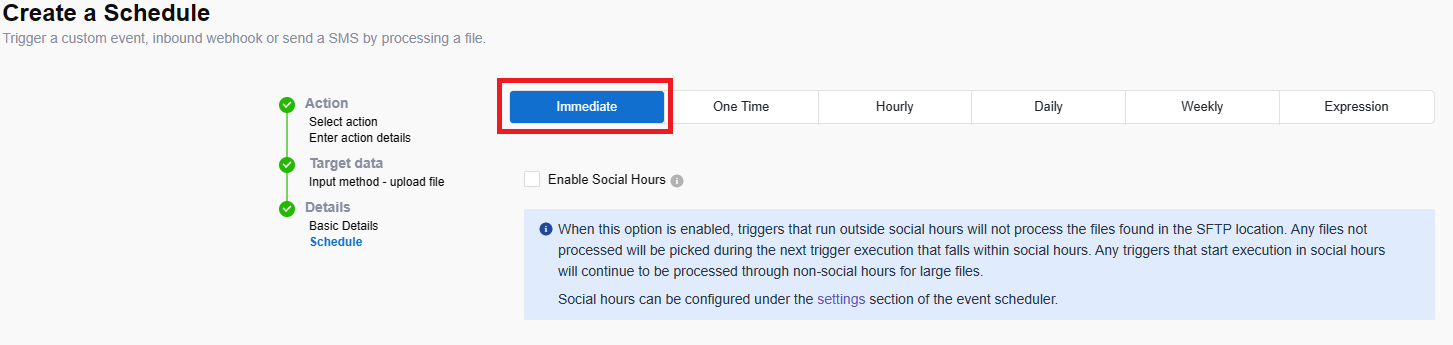
Schedule Immediate (executes ~2 min later) → Save
Lab 12.18 — Inbound Webhooks
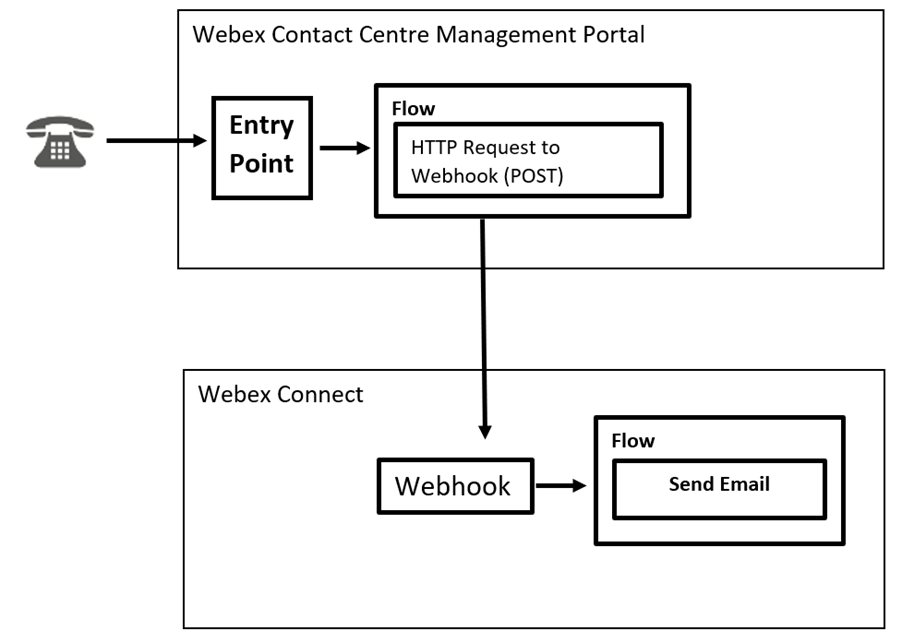
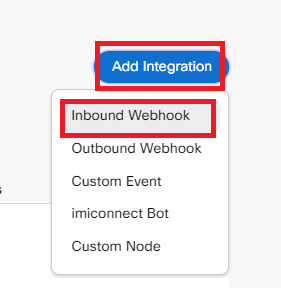
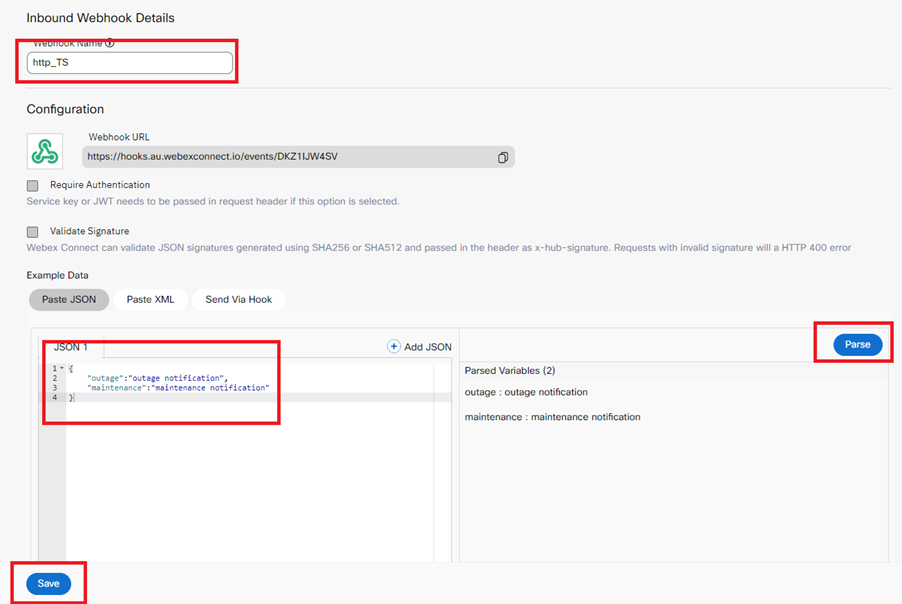
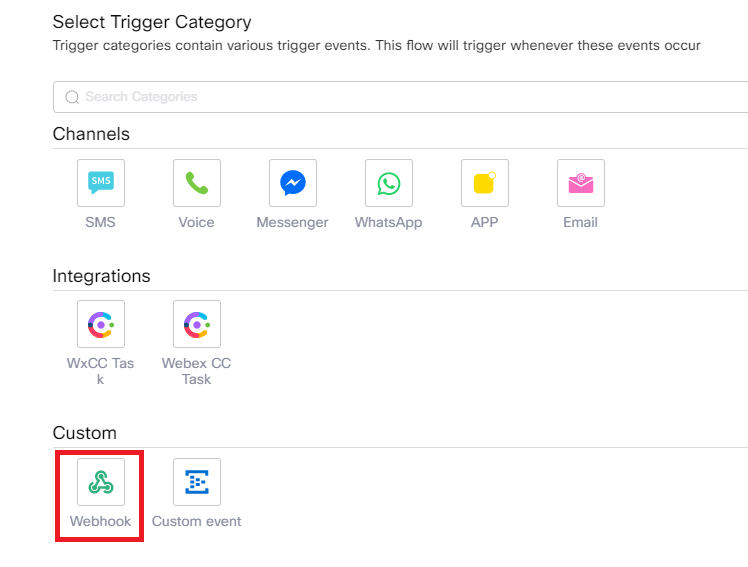
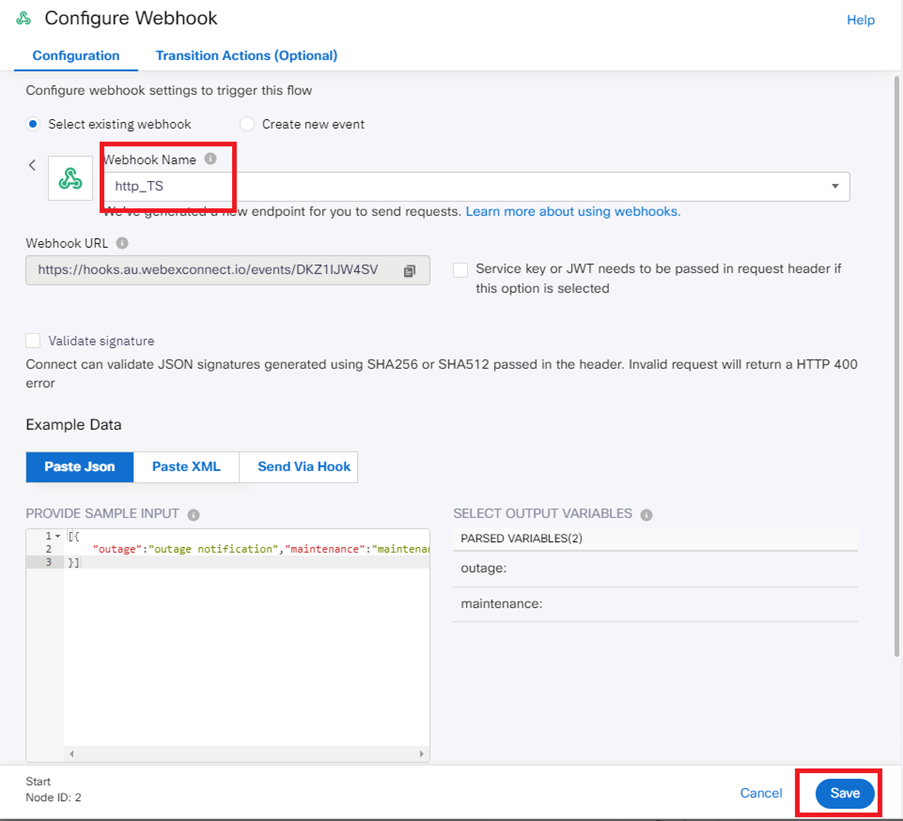
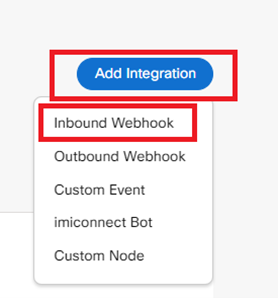
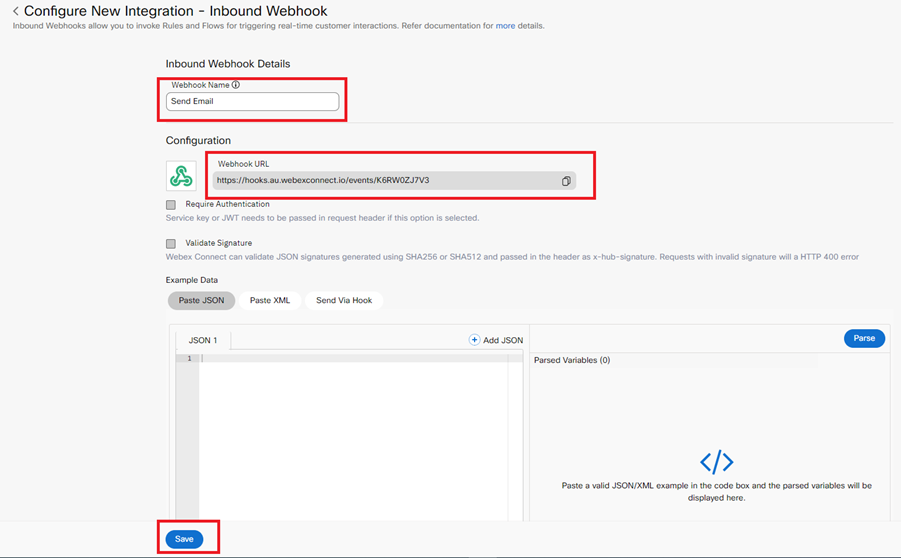
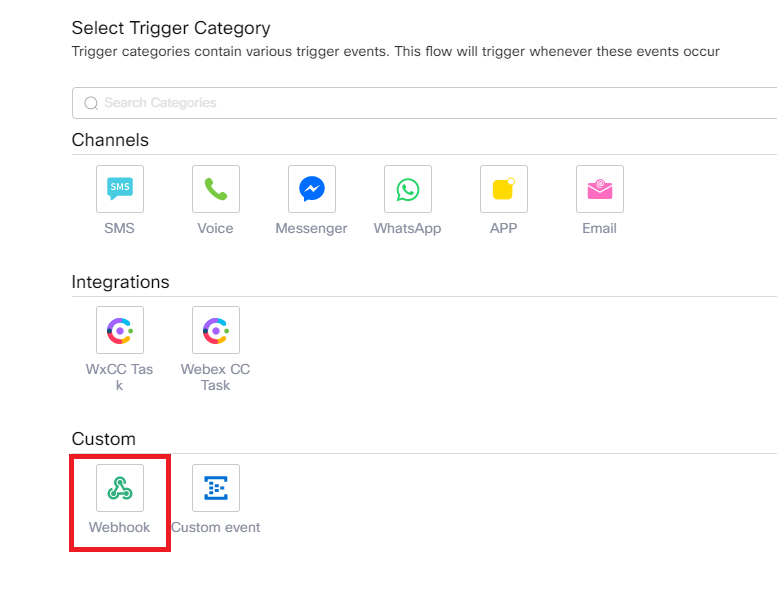
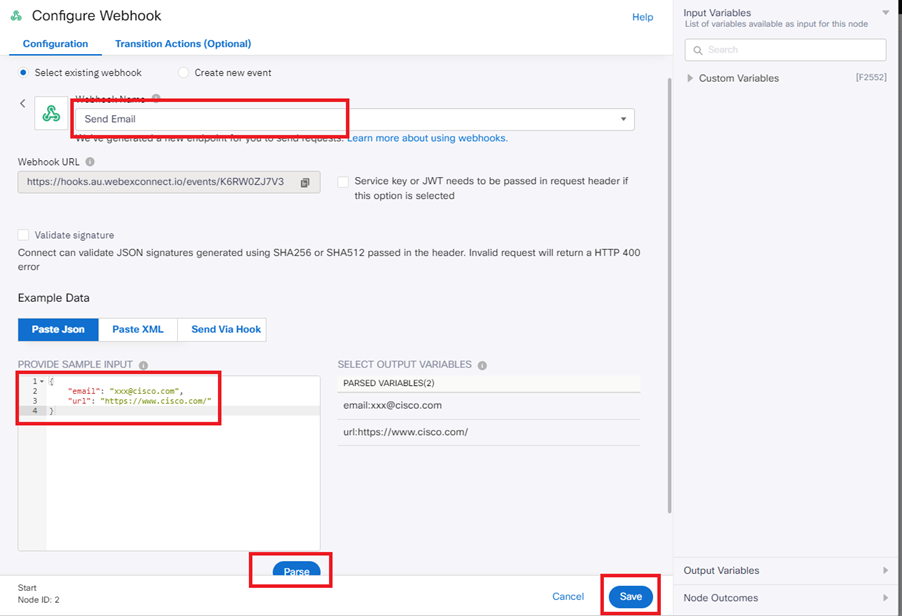
Inbound Webhooks generate a unique endpoint that can be embedded into your applications to notify Webex Connect of events occurring on business systems.
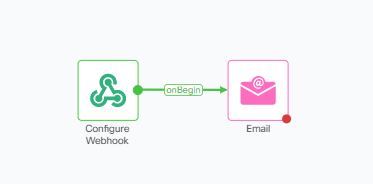
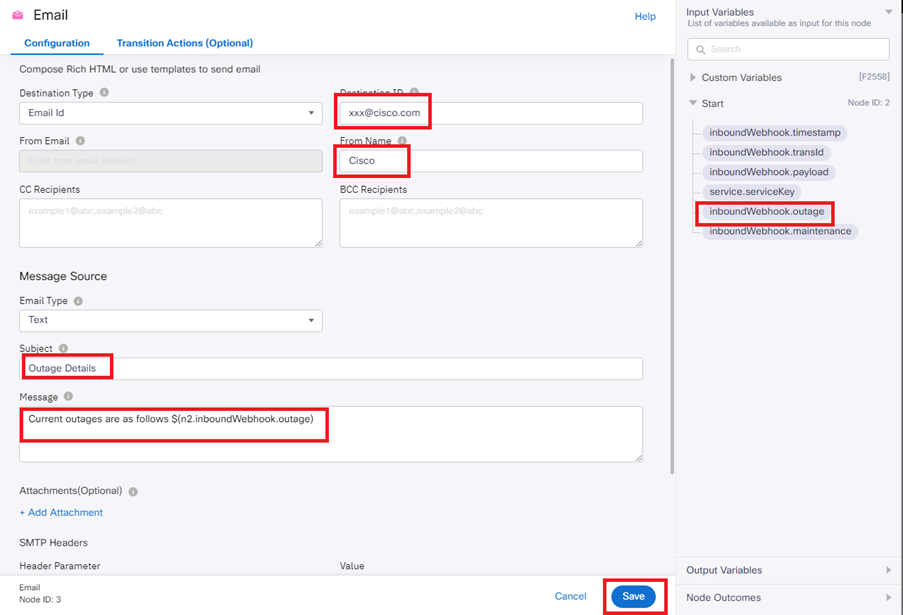
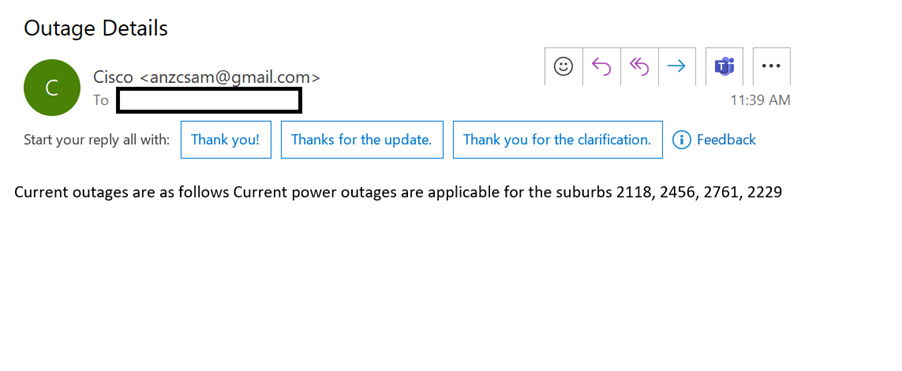
Use case for this lab: trigger an email to a customer that initiated contact through a voice call.
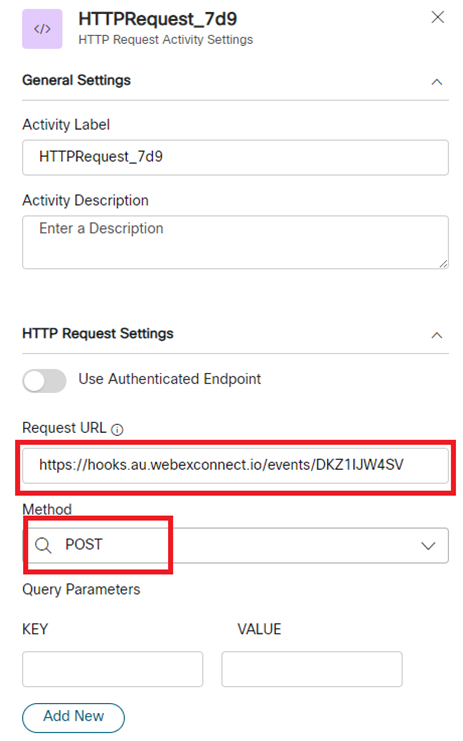
Simple flow: main menu prompt → caller presses 1 → http request node
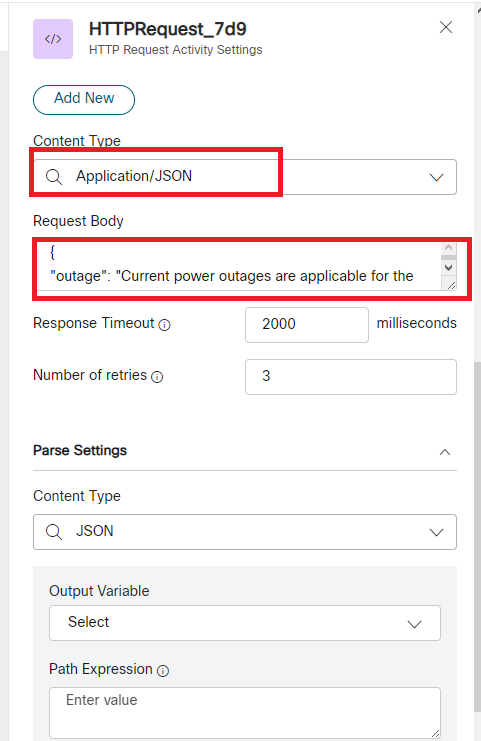
http request node triggers the Webhook with message in request body:
{
  "outage": "Current power outages are applicable for the suburbs 2118, 2456, 2761, 2229"
}
Save and publish flow
3. Testing the Inbound Webhook
Call the Entry point of the voice flow
Make selection → call disconnects
Check Destination Email box for the email
Lab 12.19 — Troubleshooting
1. Understanding of Webex Connect troubleshooting capabilities
Verify all configuration steps for digital channel have been completed successfully before troubleshooting.
Two troubleshooting tools:
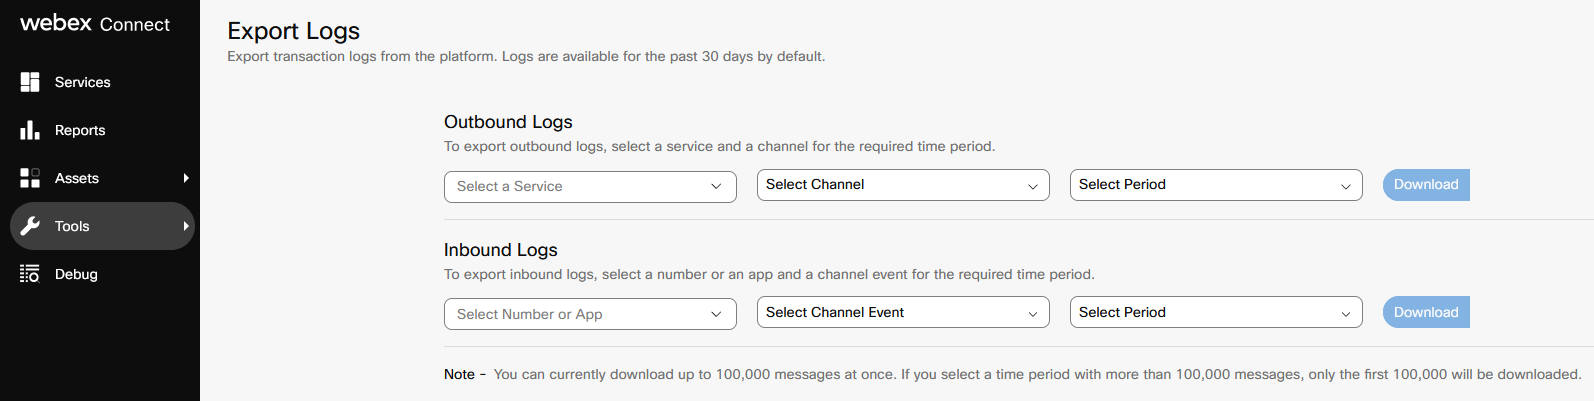
Export Logs tool
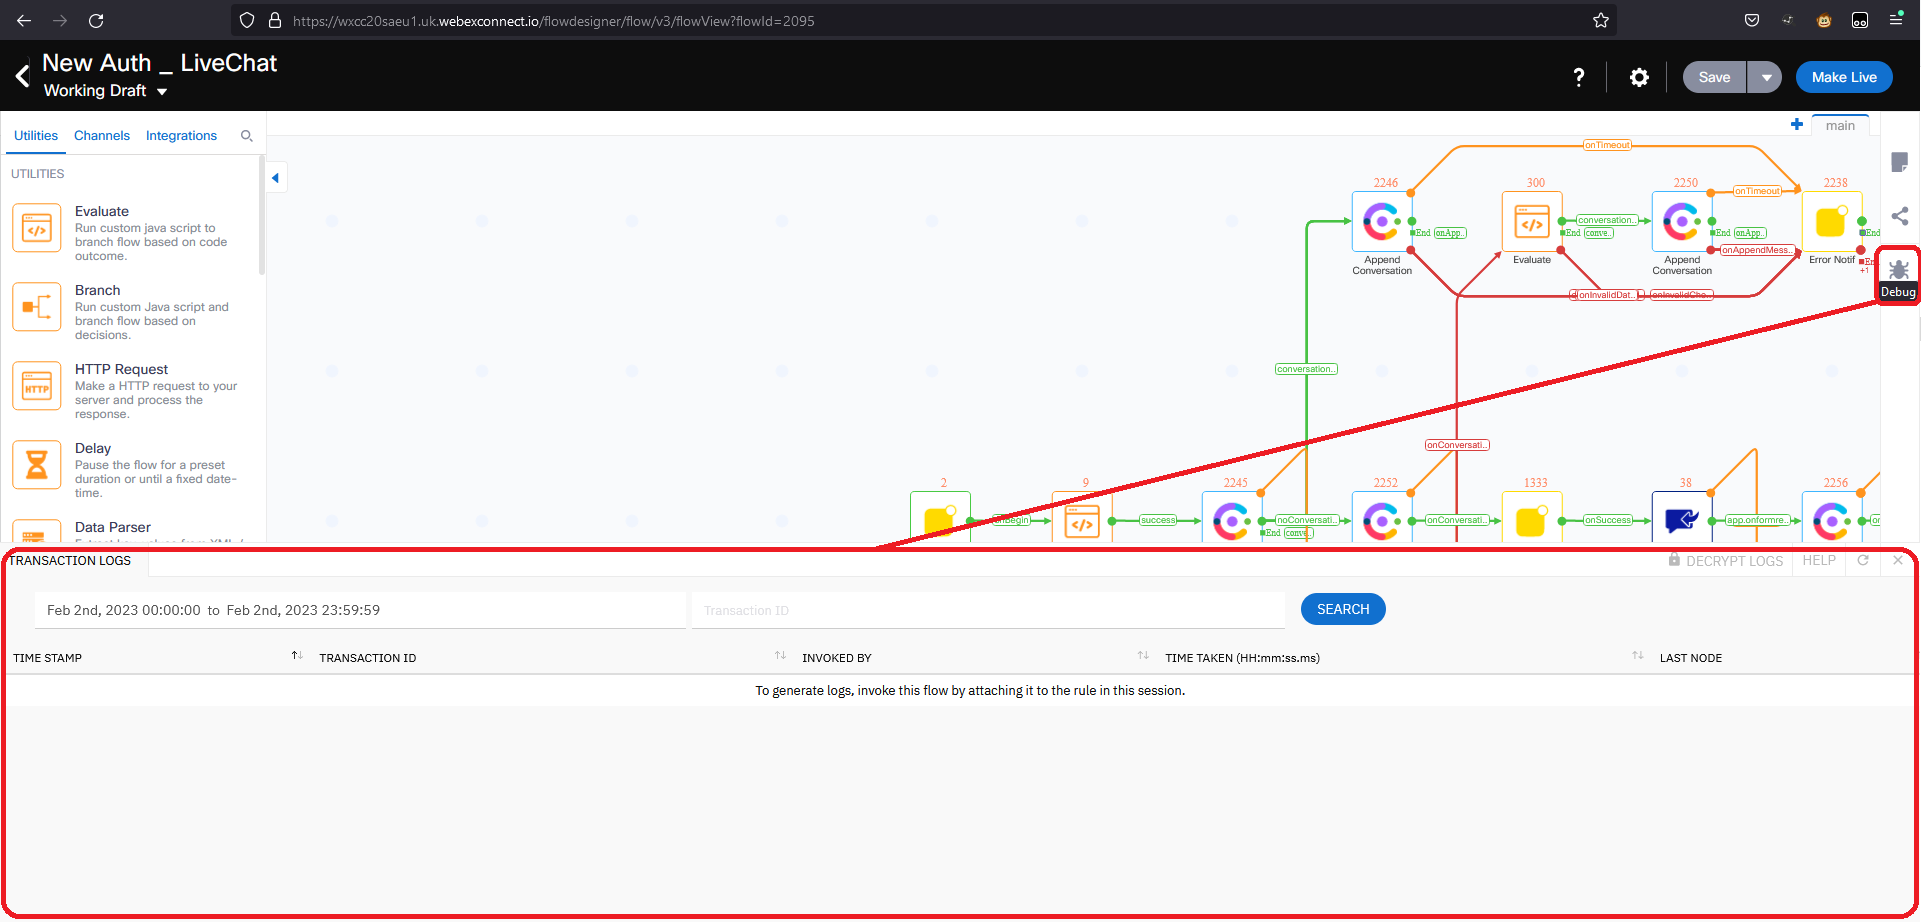
Flow Debugger built into the flow builder
1.1 Export Logs tool
Download inbound and outbound log events as XLSX for any Service/Asset/Digital Channel.
Connect Portal → Tools → Export Logs
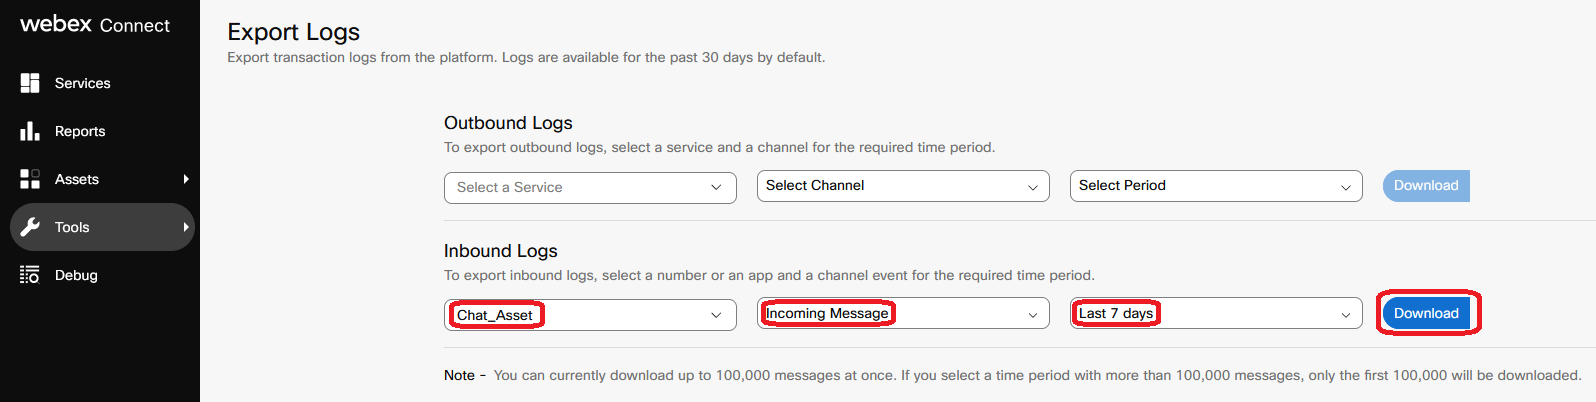
Example: download all incoming messages received via Chat_Asset for the last 7 days:
Parameter
Value
Number or App
Chat_asset
Channel Event
Incoming Message
Period
Last 7 days
Log file shows all inbound events, including timestamps, IDs, message text.
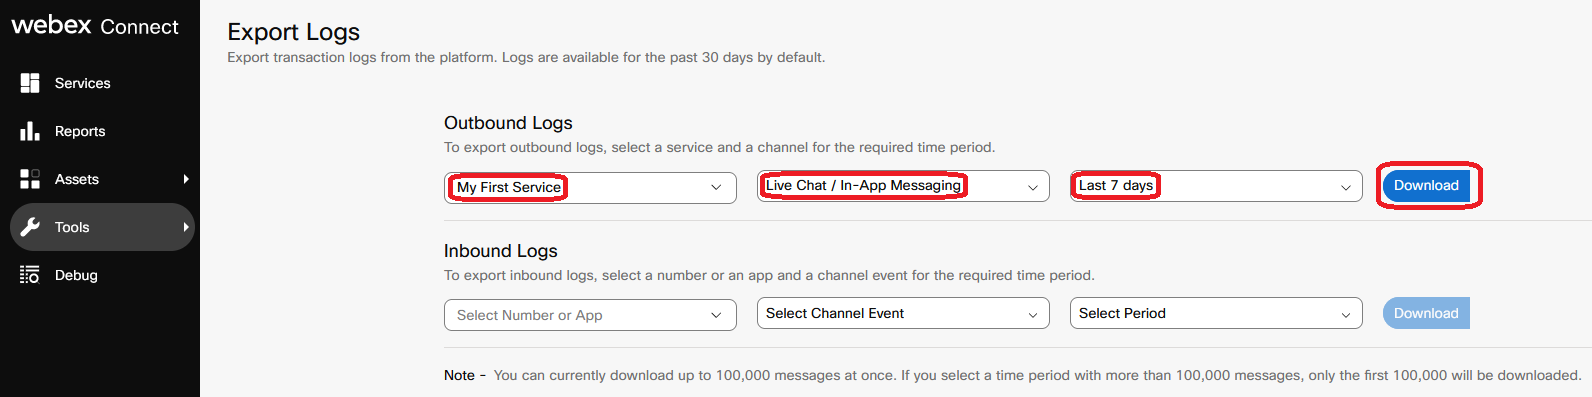
For outbound: select Service My First Service, Channel Live Chat / In-App Messaging, Period Last 7 days
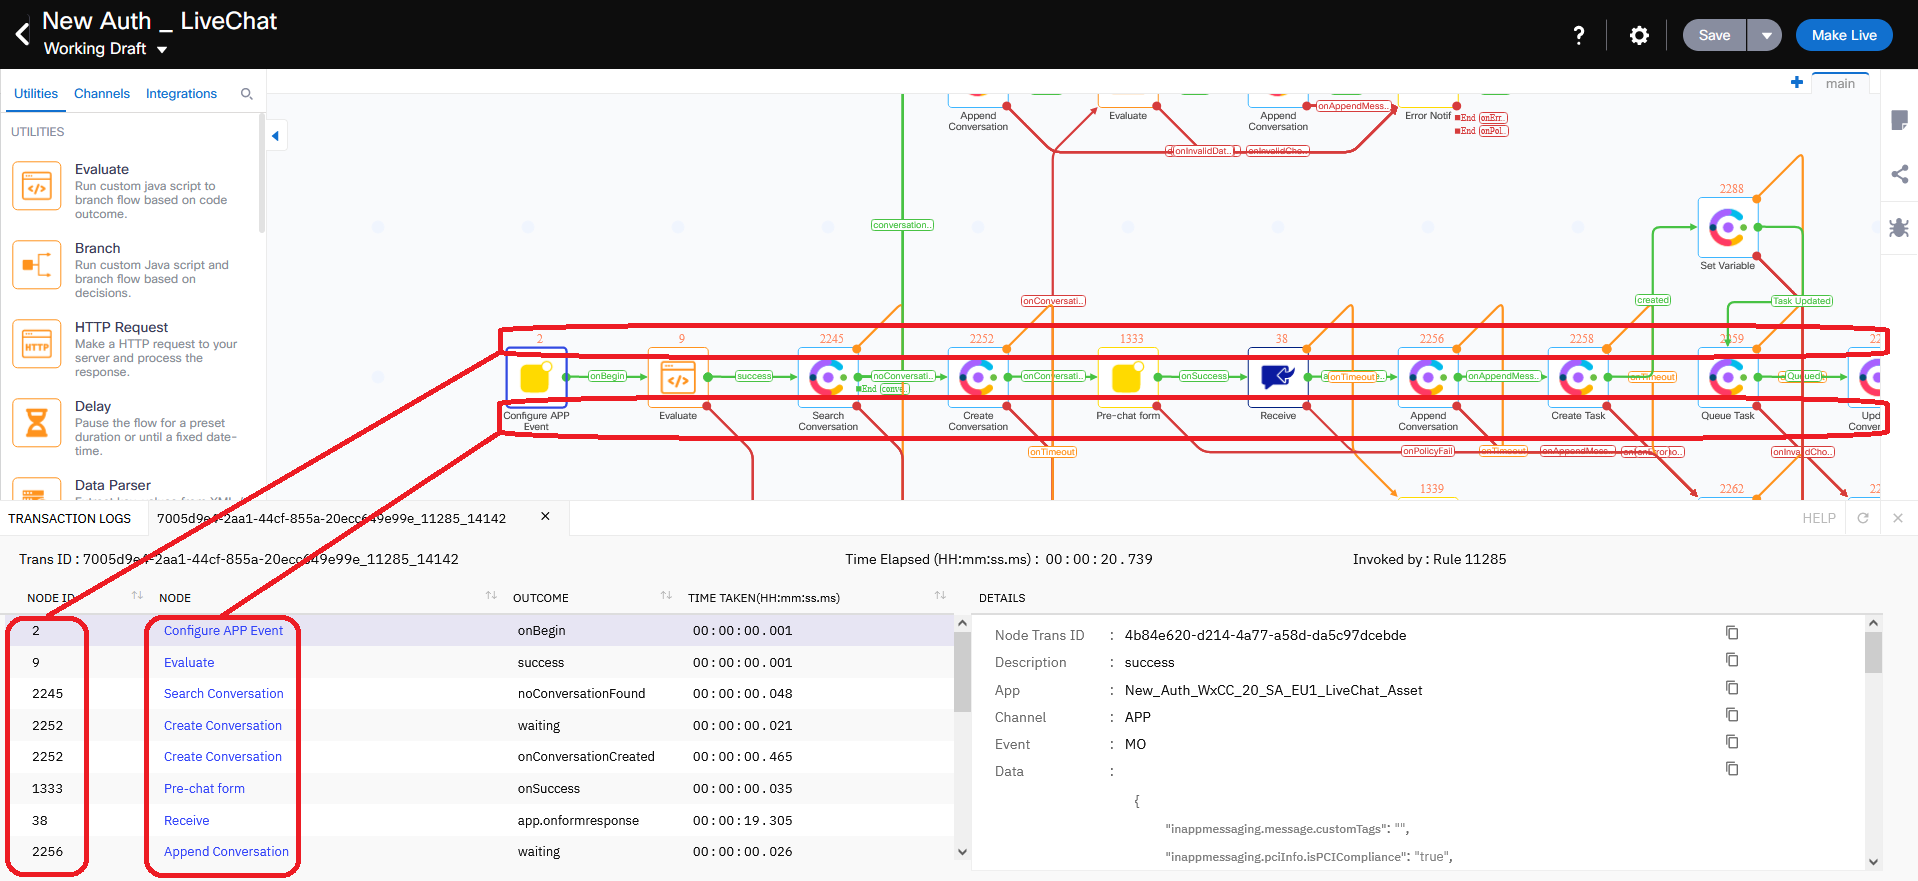
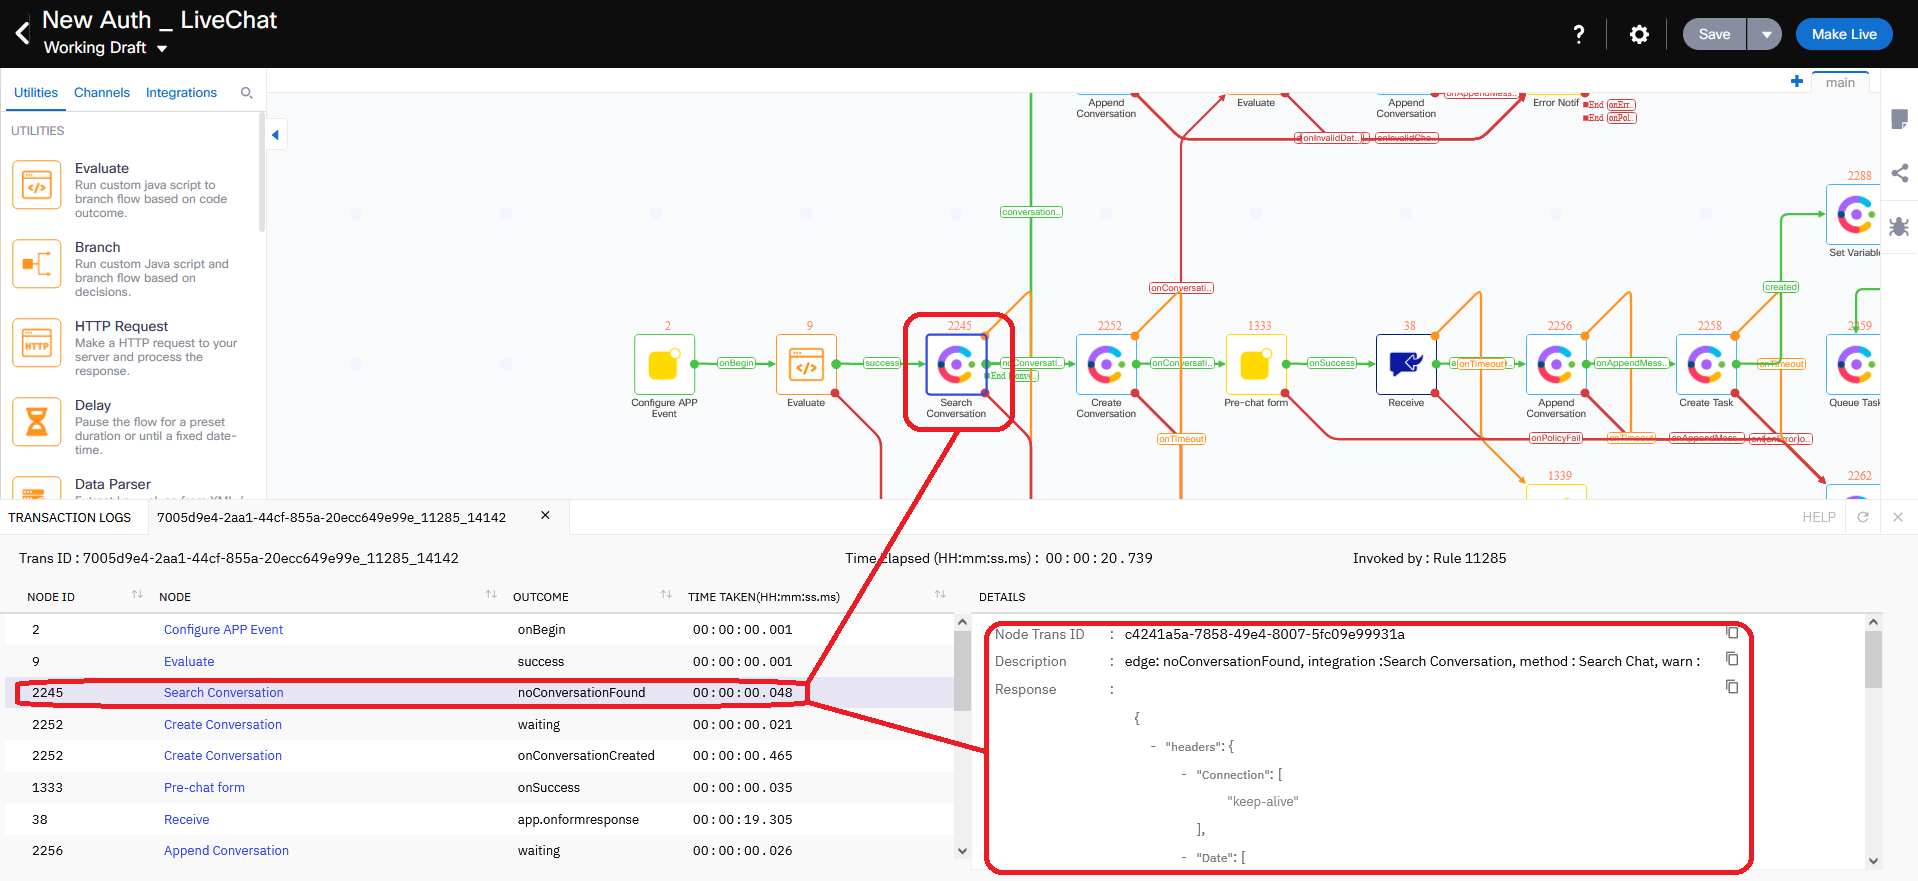
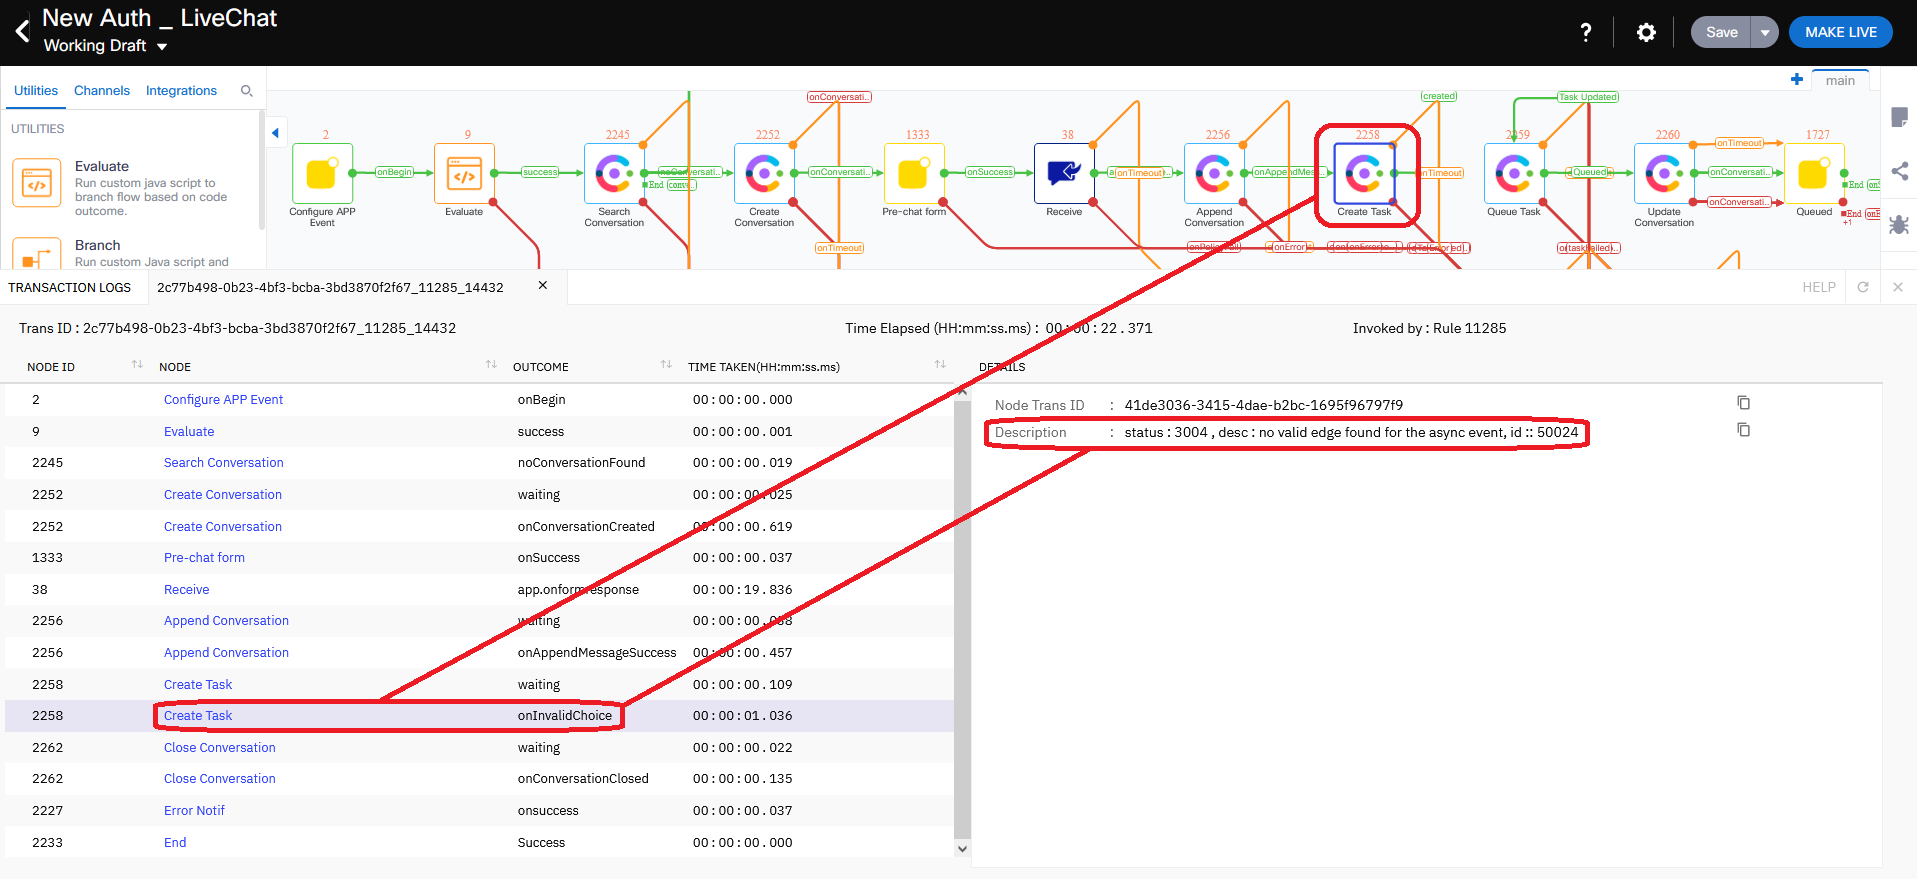
1.2 Flow Debugger
Tracks flow execution from beginning to end. Capabilities:
Search by timestamp or Transaction ID
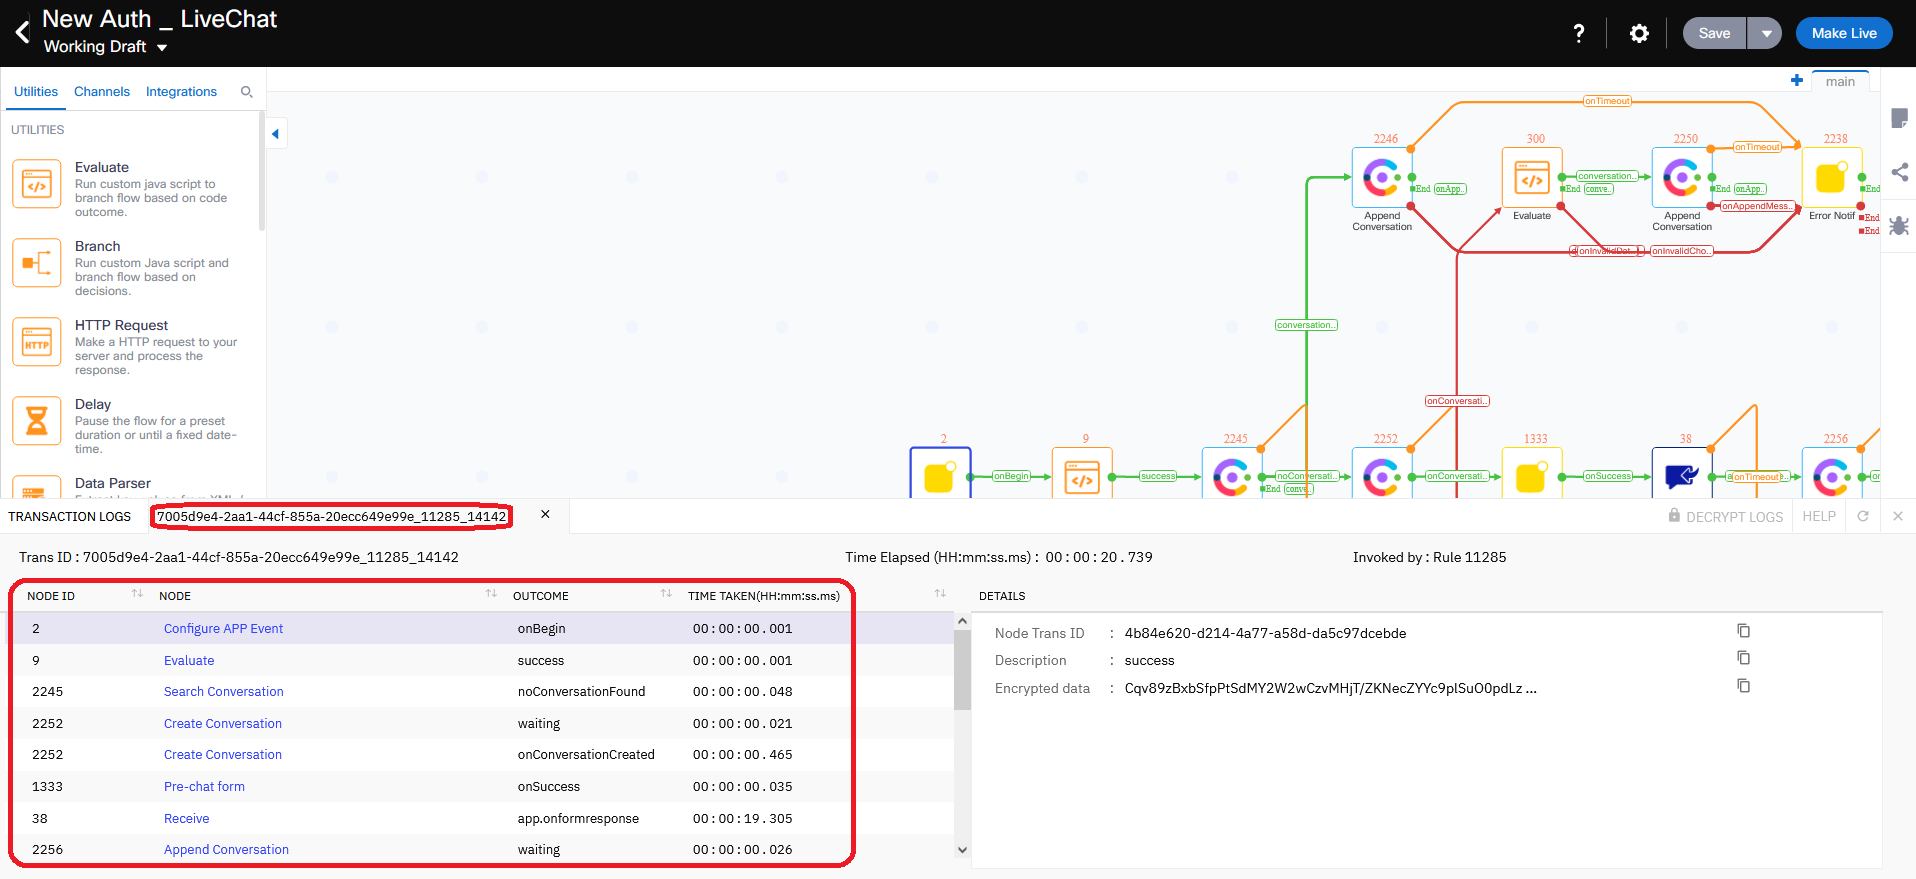
Shows result of executing each node as a list
Adds unique IDs to nodes on canvas
Shows parameters used when calling each node
Shows responses returned by each node
Shows variables created by admin for troubleshooting
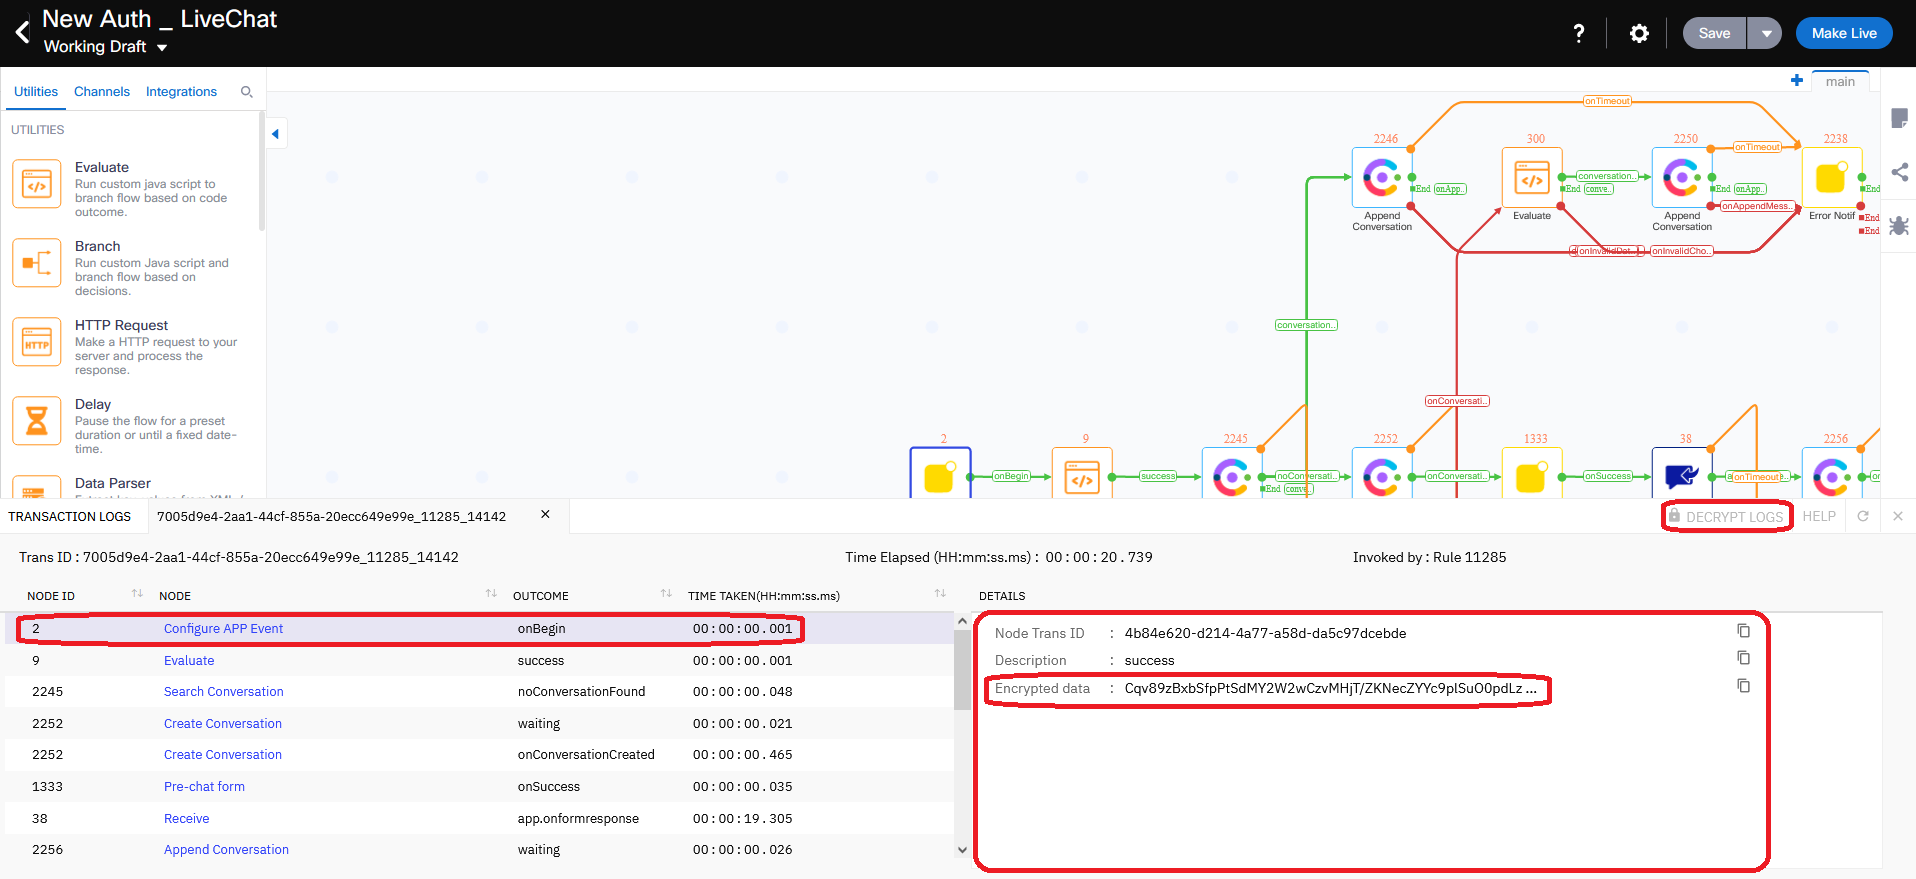
Debugging details are encrypted by default. Admin needs Decryption Access permission to decrypt.
Owner has Decryption Access by default. Other admins need it granted.
Select affected app/asset in Asset Name dropdown → Save. Create asset and register if missing.
3.2 Engage authorization not working
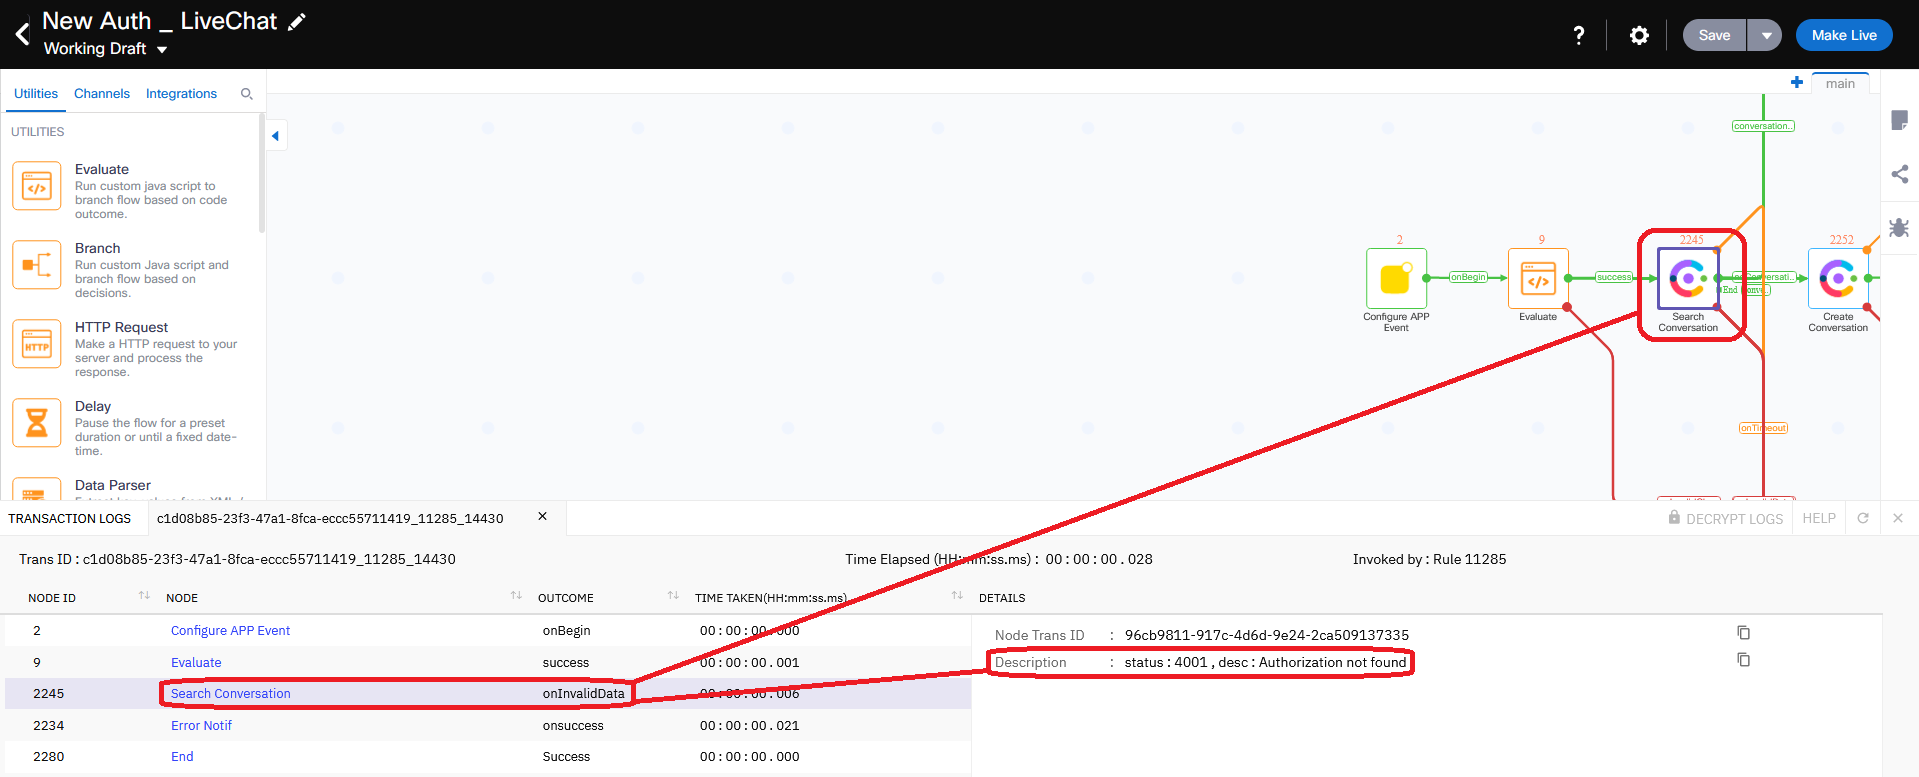
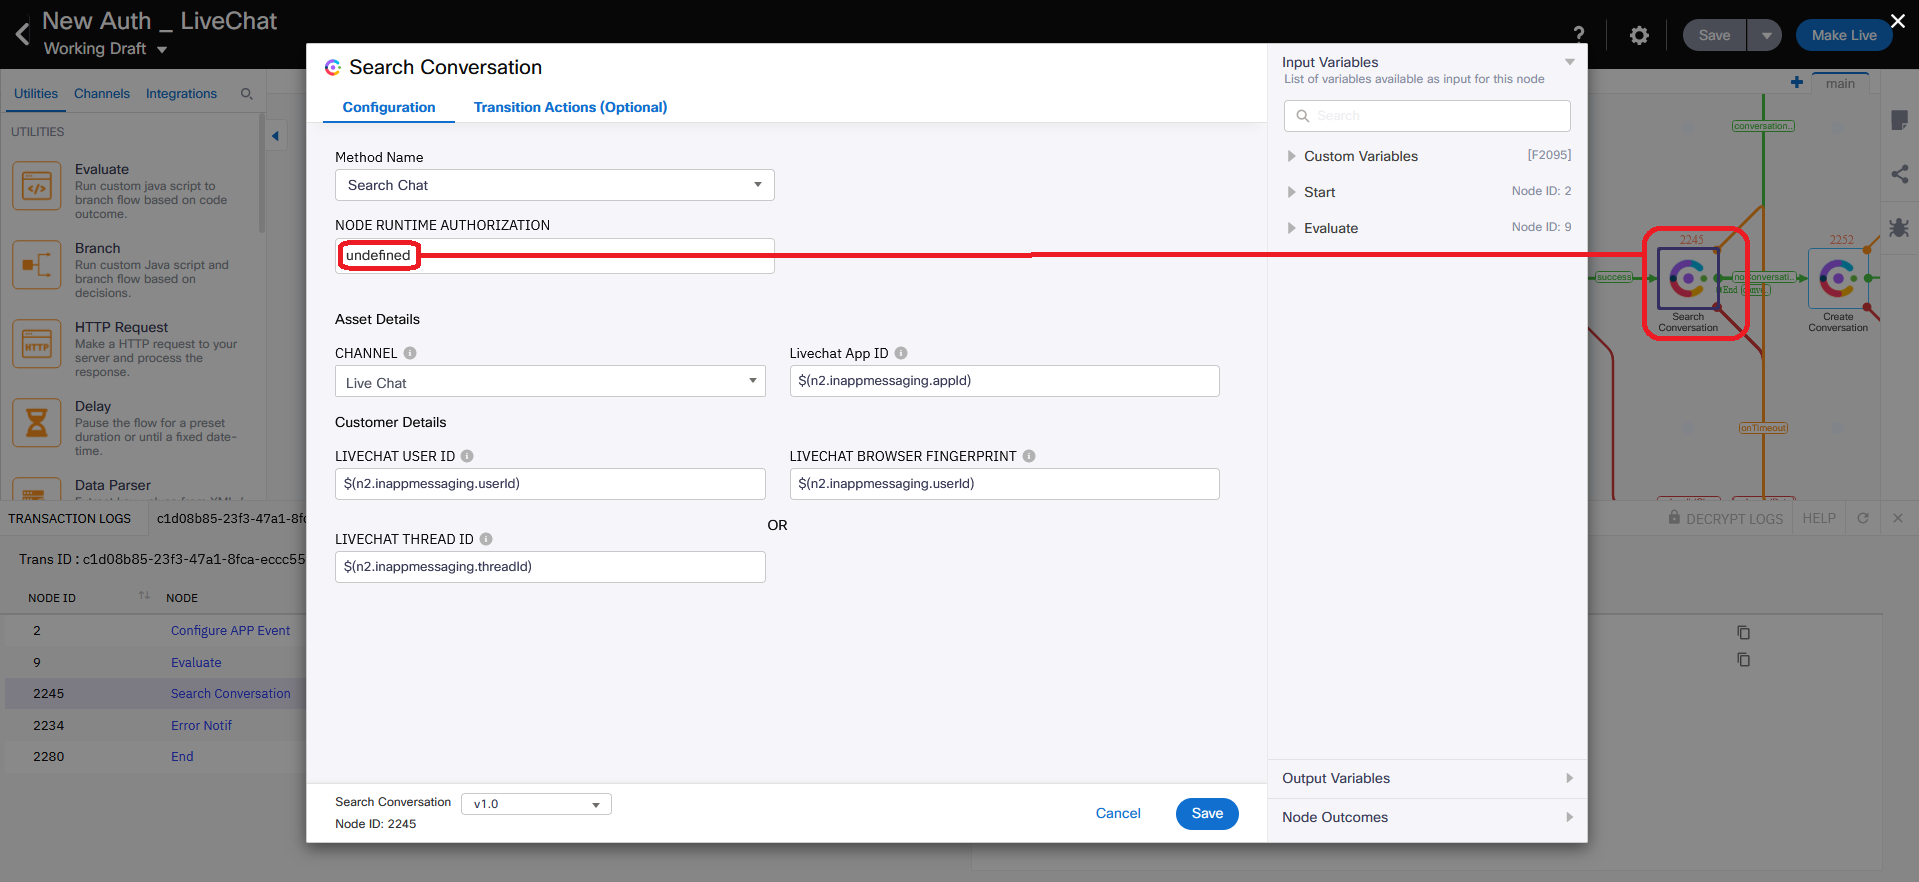
Error: onInvalidData next to Engage node, desc : Authorization not found in NODE RUNTIME AUTHORIZATION
Fixes:
If undefined value: authorization deleted → select another or create new
If incorrect: select proper value → Save and Make Live
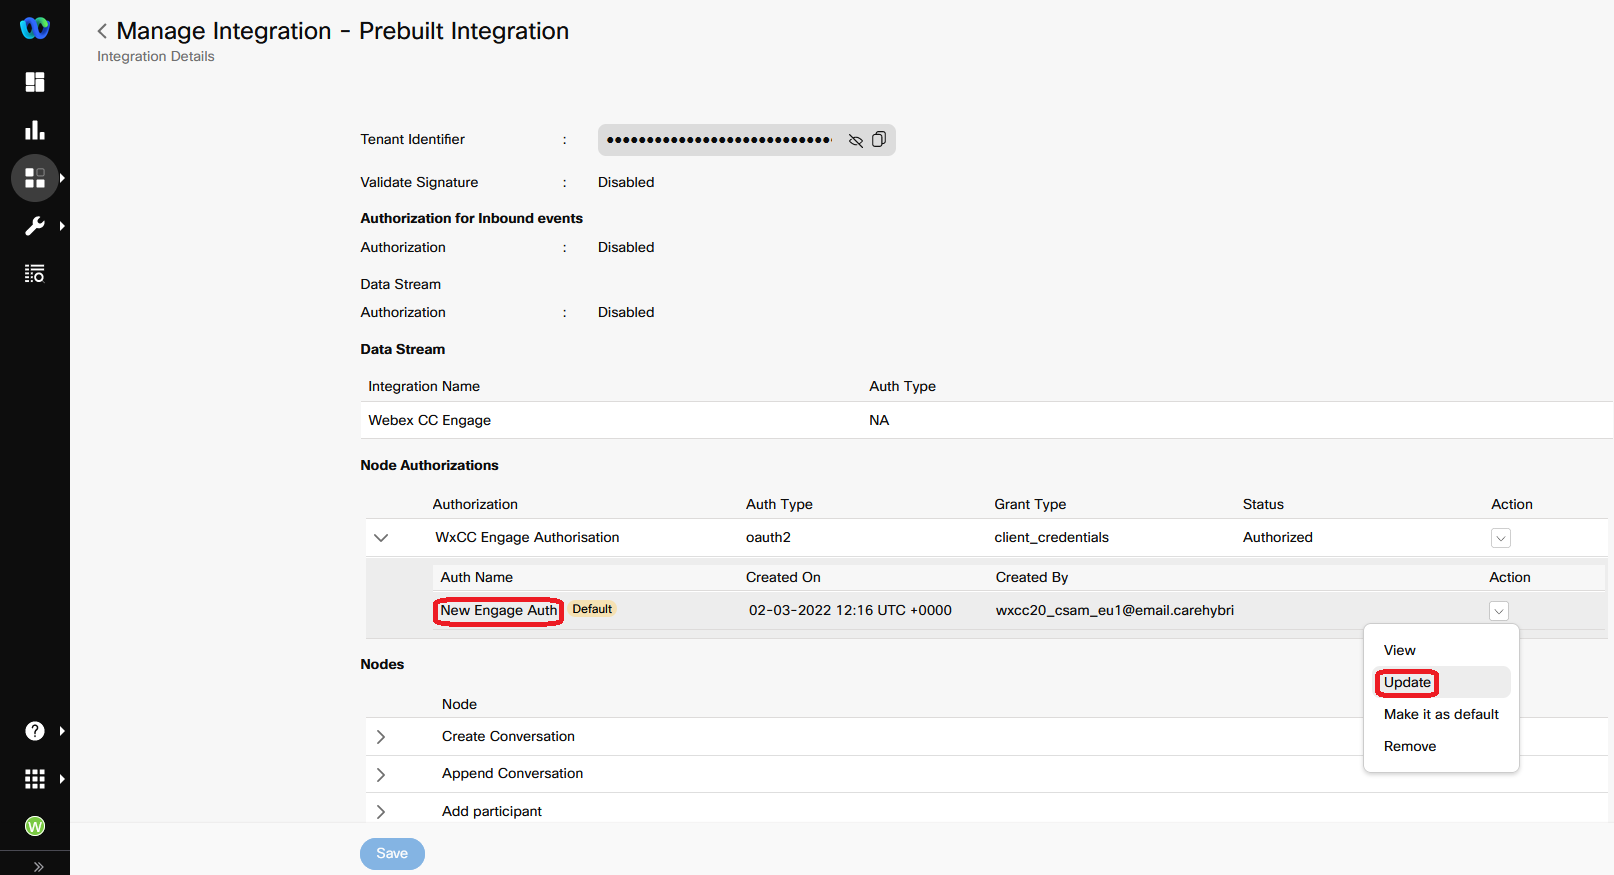
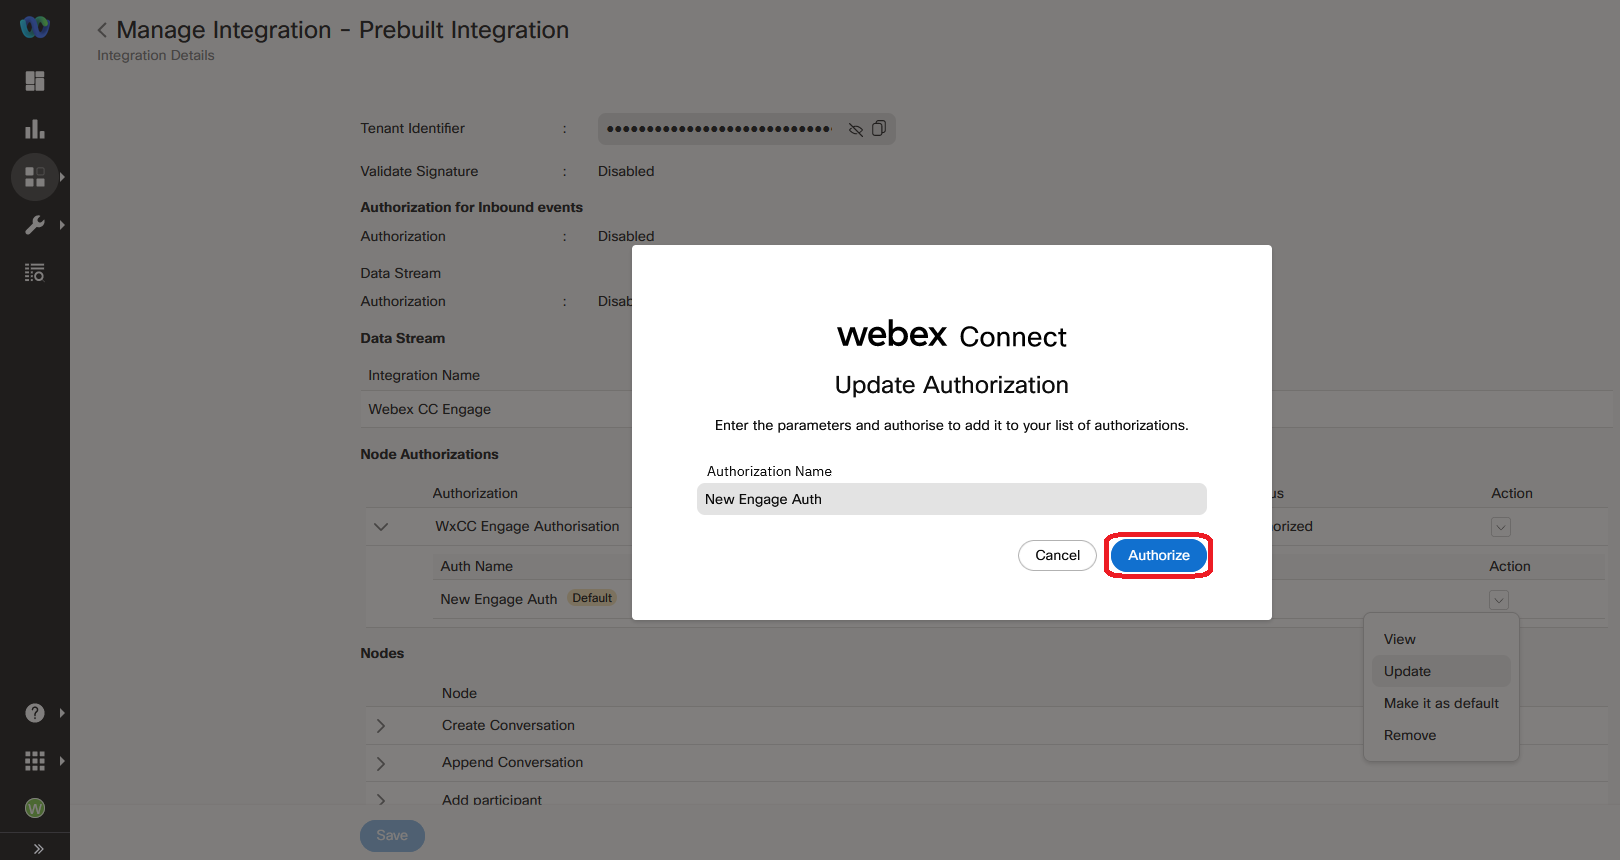
If correct but failing: Assets → Integrations → Webex CC Engage → Manage
Node Authorizations → arrow to expand → Actions → Update
Authorize in pop-up → provide credentials
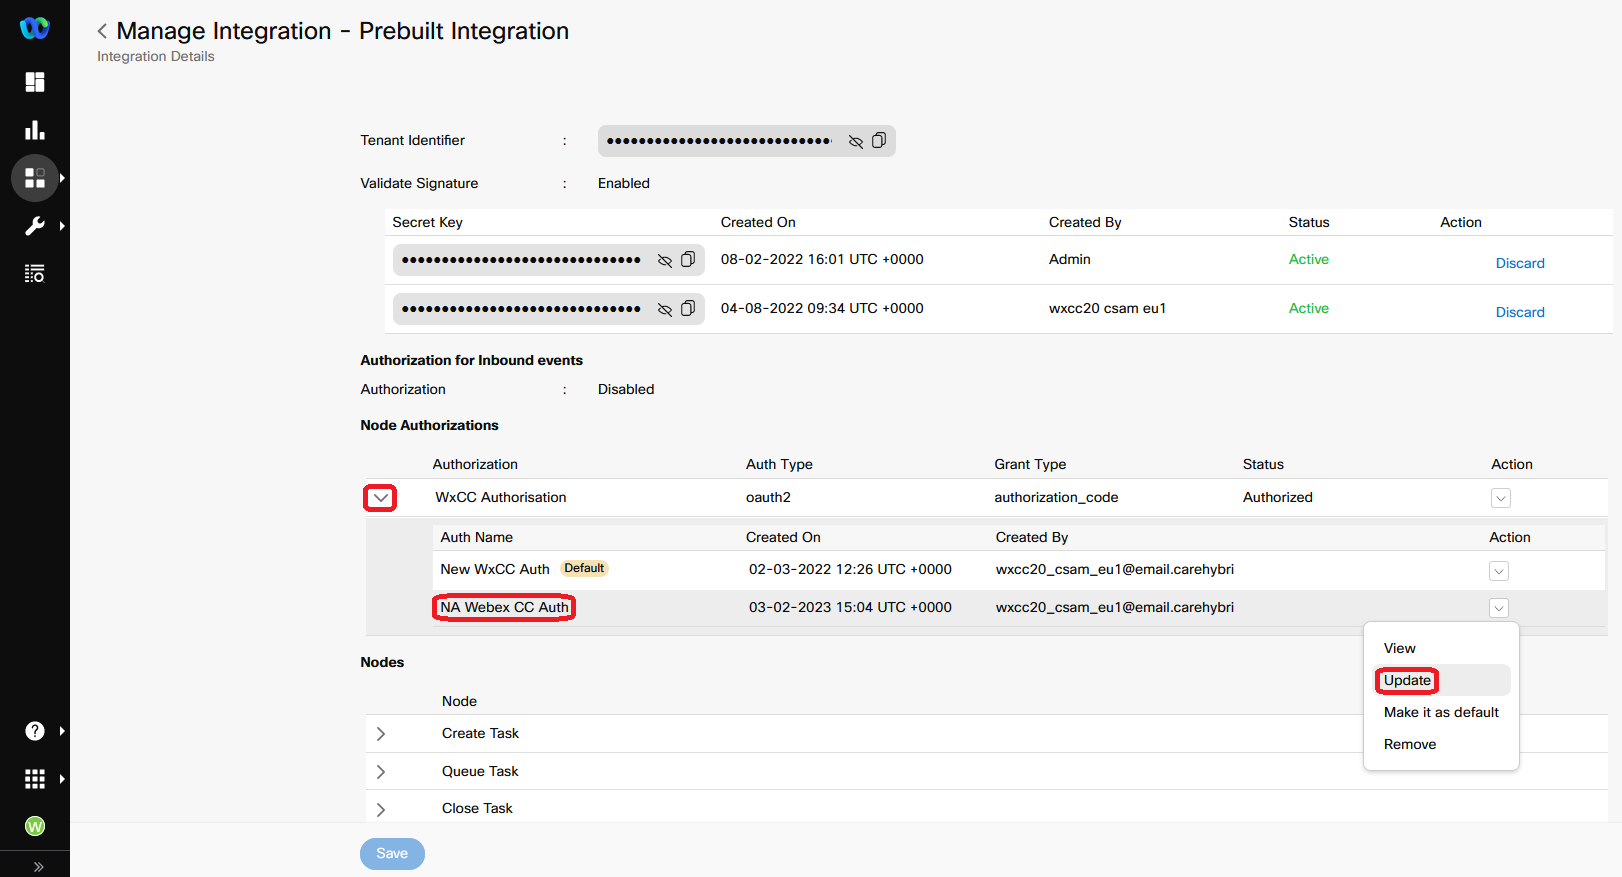
3.3 Webex CC authorization not working
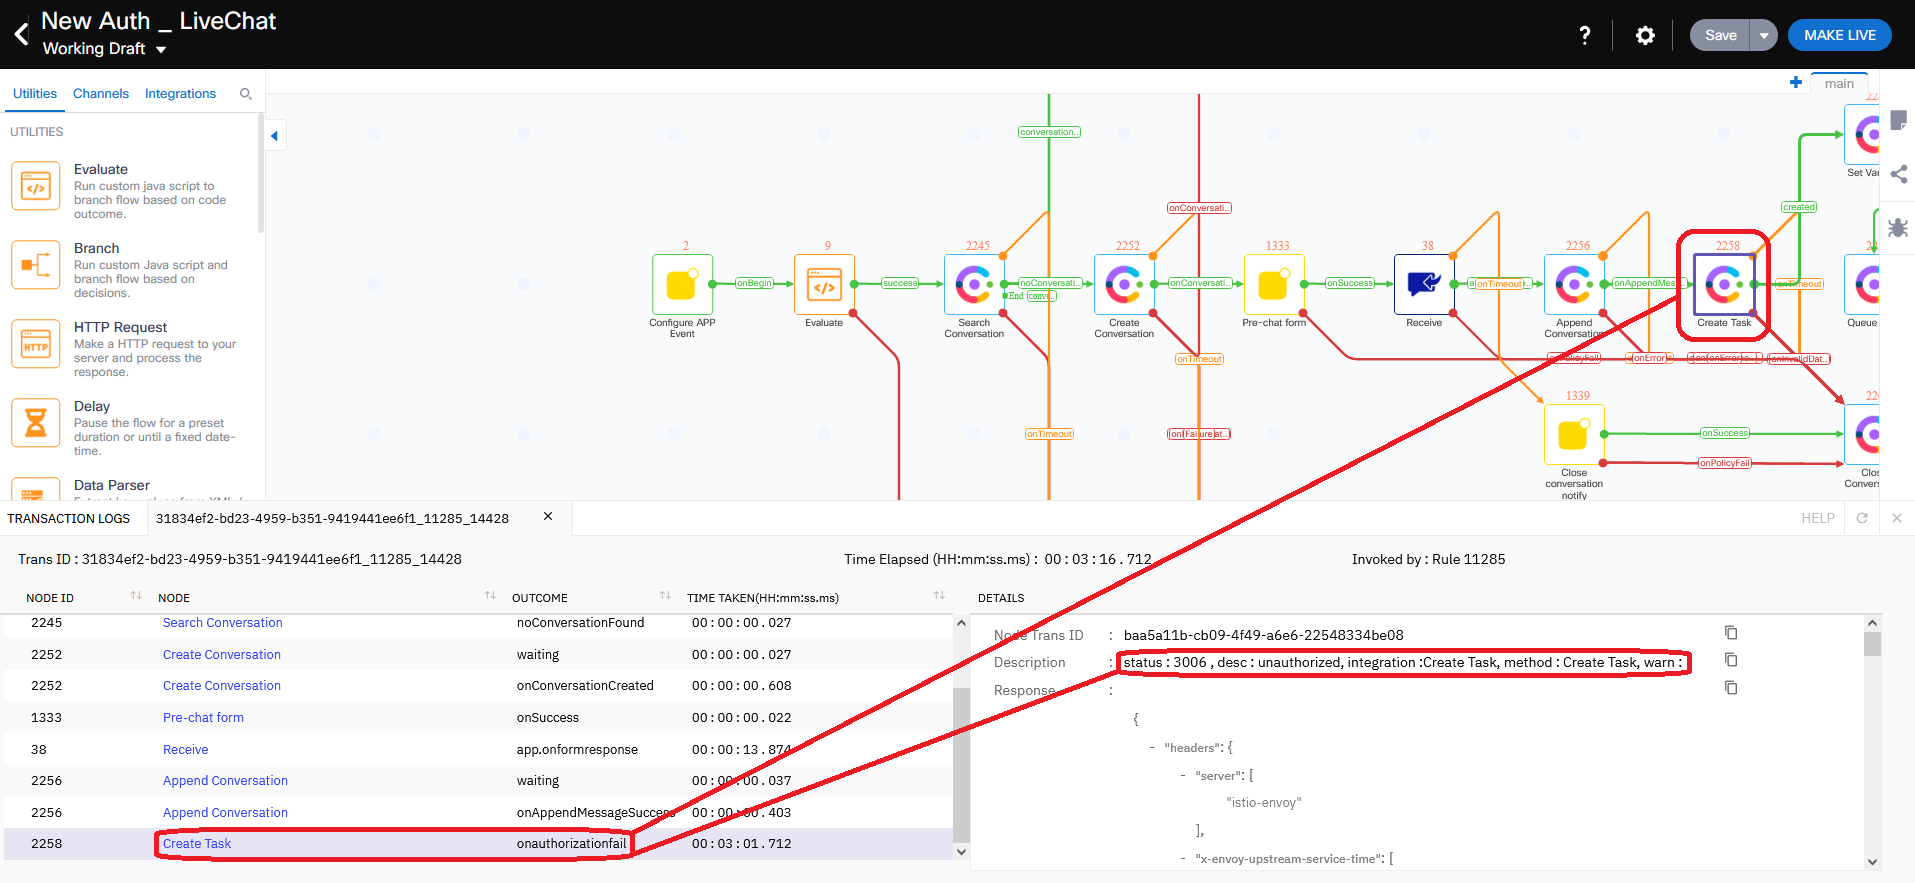
Error: onauthorizationfail next to Webex CC node, desc : unauthorized, integration :Create Task, method : Create Task
Fixes:
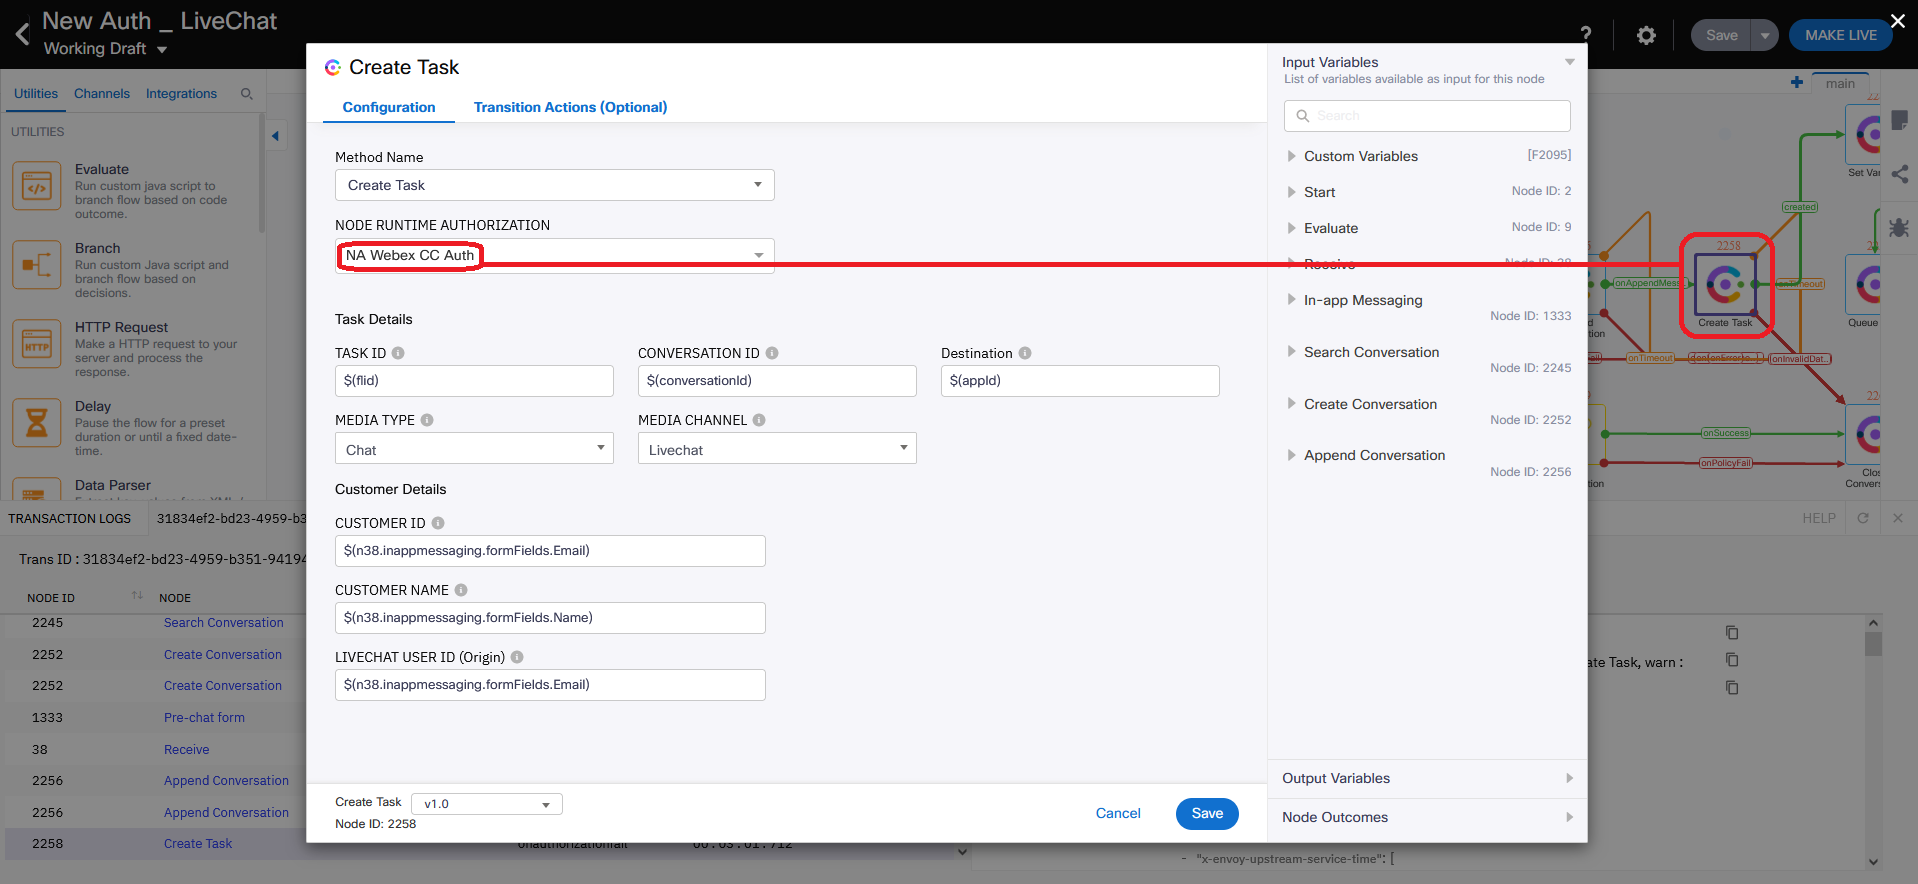
If incorrect authorization selected: select proper value → Save and Make Live
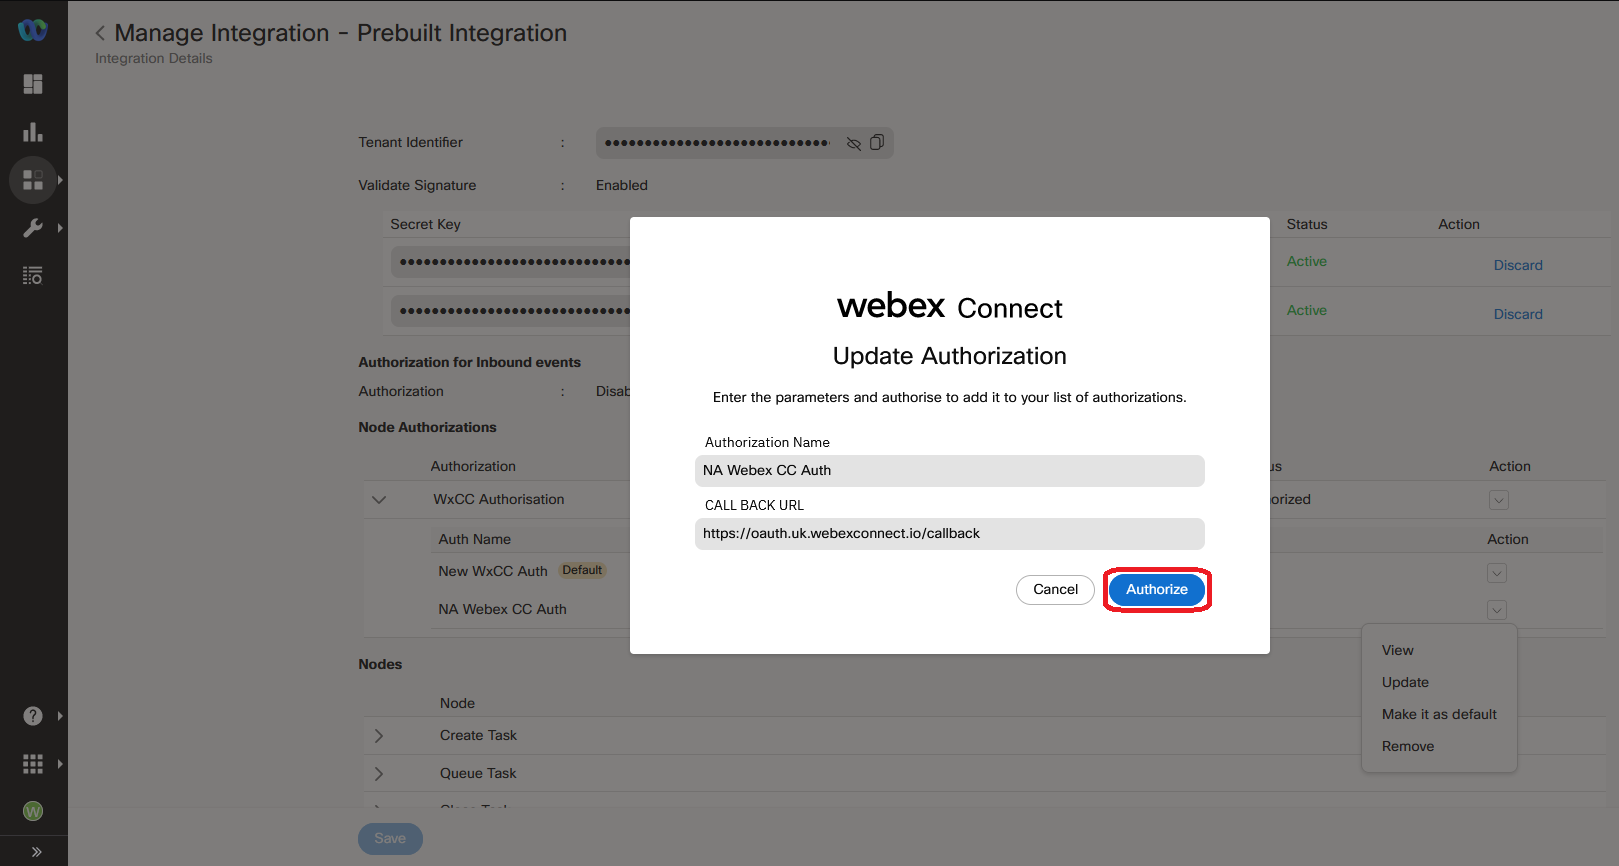
If correct but failing: verify account is active on Control Hub → Assets → Integrations → Webex CC Task → Manage
Node Authorizations → arrow to expand → Actions → Update
Authorize in pop-up
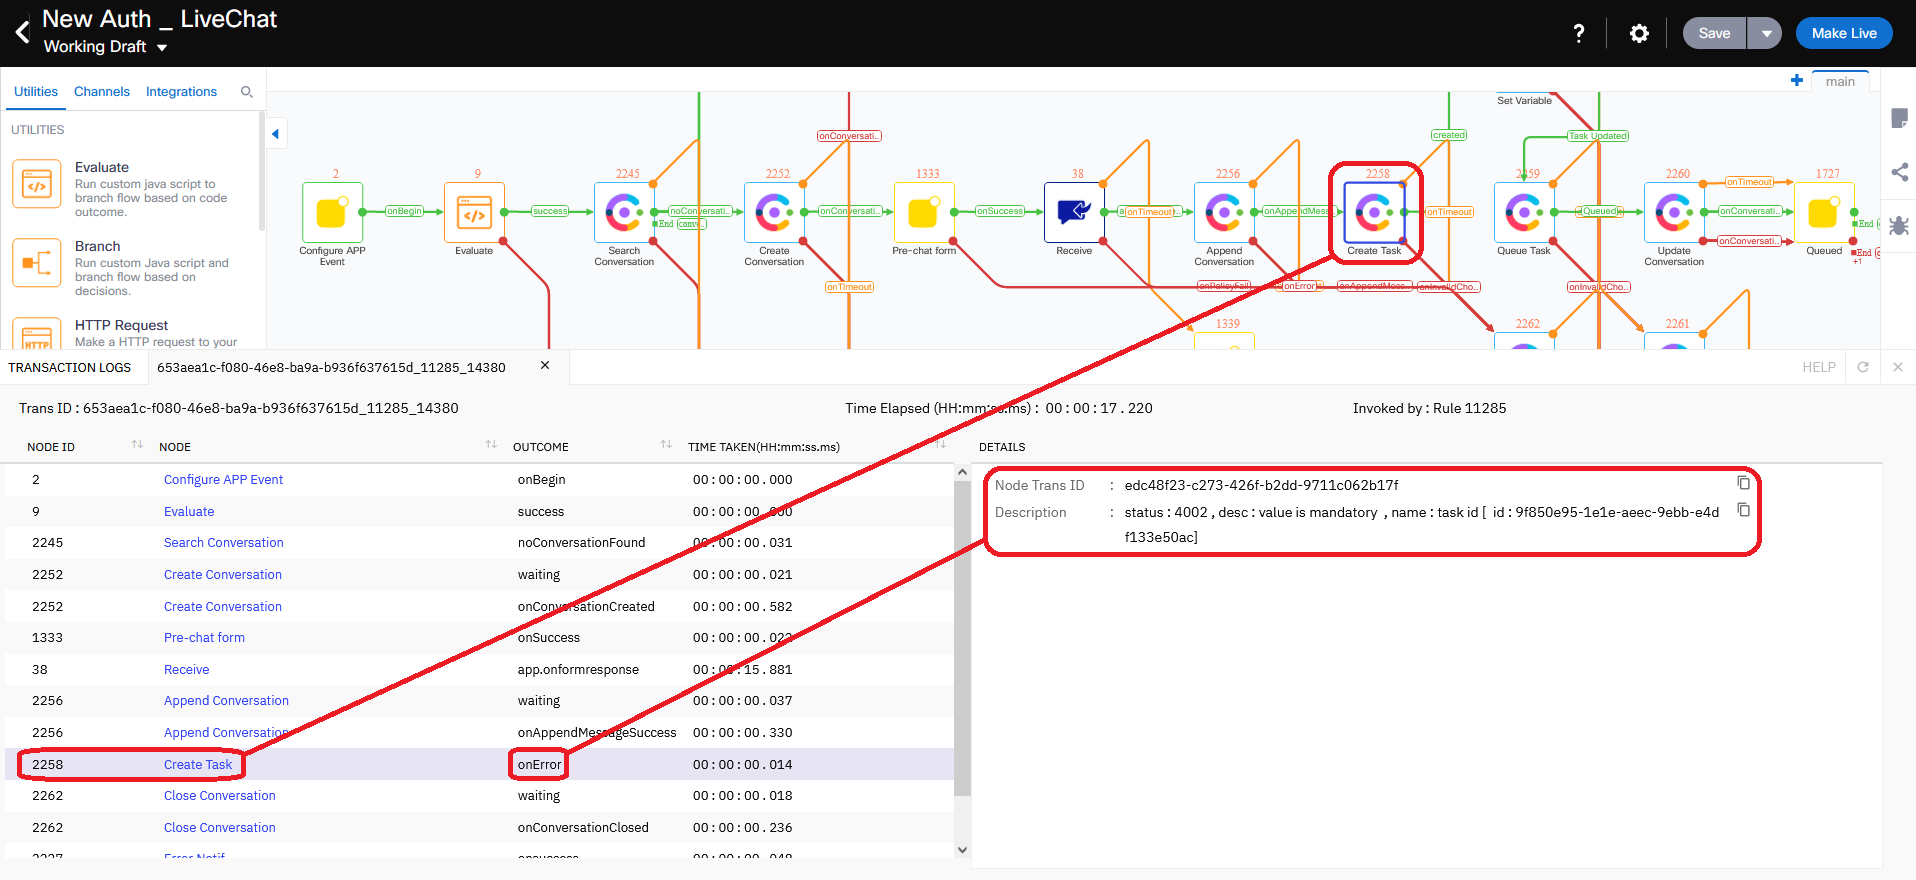
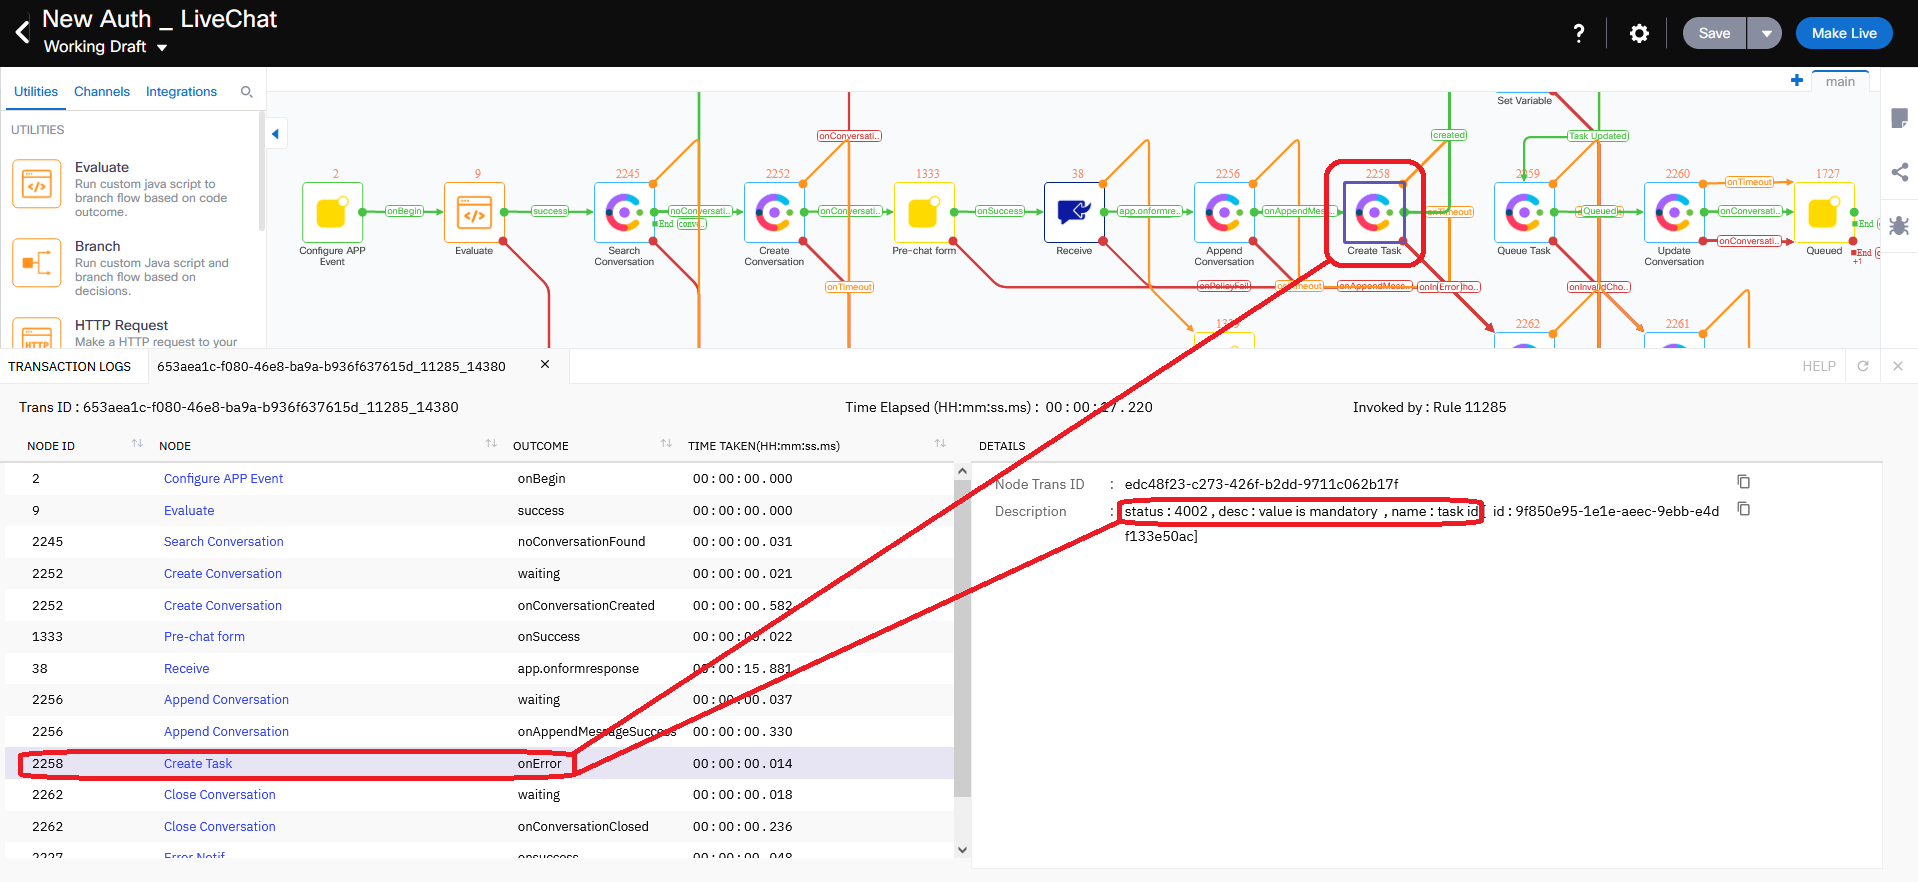
3.4 Variable does not exist or has an empty value
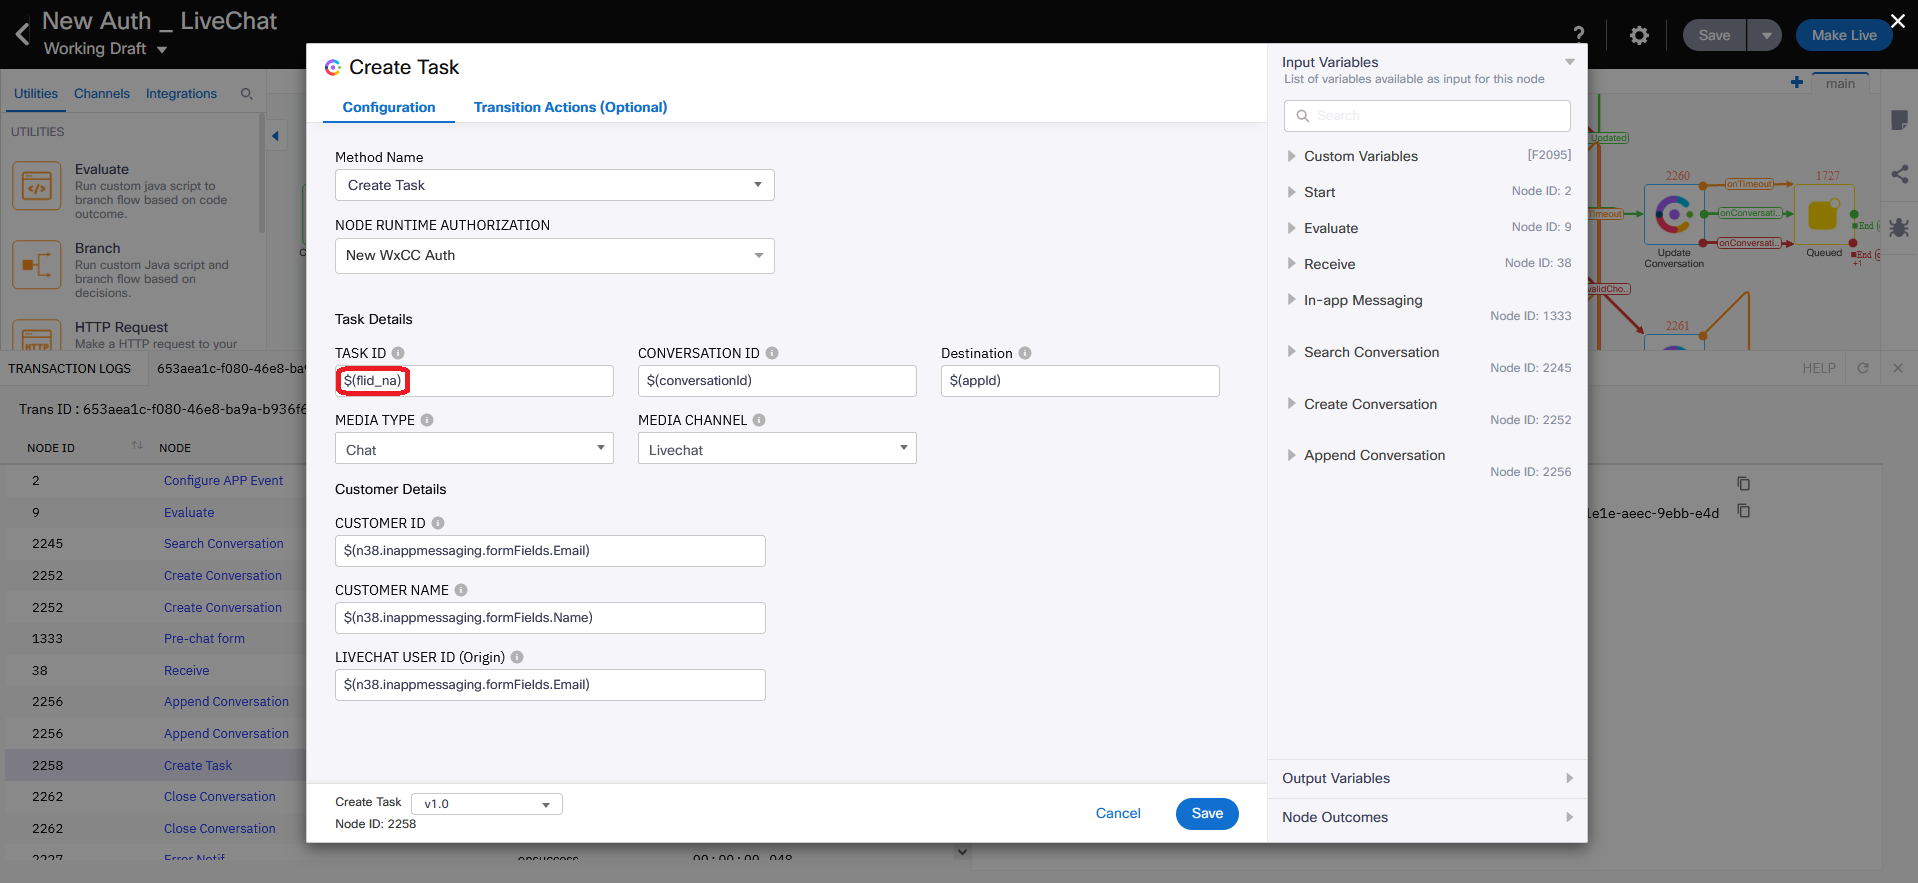
Error: onError next to Create Task node, desc : value is mandatory , name : task id
Example: TASK ID parameter has variable $(flid_na) which doesn't exist
Fixes:
Correct variable name if wrong, verify value
Create variable if missing
[Not flexible] Replace variable with exact value
3.5 Variable or parameter has wrong value
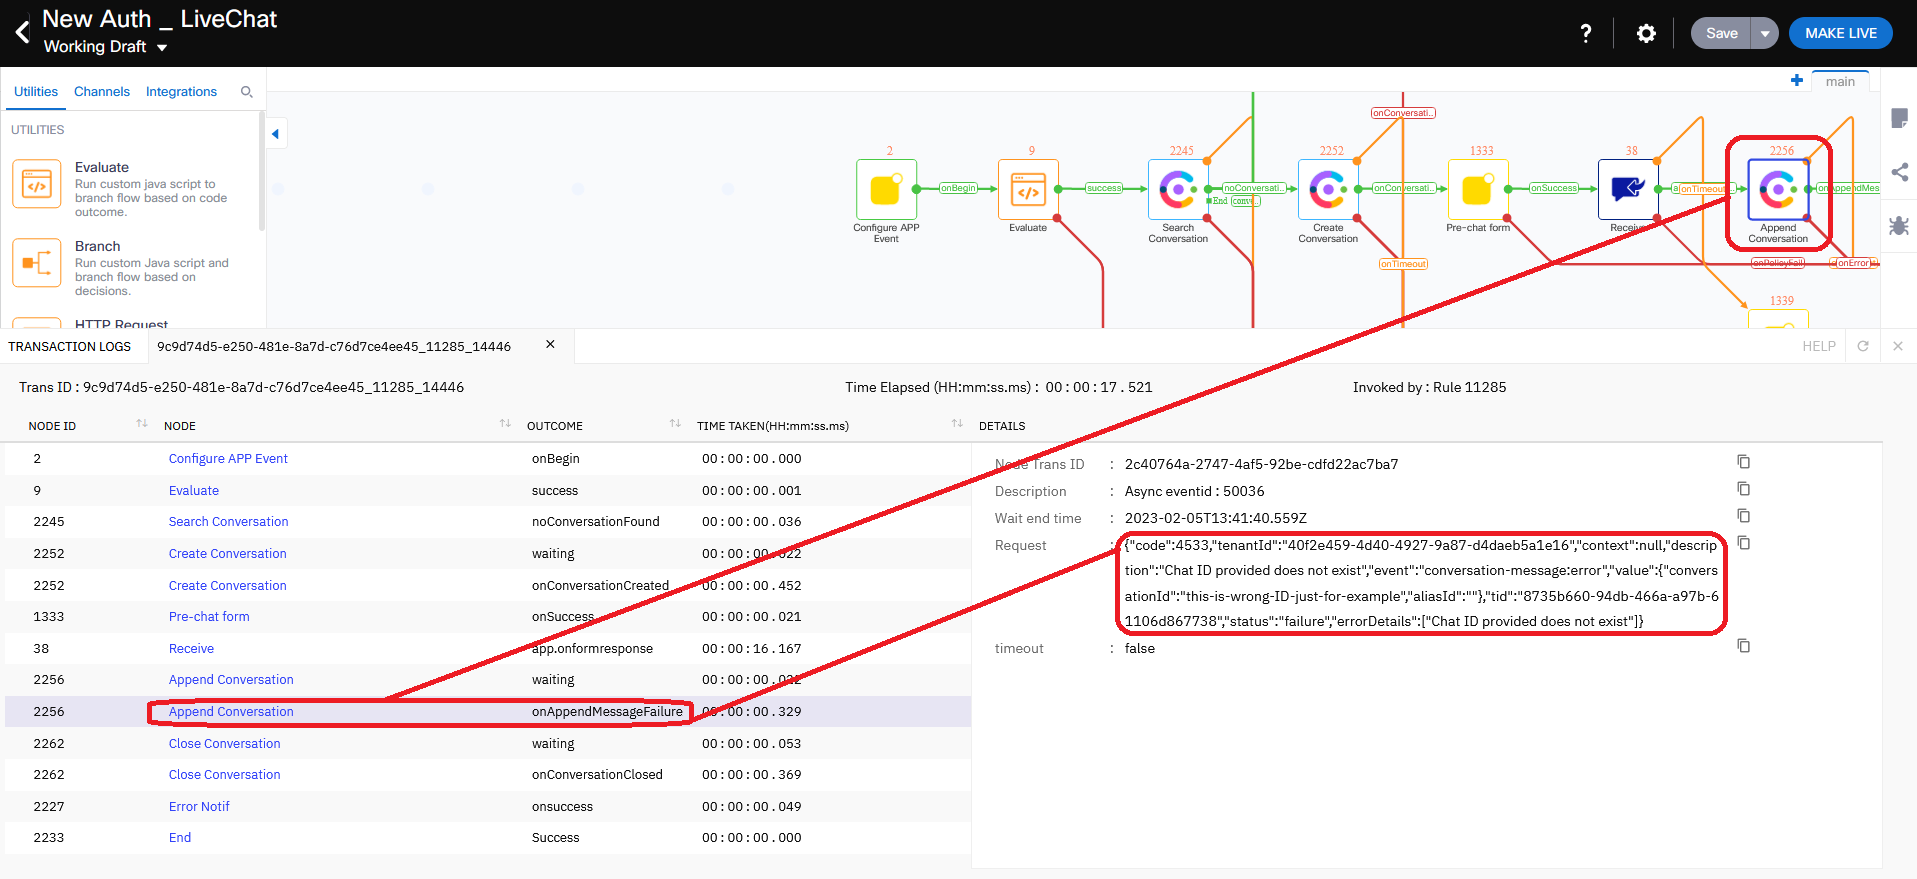
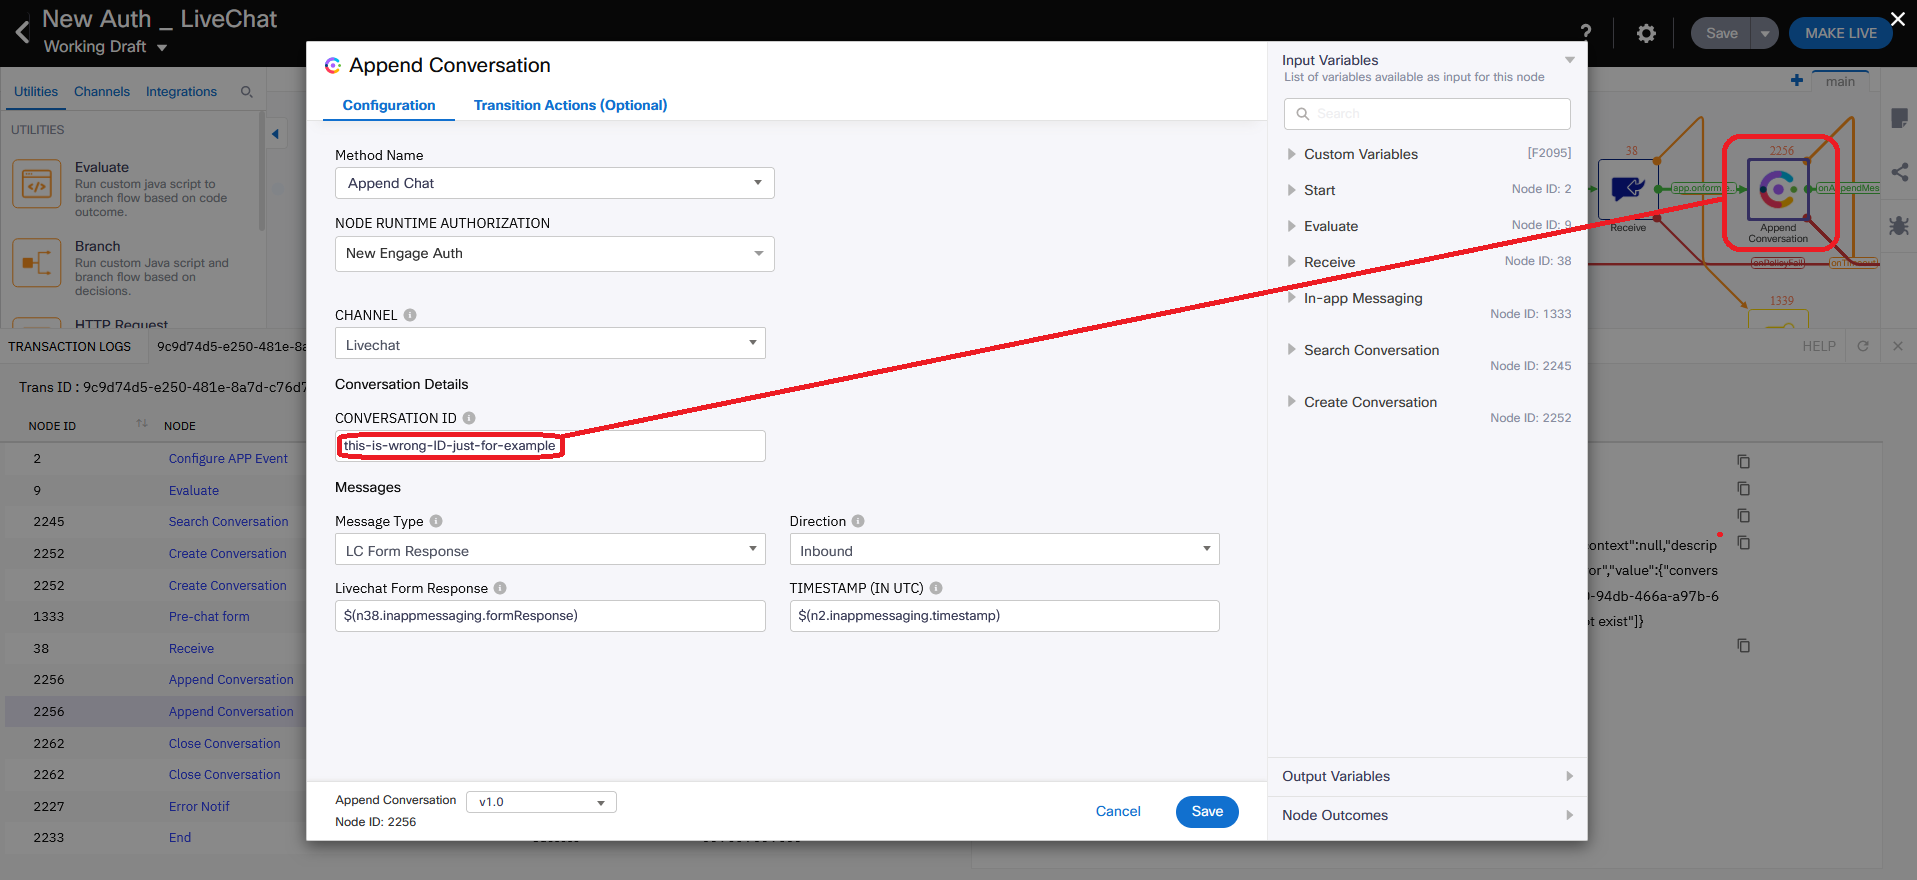
Error: onAppendMessageFailure next to Append Conversation node
Error: "description":"Chat ID provided does not exist","event":"conversation-message:error","value":{"conversationId":"this-is-wrong-ID-just-for-example","aliasId":""}
Fix: Double-click affected node → correct CONVERSATION ID value → Save and Make Live
Lab 12.20 — Creating Custom Nodes
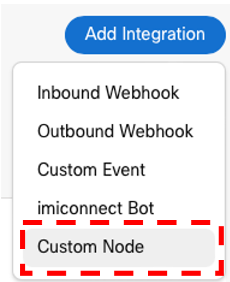
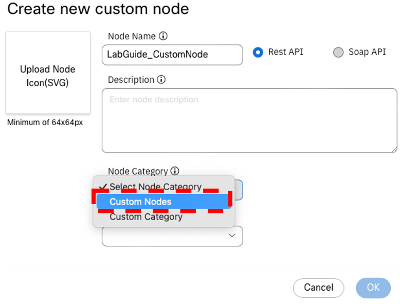
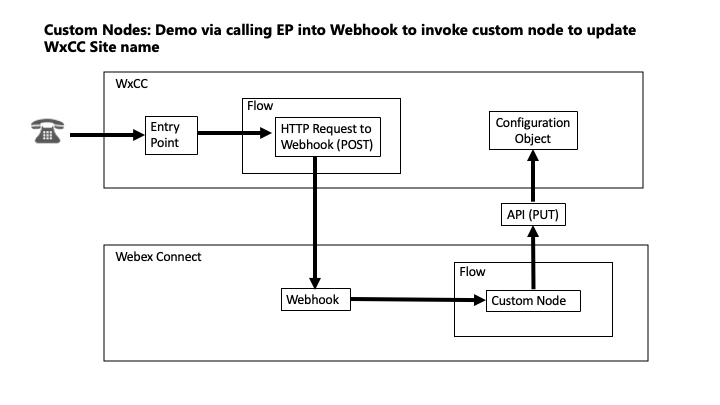
Custom nodes allow you to configure reusable integrations with existing business systems or third-party applications using REST/SOAP APIs.
Global variables are centrally configured and reported in WxCC, fetched via flows in Webex Connect. Flow variables are configured locally within Webex Connect flows and are not reportable. Both variables transferable between flows.
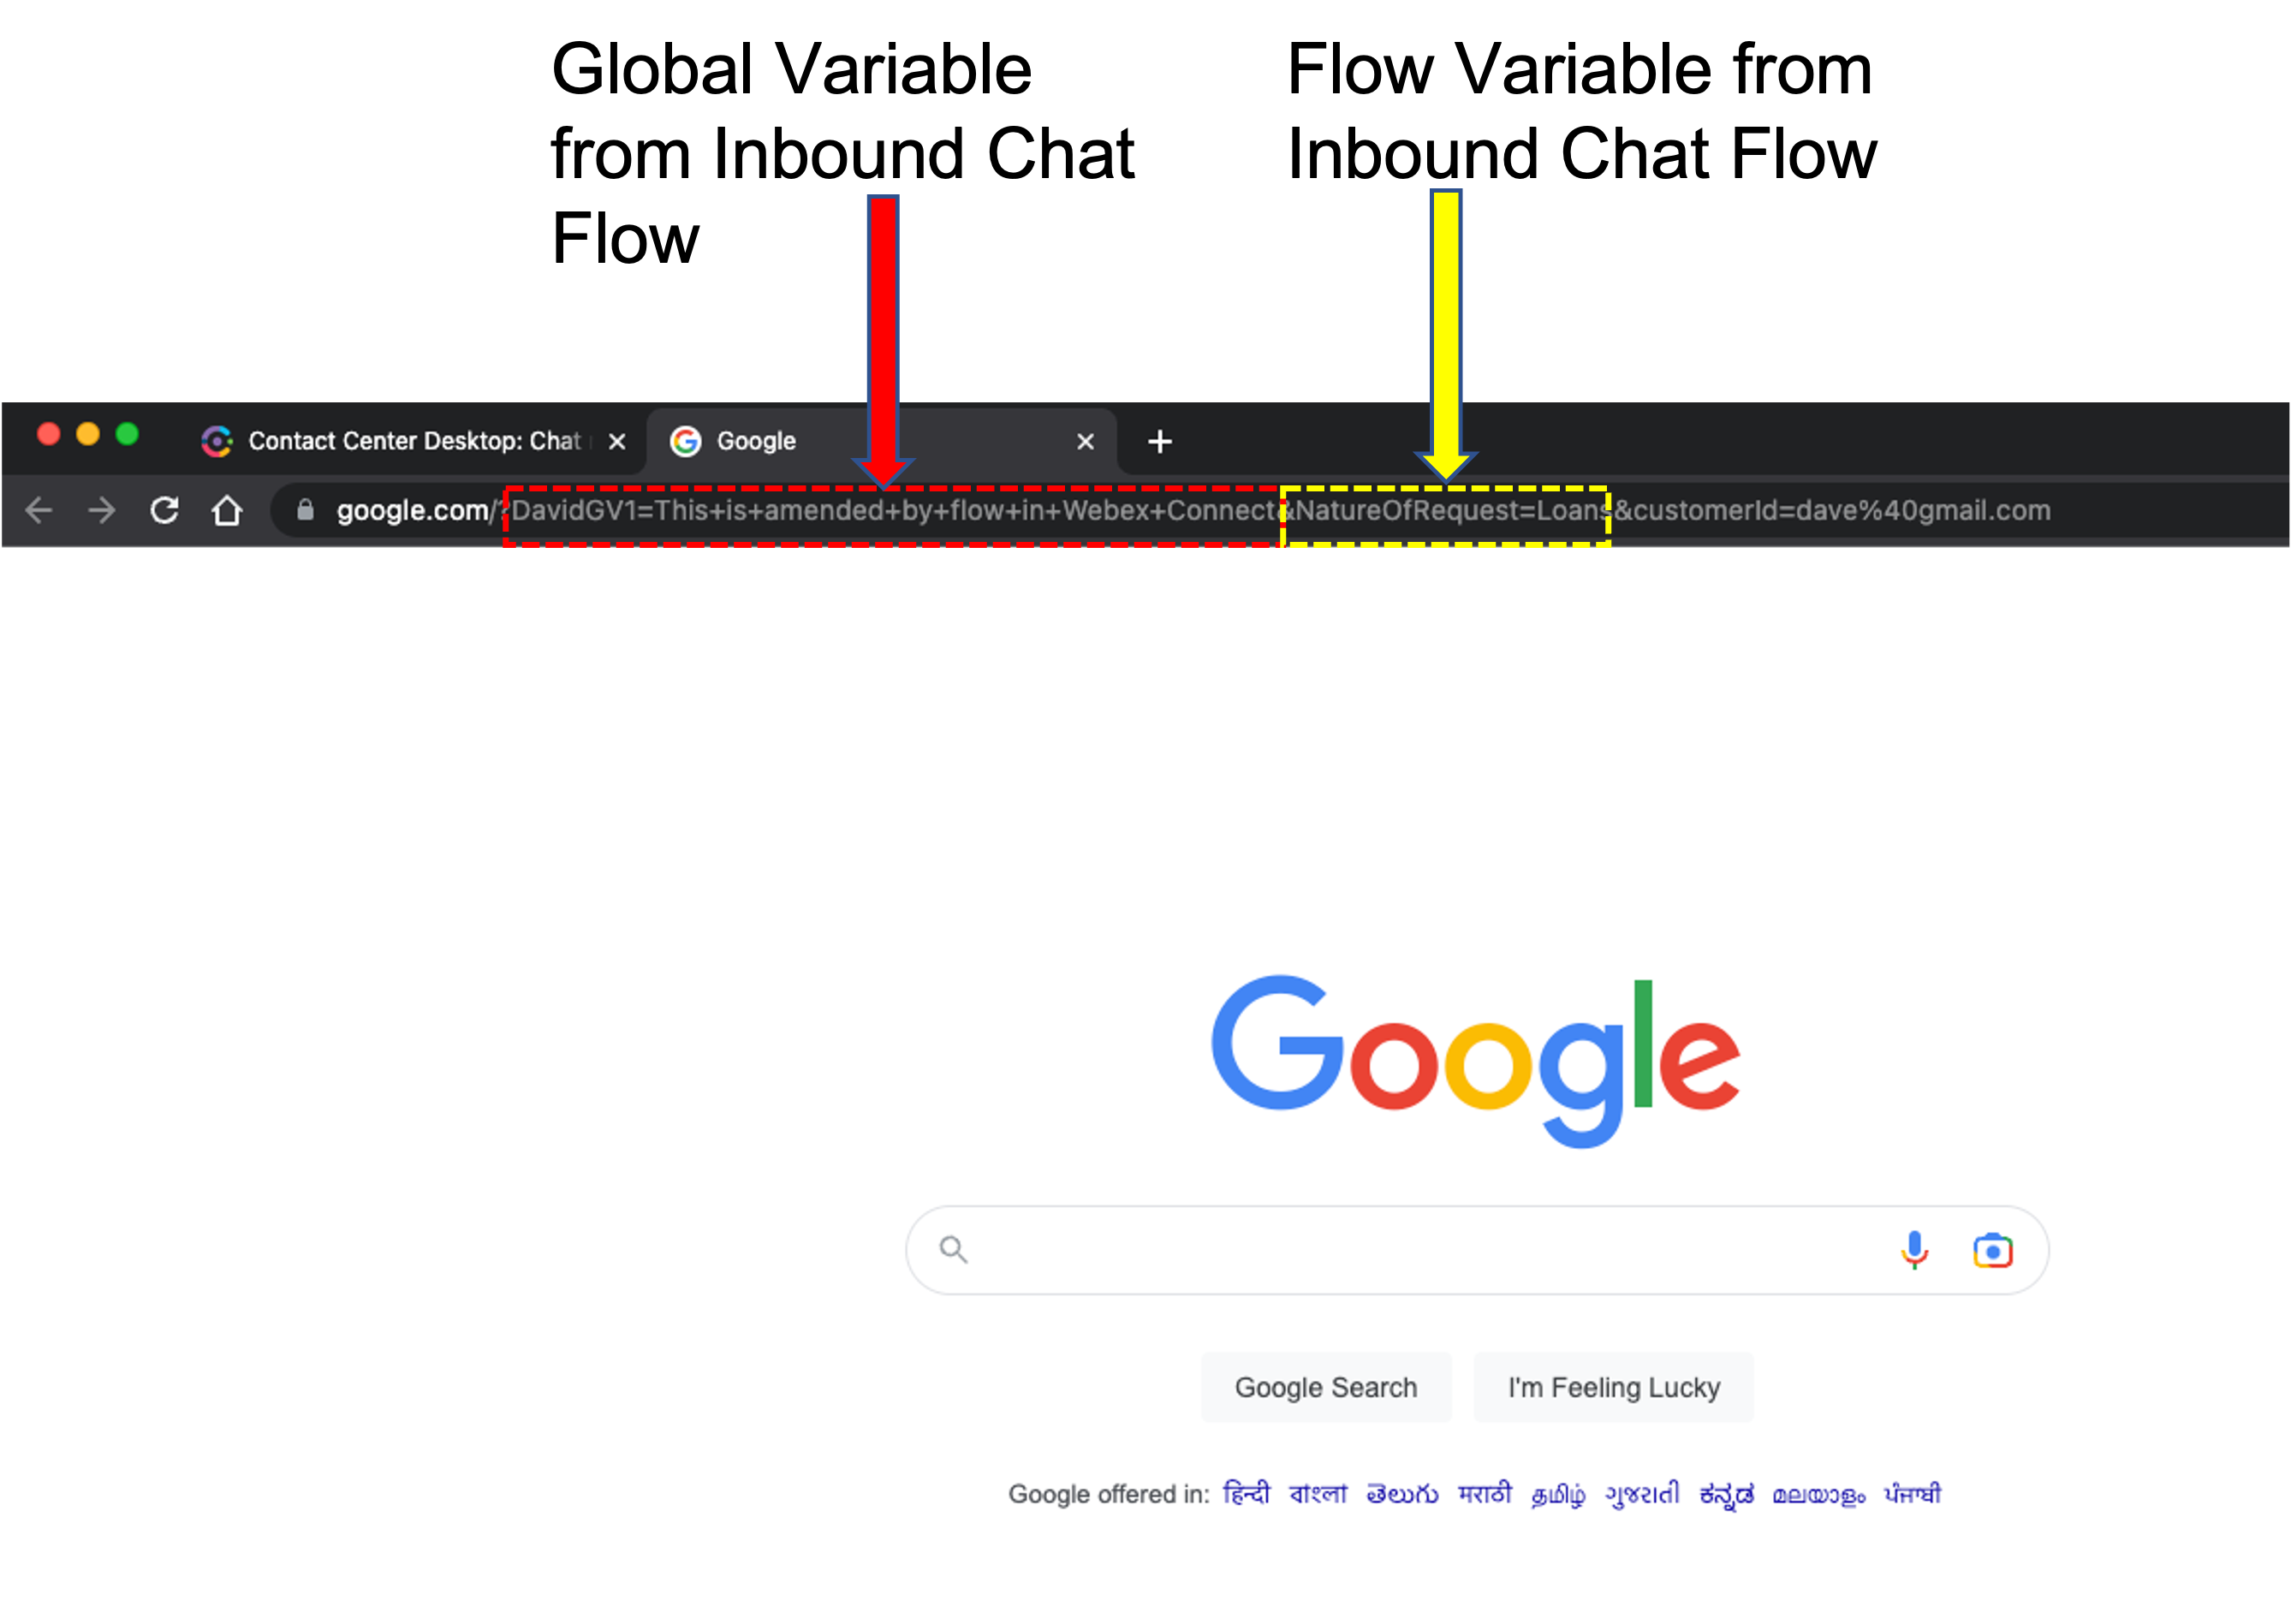
Transfer chat form input and Global variable values from inbound chat flow to channel-agnostic routed flow for Agent Desktop screen pop.
3.2 Update routed flow
Edit routed flow
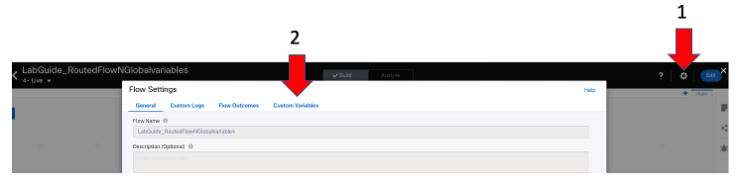
Gear icon top right → Custom Variables
Add Global variable and Flow variable (case-sensitive!)
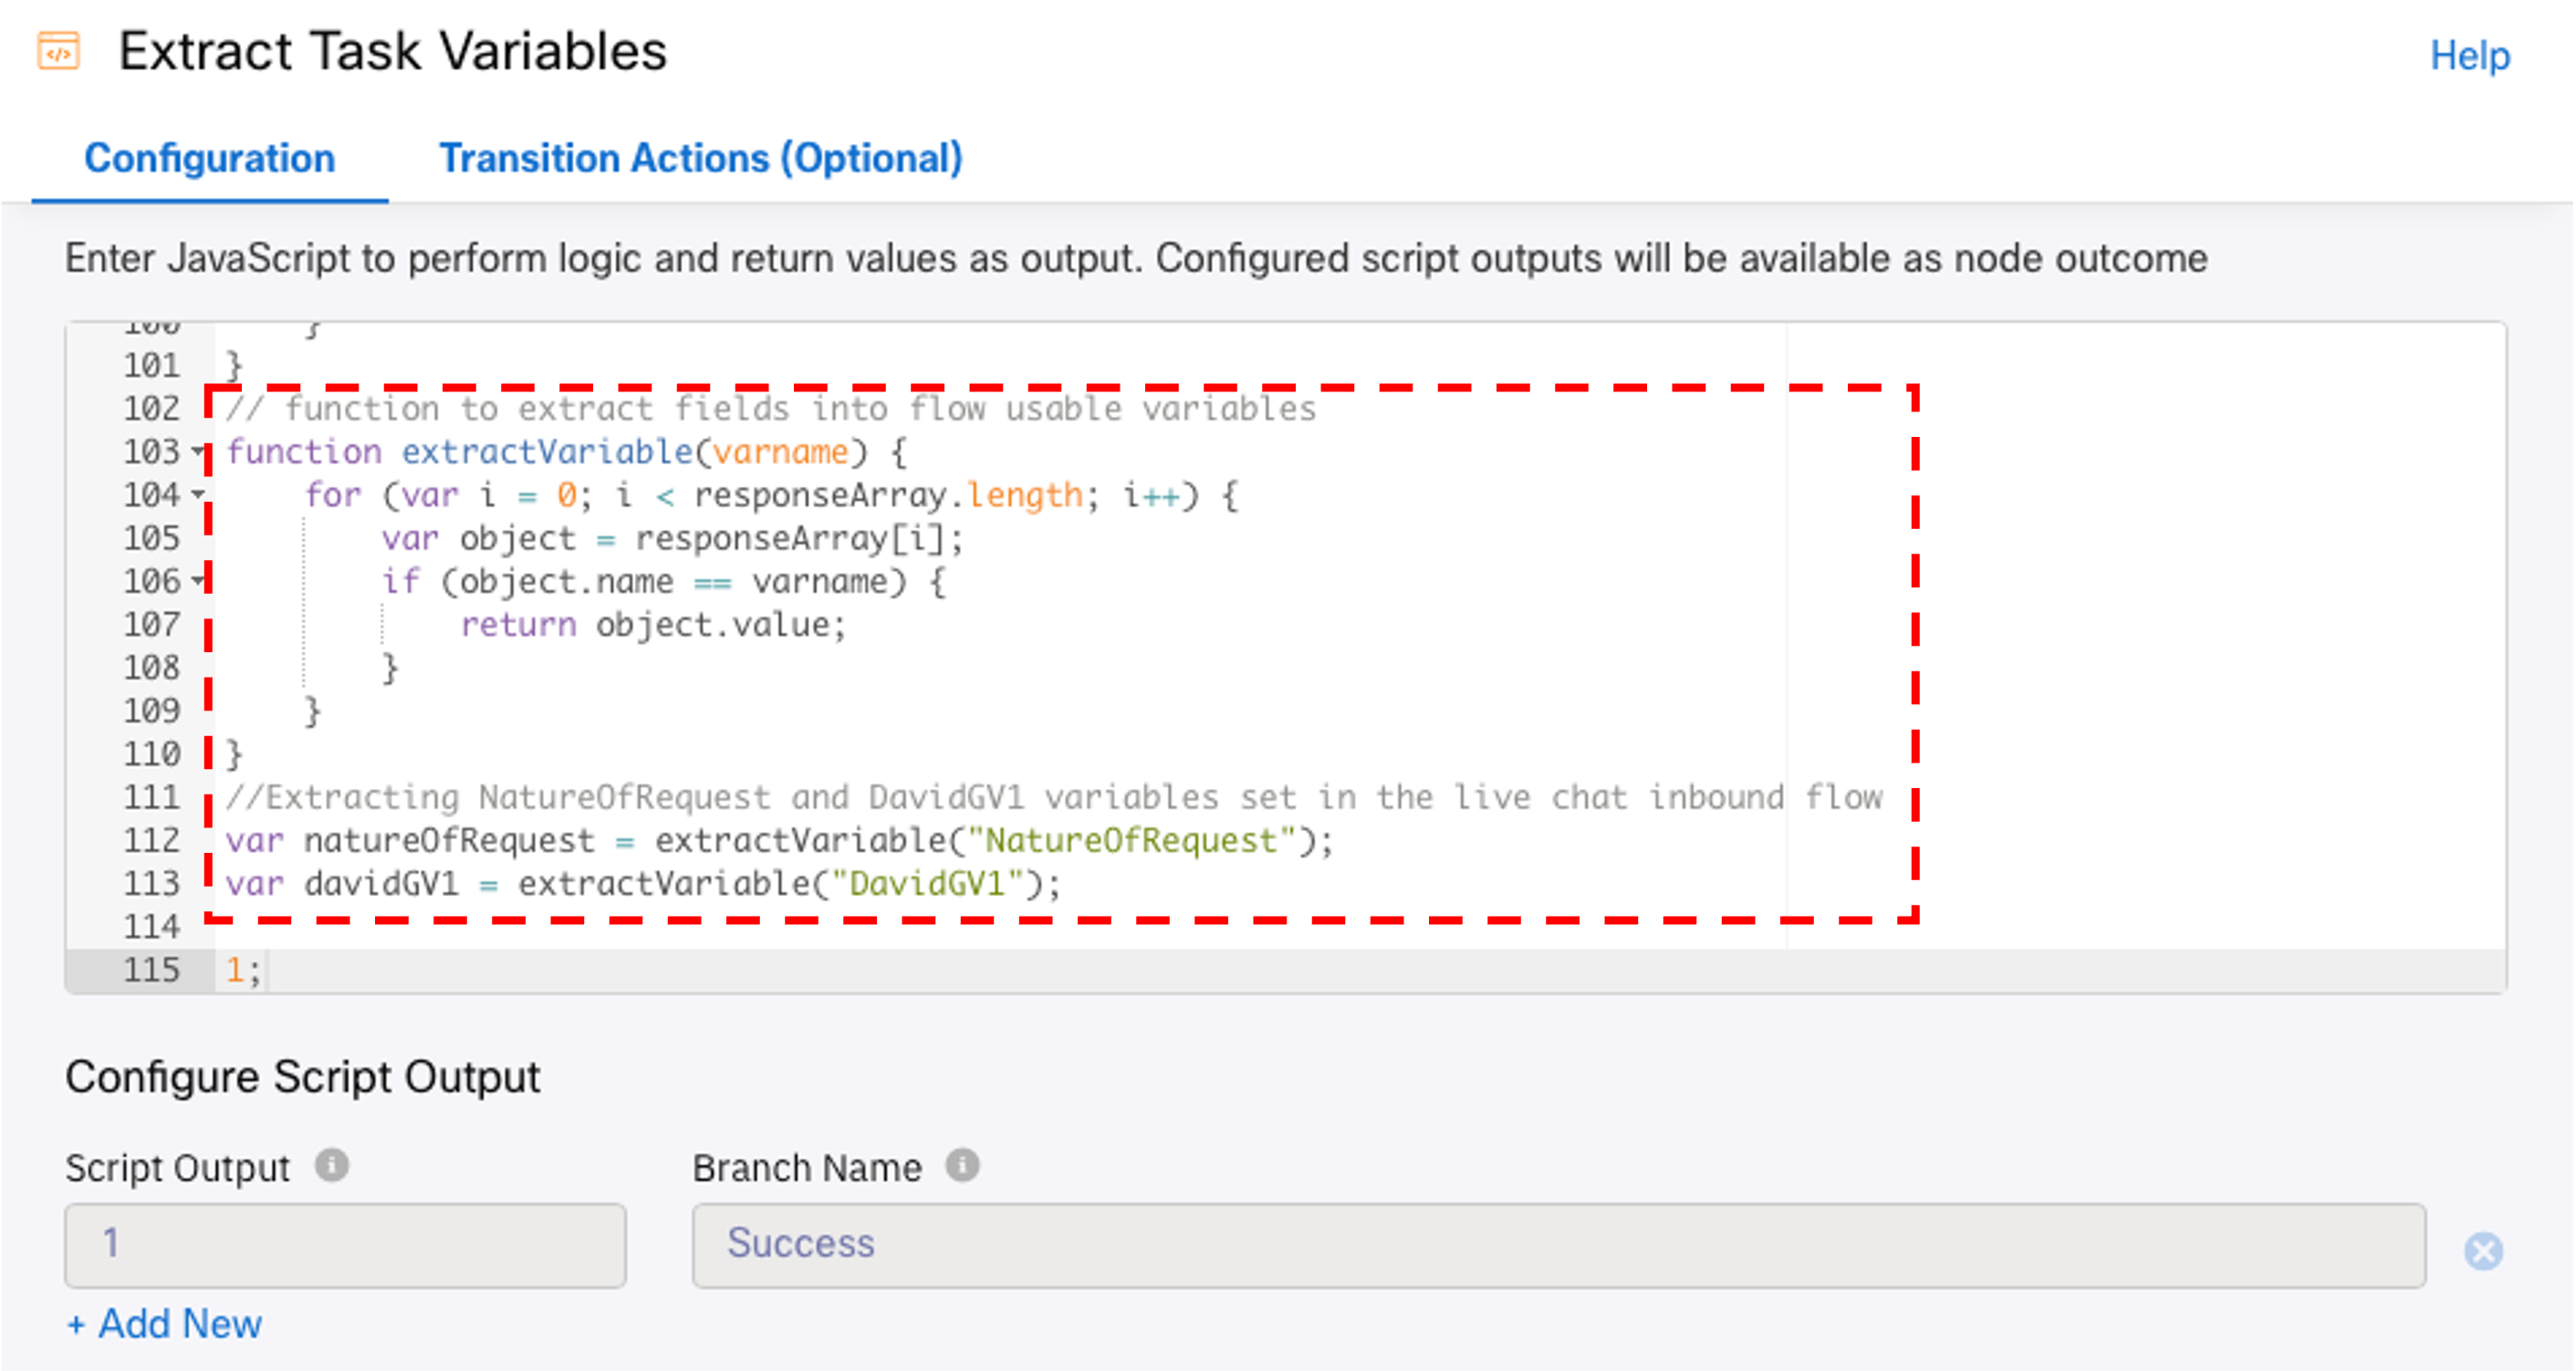
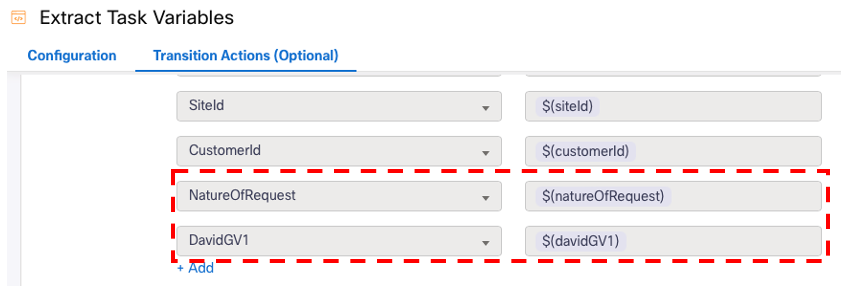
Double-click Extract Task Variables node → Configuration tab → insert JavaScript before last line (italicized words = your variable names):
// function to extract fields into flow usable variables
function extractVariable(varname) {
  for (var i = 0; i < responseArray.length; i++) {
    var object = responseArray[i];
    if (object.name == varname) {
      return object.value;
    }
  }
}

// Extracting NatureOfRequest and DavidGV1 variables set in the live chat inbound flow
var natureOfRequest = extractVariable("NatureOfRequest");
var davidGV1 = extractVariable("DavidGV1");
Within same node → Transition Actions (Optional) → add Custom variables under Time On-leave, Action Set variable → extracted Global and Flow variables
Add both variables to Debug Log for troubleshooting
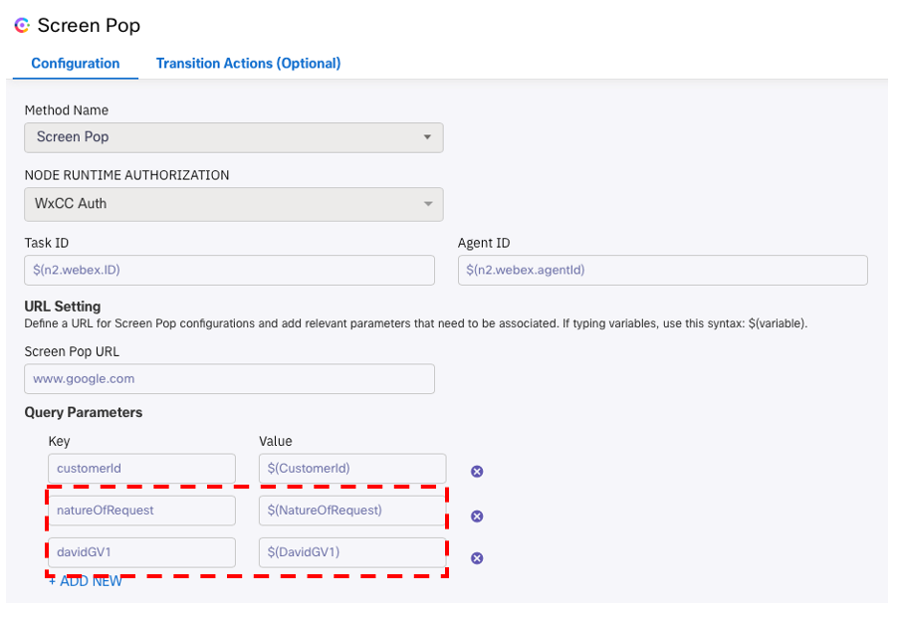
Save → double-click Screen Pop node
Add under Query Parameters:
Save → Make Live
Start chat → observe Screen Pop address bar — both Global and Flow variables transferred from channel-specific inbound chat flow to routed flow
Providing Digital Channels feedback
Cisco is seeking feedback on the Digital Channel capabilities. By participating in this survey, you help improve product quality: